Quantcast
Channel: KitPloit - PenTest Tools!
Viewing all 5854 articles
Browse latest View live

Hackbox - The Combination Of Awesome Techniques


Cookiescanner - Tool For Check The Cookie Flag In Multiple Sites

$
0
0

Tool for check the cookie flag in multiple sites.

Intro
Tool created to do more easy the process of check the cookie flag when we are analyzing multiple web servers.
If you want to know for why could be useful this tools?
https://www.owasp.org/index.php/SecureFlag
https://www.owasp.org/index.php/HttpOnly
https://www.owasp.org/index.php/Testing_for_cookies_attributes_%28OTG-SESS-002%29

Usage
Usage: cookiescanner.py [options] 
Example: ./cookiescanner.py -i ips.txt

Options:
-h, --help show this help message and exit
-i INPUT, --input=INPUT
File input with the list of webservers
-u URL, --url=URL URL
-f FORMAT, --format=FORMAT
Output format (json, xml, csv, normal, grepable)
-g GOOGLE, --google=GOOGLE
Search in google by domain
--nocolor Disable color (for the normal format output)
-I, --info More info

Performance:
-t TIMEOUT Timeout of response
-d DELAY Delay between requests

Requirements
requests >= 2.8.1
BeautifulSoup >= 4.2.1

Install requirements
pip3 install --upgrade -r requirements.txt

Author
Manuel Mancera (sinkmanu@gmail.com/@sinkmanu)


PortWitness - Tool For Checking Whether A Domain Or Its Multiple Sub-Domains Are Up And Running

$
0
0

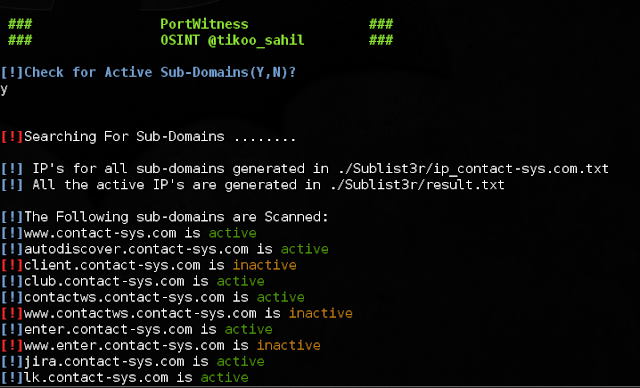
PortWitness is a bash tool designed to find out active domain and subdomains of websites using port scanning. It helps penetration testers and bug hunters collect and gather information about active subdomains for the domain they are targeting.PortWitness enumerates subdomains using Sublist3r and uses Nmap alongwith nslookup to check for active sites.Active domain or sub-domains are finally stored in an output file.Using that Output file a user can directly start testing those sites.
Sublist3r has also been integrated with this module.It's very effective and accurate when it comes to find out which sub-domains are active using Nmap and nslookup.
This tool also helps a user in getting the ip addresses of all sub-domains and stores then in a text file , these ip's can be used for further scanning of the target.

Installation
git clone https://github.com/viperbluff/PortWitness.git

BASH
This tool has been created using bash scripting so all you require is a linux machine.

Usage
bash portwitness.sh url


Hijacker v1.5 - All-in-One Wi-Fi Cracking Tools for Android

$
0
0

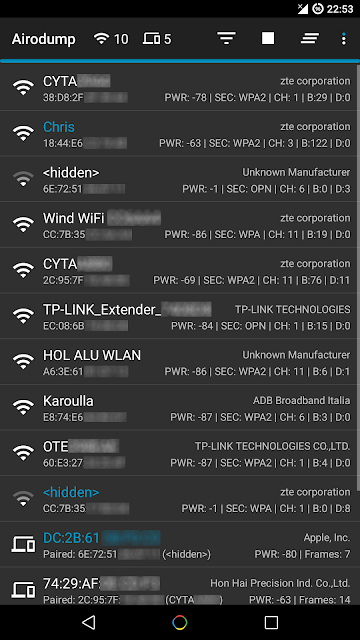
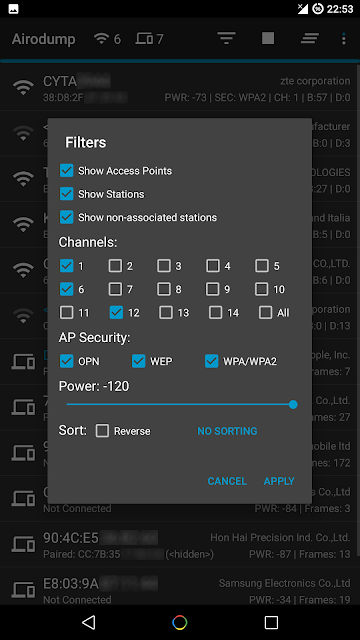
Hijacker is a Graphical User Interface for the penetration testing tools Aircrack-ng, Airodump-ng, MDK3 and Reaver. It offers a simple and easy UI to use these tools without typing commands in a console and copy&pasting MAC addresses.
This application requires an ARM android device with an internal wireless adapter that supports Monitor Mode. A few android devices do, but none of them natively. This means that you will need a custom firmware. Any device that uses the BCM4339 chipset (MSM8974, such as Nexus 5, Xperia Z1/Z2, LG G2, LG G Flex, Samsung Galaxy Note 3) will work with Nexmon (which also supports some other chipsets). Devices that use BCM4330 can use bcmon.
An alternative would be to use an external adapter that supports monitor mode in Android with an OTG cable.
The required tools are included for armv7l and aarch64 devices as of version 1.1. The Nexmon driver and management utility for BCM4339 and BCM4358 are also included.
Root access is also necessary, as these tools need root to work.

Features

Information Gathering
  • View a list of access points and stations (clients) around you (even hidden ones)
  • View the activity of a specific network (by measuring beacons and data packets) and its clients
  • Statistics about access points and stations
  • See the manufacturer of a device (AP or station) from the OUI database
  • See the signal power of devices and filter the ones that are closer to you
  • Save captured packets in .cap file

Attacks
  • Deauthenticate all the clients of a network (either targeting each one (effective) or without specific target)
  • Deauthenticate a specific client from the network it's connected
  • MDK3 Beacon Flooding with custom options and SSID list
  • MDK3 Authentication DoS for a specific network or to every nearby AP
  • Capture a WPA handshake or gather IVs to crack a WEP network
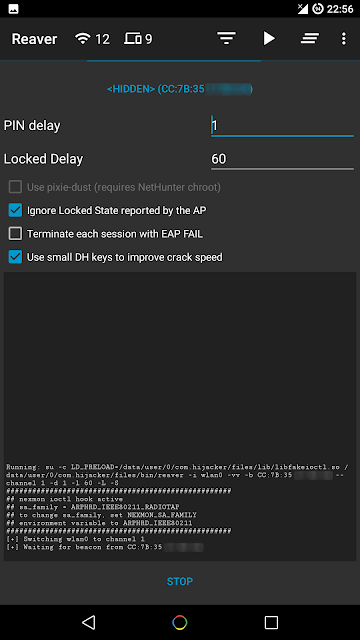
  • Reaver WPScracking (pixie-dust attack using NetHunter chroot and external adapter)

Other
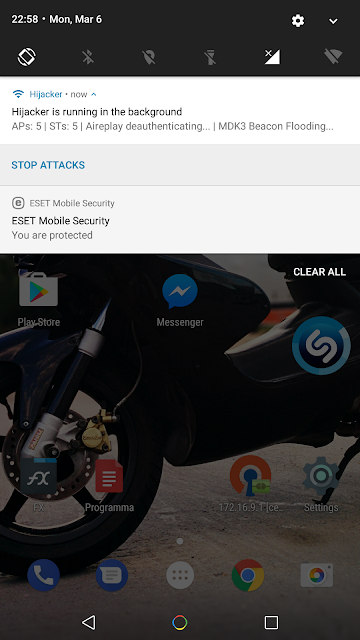
  • Leave the app running in the background, optionally with a notification
  • Copy commands or MAC addresses to clipboard
  • Includes the required tools, no need for manual installation
  • Includes the Nexmon driver, required library and management utility for BCM4339 and BCM4358 devices
  • Set commands to enable and disable monitor mode automatically
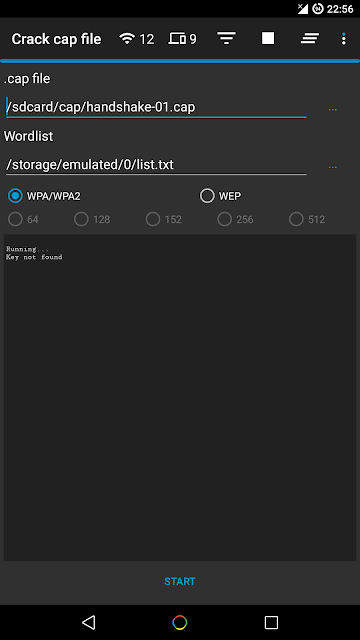
  • Crack .cap files with a custom wordlist
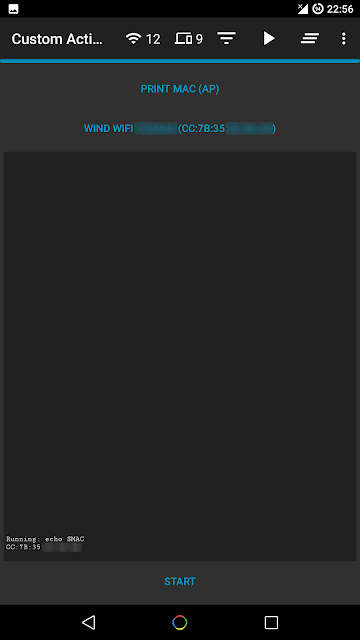
  • Create custom actions and run them on an access point or a client easily
  • Sort and filter Access Points and Stations with many parameters
  • Export all gathered information to a file
  • Add a persistent alias to a device (by MAC) for easier identification

Screenshots


Installation
Make sure:
  • you are on Android 5+
  • you are rooted (SuperSU is required, if you are on CM/LineageOS install SuperSU)
  • you have a firmware to support Monitor Mode on your wireless interface

Download the latest version here.
When you run Hijacker for the first time, you will be asked whether you want to install the nexmon firmware or go to home screen. If you have installed your firmware or use an external adapter, you can just go to the home screen. Otherwise, and if your device is supported, click 'Install Nexmon' and then 'Install'. Afterwards you will land on the home screen and airodump will start. Make sure you have enabled your WiFi and it's in monitor mode.

Note: On some devices, changing files in /system might trigger an Android security feature and your system partition will be restored when you reboot.

Troubleshooting
This app is designed and tested for ARM devices. All the binaries included are compiled for that architecture and will not work on anything else. You can check whether your device is compatible by going to Settings: if you have the option to install Nexmon, then you are on the correct architecture, otherwise you will have to install all the tools manually (busybox, aircrack-ng suite, mdk3, reaver, wireless tools, libfakeioctl.so library) in a PATH accessible directory and set the 'Prefix' option for the tools to preload the library they need: LD_PRELOAD=/path/to/libfakeioctl.so.
In settings, there is an option to test the tools. If something fails, you can click 'Copy test command' and select the tool that fails. This will copy a test command to your clipboard, which you can manually run in a root shell and see what's wrong. If all the tests pass and you still have a problem, feel free to open an issue here to fix it, or use the 'Send feedback' option in the app's settings.
If the app happens to crash, a new activity will start which will generate a bug report in your external storage and give you the option to submit it by email. The report is shown in the activity so you can see exactly what will be sent.

Do not report bugs for devices that are not supported or when you are using an outdated version.
Keep in mind that Hijacker is just a GUI for these tools. The way it runs the tools is fairly simple, and if all the tests pass and you are in monitor mode, you should be getting the results you want. Also keep in mind that these are auditing tools. This means that they are used to test the integrity of your network, so there is a chance (and you should hope for it) that the attacks don't work on your network. It's not the app's fault, it's actually something to be happy about (given that this means that your network is safe). However, if an attack works when you type a command in a terminal, but not with the app, feel free to post here to resolve the issue. This app is still under development so bugs are to be expected.


Goddi (Go Dump Domain Info) - Dumps Active Directory Domain Information

$
0
0

Based on work from Scott Sutherland (@_nullbind), Antti Rantasaari, Eric Gruber (@egru), Will Schroeder (@harmj0y), and the PowerView authors.

Install
Use the executables in the releases section. If you want to build it yourself, make sure that your go environment is setup according to the Go setup doc. The goddi package also uses the below package.
go get gopkg.in/ldap.v2

Windows
Tested on Windows 10 and 8.1 (go1.10 windows/amd64).

Linux
Tested on Kali Linux (go1.10 linux/amd64).
  • umount, mount, and cifs-utils need to be installed for mapping a share for GetGPP
apt-get update
apt-get install -y mount cifs-utils
  • make sure nothing is mounted at /mnt/goddi/
  • make sure to run with sudo

Run
When run, will default to using TLS (tls.Client method) over 636. On Linux, make sure to run with sudo.
  • username: Target user. Required parameter.
  • password: Target user's password. Required parameter.
  • domain: Full domain name. Required parameter.
  • dc: DC to target. Can be either an IP or full hostname. Required parameter.
  • startTLS: Use to StartTLS over 389.
  • unsafe: Use for a plaintext connection.
PS C:\Users\Administrator\Desktop> .\godditest-windows-amd64.exe -username=testuser -password="testpass!" -domain="test.local" -dc="dc.test.local" -unsafe
[i] Begin PLAINTEXT LDAP connection to 'dc.test.local'...
[i] PLAINTEXT LDAP connection to 'dc.test.local' successful...
[i] Begin BIND...
[i] BIND with 'testuser' successful...
[i] Begin dump domain info...
[i] Domain Trusts: 1 found
[i] Domain Controllers: 1 found
[i] Users: 12 found
[*] Warning: keyword 'pass' found!
[*] Warning: keyword 'fall' found!
[i] Domain Admins: 4 users found
[i] Enterprise Admins: 1 users found
[i] Forest Admins: 0 users found
[i] Locked Users: 0 found
[i] Disabled Users: 2 found
[i] Groups: 45 found
[i] Domain Sites: 1 found
[i] Domain Subnets: 0 found
[i] Domain Computers: 17 found
[i] Deligated Users: 0 found
[i] Users with passwords not set to expire: 6 found
[i] Machine Accounts with passwords older than 45 days: 18 found
[i] Domain OUs: 8 found
[i] Domain Account Policy found
[i] Domain GPOs: 7 found
[i] FSMO Roles: 3 found
[i] SPNs: 122 found
[i] LAPS passwords: 0 found
[i] GPP enumeration starting. This can take a bit...
[i] GPP passwords: 7 found
[i] CSVs written to 'csv' directory in C:\Users\Administrator\Desktop
[i] Execution took 1.4217256s...
[i] Exiting...

Functionality
StartTLS and TLS (tls.Client func) connections supported. Connections over TLS are default. All output goes to CSVs and are created in /csv/ in the current working directory. Dumps:
  • Domain users. Also searches Description for keywords and prints to a seperate csv ex. "Password" was found in the domain user description.
  • Users in priveleged user groups (DA, EA, FA).
  • Users with passwords not set to expire.
  • User accounts that have been locked or disabled.
  • Machine accounts with passwords older than 45 days.
  • Domain Computers.
  • Domain Controllers.
  • Sites and Subnets.
  • SPNs and includes csv flag if domain admin (a flag to note SPNs that are DAs in the SPN CSV output).
  • Trusted domain relationships.
  • Domain Groups.
  • Domain OUs.
  • Domain Account Policy.
  • Domain deligation users.
  • Domain GPOs.
  • Domain FSMO roles.
  • LAPS passwords.
  • GPP passwords. On Windows, defaults to mapping Q. If used, will try another mapping until success R, S, etc... On Linux, /mnt/goddi is used.

Snallygaster - Tool To Scan For Secret Files On HTTP Servers

$
0
0

Snallygaster is a tool that looks for files accessible on web servers that shouldn't be public and can pose a security risk.

Typical examples include publicly accessible git repositories, backup files potentially containing passwords or database dumps. In addition it contains a few checks for other security vulnerabilities.
As an introduction to these kinds of issues you may want to watch this talk:


Install
snallygaster is available via pypi:
pip3 install snallygaster
It's a simple python 3 script, so you can just download the file "snallygaster" and execute it. Dependencies are urllib3, beautifulsoup4 and dnspython.

Faq
Q: I want to contribute / send a patch / a pull request!
A: That's great, but please read the CONTRIBUTIONS.md file.
Q: What's that name?
A: Snallygaster is the name of a dragon that according to some legends was seen in Maryland and other parts of the US. There's no particular backstory why this tool got named this way, other than that I was looking for a fun and interesting name.
I thought a name of some mythical creature would be nice, but most of those had the problem that I would have had name collisions with other software. Checking the list of dragons on Wikipedia I learned about the Snallygaster. The name sounded funny, the idea that there are dragon legends in the US interesting and I found no other piece of software with that name.

Author
snallygaster is developed and maintained by Hanno Böck.


Nemesis - A Command-Line Network Packet Crafting And Injection Utility

$
0
0

The Nemesis Project is designed to be a command line based, portable human IP stack for UNIX-like and Windows systems. The suite is broken down by protocol, and should allow for useful scripting of injected packets from simple shell scripts.

Key Features
  • ARP/RARP, DNS, ETHERNET, ICMP, IGMP, IP, OSPF, RIP, TCP and UDP protocol support
  • Layer 2 or Layer 3 injection on UNIX-like systems
  • Layer 2 injection (only) on Windows systems
  • Packet payload from file
  • IP and TCP options from file
  • Tested on OpenBSD, Linux, Solaris, Mac OS X and Windows 2000
Each supported protocol uses its own protocol "injector" which is accompanied by a man page explaining its functionality.
Consult the ChangeLog for release details, and the documentation for each protocol injector for in-depth descriptions of the available functionality.

Examples
  • Inject malformed ICMP redirect
      sudo nemesis icmp -S 10.10.10.3 -D 10.10.10.1 -G 10.10.10.3 -i 5
  • IGMP v2 join for group 239.186.39.5
      sudo nemesis igmp -v -p 22 -S 192.168.1.20 -i 239.186.39.5 -D 239.186.39.5
  • IGMP v2 query, max resp. time 10 sec, with Router Alert IP option
      echo -ne '\x94\x04\x00\x00' >RA
    sudo nemesis igmp -v -p 0x11 -c 100 -D 224.0.0.1 -O RA
    or
      echo -ne '\x94\x04\x00\x00' | sudo nemesis igmp -v -p 0x11 -c 100 -D 224.0.0.1 -O -
  • IGMP v3 query, with Router Alert IP option
      echo -ne '\x03\x64\x00\x00' > v3
    sudo ./src/nemesis igmp -p 0x11 -c 100 -i 0.0.0.0 -P v3 -D 224.0.0.1 -O RA
  • Random TCP packet
      sudo nemesis tcp
  • DoS and DDoS testing
      sudo nemesis tcp -v -S 192.168.1.1 -D 192.168.2.2 -fSA -y 22 -P foo
    sudo nemesis udp -v -S 10.11.12.13 -D 10.1.1.2 -x 11111 -y 53 -P bindpkt
    sudo nemesis icmp redirect -S 10.10.10.3 -D 10.10.10.1 -G 10.10.10.3 -qR
    sudo nemesis arp -v -d ne0 -H 0:1:2:3:4:5 -S 10.11.30.5 -D 10.10.15.1

Build & Install
Nemesis is built around libnet. Windows platform builds require libpcap as well. On Debian and Ubuntu derived GNU/Linux systems:
sudo apt install libnet1-dev
The GNU Configure & Build system use /usr/local as the default install prefix. Usually this is sufficient, the below example installs to /usr instead:
tar xf nemesis-1.5.tar.xz
cd nemesis-1.5/
./configure --prefix=/usr
make -j5
sudo make install-strip

Building from GIT
If you want to contribute, or simply want to try out the latest but still unreleased features, then you need to know a few things about the GNU Configure & Build system:
  • configure.ac and a per-directory Makefile.am are key files
  • configure and Makefile.in are generated from autogen.sh, they are not stored in GIT but automatically generated for the release tarballs
  • Makefile is generated by configure script
To build from GIT you first need to clone the repository and run the autogen.sh script. This requires automake and autoconf to be installed on your system.
git clone https://github.com/troglobit/inadyn.git
cd inadyn/
./autogen.sh
./configure && make
GIT sources are a moving target and are not recommended for production systems, unless you know what you are doing!

Origin & References
  • 1999: Nemesis was created by Mark Grimes
  • 2001: Jeff Nathan took over maintainership
  • 2018: Project resurrected by Joachim Nilsson
The project is currently maintained at GitHub with the intention to serve as a focal point for new development. If you have patches and/or ideas, please submit them using the issue tracker or as pull requests.


AutoNSE - Massive NSE (Nmap Scripting Engine) AutoSploit And AutoScanner

$
0
0

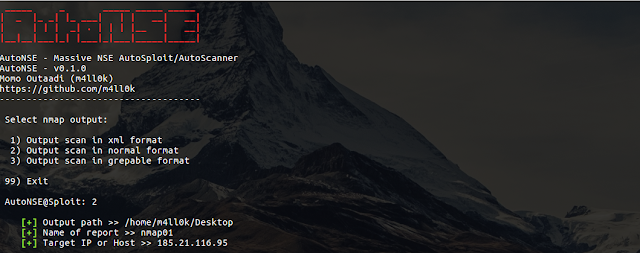
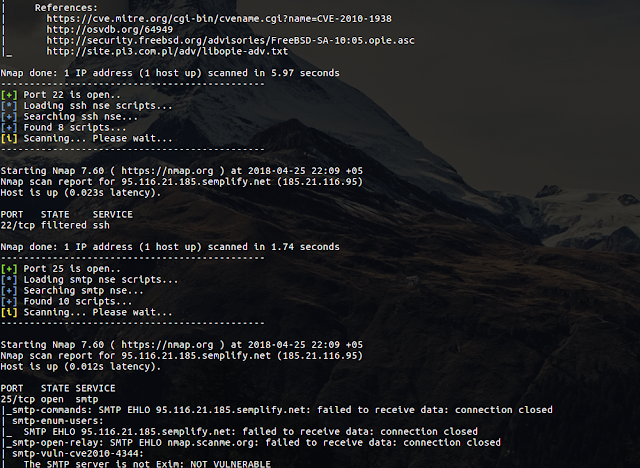
Massive NSE (Nmap Scripting Engine) AutoSploit and AutoScanner. The Nmap Scripting Engine (NSE) is one of Nmap's most powerful and flexible features. It allows users to write (and share) simple scripts (using the Lua programming language ) to automate a wide variety of networking tasks. Those scripts are executed in parallel with the speed and efficiency you expect from Nmap. Users can rely on the growing and diverse set of scripts distributed with Nmap, or write their own to meet custom needs. For more informations https://nmap.org/book/man-nse.html

Installation
$ git clone https://github.com/m4ll0k/AutoNSE.git
$ cd AutoNSE
$ bash autonse.sh

Exmaples
$ bash autonse.sh


Grok-backdoor - Backdoor With Ngrok Tunnel Support

$
0
0
Grok-backdoor is a simple python based backdoor, it uses Ngrok tunnel for the communication. Ngrok-backdoor can generate windows, linux and mac binaries using Pyinstaller.

Disclaimer:
All the code provided on this repository is for educational/research purposes only. Any actions and/or activities related to the material contained within this repository is solely your responsibility. The misuse of the code in this repository can result in criminal charges brought against the persons in question. Author will not be held responsible in the event any criminal charges be brought against any individuals misusing the code in this repository to break the law.

Dependencies:
  • Python 2.7
  • Pyinstaller 3.21
  • python-pip 9.0.1

Installation :
pip install -r requirements.txt

Usage:
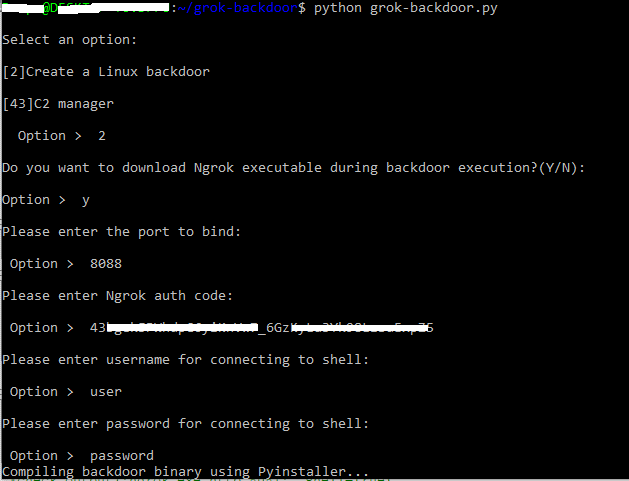
You need to register an acccount in ngrok.com to use this backdoor, provide Ngrok authcode while configuring the grok-backdoor. You will see a new tcp tunnel created in Ngrok status panel after the grok-backdoor server execution in victim machine.
Create backdoor binary by running:
python grok-backdoor.py

Linux:


Windows :


You can find the output binary in grok-backdoor/dist/ directory:


Run grok-backdoor output binary in victim machine and login to Ngrok.com control panel to see the tunnel URL:


Telnet to tunnel URL to get the Bind shell: Enjoy shell :)


Features:
  • Multi platform support(windows,linux,Mac)
  • Autheticated bind shell
  • Ngrok tunnel for communication

Metta - An Information Security Preparedness Tool To Do Adversarial Simulation

$
0
0
Metta is an information security preparedness tool.
This project uses Redis/Celery, python, and vagrant with virtualbox to do adversarial simulation. This allows you to test (mostly) your host based instrumentation but may also allow you to test any network based detection and controls depending on how you set up your vagrants.
The project parses yaml files with actions and uses celery to queue these actions up and run them one at a time without interaction.

Installation
see setup.md
There is also a wiki

Running actions
The various actions live in the MITRE folder sorted by MITRE ATT&CK phases and also in Adversarial_Simulation
Just run the python and yaml file of your choice
$ python run_simulation_yaml.py -f MITRE/Discovery/discovery_win_account.yml
YAML FILE: MITRE/Discovery/discovery_account.yaml
OS matched windows...sending to the windows vagrant
Running: cmd.exe /c net group \"Domain Admins\" /domain
Running: cmd.exe /c net user /add
Running: cmd.exe /c net user /domain
Running: cmd.exe /c net localgroup administrators
Running: cmd.exe /c net share
Running: cmd.exe /c net use
Running: cmd.exe /c net accounts
Running: cmd.exe /c net config workstation
Running: cmd.exe /c dsquery server
Running: cmd.exe /c dsquery user -name smith* | dsget user -dn -desc
Running: cmd.exe /c wmic useraccount list /format:list
Running: cmd.exe /c wmic ntdomain
Running: cmd.exe /c wmic group list /format:list
Running: cmd.exe /c wmic sysaccount list /format:list

Making actions
The actions and scenarios live in the MITRE folder sorted by MITRE ATT&CK phases and also in Adversarial_Simulation


The most important parts are the OS field and the purple_actions
os: will tell the tool which vagrant to send the command to, obviously *nix commands on windows wont work out so well
purple_actions: an array of commands to run sequentially

Making scenarios
Scenarios are a list of paths to actions.
The code will be looking for a scenario: True field and scenario_actions list. Example below:


Gotchas
The tool takes the string from purple_actions and encapsulates it in quotes. Therefore you need to escape any other quotes, ticks, weird shell characters in your command.
Use the output of the vagrant/celery piece to make sure things are working like they should

Why Metta?
Metta (Pali) Loving kindness, gentle friendship; a practice for generating loving kindness said to be first taught by the Buddha as an antidote to fear. It helps cultivate our natural capacity for an open and loving heart and is traditionally offered along with other Brahma-vihara meditations that enrich compassion, joy in the happiness of others and equanimity. These practices lead to the development of concentration, fearlessness, happiness and a greater ability to love.


RTA - Framework Designed To Test The Detection Capabilities Against Malicious Tradecraft

$
0
0

RTA provides a framework of scripts designed to allow blue teams to test their detection capabilities against malicious tradecraft, modeled after MITRE ATT&CK.
RTA is composed of python scripts that generate evidence of over 50 different ATT&CK tactics, as well as a compiled binary application that performs activities such as file timestopping, process injections, and beacon simulation as needed.
Where possible, RTA attempts to perform the actual malicious activity described. In other cases, the RTAs will emulate all or parts of the activity. For example, some lateral movement will by default target local host (though with parameters typically allow for multi-host testing). In other cases, executables such as cmd.exe or python.exe will be renamed to make it appeas as if a Windows binary is doing non-standard activities.

Installation

Prerequisites
  • Python2.7

Installation Steps
  1. Download a copy of the RTA repo from https://github.com/endgameinc/RTA.
  2. Extract the contents of the zip archive into an RTA folder, such as c:\RTA
  3. For the full experience, download additional files into the bin subdirectory (as described in the dependencies section below)

Dependencies
Some of the RTAs require 3rd party tools in order to execute properly. You can run many RTAs without additional tools, but to make use of the full suite, some will require additional downloads.
The following table provides dependency information:
DependencyRTAssource
Sysinternals Suiteuser_dir_escalation.py, sip_provider.py, system_restore_proc.py, trust_provider.pyMicrosoft
MsXslmsxsl_network.pyMicrosoft

Other Considerations
Windows Defender or other Anti-Virus products may block or otherwise interfere with RTAs while they run. Consider how you configure security products on the test host before running RTAs based on the goals of your tests.

Customization
By modifying common.py, you can customize how RTA scripts will work in your environment. You could even write an entirely new function for use in one or more new RTAs.

Running RTAs
To run the powershell_args.py RTA, simply run:
python powershell_args.py  
To run an entire directory of RTAs, you can use a loop:
Windows:
for %f in (*.py) do python %f  
Linux/Mac:
for i in (*.py); do python $i; done  
None of the rules require arguments, but some can optionally take arguments for further customization of the technique.

FAQ
To help with common issues, please refer to the following frequently-asked questions:
  • I tried to run the scripts but I am recieving an error finding the SimpleHTTPServer module
This can occur if Python 3.x is installed instead of 2.7. Note that the prerequisites specify 2.7 though we are considering a longer-term approach using 3.x.
  • When I run some RTA scripts, I get an error that "PsExec" can't be found
To resolve errors about a missing dependency, please make sure that you've followed instructions to download third-party utilities such as the Sysinternals suite and that you've extracted these executables to the "bin" subdirectory.
  • I attempted to use the lateral_command.py script in an environment where at least one other workstation was found, but the script is throwing errors about RPC access
Your environment may have host-based firewalls that are preventing you from moving laterally. This is a great thing that you should not disable in production! Instead, note whether or not you can detect the failed attempt.
  • When I run some RTA scripts, I get an error that "Access is denied"
When Windows defender or other AV products detect malicious activity, sometimes will lock files resulting in this error. Consult your AV logs to see if that is the reason for the error.
  • I noticed that there isn't a script for MITRE technique TXXXX - when's that coming?
Endgame will continue to release scripts in the coming weeks and months which correspond to various MITRE ATT&CK techniques. If you've already written a script, we're accepting pull requests and will gladly review and merge additions! Contributing to this repository is a great way to extend RTA for the entire community.


Infection Monkey - An Automated Pentest Tool

$
0
0

The Infection Monkey is an open source security tool for testing a data center's resiliency to perimeter breaches and internal server infection. The Monkey uses various methods to self propagate across a data center and reports success to a centralized Monkey Island server.


The Infection Monkey is comprised of two parts:
  • Monkey - A tool which infects other machines and propagates to them
  • Monkey Island - A dedicated server to control and visualize the Infection Monkey's progress inside the data center
To read more about the Monkey, visit http://infectionmonkey.com

Main Features
The Infection Monkey uses the following techniques and exploits to propagate to other machines.
  • Multiple propagation techniques:
    • Predefined passwords
    • Common logical exploits
    • Password stealing using Mimikatz
  • Multiple exploit methods:
    • SSH
    • SMB
    • RDP
    • WMI
    • Shellshock
    • Conficker
    • SambaCry
    • Elastic Search (CVE-2015-1427)

Setup
Check out the Setup page in the Wiki or a quick getting started guide.

Building the Monkey from source
If you want to build the monkey from source, see Setup and follow the instructions at the readme files under infection_monkey and monkey_island.


Invoke-ATTACKAPI - A PowerShell Script To Interact With The MITRE ATT& CK Framework Via Its Own API

$
0
0

A PowerShell script to interact with the MITRE ATT&CK Framework via its own API in order to gather information about techniques, tactics, groups, software and references provided by the MITRE ATT&CK Team @MITREattack.

Goals
  • Provide an easy way to interact with the MITRE ATT&CK Framework via its own API and PowerShell to the community.
  • Expedite the acquisition of data from ATT&CK when preparing for a Hunting Campaign.
  • Learn PowerShell Dynamic Parameters :)

Getting Started

Requirements
  • PowerShell version 3+

Installing /Importing
git clone https://github.com/Cyb3rWard0g/Invoke-ATTACKAPI.git
cd Invoke-ATTACKAPI
Import-Module .\Invoke-ATTACKAPI.ps1

/$$$$$$ /$$$$$$$$ /$$$$$$$$ /$$$ /$$$$$$ /$$ /$$ /$$$$$$ /$$$$$$$ /$$$$$$
/$$__ $$|__ $$__/|__ $$__//$$ $$ /$$__ $$| $$ /$$/ /$$__ $$| $$__ $$|_ $$_/
| $$ \ $$ | $$ | $$ | $$$ | $$ \__/| $$ /$$/ | $$ \ $$| $$ \ $$ | $$
| $$$$$$$$ | $$ | $$ /$$ $$/$$| $$ | $$$$$/ | $$$$$$$$| $$$$$$$/ | $$
| $$__ $$ | $$ | $$ | $$ $$_/| $$ | $$ $$ | $$__ $$| $$____/ | $$
| $$ | $$ | $$ | $$ | $$\ $$ | $$ $$| $$\ $$ | $$ | $$| $$ | $$
| $$ | $$ | $$ | $$ | $$$$/$$| $$$$$$/| $$ \ $$ | $$ | $$| $$ /$$$$$$
|__/ |__/ |__/ |__/ \____/\_/ \______/ |__/ \__/ |__/ |__/|__/ |______/ V.0.9[BETA]

Adversarial Tactics, Techniques & Common Knowledge API

[*] Author: Roberto Rodriguez @Cyb3rWard0g

[++] Pulling MITRE ATT&CK Data

Examples

This query matches all techniques
Invoke-ATTACKAPI -Category -Technique

ID : {T1001}
Bypass : {}
Contributor : {}
Requires System : {}
Data Source : {Packet capture, Process use of network, Process monitoring, Network protocol analysis}
Description : {Command and control (C2) communications are hidden (but not necessarily encrypted) in an
attempt to make the content more difficult to discover or decipher and to make the
communication less conspicuous and hide commands from being seen. This encompasses many
methods, such as adding junk data to protocol traffic, using steganography, commingling
legitimate traffic with C2 communications traffic, or using a non-standard data encoding
system, such as a modified Base64 encoding for the message body of an HTTP request.}
Mitigation : {Network intrusion detection and prevention systems that use network signatures to
identify traffic for specific adversary malware can be used to mitigate activity at the
network level. Signatures are often for unique indicators within protocols and may be
based on the specific obfuscation technique used by a particular adversary or tool, and
will likely be different across various malware families and versions. Adversaries will
likely change tool C2 signatures over time or construct protocols in such a way as to
avoid detection by common defensive tools.[[CiteRef::University of Birmingham C2]]}
Tactic : Command and Control
Analytic Details : {Analyze network data for uncommon data flows (e.g., a client sending significantly more
data than it receives from a server). Processes utilizing the network that do not normally

have network communication or have never been seen before are suspicious. Analyze packet
contents to detect communications that do not follow the expected protocol behavior for
the port that is being used.[[CiteRef::University of Birmingham C2]]}
TechniqueName : {Data Obfuscation}
FullText : Technique/T1001
Link Text : {[[Technique/T1001|Data Obfuscation]]}
Reference : {University of Birmingham C2, FireEye APT28, Axiom, FireEye APT30...}
Platform : {Windows Server 2003, Windows Server 2008, Windows Server 2012, Windows XP...}
Name : {Data Obfuscation}
CAPEC ID : {}
Requires Permission : {}
URL : https://attack.mitre.org/wiki/Technique/T1001
.............
..................

ID : {T1068}
Bypass : {Anti-virus, System access controls}
Contributor : {John Lambert, Microsoft Threat Intelligence Center}
Requires System : {Unpatched software or otherwise vulnerable target. Depending on the target and goal, the
system and exploitable service may need to be remotely accessible from the internal
network. In the case of privilege escalation, the adversary likely already has user
permissions on the target system.}
Data Source : {Windows Error Reporting, File monitoring, Process monitoring}
Description : {Exploitation of a software vulnerability occurs when an adversary takes advantage of a
programming error in a program, service, or within the operating system software or
kernel itself to execute adversary-controlled code. Exploiting software vulnerabilities
may allow adversaries to run a command or binary on a remote system for lateral movement,
escalate a current process to a higher privilege level, or bypass security mechanisms.
Exploits may also allow an adversary access to privileged accounts and credentials. One
example of this is MS14-068, which can be used to forge Kerberos tickets using domain
user permissions.[[CiteRef::Technet MS14-068]][[CiteRef::ADSecurity Detecting Forged
Tickets]]}
Mitigation : {Update software regularly by employing patch management for internal enterprise
endpoints and servers. Develop a robust cyber threat intelligence capability to determine
what types and levels of threat may use software exploits and 0-days against a particular
organization. Make it difficult for adversaries to advance their operation through
exploitation of undiscovered or unpatched vulnerabilities by using sandboxing,
virtualization, and exploit prevention tools such as the Microsoft Enhanced Mitigation
Experience Toolkit.[[CiteRef::SRD EMET]]}
Tactic : {Credential Access, Defense Evasion, Lateral Movement, Privilege Escalation}
Analytic Details : {Software exploits may not always succeed or may cause the exploited process to become
unstable or crash. Software and operating system crash reports may contain useful
contextual information about attempted exploits that correlate with other malicious
activity. Exploited processes may exhibit behavior that is unusual for the specific
process, such as spawning additional processes or reading and writing to files.}
TechniqueName : {Exploitation of Vulnerability}
FullText : Technique/T1068
Link Text : {[[Technique/T1068|Exploitation of Vulnerability]]}
Reference : {ADSecurity Detecting Forged Tickets, Bitdefender APT28 Dec 2015, ESET Sednit July 2015,
ESET Sednit Part 1...}
Platform : {Windows Server 2003, Windows Server 2008, Windows Server 2012, Windows XP...}
Name : {Exploitation of Vulnerability}
CAPEC ID : {69}
Requires Permission : {User, Administrator, SYSTEM}
URL : https://attack.mitre.org/wiki/Technique/T1068

This query matches the page Technique with ID T1014
Invoke-ATTACKAPI -Category -Technique -ID T1014

ID : {T1014}
Bypass : {Anti-virus, File monitoring, Host intrusion prevention systems, Process whitelisting...}
Contributor : {}
Requires System : {}
Data Source : {BIOS, MBR, System calls}
Description : {Rootkits are programs that hide the existence of malware by intercepting and modifying
operating system API calls that supply system information. Rootkits or rootkit enabling
functionality may reside at the user or kernel level in the operating system or lower, to
include a [[Technique/T1062|Hypervisor]], Master Boot Record, or the
[[Technique/T1019|System Firmware]].[[CiteRef::Wikipedia Rootkit]]

Adversaries may use rootkits to hide the presence of programs, files, network
connections, services, drivers, and other system components.}
Mitigation : {Identify potentially malicious software that may contain rootkit functionality, and
audit and/or block it by using whitelisting[[CiteRef::Beechey 2010]] tools, like
AppLocker,[[CiteRef::Windows Commands JPCERT]][[CiteRef::NSA MS AppLocker]] or Software
Restriction Policies[[CiteRef::Corio 2008]] where appropriate.[[CiteRef::TechNet
Applocker vs SRP]]}
Tactic : Defense Evasion
Analytic Details : {Some rootkit protections may be built into anti-virus or operating system software.
There are dedicated rootkit detection tools that look for specific types of rootkit
behavior. Monitor for the existence of unrecognized DLLs, devices, services, and changes
to the MBR.[[CiteRef::Wikipedia Rootkit]]}
TechniqueName : {Rootkit}
FullText : Technique/T1014
Link Text : {[[Technique/T1014|Rootkit]]}
Reference : {Wikipedia Rootkit, Beechey 2010, Windows Commands JPCERT, NSA MS AppLocker...}
Platform : {Windows Server 2003, Windows Server 2008, Windows Server 2012, Windows XP...}
Name : {Rootkit}
CAPEC ID : {}
Requires Permission : {Administrator, SYSTEM}
URL : https://attack.mitre.org/wiki/Technique/T1014

This query matches against all the group that use a specific software (in this case Cobalt Strike). SYNTAX: "Software: <tool name>"
Invoke-ATTACKAPI -Category -Group -Tool 'Software: Cobalt Strike'

Tool : {Software: Cobalt Strike, Software: KOMPROGO, Software: WINDSHIELD, Software: SOUNDBITE...}
Alias : {APT32, OceanLotus Group}
ID : {G0050}
URL : https://attack.mitre.org/wiki/Group/G0050
TechniqueName : {Scheduled Task, Regsvr32, PowerShell, Custom Command and Control Protocol...}
FullText : Group/G0050
Reference : {FireEye APT32 May 2017, GitHub Malleable C2, GitHub Invoke-Obfuscation}
Link Text : {[[Group/G0050|APT32]]}
Name : {APT32}
Description : {[[Group/G0050|APT32]] is a threat group that has been active since at least 2014. The group
has targeted multiple private sector industries as well as with foreign governments,
dissidents, and journalists. The group's operations are aligned with Vietnamese state
interests.[[CiteRef::FireEye APT32 May 2017]]}
TechniqueID : {Technique/T1053, Technique/T1117, Technique/T1086, Technique/T1094...}
Display Title : Group: APT32, OceanLotus Group

[BETA] Exporting custom results to a CSV
Invoke-ATTACKAPI -Category -Technique | where-object -Property ID -GE "T1134" | 
select @{Name="Name"; Expression={$_.Name -join ","}}, @{Name="Tactic"; Expression={$_.Tactic -join ","}},
@{Name ="ID"; Expression={$_.ID -join ","}}, @{Name="Description"; Expression={$_.Description -join ","}},
@{Name="Analytic details"; Expression={$_.'Analytic Details' -join ","}}, @{Name="Data Source";
Expression={$_.'Data Source' -join ","}} | export-csv F:\wardog\scripts\demo6.csv -NoTypeInformation

Showing an up to date ATT&CK Matrix for Enterprise
Invoke-ATTACKAPI -Matrix | select Persistence, 'Privilege Escalation', 'Defense Evasion','Credential Access', Discovery, 'Lateral Movement', Execution, Collection, Exfiltration, 'Command and Control' | ft

Persistence Privilege Escalation Defense Evasion Credential Access Discovery Lateral Movement Execution
----------- -------------------- --------------- ----------------- --------- ---------------- ---------
.bash_profile and .bashrc Access Token Manipulation Access Token Manipulation Account Manipulation Account Discovery AppleScript AppleScript
Accessibility Features Accessibility Features Binary Padding Bash History Application Window Discovery Application Deployment Software Application Shimming
AppInit DLLs AppInit DLLs Bypass User Account Control Brute Force File and Directory Discovery Exploitation of Vulnerability Command-Line Interface
Application Shimming Application Shimming Clear Command History Create Account Network Service Scanning Logon Scripts Execution through API
Authentication Package Bypass User Account Control Code Signing Credential Dumping Network Share Discovery Pass the Hash Execution through Mod...
Bootkit DLL Injection Component Firmware Credentials in Files Peripheral Device Discovery Pass the Ticket Graphical User Interface
Change Default File Association DLL Search Order Hijacking Component Object Model Hijacking Exploitation of Vulnerability Permission Groups Discovery Remote Desktop Protocol InstallUtil
Component Firmware Dylib Hijacking Deobfuscate/Decode Files or Information Input Capture Process Discovery Remote File Copy Launchctl
Component Object Model Hijacking Exploitation of Vulnerability Disabling Security Tools Input Prompt Query Registry Remote Services PowerShell
Cron Job File System Permissions Weakness DLL Injection Keychain Remote System Discovery Replication Through Removable Media Process Hollowing
DLL Search Order Hijacking Launch Daemon DLL Search Order Hijacking Network Sniffing Security Software Discovery Shared Webroot Regsvcs/Regasm
Dylib Hijacking Local Port Monitor DLL Side-Loading Private Keys System Information Discovery Taint Shared Content Regsvr32
External Remote Services New Service Exploitation of Vulnerability Securityd Memory System Network Configuration Discovery Third-party Software Rundll32
File System Permissions Weakness Path Interception File Deletion Two-Factor Authentication Interception System Network Connections Discovery Windows Admin Shares Scheduled Task
Hidden Files and Directories Plist Modification File System Logical Offsets System Owner/User Discovery Windows Remote Management Scripting
Hypervisor Scheduled Task Gatekeeper Bypass System Service Discovery Service Execution
Launch Agent Service Registry Permissions Weakness Hidden Files and Directories System Time Discovery Source
Launch Daemon Setuid and Setgid Hidden Users Space after Filename
Launchctl Startup Items Hidden Window Third-party Software
LC_LOAD_DYLIB Addition Sudo HISTCONTROL Trap
Local Port Monitor Valid Accounts Indicator Blocking Trusted Developer Uti...
Login Item Web Shell Indicator Removal from Tools Windows Management In...
Logon Scripts Indicator Removal on Host Windows Remote Manage...
Modify Existing Service Install Root Certificate
Netsh Helper DLL InstallUtil
New Service Launchctl
Office Application Startup LC_MAIN Hijacking
Path Interception Masquerading
Plist Modification Modify Registry
Rc.common Network Share Connection Removal
Redundant Access NTFS Extended Attributes
Registry Run Keys / Start Folder Obfuscated Files or Information
Re-opened Applications Plist Modification
Scheduled Task Process Hollowing
Security Support Provider Redundant Access
Service Registry Permissions Weakness Regsvcs/Regasm
Shortcut Modification Regsvr32
Startup Items Rootkit
System Firmware Rundll32
Trap Scripting
Valid Accounts Software Packing
Web Shell Space after Filename
Windows Management Instrumentation Event Subscription Timestomp
Winlogon Helper DLL Trusted Developer Utilities
Valid Accounts

Getting an up to date ATT&CK Matrix for Enterprise and exporting it to a csv file
Invoke-ATTACKAPI -Matrix | select Persistence, 'Privilege Escalation', 'Defense Evasion','Credential Access',
Discovery, 'Lateral Movement', Execution, Collection, Exfiltration, 'Command and Control' |
Export-Csv C:\wardog\scripts\matrix.csv -NoTypeInformation

Showing an up to date table of Groups/APTs with the techniques and tools attributed to them
Invoke-ATTACKAPI -Attribution | ft

Group Group Alias Group ID Tactic TechniqueName TechniqueID Tool
----- ----------- -------- ------ ------------- ----------- ----
admin@338 admin@338 G0018 Discovery System Time Discovery Technique/T1124 Software: Net, net.exe
admin@338 admin@338 G0018 Defense Evasion Network Share Connection Removal Technique/T1126 Software: Net, net.exe
admin@338 admin@338 G0018 Command and Control Commonly Used Port Technique/T1043 Software: LOWBALL
admin@338 admin@338 G0018 {Command and Control, Lateral Movement} Remote File Copy Technique/T1105 Software: LOWBALL
admin@338 admin@338 G0018 Discovery System Network Connections Discovery Technique/T1049 Software: netstat, netstat.exe
admin@338 admin@338 G0018 Discovery System Information Discovery Technique/T1082 Software: BUBBLEWRAP, Backdoor.APT...
admin@338 admin@338 G0018 Discovery Account Discovery Technique/T1087
admin@338 admin@338 G0018 Execution Command-Line Interface Technique/T1059
admin@338 admin@338 G0018 Discovery System Service Discovery Technique/T1007
admin@338 admin@338 G0018 Defense Evasion Masquerading Technique/T1036
admin@338 admin@338 G0018 Discovery Remote System Discovery Technique/T1018 Software: Net, net.exe
admin@338 admin@338 G0018 Discovery System Network Connections Discovery Technique/T1049 Software: Net, net.exe
admin@338 admin@338 G0018 Lateral Movement Windows Admin Shares Technique/T1077 Software: Net, net.exe
admin@338 admin@338 G0018 {Defense Evasion, Privilege Escalation} DLL Injection Technique/T1055 Software: PoisonIvy, Poison Ivy
admin@338 admin@338 G0018 Discovery System Service Discovery Technique/T1007 Software: Net, net.exe
admin@338 admin@338 G0018 Discovery Account Discovery Technique/T1087 Software: Net, net.exe
admin@338 admin@338 G0018 Command and Control Standard Non-Application Layer Protocol Technique/T1095 Software: BUBBLEWRAP, Backdoor.APT...
admin@338 admin@338 G0018 Discovery System Information Discovery Technique/T1082 Software: Systeminfo, systeminfo.exe
admin@338 admin@338 G0018 Credential Access Create Account Technique/T1136 Software: Net, net.exe
admin@338 admin@338 G0018 Discovery Permission Groups Discovery Technique/T1069
admin@338 admin@338 G0018 Discovery Network Share Discovery Technique/T1135 Software: Net, net.exe
admin@338 admin@338 G0018 Command and Control Web Service Technique/T1102 Software: LOWBALL
admin@338 admin@338 G0018 Execution Service Execution Technique/T1035 Software: Net, net.exe
admin@338 admin@338 G0018 Discovery File and Directory Discovery Technique/T1083
admin@338 admin@338 G0018 Discovery Permission Groups Discovery Technique/T1069 Software: Net, net.exe
admin@338 admin@338 G0018 Discovery System Network Connections Discovery Technique/T1049
admin@338 admin@338 G0018 Discovery System Information Discovery Technique/T1082
admin@338 admin@338 G0018 Command and Control Standard Application Layer Protocol Technique/T1071 Software: LOWBALL
admin@338 admin@338 G0018 Command and Control Standard Cryptographic Protocol Technique/T1032 Software: PoisonIvy, Poison Ivy
admin@338 admin@338 G0018 {Collection, Credential Access} Input Capture Technique/T1056 Software: PoisonIvy, Poison Ivy
admin@338 admin@338 G0018 Command and Control Standard Application Layer Protocol Technique/T1071 Software: BUBBLEWRAP, Backdoor.APT...
admin@338 admin@338 G0018 Discovery System Network Configuration Discovery Technique/T1016 Software: ipconfig, ipconfig.exe
admin@338 admin@338 G0018 Discovery System Network Configuration Discovery Technique/T1016
APT1 {APT1, Comment Crew, Comment Group, Comment Panda} G0006 Collection Data from Local System Technique/T1005
APT1 {APT1, Comment Crew, Comment Group, Comment Panda} G0006 Execution Service Execution Technique/T1035 Software: xCmd
APT1 {APT1, Comment Crew, Comment Group, Comment Panda} G0006 Lateral Movement Pass the Hash Technique/T1075 Software: Pass-The-Hash Toolkit
APT1 {APT1, Comment Crew, Comment Group, Comment Panda} G0006 Execution Service Execution Technique/T1035 Software: Net, net.exe
APT1 {APT1, Comment Crew, Comment Group, Comment Panda} G0006 Discovery Remote System Discovery Technique/T1018 Software: Net, net.exe
APT1 {APT1, Comment Crew, Comment Group, Comment Panda} G0006 Collection Email Collection Technique/T1114
APT1 {APT1, Comment Crew, Comment Group, Comment Panda} G0006 Lateral Movement Pass the Hash Technique/T1075

Showing an up to date table of the techniques and tools attributed to a Group/APT with Group ID G0051 (FIN7)
Invoke-ATTACKAPI -Attribution | Where-Object -Property 'Group ID' -EQ 'G0046' | ft

Group Group Alias Group ID Tactic TechniqueName TechniqueID Tool Description
----- ----------- -------- ------ ------------- ----------- ---- -----------
FIN7 FIN7 G0046 Discovery Process Discovery Technique/T1057 Software: HALFBAKED {[[Software/S0151|HALFBAKED]] can obtain information about running processes on the victim.[[CiteRef::Fir...
FIN7 FIN7 G0046 Persistence Registry Run Keys / Start Folder Technique/T1060 {[[Group/G0046|FIN7]] malware has created a Registry Run key pointing to its malicious LNK file to establ...
FIN7 FIN7 G0046 Discovery Query Registry Technique/T1012 Software: POWERSOURCE, DNSMessenger {[[Software/S0145|POWERSOURCE]] queries Registry keys in preparation for setting Run keys to achieve pers...
FIN7 FIN7 G0046 Persistence Registry Run Keys / Start Folder Technique/T1060 Software: POWERSOURCE, DNSMessenger {[[Software/S0145|POWERSOURCE]] achieves persistence by setting a Registry Run key, with the path dependi...
FIN7 FIN7 G0046 {Command and Control, Lateral Movement} Remote File Copy Technique/T1105 Software: POWERSOURCE, DNSMessenger {[[Software/S0145|POWERSOURCE]] has been observed being used to download [[Software/S0146|TEXTMATE]] and ...
FIN7 FIN7 G0046 {Execution, Persistence, Privilege Escalation} Application Shimming Technique/T1138 {[[Group/G0046|FIN7]] has used application shim databases for persistence.[[CiteRef::FireEye FIN7 Shim Da...
FIN7 FIN7 G0046 {Execution, Persistence, Privilege Escalation} Scheduled Task Technique/T1053 {[[Group/G0046|FIN7]] malware has created scheduled tasks to establish persistence.[[CiteRef::FireEye FIN...
FIN7 FIN7 G0046 Command and Control Standard Application Layer Protocol Technique/T1071 Software: Carbanak, Anunak {The [[Software/S0030|Carbanak]] malware communicates to its command server using HTTP with an encrypted ...
FIN7 FIN7 G0046 Collection Screen Capture Technique/T1113 Software: HALFBAKED {[[Software/S0151|HALFBAKED]] can obtain screenshots from the victim.[[CiteRef::FireEye FIN7 April 2017]]}
FIN7 FIN7 G0046 Command and Control Standard Application Layer Protocol Technique/T1071 Software: POWERSOURCE, DNSMessenger {[[Software/S0145|POWERSOURCE]] uses DNS TXT records for C2.[[CiteRef::FireEye FIN7 March 2017]][[CiteRef...
FIN7 FIN7 G0046 Execution Windows Management Instrumentation Technique/T1047 Software: HALFBAKED {[[Software/S0151|HALFBAKED]] can use WMI queries to gather system information.[[CiteRef::FireEye FIN7 Ap...
FIN7 FIN7 G0046 Command and Control Standard Application Layer Protocol Technique/T1071 Software: TEXTMATE, DNSMessenger {[[Software/S0146|TEXTMATE]] uses DNS TXT records for C2.[[CiteRef::FireEye FIN7 March 2017]]}
FIN7 FIN7 G0046 Discovery System Information Discovery Technique/T1082 Software: HALFBAKED {[[Software/S0151|HALFBAKED]] can obtain information about the OS, processor, and BIOS.[[CiteRef::FireEye...
FIN7 FIN7 G0046 {Collection, Credential Access} Input Capture Technique/T1056 Software: Carbanak, Anunak {[[Software/S0030|Carbanak]] contains keylogger functionality.[[CiteRef::Kaspersky Carbanak]]}
FIN7 FIN7 G0046 Command and Control Standard Cryptographic Protocol Technique/T1032 Software: Carbanak, Anunak {[[Software/S0030|Carbanak]] encrypts the message body of HTTP traffic with RC2 and Base64 encoding.[[Cit...
FIN7 FIN7 G0046 Execution PowerShell Technique/T1086 Software: HALFBAKED {[[Software/S0151|HALFBAKED]] can execute PowerShell scripts.[[CiteRef::FireEye FIN7 April 2017]]}
FIN7 FIN7 G0046 {Command and Control, Lateral Movement} Remote File Copy Technique/T1105 {[[Group/G0046|FIN7]] uses a PowerShell script to launch shellcode that retrieves an additional payload.[...
FIN7 FIN7 G0046 Execution PowerShell Technique/T1086 Software: POWERSOURCE, DNSMessenger {[[Software/S0145|POWERSOURCE]] is a PowerShell backdoor.[[CiteRef::FireEye FIN7 March 2017]][[CiteRef::C...
FIN7 FIN7 G0046 Execution PowerShell Technique/T1086 {[[Group/G0046|FIN7]] uses a PowerShell script to launch shellcode that retrieves an additional payload.[...
FIN7 FIN7 G0046 Defense Evasion Masquerading Technique/T1036 {[[Group/G0046|FIN7]] has created a scheduled task named “AdobeFlashSync” to establish persistence.[[Cite...
FIN7 FIN7 G0046 Defense Evasion Obfuscated Files or Information Technique/T1027 Software: POWERSOURCE, DNSMessenger {If the victim is using PowerShell 3.0 or later, [[Software/S0145|POWERSOURCE]] writes its decoded payloa...
FIN7 FIN7 G0046 Defense Evasion File Deletion Technique/T1107 Software: HALFBAKED {[[Software/S0151|HALFBAKED]] can delete a specified file.[[CiteRef::FireEye FIN7 April 2017]]}
FIN7 FIN7 G0046 Execution Command-Line Interface Technique/T1059 Software: TEXTMATE, DNSMessenger {[[Software/S0146|TEXTMATE]] executes cmd.exe to provide a reverse shell to attackers.[[CiteRef::FireEye...

Getting an up to date table of Groups/APTs with the techniques and tools attributed to them and exporting it to a csv file
Invoke-ATTACKAPI -Attribution | select Group, 'Group Alias','Group ID', Tactic, TechniqueName,
TechniqueID, Tool, @{Name='Description'; Expression={$_.Description}}, 'Data Source'|
export-csv -NoTypeInformation C:\Documents\ATTACK_Attribution.csv

Showing an up to date table with all the valuable information from the MITRE ATTACK DB at once
Invoke-ATTACKAPI -All | ft

Tactic TechniqueName TechniqueID Group Group Alias Group ID Tool
------ ------------- ----------- ----- ----------- -------- ----
Collection Screen Capture Technique/T1113 APT28 {APT28, Sednit, Sofacy, Pawn Storm...} G0007
Collection Screen Capture Technique/T1113 APT28 {APT28, Sednit, Sofacy, Pawn Storm...} G0007 Software: XAgentOSX
Collection Data from Local System Technique/T1005 APT1 {APT1, Comment Crew, Comment Group, Comment Panda} G0006
Collection Screen Capture Technique/T1113 Cleaver {Cleaver, TG-2889, Threat Group 2889} G0003 Software: TinyZBot
Collection Screen Capture Technique/T1113 APT32 {APT32, OceanLotus Group} G0050 Software: Cobalt Strike
Collection Screen Capture Technique/T1113 APT29 {APT29, The Dukes, Cozy Bear} G0016 Software: CosmicDuke, TinyBaron,...
Collection Data Staged Technique/T1074 APT30 APT30 G0013 Software: SPACESHIP
Collection Data from Local System Technique/T1005 Ke3chang Ke3chang G0004
Collection Data from Local System Technique/T1005 Lazarus Group {Lazarus Group, HIDDEN COBRA, Guardians of Peace} G0032
Collection Data from Local System Technique/T1005 APT29 {APT29, The Dukes, Cozy Bear} G0016 Software: CosmicDuke, TinyBaron,...
Collection Data from Local System Technique/T1005 APT29 {APT29, The Dukes, Cozy Bear} G0016 Software: PinchDuke
Collection Data from Local System Technique/T1005 APT30 APT30 G0013 Software: FLASHFLOOD
Collection Screen Capture Technique/T1113 RTM RTM G0048 Software: RTM
Collection Screen Capture Technique/T1113 MONSOON {MONSOON, Operation Hangover} G0042 Software: BADNEWS
Collection Screen Capture Technique/T1113 menuPass {menuPass, Stone Panda, APT10, Red Apollo...} G0045 Software: RedLeaves, BUGJUICE
Collection Email Collection Technique/T1114 APT29 {APT29, The Dukes, Cozy Bear} G0016 Software: SeaDuke, SeaDaddy, Sea...
Collection Email Collection Technique/T1114 APT1 {APT1, Comment Crew, Comment Group, Comment Panda} G0006
Collection Screen Capture Technique/T1113 Sandworm Team {Sandworm Team, Quedagh} G0034 Software: BlackEnergy, Black Energy
Collection Screen Capture Technique/T1113 FIN7 FIN7 G0046 Software: HALFBAKED
Collection Screen Capture Technique/T1113 Dust Storm Dust Storm G0031 Software: ZLib
Collection Screen Capture Technique/T1113 Dragonfly {Dragonfly, Energetic Bear} G0035 Software: Trojan.Karagany
Collection Screen Capture Technique/T1113 menuPass {menuPass, Stone Panda, APT10, Red Apollo...} G0045 Software: EvilGrab
Collection Screen Capture Technique/T1113 Group5 Group5 G0043
Collection Screen Capture Technique/T1113 Gamaredon Group Gamaredon Group G0047 Software: Pteranodon
Collection Data Staged Technique/T1074 APT30 APT30 G0013 Software: FLASHFLOOD

Getting an up to date table with all the valuable information from the MITRE ATTACK DB at once and exporting it to a csv file
Invoke-ATTACKAPI -All | select @{Name='Tactic'; Expression={$_.tactic -join ','}}, @{Name='TechniqueName';
Expression={$_.techniquename -join ','}}, techniqueID, group, @{Name='Group Alias'; Expression={$_.'Group alias'
-join ','}}, 'Group ID', @{Name='Tool'; Expression={$_.Tool -join ','}}, @{Name='Description';
Expression={$_.Description -join ','}}, @{Name='Data Source'; Expression={$_.'Data Source' -join ','}},
@{Name='Bypass'; Expression={$_.Bypass -join ','}}, @{Name='Analytic Details'; Expression={$_.'Analytic Details'
-join ','}}, @{Name='Mitigation'; Expression={$_.Mitigation -join ','}}, @{Name='Platform';
Expression={$_.Platform -join ','}}, @{Name='Requires Permission'; Expression={$_.'Requires Permission' -join
','}}, @{Name='Requires System'; Expression={$_.'Requires System' -join ','}}, @{Name='CAPEC ID';
Expression={$_.'CAPEC ID' -join ','}}, @{Name='Contributor'; Expression={$_.Contributor -join ','}},
@{Name='URL'; Expression={$_.URL -join ','}} | Export-Csv -NoTypeInformation C:\\Downloads\ATTACK_ALL.csv

Author

RedHunt OS - Virtual Machine For Adversary Emulation And Threat Hunting

$
0
0

Virtual Machine for Adversary Emulation and Threat Hunting
RedHunt aims to be a one stop shop for all your threat emulation and threat hunting needs by integrating attacker's arsenal as well as defender's toolkit to actively identify the threats in your environment.

Base Machine:
  • Lubuntu-17.10.1 x64

Tool Setup

Attack Emulation:

Logging and Monitoring:

Open Source Intelligence (OSINT):

Threat Intelligence:

Sneak Peek:


References:


Bad-Pdf - Steal NTLM Hashes With A PDF From Windows Machines

$
0
0
Bad-PDF create malicious PDF to steal NTLM Hashes from windows machines, it utilize vulnerability disclosed by checkpoint team to create the malicious PDF file. Bad-Pdf reads the NTLM hashes using Responder listener.
This method work on all PDF readers(Any version) and java scripts are not required for this attack.
Reference : https://research.checkpoint.com/ntlm-credentials-theft-via-pdf-files/

Dependency:
Responder/Kali Linux

Usage:
python badpdf.py

Run Bad-PDF in Kali linux:


Responder waiting for NTLM hash:


Run generated Bad-PDF file on a windows machine and get NTLM hash: :)


Author : Deepu twitter.com/DeepZec


WSSAT v2.0 - Web Service Security Assessment Tool

$
0
0

WSSAT is an open source web service security scanning tool which provides a dynamic environment to add, update or delete vulnerabilities by just editing its configuration files. This tool accepts WSDL address list as input file and for each service, it performs both static and dynamic tests against the security vulnerabilities. It also makes information disclosure controls. With this tool, all web services could be analysed at once and the overall security assessment could be seen by the organization.

Objectives of WSSAT are to allow organizations:
  • Perform their web services security analysis at once
  • See overall security assessment with reports
  • Harden their web services

WSSAT 2.0
REST API scanning support was added with same dynamic vulnerability management environment philosophy as SOAP services. ChangeLog

WSSAT’s main capabilities include:

Dynamic Testing:
  • Insecure Communication - SSL Not Used
  • Unauthenticated Service Method
  • Error Based SQL Injection
  • Cross Site Scripting
  • XML Bomb
  • External Entity Attack - XXE
  • XPATH Injection
  • HTTP OPTIONS Method
  • Cross Site Tracing (XST)
  • Missing X-XSS-Protection Header
  • Verbose SOAP Fault Message
Static Analysis:
  • Weak XML Schema: Unbounded Occurrences
  • Weak XML Schema: Undefined Namespace
  • Weak WS-SecurityPolicy: Insecure Transport
  • Weak WS-SecurityPolicy: Insufficient Supporting Token Protection
  • Weak WS-SecurityPolicy: Tokens Not Protected
Information Leakage:
  • Server or technology information disclosure
WSSAT’s main modules are:
  • Parser
  • Vulnerabilities Loader
  • Analyzer/Attacker
  • Logger
  • Report Generator
Installation & Usage:
For more Help
The main difference of WSSAT is to create a dynamic vulnerability management environment instead of embedding the vulnerabilities into the code.


Gitmails - An Information Gathering Tool To Colect Git Commit Emails In Version Control Host Services

$
0
0

An information gathering tool to colect git commit emails in version control host services.

Overview
Gitmails explores that git commits contains a name and an email configured by the author and that version control host services are being used to store a lot of projects.
What Gitmails does is:
  • Query the version control host services for information about an organization, team, group, user or single repository;
  • List all repositories (restricted by authentication) if not on single repository mode;
  • Clone the repository or query the version control host service for the commit history;
  • Analyze the commit history to identify unique authors. Authors are defined by a name and email par.
With these steps, Gitmails can collect all emails found in commit history for a specific target.

Usage
First, you must choose the operation method: collect emails of organization, user or single repository. This can be done by the options: -u --username, -o --organization or -r --repository.
After specifying the operation method, you must set the target. You should pass it right after the operation method: python3 gitmails.py -u some_username, python3 gitmails.py -o some_org or python3 gitmails.py -r some_repo_url. NOTE: gitlab usernames are case sensitive, keep that in mind when trying to collect emails there.
With this basic configuration, Gitmails will clone all repositories for the specified target (or clone the repository in the url) and analyze its commit history. Then, it will print the high level information of the user or organization and finally print, in a "fancy_grid" table (from tabulate), all the Name-Email pars found during analysis.
Useful options:
  • --raw: Will print the results in pure text, no grids, just a comma separated values;
  • -f | --file: Will store the result in the specified file. The results will be in csv with no header format.
  • --include-repositories: Will make Gitmails print the result with information about in which repository the email was found.
  • -p | --path: Specify the temporary path to clone the repositories.
  • -e | --exclude: Ignore specified repositories. Will compare the repository name, if it matches, will ignore the repository and go to the next.
  • --no-cleanup: Will not remove the clonned repositories.
  • --include-forks: Will include forked repositories in the analysis (Only for github).
  • --include-users: If collecting an organization, will collect info about its public members (Only for github).
  • --no-[gitlab|github|bitbucket]: Will not collect information of the specified host service.
  • --run-plugins: Will execute plugins in the collected result.
  • --api: Will try to collect all the information only through API, without clonning repositories. NOTE: Accessing APIs without authentication will cause your IP to be throttled. Also, API only collection is usually slower than clonning the repositories.

Installation
To install Gitmails, you will have to execute the following steps:
  • pip3 install -r requirements.txt
  • Install pygit2 through your operating system package manager.

Debian problems
If you are using Debian (maybe Ubuntu too), the libgit2 package do not work with Gitmails. To solve this, you will need to compile the libgit2 manually. The following steps should enough:
wget https://github.com/libgit2/libgit2/archive/v0.27.0.tar.gz && \
tar xzf v0.27.0.tar.gz && \
cd libgit2-0.27.0/ && \
cmake . && \
make && \
sudo make install
ldconfig
pip3 install pygit2
Or execute the debian install script.

Docker
You can also use the docker version of the tool by issuing the following command:
docker run -it giovanifss/gitmails --help
Note that if you want to write to a file, you will need to mount a docker volume:
docker run -v /tmp/output:/opt -it giovanifss/gitmails -f /opt/result.txt


Yamot - Yet Another MOnitoring Tool

$
0
0

yamot is a web-based server-monitoring tool built for small environments with just a handful servers. It takes a minimum of resources which allows the execution on almost every machine, also very old ones. It works best with Linux or BSD. Windows is not part of the server scope.

You could use it for example to monitor your Raspberry Pi Servers running at home. It takes only a few steps of configuration and after that it displays much relevant server measurement data in your browser:
  • System Load
  • Memory Usage
  • Uptime / Boot Time
  • Costs (calculated)
  • Battery (e.g. for monitoring a mobile device)
  • WiFi Signal Strength
  • Temperatures
  • Processor (Cores, Speed, Usages, ...)
  • System (Distro, Version, Architecture, …)
  • Network Services (Open Listening Ports)
  • Network Devices & Addresses
  • Network Interfaces IO (bytes sent/received)
  • Disk Storage Usage (used & total space)
  • Disk Device IO (bytes read/written)
  • Users logged in (name, login date, …)

All this information is displayed in real-time on one page to give an uncomplicated overview. If you are looking for something big, feature-rich and scalable you are definitely wrong here. For a business solution have a look at Nagios instead.

Architecture
The architecture is divided up into three parts (original MVC)

Server Component
This component needs to be executed on the server-system which you want to monitor. It’s basically a simple webserver. For security reasons it just has readonly access to the system. The Auth is done via HTTP Basic Auth, so don’t use it in untrusted networks!
The Server component provides realtime data only. There are no cyclical background tasks or other stuff running which occupy the processor/memory/disk. If you don’t access the server it will take up almost no resources. The server is built with Python3, which of course needs to be installed. Default server port is 9393.

Controller Component
One server needs to have the additional role of the controller. The controller is also just a webserver which provides a REST-API to manage the application.
The Auth is also done via HTTP Basic Auth, so also don’t use it in untrusted networks! The controller is built with node.js and express.js. If you don’t have those installed, you could also use the Docker-Image called prod. Default controller port is 8080.

Client Component
Finally the client represents the web-page and gets served by the Controller (on port 8080). The client is built with Angular, some Bootstrap CSS and a subset of FontAwesome Icons. A refresh-cycle to display new data (every 3sec per default) incurs requesting all your servers to get updates of the measured data.
                    WebFiles          .--------.
.--------.-----------REQ------------>| ____ |
| ____ |<----------RES-------------| |====| |
| | | | | | | |
| |____| | ServerList | | | |
| /::::/ |-----------REQ------------>| |____| |
'--------'<----------RES-------------'--------'
Client Controller


.--------. ServerData .--------------.
| ____ |-----------REQ---------->| __________ |
| | | |<----------RES-----------| |____oooo_°| | -------.
| |____| | '--------------' |
| /::::/ | Server 1 ^ |
| | | |
| | ServerData .--------------. | |
| |-----------REQ---------->| __________ | '-------
| |<----------RES-----------| |____oooo_°| |
'--------' '--------------'
Client Server 2

Getting started
Before installing: Try it via docker, there are multiple docker images available. Just try the demo image to get a first impression.

Installation

Server
  1. Install python3 and psutil and ujson on every server with sudo apt-get install python3-psutil python3-ujson. If you are not running an apt-based system (Debian or Ubuntu) use sudo pip3 install psutil instead.
  2. Copy the file yamot_server.py to your server (e.g. under /opt/yamot) and add it to /etc/rc.local as sudo -uusernamedash -c 'cd /opt/yamot && python3 /opt/yamot/yamot_server.py' & in front of the “exit 0”-line (enable autostart)
  3. Run the server once interactively via python3 yamot_server.py to generate a config file (needs one-time write permission in the same folder).
  4. If you are running a firewall on your server (like ufw) open the specified port sudo ufw allow 9393 (default port is 9393)

Client & Controller
  1. The controller-component needs to be running on a server in your network (the same network where also the servers are running). The server which runs the controller can also run the server component at the same time. Use the content of the folder controller/dist.
  2. You will need a node.js installation with express.js (or docker, if you use the prod image)
  3. Use node controller.js to start the controller and check if it is working
  4. The login credentials will be provided by the controller on startup in the shell.
  5. Now you could also add it to the autostart of the system. Don’t forget to open the port if you are using a firewall.
  6. If you are done, open browser and navigate to http://ip-of-the-controller-device:8080 (8080 is the default controller port)

Docker
There are three docker images available which follow various purposes.
All images needs to be built from the corresponding dockerfile. Just use the additional shell scripts.

build
  • transpiles the client and controller code into the dist-folder in a consistent environment, there is no need to build the server

prod
  • contains the controller & client for productive usage, just add the container to your docker infrastructure

demo
  • contains all components to show how the application is supposed to work
  • URL: http://localhost:8080/
  • login credentials:
    • Username: yamot
    • Password: test123
  • The docker container gets measured and also a dummy server produces random data.
  • All changes will be reverted on next container startup, so you can easily try it out.

Kali Linux 2018.2 Release - The Best Penetration Testing Distribution

$
0
0

This Kali release is the first to include the Linux 4.15 kernel, which includes the x86 and x64 fixes for the much-hyped Spectre and Meltdown vulnerabilities. It also includes much better support for AMD GPUs and support for AMD Secure Encrypted Virtualization, which allows for encrypting virtual machine memory such that even the hypervisor can’t access it.

Easier Metasploit Script Access
If you spend any significant amount of time writing exploits, you are undoubtedly familiar with the various Metasploit scripts that are available, such as pattern_create, pattern_offset, nasm_shell, etc. You are likely also aware that all of these helpful scripts are tucked away under /usr/share/metasploit-framework/tools/exploit/, which makes them more than a little difficult to make use of. Fortunately, as of metasploit-framework_4.16.34-0kali2, you can now make use of all these scripts directly as have been included links to all of them in the PATH, each of them prepended with msf-.
root@kali:~# msf-
msf-egghunter msf-java_deserializer msf-nasm_shell
msf-exe2vba msf-jsobfu msf-pattern_create
msf-exe2vbs msf-makeiplist msf-pattern_offset
msf-find_badchars msf-md5_lookup msf-pdf2xdp
msf-halflm_second msf-metasm_shell msf-virustotal
msf-hmac_sha1_crack msf-msf_irb_shell

root@kali:~#
root@kali:~# msf-pattern_create -l 50 -s ABC,123
A1A2A3B1B2B3C1C2C3A1A2A3B1B2B3C1C2C3A1A2A3B1B2B3C1
root@kali:~#

Upgrade to Kali Linux 2018.2
If you already have a Kali installation you’re happy with, you can easily upgrade in place as follows.
root@kali:~# apt update && apt full-upgrade

More info.

Astra - Automated Security Testing For REST API's

$
0
0
REST API penetration testing is complex due to continuous changes in existing APIs and newly added APIs. Astra can be used by security engineers or developers as an integral part of their process, so they can detect and patch vulnerabilities early during development cycle. Astra can automatically detect and test login & logout (Authentication API), so it's easy for anyone to integrate this into CICD pipeline. Astra can take API collection as an input so this can also be used for testing apis in standalone mode.
  • SQL injection
  • Cross site scripting
  • Information Leakage
  • Broken Authentication and session management
  • CSRF (including Blind CSRF)
  • Rate limit
  • CORS misonfiguration (including CORS bypass techniques)
  • JWT attack

Coming soon
  • XXE
  • CSP misconfiguration

Requirement
  • Linux or MacOS
  • Python 2.7
  • mongoDB

Installation
$ git clone https://github.com/flipkart-incubator/Astra

$ cd Astra

$ sudo pip install -r requirements.txt

Dependencies
- requests
- logger
- pymongo
- ConfigParser
- pyjwt
- flask
- sqlmap

Usage: CLI
$ python astra.py --help

_
/\ | |
/ \ ___| |_ _ __ __ _
/ /\ \ / __| __| '__/ _` |
/ ____ \__ \ |_| | | (_| |
/_/ \_\___/\__|_| \__,_|


usage: astra.py [-h] [-c {Postman,Swagger}] [-n COLLECTION_NAME] [-u URL]
[-headers HEADERS] [-method {GET,POST}] [-b BODY]
[-l LOGINURL] [-H LOGINHEADERS] [-d LOGINDATA]

REST API Security testing Framework

optional arguments:
-h, --help show this help message and exit
-c {Postman,Swagger}, --collection_type {Postman,Swagger}
Type of API collection
-n COLLECTION_NAME, --collection_name COLLECTION_NAME
Type of API collection
-u URL, --url URL URL of target API
-headers HEADERS, --headers HEADERS
Custom headers.Example: {"token" : "123"}
-method {GET,POST}, --method {GET,POST}
HTTP request method
-b BODY, --body BODY Request body of API
-l LOGINURL, --loginurl LOGINURL
URL of login API
-H LOGINHEADERS, --loginheaders LOGINHEADERS
Headers should be in a dictionary format. Example:
{"accesstoken" : "axzvbqdadf"}
-d LOGINDATA, --logindata LOGINDATA
login data of API

Usage: Web interface
Run the api.py and access the web interface at http://127.0.0.1:8094
$ cd API
$ python api.py

Screenshots

New scan


Scan Reports


Detailed Report


Lead Developer
  • Sagar Popat (@popat_sagar)

Credits
  • Harsh Grover
  • Prajal Kulkarani
  • Ankur Bhargava
  • Mohan Kallepalli
  • Pardeep battu
  • Anirudh Anand
  • Divya Salu John


Viewing all 5854 articles
Browse latest View live


<script src="https://jsc.adskeeper.com/r/s/rssing.com.1596347.js" async> </script>