Quantcast
Channel: KitPloit - PenTest Tools!
Viewing all 5838 articles
Browse latest View live

SocialFish v2 - Educational Phishing Tool & Information Collector

$
0
0


Ultimate phishing tool with Ngrok integrated.

Are you looking for SF's mobile controller? UndeadSec/SocialFishMobile

PREREQUISITES
  • Python 2.7
  • Wget from Python
  • PHP

TESTED ON
Kali Linux - ROLLING EDITION

CLONE
git clone https://github.com/UndeadSec/SocialFish.git

RUNNING
cd SocialFish
sudo pip install -r requirements.txt
python SocialFish.py

AVAILABLE PAGES
+ Facebook:
  • Traditional Facebook login page.
  • Advanced login with Facebook.
+ Google:
  • Traditional Google login page.
  • Advanced login with Facebook.
+ LinkedIN:
  • Traditional LinkedIN login page.
+ Github:
  • Traditional Github login page.
+ Stackoverflow:
  • Traditional Stackoverflow login page.
+ Wordpress:
  • Similar Wordpress login page.

VIDEO


Arjun v1.3 - HTTP Parameter Discovery Suite

$
0
0

Features
  • Multi-threading
  • 4 modes of detection
  • A typical scan takes 30 seconds
  • Regex powered heuristic scanning
  • Huge list of 25,980 parameter names
  • Makes just 30-35 requests to the target

Usage
Note:Arjun doesn't work with python < 3.4

Discover parameters
To find GET parameters, you can simply do:
python3 arjun.py -u https://api.example.com/endpoint --get
Similarly, use --post to find POST parameters.

Multi-threading
Arjun uses 2 threads by default but you can tune its performance according to your network connection.
python3 arjun.py -u https://api.example.com/endpoint --get -t 22

Delay between requests
You can delay the request by using the -d option as follows:
python3 arjun.py -u https://api.example.com/endpoint --get -d 2

Including presistent data
Let's say you have an API key that you need to send with every request, to tell Arjun to do that you can use the --include option as follows:
python3 arjun.py -u https://api.example.com/endpoint --get --include 'api_key=xxxxx'
OR
python3 arjun.py -u https://api.example.com/endpoint --get --include '{"api_key":"xxxxx"}'
To include multiple parameters, use & to seperate them or pass them as a valid json object.

JSON Output
You can save the result in a JSON format by using the -o as follows:
python3 arjun.py -u https://api.example.com/endpoint --get -o result.json

Adding HTTP Headers
Using the --headers switch will open an interactive prompt where you can paste your headers. Press Ctrl + S to save and Ctrl + X to procced.


Note: Arjun uses nano as the default editor for the prompt but you can change it by tweaking /core/prompt.py.

Credits
The parameter names are taken from @SecLists.


Karma - Search of Emails and Passwords on Pwndb

$
0
0

API pwndb
Karma is a tool written in python3 for the search of emails and passwords on the site: pwndb2am4tzkvold (dot) onion

Install
sudo apt install tor python3 python3-pip
git clone https://github.com/decoxviii/karma.git ; cd karma
sudo -H pip3 install -r requirements.txt
python3 bin/karma.py --help

Tests
All the tests were done in Debian/Ubuntu.
  1. Search emails with the password: 123456789
python3 bin/karma.py search '123456789' --password -o test1
  1. Search emails with the local-part: johndoe
python3 bin/karma.py search 'johndoe' --local-part -o test2
  1. Search emails with the domain: hotmail.com
python3 bin/karma.py search 'hotmail.com' --domain -o test3
  1. Search email password: johndoe@unknown.com
python3 bin/karma.py target 'johndoe@unknown.com' -o test4

Demo


Thanks
This program is inspired by the projects:


CarbonCopy - A Tool Which Creates A Spoofed Certificate Of Any Online Website And Signs An Executable For AV Evasion

Hashboy-Tool - A Hash Query Tool

$
0
0

Hashboy was redeveloped on hash-buster
Author:Leiothrix

How to install
 $git clone https://github.com/sf197/hashboy-tool
$cd hashboy-tool
$python3 hashboy.py

How to use
$ python3 hashboy.py 
__ __ __
/ /_ ____ ______/ /_ / /_ ____ __ __
/ __ \/ __ `/ ___/ __ \/ __ \/ __ \/ / / /
/ / / / /_/ (__ ) / / / /_/ / /_/ / /_/ /
/_/ /_/\__,_/____/_/ /_/_.___/\____/\__, /
/____/
Author:Leiothrix Github:https://github.com/sf197

usage: hashboy.py [-h] [-s HASH] [-f FILE] [-t THREADS]

optional arguments:
-h, --help show this help message and exit
-s HASH, --hash HASH hash
-f FILE, --file FILE file containing hashes
-t THREADS, --threads THREADS
number of threads

Video


Metaforge - An OSINT Metadata Analyzing Tool That Filters Through Tags And Creates Reports

$
0
0

An OSINT tool that analyzes metadata and creates dynamic reports"


What is "metadata"?

To put it simply, metadata is just information about data. The information comes from the tags that capture valuable information about each specific file. Each file has can have many different tags of data that can be retreived for multiple purposes.
The uses for metadata are endless and can prove valuable to those in the information security fields for pentesting and gathering information, like who created the file and what software was used to edit it.

Metaforge Checklist
  • Must have a Unix-based Operating System (Arch, Debian, and RHEL Linux distros have been tested and also Mac OSX)
  • Must have at least Python3.5 or higher
  • Must place all data you wish to analyze in the /media directory. Cannot place folders within the /media directory.

Senior Design Project 2019 - By Chris Morris and Collin Mockbee
A Python3 Application for Unix-based Operating Systems
Note: Metaforge requires at least python version 3.5 to work!

Supported Filetypes
dll | docx | doc | exe | gif | html | jpeg| mkv | mp3 | mp4 | odp | ods | odt | pdf | png | pptx| ppt | svg | torrent |wav | xlsx | xls |zip |

Setup

Install exiftool
Debian-based
apt install libimage-exiftool-perl
RHEL-based
yum install perl-Image-ExifTool
Arch Linux
pacman -S perl-image-exiftool
Mac OSX
brew install exiftool

Install dependencies
pip3 install -r requirements.txt

Running Metaforge
  1. Place the files you wish to analyze in the /media directory
  2. Run metaforge.py
python3 metaforge.py

When Metaforge is finished running, check the User_Projects folder and look for the name of the project you entered. Click on the index.html file to view your generated report.
Thanks to...
Exiftool: https://www.sno.phy.queensu.ca/~phil/exiftool/
progress: https://pypi.org/project/progress/
dominate: https://pypi.org/project/dominate/
colorama: https://pypi.org/project/colorama/
pyexifinfo: https://pypi.org/project/pyexifinfo/


Mad-Metasploit - Metasploit Custom Modules, Plugins & Resource Scripts

$
0
0

Metasploit custom modules, plugins, resource script and.. awesome metasploit collection
https://www.hahwul.com/p/mad-metasploit.html

Awesome
open awesome.md

Add mad-metasploit to metasploit framework
  1. config your metasploit-framework directory
$ vim config/config.rb
$metasploit_path = '/opt/metasploit-framework/embedded/framework/'
# /usr/share/metasploit-framework
2-A. Interactive Mode
$ ./mad-metasploit
2-B. Commandline Mode(preset all)
$ ./mad-metasploit [-a/-y/--all/--yes]

Use custom modules
search auxiliary/exploits, other..
HAHWUL > search springboot

Matching Modules
================

Name Disclosure Date Rank Check Description
---- --------------- ---- ----- -----------
auxiliary/mad_metasploit/springboot_actuator normal No Springboot actuator check

Use custom plugins
load mad-metasploit/{plugins} in msfconsole
HAHWUL > load mad-metasploit/db_autopwn
[*] Successfully loaded plugin: db_autopwn

HAHWUL > db_autopwn
[-] The db_autopwn command is DEPRECATED
[-] See http://r-7.co/xY65Zr instead
[*] Usage: db_autopwn [options]
-h Display this help text
-t Show all matching exploit modules
-x Select modules based on vulnerability references
-p Select modules based on open ports
-e Launch exploits against all matched targets
-r Use a reverse connect shell
-b Use a bind shell on a random port (default)
-q Disable exploit module output
-R [rank] Only run modules with a minimal rank
-I [range] Only exploit hosts inside this range
-X [range] Always exclude hosts inside this range
-PI [range] Only exploit hosts with these ports open
-PX [range] Always exclude hosts with these ports open
-m [regex] Only run modules whose name matches the regex
-T [secs] Maximum runtime for any exploit in seconds

etc...
List of
mad-metasploit/db_autopwn
mad-metasploit/arachni
mad-metasploit/meta_ssh
mad-metasploit/db_exploit

Use Resource-scripts
 #> msfconsole

MSF> load alias
MSF> alias ahosts 'resource /mad-metasploit/resource-script/ahosts.rc'
MSF> ahosts
[Custom command!]
List of rs
ahosts.rc
cache_bomb.rb
feed.rc
getdomains.rb
getsessions.rb
ie_hashgrab.rb
listdrives.rb
loggedon.rb
runon_netview.rb
search_hash_creds.rc
virusscan_bypass8_8.rb

Archive(Informal metasploit modules)
archive/
└── exploits
├── aix
│   ├── dos
│   │   ├── 16657.rb
│   │   └── 16929.rb
│   ├── local
│   │   └── 16659.rb
│   └── remote
│   └── 16930.rb
├── android
│   ├── local
│   │   ├── 40504.rb
│   │   ├── 40975.rb
│   │   └── 41675.rb
│   └── remote
│   ├── 35282.rb
│   ├── 39328.rb
│   ├── 40436.rb
│   └── 43376.rb
.....

Patch mad-metasploit-archive
 #> ln -s mad-metasploit-archive /usr/share/metasploit-framework/modules/exploit/mad-metasploit-arvhice
#> msfconsole

MSF> search [string!]
..
exploit/multi/~~~
exploit/mad-metasploit-arvhice/[custom-script!!]
..

How to update?
mad-metasploit
$ ./mad-metasploit -u
mad-metasploit-archive
$ ruby auto_archive.rb

or

$ ./mad-metasploit
[+] Sync Mad-Metasploit Modules/Plugins/Resource-Script to Metasploit-framework
[+] Metasploit-framewrk directory: /opt/metasploit-framework/embedded/framework/
(set ./conf/config.rb)
[*] Update archive(Those that are not added as msf)? [y/N] y
[-] Download index data..

How to remove mad-metasploit?
$ ./mad-metasploit -r

or

$ ./mad-metasploit --remove

Development
Hello world..!
 $ git clone https://githhub.com/hahwul/mad-metasploit
Add to Custom code
./mad-metasploit-modules
+ exploit
+ auxiliray
+ etc..
./mad-metasploit-plugins
./mad-metasploit-resource-script
New Idea issue > idea tag

Contributing
Bug reports and pull requests are welcome on GitHub. (This project is intended to be a safe)


DOGE - Darknet Osint Graph Explorer

$
0
0

DOGE
Darknet Osint Graph Explorer
Still in dev, works right.
You should use this in addtion to Darknet OSINT Transform

Pay attention here
Query prototype: SELECT DISTINCT custom_column_name AS input, another_custom_name AS output FROM some_table, obviously you can add other options as WHERE, ORDER BY, etc.

How-To
Database file: the filename of the database (sqlite3), ex: db.sqlite3
Graph file: useless (now as now)
Icon From: the type of the "from" entity (email -> domain, email is "from", domain is "to"), so the same as Icon To
Center to node: put node id here, then click on Center Graph to center the graph to that specific node id
Query: write here the query that you'll use to retrieve data from the database, follow the prototype above
Load Data: add data but don't draw, you could use this to import stuff from various databases and when everyting is imported, draw
Draw Graph: draws nodes with edges
Import Graph: useless (now as now)
Export Graph: useless (now as now)
Prerender: does not display the graph until the "pre-rendering" process is done, this should be used when you have to graph 100s of nodes, feel free to change parameters:
  • 1st argument, precomputeGraph(), in pages/graph_1.html;
  • in the same file, lines 246 and 247.

Custom icons
Every icon comes from Font Awesome, I just changed colors.


Screenshots


Stay tuned.


Armory - A Tool Meant To Take In A Lot Of External And Discovery Data From A Lot Of Tools, Add It To A Database And Correlate All Of Related Information

$
0
0

Armory is a tool meant to take in a lot of external and discovery data from a lot of tools, add it to a database and correlate all of related information. It isn't meant to replace any specific tool. It is meant to take the output from various tools, and use it to feed other tools.
Additionally, it is meant to be easily extendable. Don't see a module for your favorite tool? Write one up! Want to export data in just the right format for your reporting? Create a new report!

Installation

Prerequisites
First, set up some kind of virtual environment. I like virtualenvwrapper:
http://virtualenvwrapper.readthedocs.io/en/latest/install.html

Actually installing
Clone the repo:
git clone https://github.com/depthsecurity/armory
Install the module:
python setup.py install
You will want to run armory at least once in order to create the default config directory: ~/.armory with the default settings.ini and settings for each of the modules.
Next edit settings.ini and modify the base_path option. This should point to the root path you are using for your current project. You should change this with every project, so you will always be using a clean database. All files generated by modules will be created in here, as well as the sqlite3 database. By default it will be within the current directory-.

Usage
Usage is split into modules and reports.

Modules
Modules run tools, ingest output, and write it to the database. To see a list of available modules, type:
armory -lm
To see a list of module options, type:
armory -m <module> -M

Reports
Reports are similar to modules, except they are meant to pull data from the database, and display it in a usable format. To view all of the available reports:
armory -lr
To view available report options:
armory -r <report> -R

Interactive Shell
There is also an interactive shell which uses IPython as the base and will allow you to run commands or change database values. It can be launched with: armory-shell. By default, the following will be available: Domain, BaseDomains, IPAddresses, CIDRs, Users, Creds, Vulns, Ports, Urls, ScopeCIDRs.


Freevulnsearch - Free And Open NMAP NSE Script To Query Vulnerabilities Via The cve-search.org API

$
0
0

This NMAP NSE script is part of the Free OCSAF project - https://freecybersecurity.org. In conjunction with the version scan "-sV" in NMAP, the corresponding vulnerabilities are automatically assigned using CVE (Common Vulnerabilities and Exposures) and the severity of the vulnerability is assigned using CVSS (Common Vulnerability Scoring System). For more clarity, the CVSS are still assigned to the corresponding v3.0 CVSS ratings:
  • Critical (CVSS 9.0 - 10.0)
  • High (CVSS 7.0 - 8.9)
  • Medium (CVSS 4.0 - 6.9)
  • Low (CVSS 0.1 - 3.9)
  • None (CVSS 0.0)
The CVEs are queried by default using the CPEs determined by NMAP via the ingenious and public API of the cve-search.org project, which is provided by circl.lu. For more information visit https://www.cve-search.org/api/.

Confidentiality information:
The queries are made using the determined CPE via the circl.lu API. For further information on the confidentiality of the circl.lu API, please visit https://www.circl.lu/services/cve-search/ directly.
The best way is to install cve-search (https://github.com/cve-search/cve-search) locally and use your own API with
nmap -sV --script freevulnsearch --script-args apipath=<URL> <target>

Installation:
You can either specify the script path directly in the NMAP command, for example
nmap -sV --script ~/freevulnsearch <target>
or copy the script into the appropriate directory of your NMAP installation.
In KALI LINUXâ„¢ for example: /usr/share/nmap/scripts/

sudo nmap --script-ubdatedb
Important note: First read the confidentiality information. It is recommended to run freevulnsearch.nse separately without additional NSE scripts. If you do not want to make an assignment to the category safe, vuln and external, then do not execute the nmap --script-updatedb command mentioned above.

Usage:
The usage is simple, just use NMAP -sV and this script.
nmap -sV --script freevulnsearch <target>
According to my tests, for stability reasons, only http without TLS should be used when querying the API for many simultaneous requests. For this reason, you can optionally disable TLS using an input argument. Important, after that the API query to circl.lu is unencrypted.
nmap -sV --script freevulnsearch --script-args notls=yes <target>
If you scan with the categories safe or vuln then exclude the script or the category external or do not add the script to the NMAP default directory. It is recommended to run freevulnsearch.nse separately without additional NSE scripts.

CPE exception handling for format:
If a NMAP CPE is not clear, several functions in the freevulnsearch.nse script check whether the formatting of the CPE is inaccurate. For example:
  • (MySQL) 5.0.51a-3ubuntu5 -to- 5.0.51a
  • (Exim smtpd) 4.90_1 -to- 4.90
  • (OpenSSH) 6.6.1p1 -to- 6.6:p1
  • (OpenSSH) 7.5p1 -to- 7.5:p1
  • ...


Dnsdmpstr - Unofficial API & Client For Dnsdumpster.Com And Hackertarget.Com

$
0
0

Unofficial API & Client for DNS Dumpster and HackerTarget.com IP tools.

Installation
git clone https://github.com/zeropwn/dnsdmpstr
cd dnsdmpstr
pip3 install -r requirements.txt
chmod +x ddump.py

Usage

As a command-line utility
target="hackerone.com"
python3 ddump.py -u $target --all

Extended usage
usage: ddump.py [-h] [-u U] [-a] [-r] [-d] [-dd] [--links] [--headers] [--all]

optional arguments:
-h, --help show this help message and exit
-u U target domain
-a host search (DNS A Record lookup)
-r reverse dns lookup (accepts IP, IP range or domain name)
-d dns lookup
-dd classical dns dump format
--links grab page links from url
--headers grab http headers from url
--all grab all information available

As a library
import dnsdmpstr

target = "hackerone.com"

dnsdump = dnsdmpstr()
print(json.dumps(dnsdump.dump(target), indent=1))
print(dnsdump.hostsearch(target))
print(dnsdump.reversedns(target))
print(dnsdump.dnslookup(target))
print(dnsdump.pagelinks(target))
print(dnsdump.httpheaders(target))


Remot3d v2.0 - Tool Created For Large Pentesters As Well As Just For The Pleasure Of Defacers To Control Server By Backdoors

$
0
0

Remot3d - A tool made to generate backdoor to control and exploit a server where the server runs the PHP (Hypertext Preprocessor) program.
                Equipped with a backdoor that has been Obfuscated which means that 100% FUD (FULLY UNDETECTABLE) in other words can penetrate the firewall of a server because of its ignorance if it's a Malware, Written in Shell Script Language or commonly known as BASH by a 16 year old teenager.

Screenshots


List of Remot3d Functions
  • Create backdoor for windows or linux servers (can run php file)
  • Bypass disable function's with imap_open vulnerability
  • Bypass read file /etc/passwd with cURL or Unique Logic Script's
  • Generating Backdoor and can be remoted on Tools
  • Some other fun stuff :)

Getting Started
  1. git clone https://github.com/KeepWannabe/Remot3d
  2. cd Remot3d
  3. sudo setup.sh && Remot3d

Linux operating systems we recommend :
  • Linux mint (Ubuntu Based with Mate DE)
  • Parrot
  • BackTrack
  • Backbox
  • DracOS
  • IbisLinux

Update Remot3d
  • To update remot3d go to your Remot3d folder and execute : git pull && sudo setup.sh && Remot3d

Helped by :

- my god Allah SWT.

- Bayu Fedra (https://github.com/bayufedra)

- Ardhana Reky (https://github.com/ardzz)

- Novran Fathir (https://github.com/panophan)

- Ardhana Resky (https://github.com/Ardzz)

- Hasanal Bulkiah (https://github.com/florienzh4x)

- Agus Setya R (https://github.com/agussetyar)

- Edo Maland (https://github.com/ScreetSec)

- IndoXploit - ZeroByte.ID - Eldersc0de Family and Much more !


Goscan - Interactive Network Scanner

$
0
0

GoScan is an interactive network scanner client, featuring auto-completion, which provides abstraction and automation over nmap.
Although it started as a small side-project I developed in order to learn @golang, GoScan can now be used to perform host discovery, port scanning, and service enumeration not only in situations where being stealthy is not a priority and time is limited (think at CTFs, OSCP, exams, etc.), but also (with a few tweaks in its configuration) during professional engagements.

GoScan is also particularly suited for unstable environments (think unreliable network connectivity, lack of "screen", etc.), given that it fires scans and maintain their state in an SQLite database. Scans run in the background (detached from the main thread), so even if connection to the box running GoScan is lost, results can be uploaded asynchronously (more on this below). That is, data can be imported into GoScan at different stages of the process, without the need to restart the entire process from scratch if something goes wrong.
In addition, the Service Enumeration phase integrates a collection of other tools (e.g., EyeWitness, Hydra, nikto, etc.), each one tailored to target a specific service.


Installation

Binary installation (Recommended)
Binaries are available from the Release page.
# Linux (64bit)
$ wget https://github.com/marco-lancini/goscan/releases/download/v2.3/goscan_2.3_linux_amd64.zip
$ unzip goscan_2.3_linux_amd64.zip

# Linux (32bit)
$ wget https://github.com/marco-lancini/goscan/releases/download/v2.3/goscan_2.3_linux_386.zip
$ unzip goscan_2.3_linux_386.zip

# After that, place the executable in your PATH
$ chmod +x goscan
$ sudo mv ./goscan /usr/local/bin/goscan

Build from source
$ git clone https://github.com/marco-lancini/goscan.git
$ cd goscan/goscan/
$ make setup
$ make build
To create a multi-platform binary, use the cross command via make:
$ make cross

Docker
$ git clone https://github.com/marco-lancini/goscan.git
$ cd goscan/
$ docker-compose up --build

Usage
GoScan supports all the main steps of network enumeration:


StepCommands
1. Load targets
  • Add a single target via the CLI (must be a valid CIDR): load target SINGLE <IP/32>
  • Upload multiple targets from a text file or folder: load target MULTI <path-to-file>
2. Host Discovery
  • Perform a Ping Sweep: sweep <TYPE> <TARGET>
  • Or load results from a previous discovery:
    • Add a single alive host via the CLI (must be a /32): load alive SINGLE <IP>
    • Upload multiple alive hosts from a text file or folder: load alive MULTI <path-to-file>
3. Port Scanning
  • Perform a port scan: portscan <TYPE> <TARGET>
  • Or upload nmap results from XML files or folder: load portscan <path-to-file>
4. Service Enumeration
  • Dry Run (only show commands, without performing them): enumerate <TYPE> DRY <TARGET>
  • Perform enumeration of detected services: enumerate <TYPE> <POLITE/AGGRESSIVE> <TARGET>
5. Special Scans
  • EyeWitness
    • Take screenshots of websites, RDP services, and open VNC servers (KALI ONLY): special eyewitness
    • EyeWitness.py needs to be in the system path
  • Extract (Windows) domain information from enumeration data
    • special domain <users/hosts/servers>
  • DNS
    • Enumerate DNS (nmap, dnsrecon, dnsenum): special dns DISCOVERY <domain>
    • Bruteforce DNS: special dns BRUTEFORCE <domain>
    • Reverse Bruteforce DNS: special dns BRUTEFORCE_REVERSE <domain> <base_IP>
Utils
  • Show results: show <targets/hosts/ports>
  • Automatically configure settings by loading a config file: set config_file <PATH>
  • Change the output folder (by default ~/goscan): set output_folder <PATH>
  • Modify the default nmap switches: set nmap_switches <SWEEP/TCP_FULL/TCP_STANDARD/TCP_VULN/UDP_STANDARD> <SWITCHES>
  • Modify the default wordlists: set_wordlists <FINGER_USER/FTP_USER/...> <PATH>

External Integrations
The Service Enumeration phase currently supports the following integrations:
WHATINTEGRATION
ARP
  • nmap
DNS
  • nmap
  • dnsrecon
  • dnsenum
  • host
FINGER
  • nmap
  • finger-user-enum
FTP
  • nmap
  • ftp-user-enum
  • hydra [AGGRESSIVE]
HTTP
  • nmap
  • nikto
  • dirb
  • EyeWitness
  • sqlmap [AGGRESSIVE]
  • fimap [AGGRESSIVE]
RDP
  • nmap
  • EyeWitness
SMB
  • nmap
  • enum4linux
  • nbtscan
  • samrdump
SMTP
  • nmap
  • smtp-user-enum
SNMP
  • nmap
  • snmpcheck
  • onesixtyone
  • snmpwalk
SSH
  • hydra [AGGRESSIVE]
SQL
  • nmap
VNC
  • EyeWitness


RapidRepoPull - Tool To Quickly Pull And Install Repos From A List

$
0
0

Description
  • This program uses Python to clone/maintain multiple security related repos using threading and multiprocessing

Goal
  • The goal of this program is to quickly pull and install repos from its list

Use cases
  • Quickly install your favorite Security repos on a new system
  • Kick off multiple concurrent git clone tasks utilizing Python
  • Add remove repos to the worker_data list as needed in order to address indivudual use case/project needs

Requirements
  • This program was tested with Python version 3.7.2 64-bit
  • Ensure the Python3 virtual environment package is installed (Ubuntu)
    sudo apt-get install python3-venv
  • Ensure git is installed (Ubuntu)
    sudo apt-get install git

Usage Option 1 Automatic (Docker)
  • Clone code repo
    git clone https://github.com/tbalz2319/RapidRepoPull.git
  • Change directory into RapidRepoPull
    cd RapidRepoPull
  • The script will run in a minimal Alpine Docker container (126 MB) and extract the dirs in the current working dir
    docker-compose up --build

Usage Option 2 Local Install
  • Clone code repo
    git clone https://github.com/tbalz2319/RapidRepoPull.git
  • Change directory into RapidRepoPull
    cd RapidRepoPull
  • Execute the script below
    ./install.sh

Usage Option 3 Manual
  • Clone code repo
    git clone https://github.com/tbalz2319/RapidRepoPull.git
  • Change directory into RapidRepoPull
    cd RapidRepoPull
  • Create a virtual Python3 environment to run this code
    python3 -m venv venv
  • Activate the virual enivornment
    source venv/bin/activate
  • Install requirements
    pip install -r requirements.txt
  • Run program
    python3 rapid.py

Update Program
  • Run the following script
    ./update.sh

Mass Update all existing repos
  • Run the command to maintain all existing repos by attempting to pull latest version
    ./update_repos.sh


mXtract - Memory Extractor & Analyzer

$
0
0
An opensource linux based tool that analyses and dumps memory. Its developed as an offensive pentration testing tool which can be used to scan memory for private keys, ips, and passwords using regexes. Remember your results are only as good as your regexes.

Screenshots

Scan with verbose and with a simple IP regex, scanning every data segment.

Scan with verbose and with a simple IP regex, scanning only heap and stack.

Scan without verbose, and with a simple IP regex.

Why dump directly from memory?
In most linux environments users can access the memory of processes, this allows attackers to harvest credentials, private keys, or anything that isnt suppose to be seen but is being processed by a program in clear text.

Features
  • Ability to enter regex lists
  • Clear and Readable Display
  • Ability to Mass Scan Every Proccess or a Specfic PID
  • Able to choose memory sections to scan
  • Memory dumps automatically removes unicode characters which allows for processing with other tools or manually

Getting started

Compiling: g++ -std=c++11 -O2 src/main.cpp -o mxtract

Commands
        -v      Enable Verbose Output
-s Suppress Banner
-h Help
-c suppress colored output
-r= Regex DB
-a Scan all memory ranges not just heap/stack
-w Write raw memory to file Default directory is pid/
-o Write regex output to file
-d= Custom Ouput Directory
-p= Specify single pid to scan
Either -r= or -w needed


Xerxes - DoS Tool Enhanced

$
0
0

Xerxes dos tool enhanced with many features for stress testing.

Features
Xerxes has many features, some of these features are:
  • TLS Support
  • HTTP header randomization
  • Useragent randomization
  • Multiprocessing support
  • Multiple Attack vectors
  • etc...
Not only that but also we are aggressively developing it and adding a lot more features and functionalities.

Compile

sudo apt-get -y install build-essential cmake libssl-dev pkgconf
git clone https://github.com/sepehrdaddev/Xerxes
cd Xerxes
mkdir build
cd build
cmake ..
make
cd bin
./Xerxes

Usage
$ ./Xerxes -H
--==[ Xerxes enhanced by Sepehrdad Sh ]==--

./Xerxes {OPTIONS}

Xerxes dos tool enhanced

OPTIONS:

-H, --help display this help menu
-V, --version display version
--vecs display available vectors
-h[rhost], --rhost=[rhost] remote host address [default 127.0.0.1]
-p[rport], --rport=[rport] remote host port [default 80]
-b[bcast], --bcast=[bcast] broadcast address [default 127.0.0.1]
-v[vector], --vec=[vector] attack vector [default 0]
-d[delay], --dly=[delay] attack delay [default 1 ns]
-t[threads], --trds=[threads] number of threads [default 10]
-c[connections],
--conn=[connections] number of connections [default 25]
--tls enable tls
--rand-lhost enable local host randomization
--rand-lport enable local port randomization

Questions ?
If you have any questions feel free to visit Wiki page


SMS-Stack - Framework to provided TPC/IP based characteristics to the GSM Short Message Service

$
0
0
Sms Stack is a Framework to provided TPC/IP based characteristics to the GSM Short Message Service.
This framework works in multiple environments to provided a full stack integration in a service.
The main layer features techniques to control the order and the number of sms for a given stream, and a layer of security with AES + CTR cypher.
You can easily implement your own protocol on the top of the stack of Sms Stack and add new features to an Sms Based communication between devices.

Prerequisities
You can download use sms-stack in multiple environments in order to implement it in multiple scenearios.

Typescript
Npm - https://www.npmjs.com
Nodejs - https://nodejs.org/en/
Typescript - https://www.typescriptlang.org/#download-links

Python
Python 3.4 or higher - https://www.python.org/downloads/
Pip - https://pypi.org/project/pip/

Android
Android API 23 (6.0) or higher - https://developer.android.com/about/versions/marshmallow/android-6.0
Android Studio + Gradle (With JUnit) - https://developer.android.com/studio/install

Usage
Simply add the framework in one of each repositories given in your repository.

Typescript
npm install sms-stack 1.x.x

Python
pip install sms stack 0.x.x

Android
Add in the gradle app file implementation 'com.example.smstcplibrary:smsstack:0.x.x
For further implementation, please use the given wiki

SMS Stack scheme


Contact
THE SOFTWARE IS PROVIDED "AS IS", WITHOUT WARRANTY OF ANY KIND, EXPRESS OR IMPLIED, INCLUDING BUT NOT LIMITED TO THE WARRANTIES OF MERCHANTABILITY, FITNESS FOR A PARTICULAR PURPOSE AND NONINFRINGEMENT. IN NO EVENT SHALL THE AUTHORS OR COPYRIGHT HOLDERS BE LIABLE FOR ANY CLAIM, DAMAGES OR OTHER LIABILITY, WHETHER IN AN ACTION OF CONTRACT, TORT OR OTHERWISE, ARISING FROM, OUT OF OR IN CONNECTION WITH THE SOFTWARE OR THE USE OR OTHER DEALINGS IN THE SOFTWARE.
This software doesn't have a QA Process. This software is a Proof of Concept.
If you have any problems, you can contact:
pablo@11paths.com - Ideas Locas CDO - Telefónica
franciscojose.ramirezvicente@telefonica.com - Ideas Locas CDO - Telefónica
lucas.fernandezaragon@telefonica.com - Ideas Locas CDO - Telefónica
For more information please visit https://www.elevenpaths.com.


Lynis 2.7.3 - Security Auditing Tool for Unix/Linux Systems

$
0
0

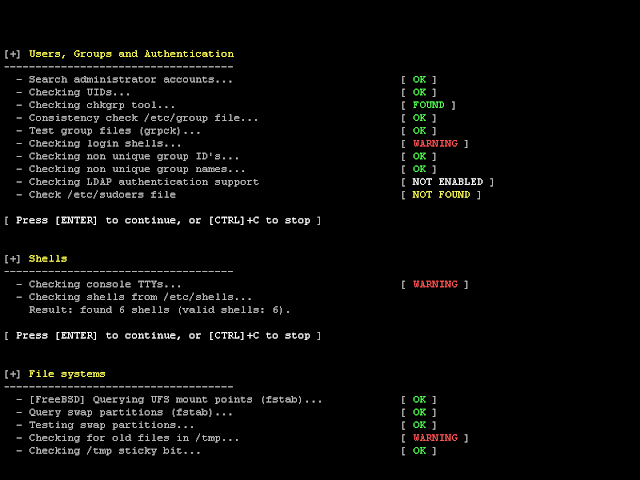
We are excited to announce this major release of auditing tool Lynis. Several big changes have been made to core functions of Lynis. These changes are the next of simplification improvements we made. There is a risk of breaking your existing configuration.

Lynis is an open source security auditing tool. Used by system administrators, security professionals, and auditors, to evaluate the security defenses of their Linux and UNIX-based systems. It runs on the host itself, so it performs more extensive security scans than vulnerability scanners.

Supported operating systems

The tool has almost no dependencies, therefore it runs on almost all Unix-based systems and versions, including:
  • AIX
  • FreeBSD
  • HP-UX
  • Linux
  • Mac OS
  • NetBSD
  • OpenBSD
  • Solaris
  • and others
It even runs on systems like the Raspberry Pi and several storage devices!

Installation optional

Lynis is light-weight and easy to use. Installation is optional: just copy it to a system, and use "./lynis audit system" to start the security scan. It is written in shell script and released as open source software (GPL). 

How it works

Lynis performs hundreds of individual tests, to determine the security state of the system. The security scan itself consists of performing a set of steps, from initialization the program, up to the report.

Steps
  1. Determine operating system
  2. Search for available tools and utilities
  3. Check for Lynis update
  4. Run tests from enabled plugins
  5. Run security tests per category
  6. Report status of security scan
Besides the data displayed on the screen, all technical details about the scan are stored in a log file. Any findings (warnings, suggestions, data collection) are stored in a report file.

Opportunistic Scanning

Lynis scanning is opportunistic: it uses what it can find.
For example, if it sees you are running Apache, it will perform an initial round of Apache related tests. When during the Apache scan it also discovers an SSL/TLS configuration, it will perform additional auditing steps on that. While doing that, it then will collect discovered certificates so they can be scanned later as well.

In-depth security scans

By performing opportunistic scanning, the tool can run with almost no dependencies. The more it finds, the deeper the audit will be. In other words, Lynis will always perform scans which are customized to your system. No audit will be the same!

Use cases

Since Lynis is flexible, it is used for several different purposes. Typical use cases for Lynis include:
  • Security auditing
  • Compliance testing (e.g. PCI, HIPAA, SOx)
  • Vulnerability detection and scanning
  • System hardening

Resources used for testing

Many other tools use the same data files for performing tests. Since Lynis is not limited to a few common Linux distributions, it uses tests from standards and many custom ones not found in any other tool.
  • Best practices
  • CIS
  • NIST
  • NSA
  • OpenSCAP data
  • Vendor guides and recommendations (e.g. Debian Gentoo, Red Hat)

Lynis Plugins

Plugins enable the tool to perform additional tests. They can be seen as an extension (or add-on) to Lynis, enhancing its functionality. One example is the compliance checking plugin, which performs specific tests only applicable to some standard.

Changelog
Upgrade note
## Lynis 2.7.3 (2019-03-21)

### Added
- Detection for Lynis being scheduled (e.g. cronjob)

### Changed
- HTTP-6624 - Improved logging for test
- KRNL-5820 - Changed color for default fs.suid_dumpable value
- LOGG-2154 - Adjusted test to search in configuration file correctly
- NETW-3015 - Added support for ip binary
- SQD-3610 - Description of test changed
- SQD-3613 - Corrected description in code
- SSH-7408 - Increased values for MaxAuthRetries
- Improvements to allow tailored tool tips in future
- Corrected detection of blkid binary
- Minor textual changes and cleanups


Webtech - Identify Technologies Used On Websites

$
0
0

Identify technologies used on websites.
More info on the release's blogpost.

CLI Installation
WebTech is available on pip:
pip install webtech
It can be also installed via setup.py:
python setup.py install --user

Burp Integration
Download Jython 2.7.0 standalone and install it into Burp.
In "Extender" > "Options" > "Python Environment":
  • Select the Jython jar location
Finally, in "Extender" > "Extension":
  • Click "Add"
  • Select "py" or "Python" as extension format
  • Select the Burp-WebTech.py file in this folder

Usage
Scan a website:
$ webtech -u https://example.com/

Target URL: https://example.com
...

$ webtech -u file://response.txt

Target URL:
...
Full usage:
$ webtech -h

Usage: webtech [options]

Options:
-h, --help show this help message and exit
-u URLS, --urls=URLS url(s) to scan
--ul=URLS_FILE, --urls-file=URLS_FILE
url(s) list file to scan
--ua=USER_AGENT, --user-agent=USER_AGENT
use this user agent
--rua, --random-user-agent
use a random user agent
--db=DB_FILE, --database-file=DB_FILE
custom database file
--oj, --json output json-encoded report
--og, --grep output grepable report

Resources for database matching
HTTP Headers information - http://netinfo.link/http/headers.html
Cookie names - https://webcookies.org/top-cookie-names


FIR - Fast Incident Response

$
0
0

FIR (Fast Incident Response) is an cybersecurity incident management platform designed with agility and speed in mind. It allows for easy creation, tracking, and reporting of cybersecurity incidents.
FIR is for anyone needing to track cybersecurity incidents (CSIRTs, CERTs, SOCs, etc.). It was tailored to suit our needs and our team's habits, but we put a great deal of effort into making it as generic as possible before releasing it so that other teams around the world may also use it and customize it as they see fit.


See the wiki for the user manual and more screenshots !

Installation
There are two ways to install FIR. If you want to take it for a test-drive, just follow the instructions for setting up a development environment in the Wiki.
If you like it and want to set it up for production, here's how to do it.
A dockerfile for running a dev-quality FIR setup is also available in docker/Dockerfile.
Deploy to Heroku via fir/heroku_settings.py

Community
A dedicated users mailing list is available https://groups.google.com/d/forum/fir-users

Technical specs
FIR is written in Python (but you probably already knew that), using Django 1.9. It uses Bootstrap 3 and some Ajax and d3js to make it pretty. We use it with a MySQL back-end, but feel free to use any other DB adaptor you might want - as long as it's compatible with Django, you shouldn't run into any major issues.
FIR is not greedy performance-wise. It will run smoothly on a Ubuntu 14.04 virtual machine with 1 core, a 40 GB disk and 1 GB RAM.


    Viewing all 5838 articles
    Browse latest View live